10.3.4 Contacts
Telephone Directory in General
In the 2N® – NetStar system, you can be assigned telephone directories by the system administrator or create your own telephone directories using your telephone or the 2N® – NetStar Assistant web application enviroment. Subsequently, you can search the directories and make calls or send SMS to selected items.
Access to Telephone Directory
In general, you can access the telephone directory in your telephone as follows:
- Push
 when your phone is at relax.
 - Use a programmable button with the Phone directory function. Refer to 10.4.2 Programmable Buttons - Setting for button programming.
- Or, access the directory through the telephone menu. Enter the following sequence at relax:
 > 2x > 2x .
The first two items (alphabetically) are displayed when you enter the phone directory. Again, use and  to browse through the items.
Telephone Directory Search
You are recommended to use the search function for extensive directories. Press any key on the numerical keypad while you are in the directory to activate the function.
Letters are entered using the numerical keypad – each numerical key is assigned defined letters (see the button tagnames). Each letter in the sequence is typed by a specific count of button presses. For example, letter E requires two presses of the 3 button. Do not enter the next character for searching until the display cursor moves. You can use the ESC button if pre-programmed to delete characters.
Whenever a character is entered, the telephone directory records are filtered automatically and you can browse through the filtered items using the arrows.
The first item containing the required character string is always displayed:
 |
Use and to access the following items. If no item matches the string entered, the 'No match' message is displayed:
 |
Push the ESC programmable button repeatedly to terminate filtering.
Record Processing Options
Use and to browse through the phone directory items. Push to display the contact submenu.
 |
Tip
- Remember that phone directory email items cannot be called but can only be sent messages.
Send message – press the key to enter the message editing section with the sender's number pre-defined.
Details – display complete information on the contact (name, number, prefix, email).
Edit – edit contact details sequentially. Push to move to the next contact detail.
Delete – delete the phone directory items in singles. Confirmation is required before deletion.
Tip
- By deleting a global contact from your telephone you delete the same from the list of all users and so be very careful while using this function.
Menu Structure
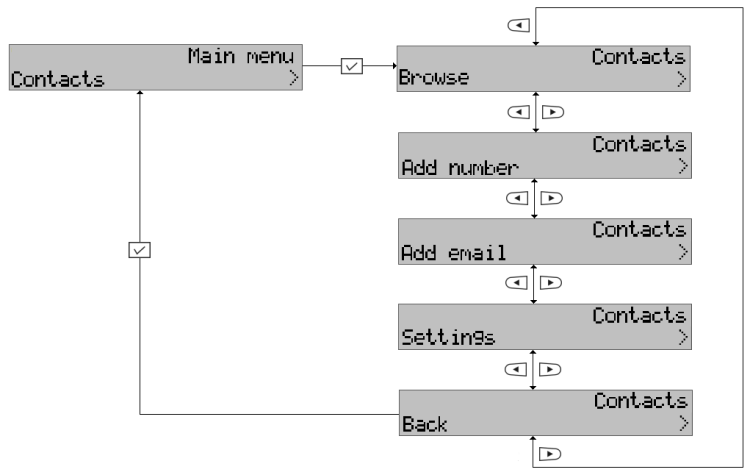 |
Browse
Select this item to enter the telephone directory.
Add Number and Email
Add number – add an item to the phone directory to be called or sent messages. To add an item:
- Enter the name and push for confirmation.
- Enter the contact number or URL and push for confirmation.
- Select a prefix from the menu using the and buttons or confirm None with .
- The record will be stored in your user directory.
Add email – add an item to the phone directory to be sent only text messages, which are transformed into email messages. To add an item:
- Enter the name and push for confirmation.
- Enter the contact email address and push for confirmation.
The record will be stored in your user directory.
Settings
The menu offers two display options for the phone directory records. They are as follows:
- Name and number – the contact name and number are displayed in the directory.
- Name list – contact names are displayed only.