10.3.3 Messages
Menu Structure
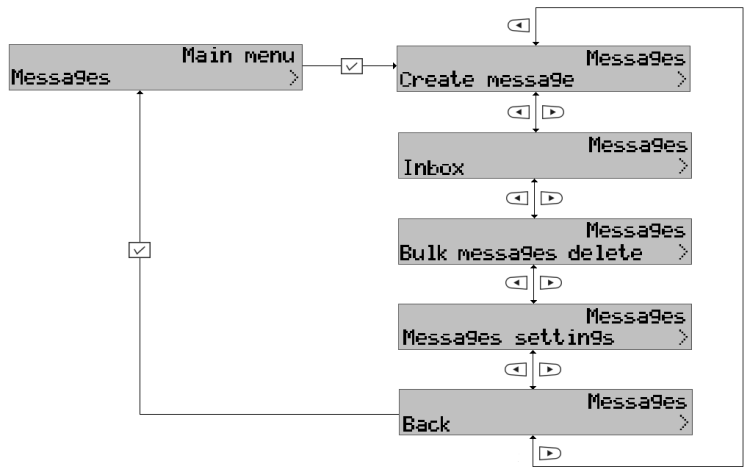
You can send and receive text messages using the 2N® StarPoint telephones. Refer to Create Message for sending SMS and to Inbox for receiving SMS. The figure below shows the Messages menu structure. Push the following sequence to get into this menu at relax:  >
>  > .
> .
 |
Tip
- You can also use the 2N® NetStar – Assistant web application for sending and receiving SMS. Refer to the 2N® NetStar Assistant Manual for more details.
Create Message
- Use the
 and arrows to select the Create message item in the Messages menu and press for confirmation.
 - Now type any text using your numerical keypad. Press the keys repeatedly to type different letters. Push the # button to switch to digits or capital letters. To enter such special characters as *, # a + push the * button repeatedly. Punctuation and other special symbols are available under the 1 button.
- Having completed the message, push for confirmation.
- Now choose whether to send the message to a number, email, or a selected telephone directory contact, or return into the editing mode. If you choose Send to contact, use the and buttons to browse through the contacts.
Having chosen a number, email address or contact, press
to send the message.
Inbox
To read a received message:
- Push while an incoming message is signalled on the display.
- Use the programmable button with the Received messages function. Refer to 10.4.2 Programmable Buttons - Setting for button programming.
- Or, access the messages through the telephone main menu. Enter the following sequence at relax: > > > > .
Message Processing Options
Press the and arrows to browse through the received messages. All new messages are denoted New before the sender's name until read. Press to read the message and and to scroll down in long messages. In addition to a text, a message contains some details, such as the sender's name and number, station type and date&time. Push again while reading your message to display the details.
 |
- Answer message – here you can easily send a reply to the number that sent the message. Type the reply and push to send the message.
- Resend message – here you can alter and forward the message to another user.
- Delete message – here you can delete the message. Confirmation is required before deletion.
Bulk Message Delete
Enter the following sequence at relax to enable mass deleting of messages: > > > 2x > . The following options are available:
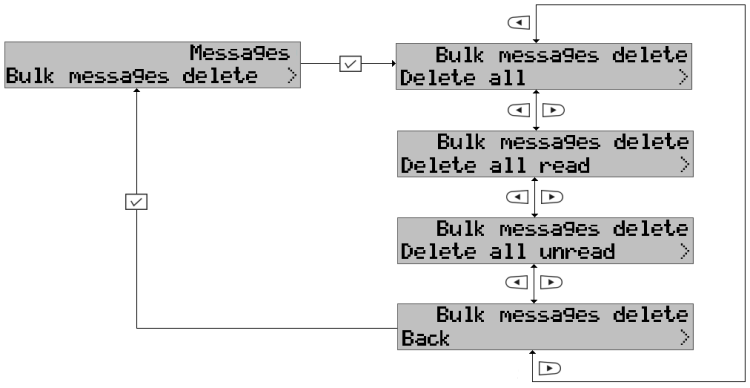 |
Use the and buttons to browse through these options. Push for confirmation.
Delete all – delete all user messages. Confirmation is required before deletion.
Delete all read – delete all user messages that have been read (those which are not marked New). Confirmation is required before deletion.
Delete all unread – delete all user messages that have not been read (those which are marked New). Confirmation is required before deletion.
Tip
- Being deleted, the messages are completely removed from the system and cannot be recovered even using the 2N® NetStar – Assistant interface. Therefore, be careful while using this function.
Message Settings
The menu offers several display options for received messages. They are as follows:
- Name and time – the name and receiving time are displayed in the list of received messages.
- Number and time – the number and receiving time are displayed in the list of received messages.
- Name list – senders' names are displayed only.
- Number list – senders' numbers are displayed only.