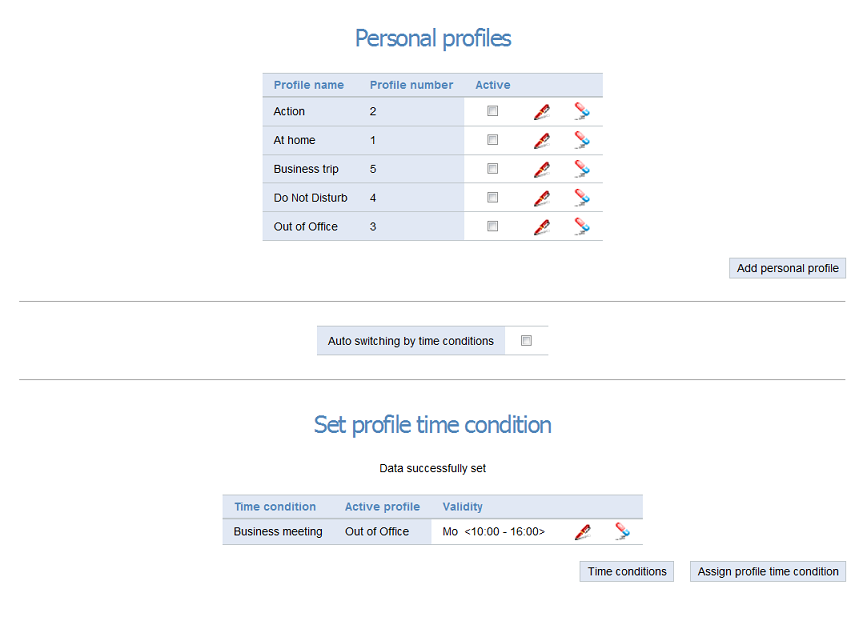
3.2 Personal Profile
Click on the User settings menu and then on Personal profiles, or on the Profile toolbar item to work with user profiles. You will be forwarded to the Personal profiles page. There is a table with your profiles in the upper part of the screen, where you can activate, edit or delete a profile. Click on Add personal profile to create a new profile. The maximum count of profiles per user is eight.
 |
 |
 |
Caution
- If the Switch profiles automatically option is enabled, the profiles switch according to the rules defined in the Profile time conditions window. However, by changing a profile manually or using the 2N® NetStar Assistent, a service, a key system phone button or the 2N® StarPoint menu you deactivate the automatic profile switching and have to re-activate the function if necessary.
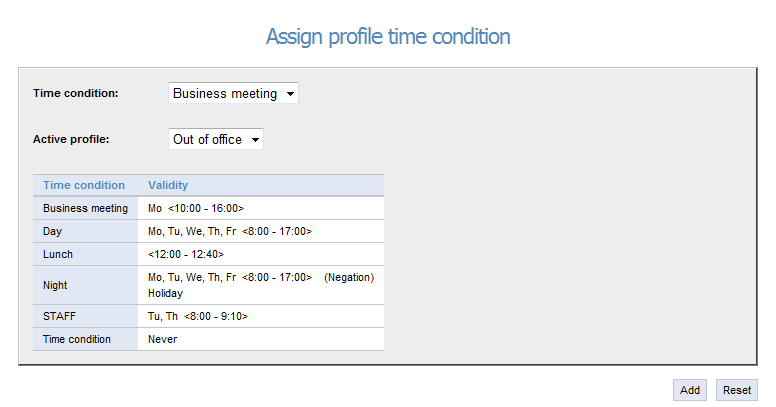
If no suitable time condition is available to you, ask your 2N® NetStar administrator to create one or create a time condition of your own. To do so, click on the Time conditions button to display the list of all PBX time conditions. Then click on Create new time condition, enter your condition name and push Add for confirmation. However, the validity of the time condition you have created is Never. Therefore, click on Edit to open the Modify time condition window, where you can change the name and, particularly, the validity term for your time condition. Every time condition may have multiple validity terms but you need just one for your needs. Push Edit to open the Modify time interval window.
 |
The following rules have to be obeyed while setting validity:
- If used, the 'from – to' data must represent valid days and time values. If both values ('from' and 'to') are defined, then the 'from' value must not be higher than the 'to' value.
- If a bank holiday is selected, no other selections may be made (except for interval negation).
- If a day is selected, the 'from' and 'to' values must range within 1–31 and the 'from' value must not be higher than the 'to' value.
- If a month is selected, the 'from' and 'to' values must range within 1–12 and the 'from' value must not be higher than the 'to' value.
- If a time value is selected, the 'from' and 'to' values must range within 0–23 for hours and within 0–59 for minutes and the 'from' value must not be higher than the 'to' value for the whole time value (hour + minute).
- If negation is selected, validity of the whole time conditon is negated.