3.3 Telephone Directory
Click on the Listings menu and then on the Telephone directory item to view, modify and use the telephone directory. Your user telephone directory (phone book) including the telephone directories assigned to your group gets displayed. These telephone directories are assigned by the PBX administrator. You can edit your telephone directories entries and, if you have higher rights, the group telephone directory entries. Move to the Own numbers window to view your telephone directory exclusively.
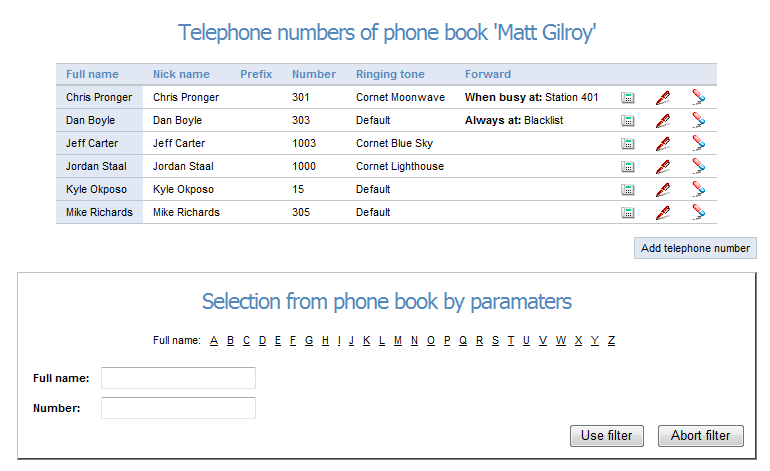 |
Click on Add telephone number to add a number and enter the contact name and number in a new window.
Caution
- If the required prefix is not defined, enter numbers including the PBX DID. Example: when you are calling a mobile number via '0', enter 0774236891 or set Prefix 0. Make sure that the DID has been set properly. Otherwise, you will not be able to call the contact using CTI in 2N® NetStar Assistant.
 |
Select the Ringing tone parameter to assign different ringing tones to the contact selecting an item from the list of pre-defined PBX tones. If you do not select any item, the standard ringing tone will be used. Select the Allowed numbers (White list) or Barred numbers (Black list) for the contacts in the forwarding section or set such call forwarding option that will ensure that your call will be answered in the event of your line error ir unavailability. Refer to the figure above for such setting.