Iddero
Content
About
Iddero is a manufacturer of high quality, innovative products for home and building automation based on the KNX standard. Iddero products combine the latest technological advances, a strong and robust design, and elegant and attractive aesthetics. We build functional, reliable, and easy to use solutions. Our solutions also provide advanced functions such as video door phone integration.
Supported features
- Video from intercom (HTTP or RTSP)
- Calls from intercom (direct P2P calls)
- Door lock control (HTTP or DTMF)
Supported versions
Iddero HC3-KNX / HC3L-KNX | 2N IP Intercoms | Audio Calls | Video Stream | Door Control |
|---|---|---|---|---|
V 4.5 | 2.36 + |
Iddero VERSO INDOOR | 2N IP Intercoms | Audio Calls | Video Stream | Door Control |
|---|---|---|---|---|
V 1.0 | 2.36 + |
License
Gold license can be used optionally (video streaming RTSP),
Manual
This manual covers integration of HC3-KNX and HC3L-KNX touch panels with 2N IP door stations:
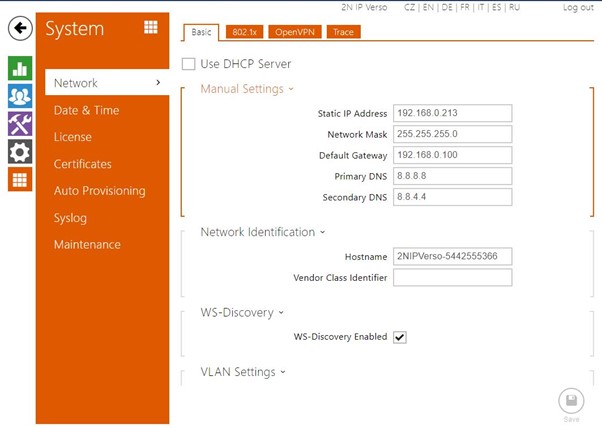
Network configuration
System > Network
Disable “Use DHCP server” and manually configure network settings. The touch panel needs to know the IP address of the door station.

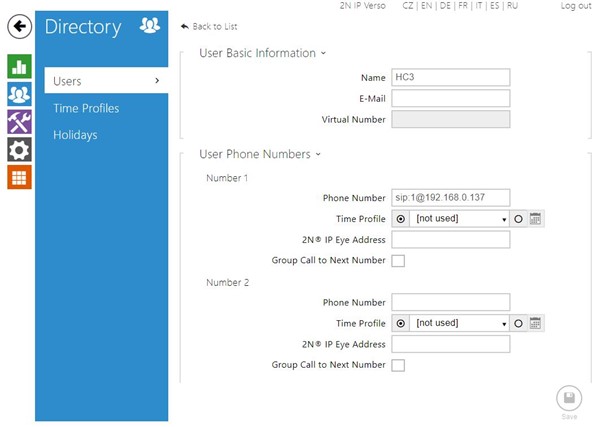
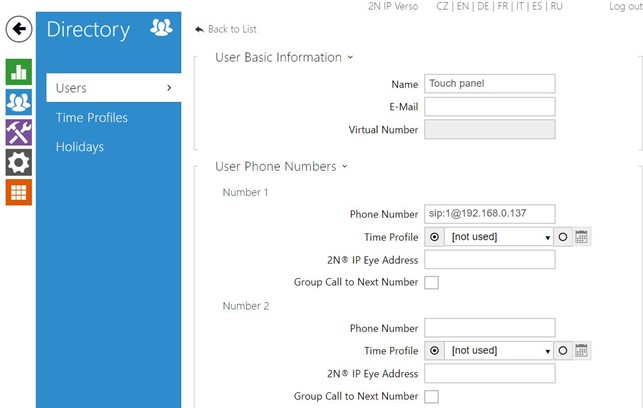
Create users
Directory > Users
Create a new user, and fill in “Name” and “Phone Number”. “Phone Number” should be in SIP address format, “sip:<user>@<ip_address>”, where:
- <ip_address> should be the IP address of the touch panel
- <user> can be anything (not relevant – P2P calls will be used)
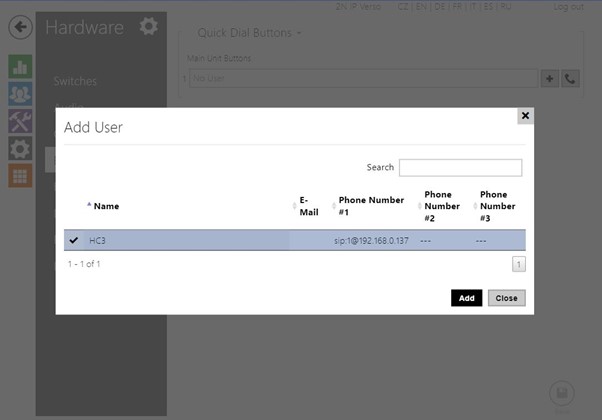
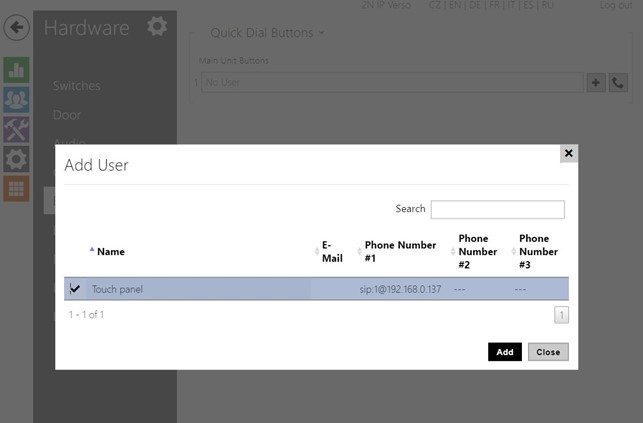
Hardware > Buttons
Add the created User to the corresponding Button:
Services configuration
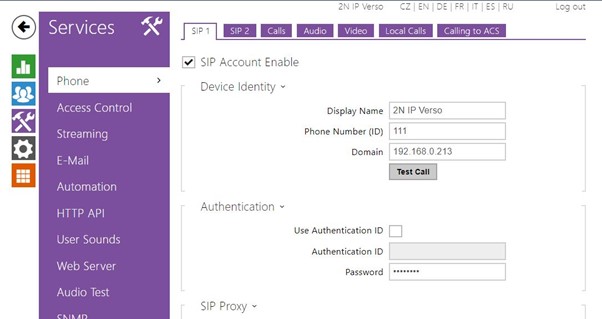
Services > Phone
Enable a SIP Account and configure “Phone number (ID)” (for example “111”) and “Domain” (the IP address of the 2N door station).
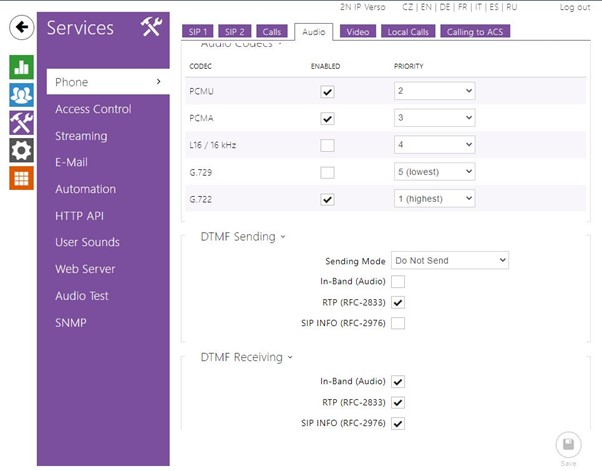
Ensure PCMU and PCMA audio codecs are enabled for audio.
If using DTMF for door opening, ensure “SIP INFO” is enabled for “DTMF Receiving”. Alternatively, door opening can be done using the HTTP API.
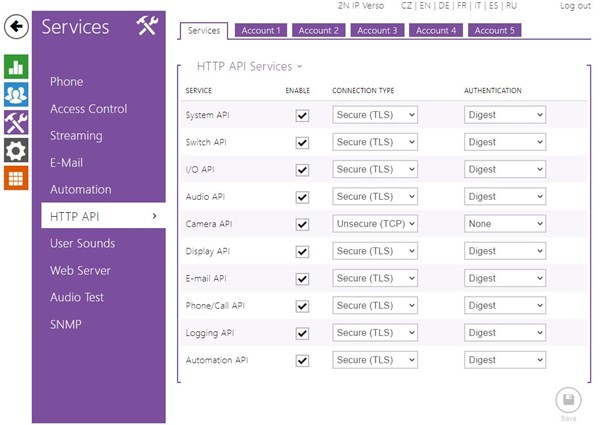
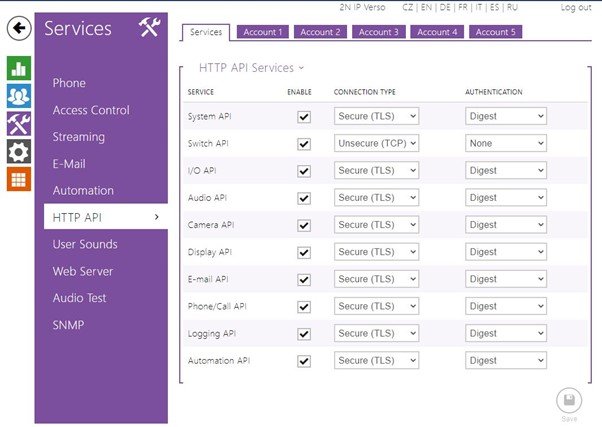
Services > HTTP API
(if using HTTP for the video stream; alternatively, RTSP can also be used)
In order to enable the HTTP video stream, ensure the “Camera API” is enabled with Connection Type set to “Unsecure (TCP)”, and Authentication set to “None”.
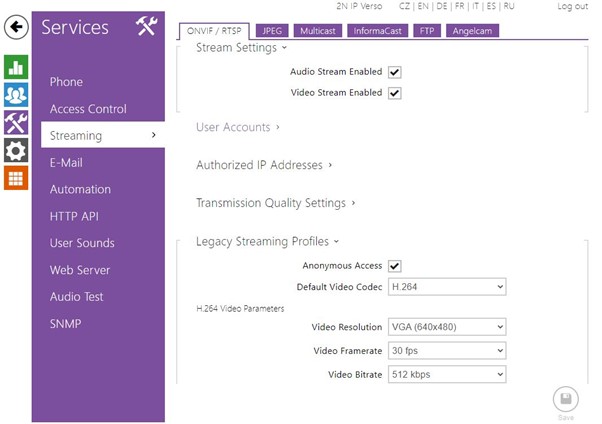
Services > Streaming
(if using RTSP for the video stream; alternatively, HTTP can also be used)
If an Gold license is available, the RTSP video stream can be enabled. It should be configured with Anonymous Access, “H.264” Default Video Codec, and a suggested Video Framerate of 30 fps.

Switch control
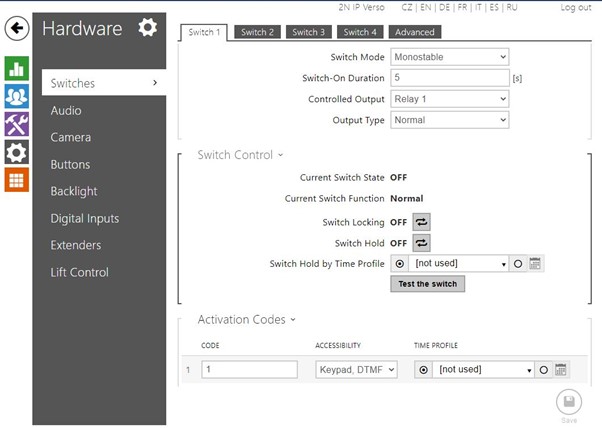
Hardware > Switches
(if using DTMF for door opening; alternatively, the HTTP API can also be used)
Enable the corresponding Switch, and configure the desired Activation Code. Make sure “Accessibility” includes “DTMF”.

Services > HTTP API
(if using HTTP API for door opening; alternatively, DTMF can also be used)
Ensure “Switch API” is enabled with Connection Type set to “Unsecure (TCP)” and Authentication set to “None”.

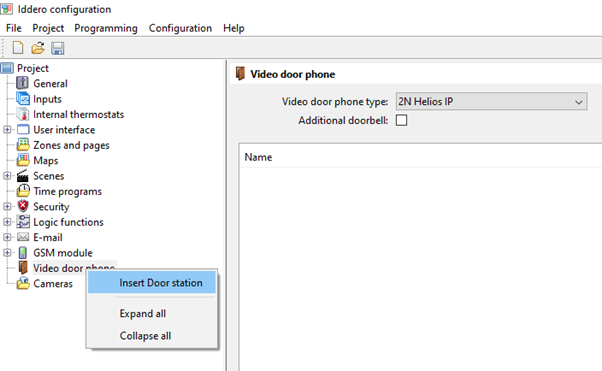
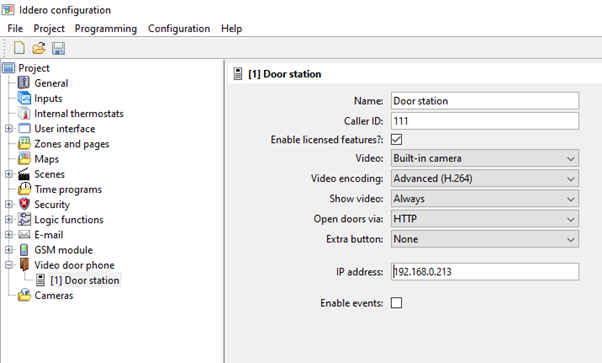
Go to the “Video door phone” section, select “2N Helios IP” for the Video door phone type.
Insert a new door station (right click on the “Video door phone” section).
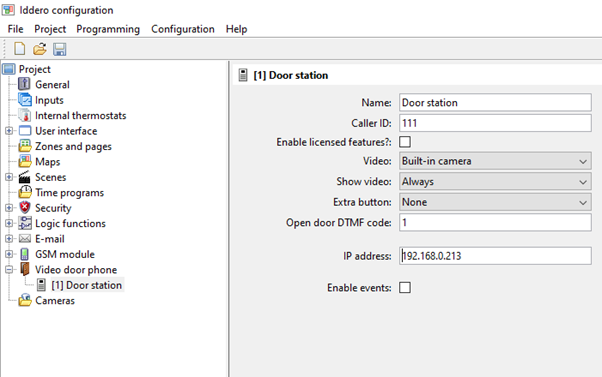
Default configuration
In the default configuration, no licensed features are required. The touch panel will use the HTTP video stream, and will use DTMF for door opening (using the “SIP INFO” method).
Basic parameters:
- Name: Any friendly name; shown in the touch panel user interface
- Caller ID: Only used when more than one door station is configured. If used, it must match the “Phone Number (ID)” configured in the 2N door station.
- Open door DTMF code: Must match the Activation Code configured in the 2N door station.
- IP address: IP address of the 2N door station.
Optional parameters:
- Video: an external camera can be selected (instead of the 2N built in camera)
- Extra button: enable an extra button for a second switch
Optional: Use HTTP API for door opening
(Note: from v2.35, 2N door station doesn’t require any license for this functionality)
To use the HTTP API for door opening, check the “Enable licensed features?” box and select “Open doors via”: “HTTP”
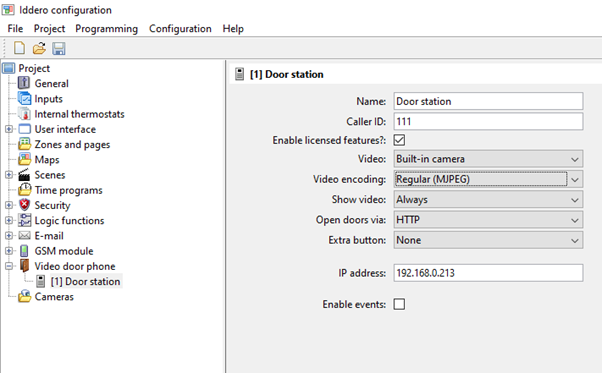
Optional: RTSP/H.264 video stream (Gold license required)
Note
from v2.35, 2N door station doesn’t require any license for this functionality
If case of using RTSP/H.264 video stream, check the “Enable licensed features?” box and select “Video encoding”: “Advanced (H.264)” (*).
(*) The “Regular (MJPEG)” video encoding corresponds to HTTP video stream.
This manual covers integration of VERSO INDOOR touch panel with 2N IP door stations:
Network configuration
System > Network
Disable “Use DHCP server” and manually configure network settings. The touch panel needs to know the IP address of the door station.
Create users
Directory > Users
Create a new user, and fill in “Name” and “Phone Number”. “Phone Number” should be in SIP address format, “sip:<user>@<ip_address>”, where:
- <ip_address> should be the IP address of the touch panel
- <user> can be anything (not relevant – P2P calls will be used)
Hardware > Buttons
Add the created User to the corresponding Button:
Services configuration
Services > Phone
Enable a SIP Account and configure “Phone number (ID)” (for example “111”) and “Domain” (the IP address of the 2N door station).

Ensure PCMU and PCMA audio codecs are enabled for audio.
If using DTMF for door opening, ensure “SIP INFO” is enabled for “DTMF Receiving”. Alternatively, door opening can be done using the HTTP API.

Services > HTTP API
(if using HTTP for the video stream; alternatively, RTSP can also be used)
In order to enable the HTTP video stream, ensure the “Camera API” is enabled with Connection Type set to “Unsecure (TCP)”, and Authentication set to “None”.

Services > Streaming
(if using RTSP for the video stream; alternatively, HTTP can also be used)
In an Enhanced video license is available, the RTSP video stream can be enabled. It should be configured with Anonymous Access, “H.264” Default Video Codec, and a suggested Video Framerate of 30 fps. “Video resolution” should not be higher than 640x480.
Switch control
Hardware > Switches
(if using DTMF for door opening; alternatively, the HTTP API can also be used)
Enable the corresponding Switch, and configure the desired Activation Code. Make sure “Accessibility” includes “DTMF”.
Services > HTTP API
(if using HTTP API for door opening; alternatively, DTMF can also be used)
Ensure “Switch API” is enabled with Connection Type set to “Unsecure (TCP)” and Authentication set to “None”.
Iddero VERSO INDOOR is configured through ETS, the standard configuration software for KNX products.
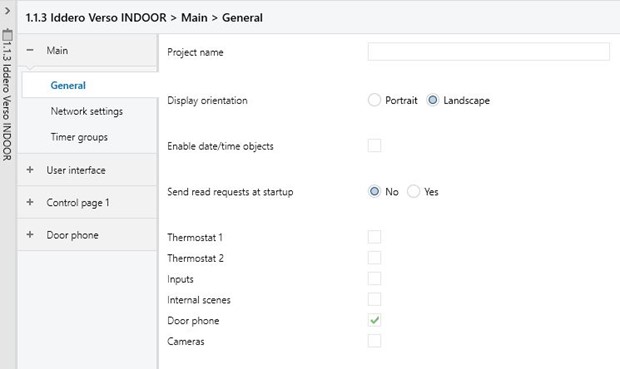
1. Door phone function configuration
Enable the “Door phone” option in “Main > General”:
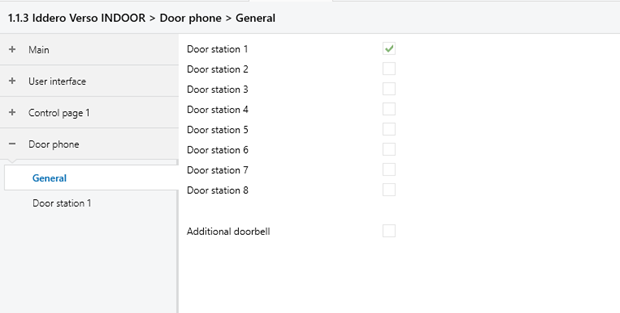
Enable at least one “Door station” in section “Door phone > General”:
In the Door station parameters section, select “Door phone type”: “2N IP”
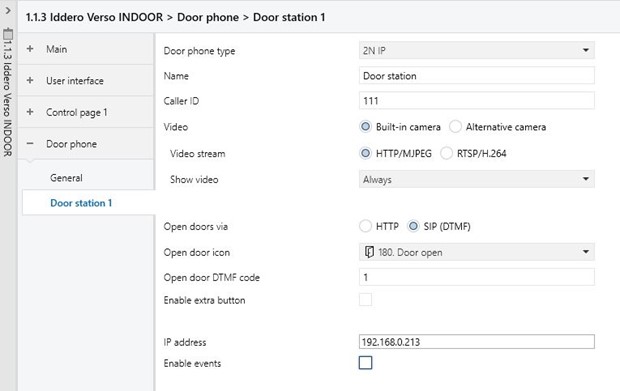
Configure the basic parameters:
- Name: Any friendly name; shown in the touch panel user interface
- Caller ID: The touch panel uses this parameter to identify the caller, when more than one door station is configured. In that case, it must match the “Phone Number (ID)” configured in the 2N door station.
- Open door DTMF code: This must match the Activation Code configured in the 2N door station.
- IP address: IP address of the 2N door station.
Additional parameters:
- Video: an external camera can be selected (instead of the 2N built in camera)
- Extra button: enable an extra button in the user interface to control a second switch
Video stream
The “Video stream” parameter determines how the touch panel fetches the video from the door station.
By default, it is set to “HTTP/MJPEG”.
This can optionally be changed to “RTSP/H.264” (requires 2N Enhanced video license).
NOTE: In any case, video resolution should not be higher than 640x480.
Door opening
The “Open doors via” parameter determines how the touch panel controls the door switches.
By default, it is set to “SIP (DTMF)” (sends DTMF codes; requires a call in progress).
This can optionally be changed to “HTTP” in order to send switch commands as HTTP requests.
2. User interface configuration
A widget (“component”) must be added in the user interface so that the user can navigate to the door phone page at any time.
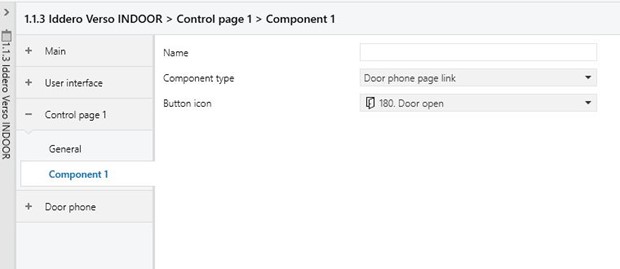
For example, if we want to configure component 1 in page 1:
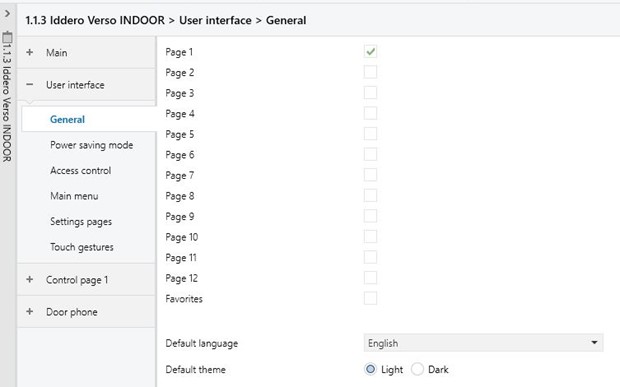
Make sure “Page 1” is enabled in section “User interface > General”:
Enable “Component 1” in “Control page 1 > General”:
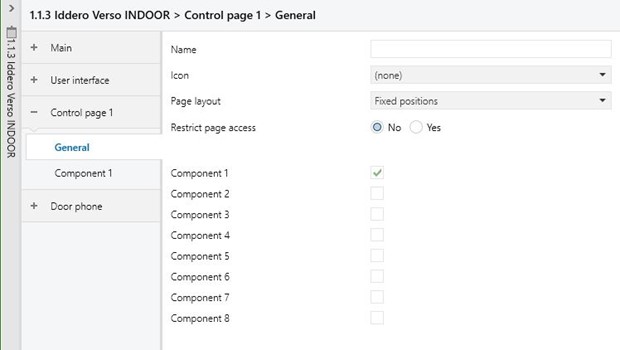
Set the “Component type” to “Door phone page link”:
Used Symbols
![]() - Compatible
- Compatible
![]() - Work with limitation
- Work with limitation
![]() - Incompatible
- Incompatible