BES KNX
About company
Ingenium, with 100% of our products Made in Spain, is a specialist home automation company on all kind of projects, related to control, such as residential (single flats, houses, Villas, etc.), commercial areas (shops, brand stores, hostelry, etc.) or major infrastructures (Hotels, corporate buildings, stadiums, convention centers, museums, etc.).
BES KNX product line continues to evolve, keep growing with the intention of covering all types of home automation installations that require KNX, the European standard for houses and buildings automation. Actually, we have more than 120 references in our catalogue, from touch screens (with intercom SIP support) or capacitive push-buttons to Actuators, dimmers sensors, gateways (clima, lighting, etc.), power supplies, line couplers, IP routers, etc. More information available in the website
Supported features
- Video from intercom
- Calls from intercom
- Door lock control
- Call fordwarding
- Missed call log
Supported versions:
| VIIP screens | 2N IP Intercoms | SIP Calls | Video | Door Control |
|---|---|---|---|---|
| 1.0.41729 or higher | 2.30 + |
|
|
|

License
No licenses required.
Manual
2N Device configuration
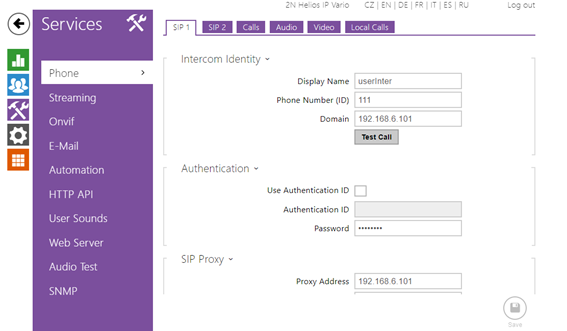
Go to Services/Phone/SIP1. The following data must be entered in this menu:
- Display name
- Phone number (ID)
- Domain (Viip‘s IP)
- Proxy Address (Viip‘s IP)
 |
 .
.
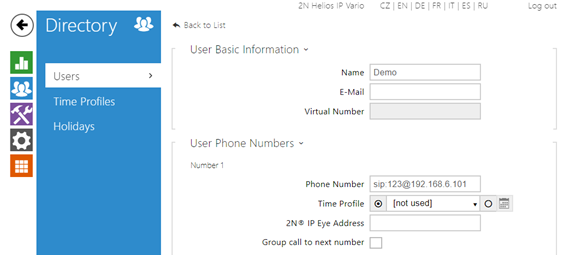
To configure the outdoor devices, it is necessary to create a user, to do this, access the Directory menu.
Click on the button  to create a new user and a new window opens in which you enter:
- Name
- Phone number: sip: + a 3 digit number + @ + Viip‘s IP.
E.g.: sip:123@192.168.6.101.
 |
 .
.
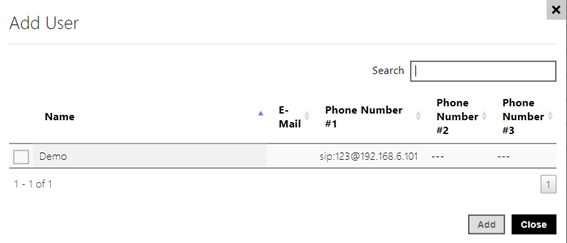
On the main screen you can check that the user has been saved ok.
 |
 .
.
Select the user created to associate it with the button on the board and click add.
 |
 .
.
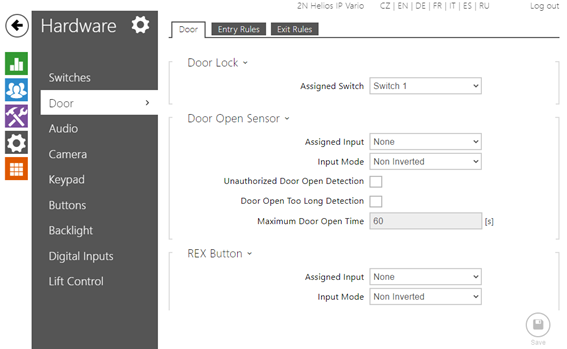
To associate the button created with the relay go to Hardware/Door/Door and assign the switch.
Assigned switch: Switch 1
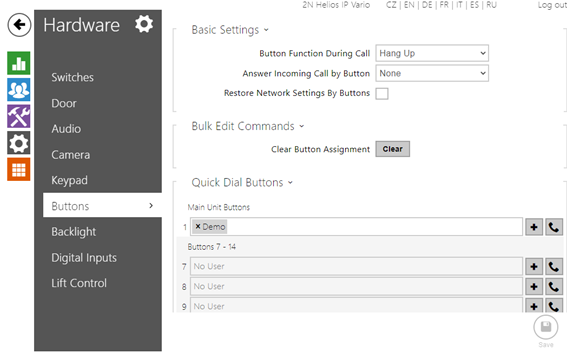 |
- Assigned switch: Switch 1
 |
 .
.
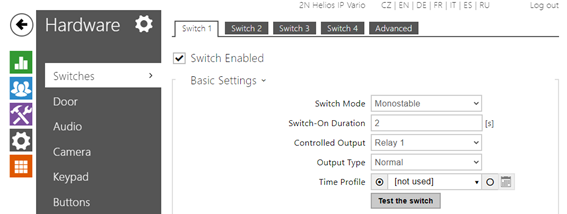
To configure the switch, go to Hardware/Switches/Switch 1 menu and complete the following fields:
- Switch Enabled

- Controlled Output: Relay 1
 |
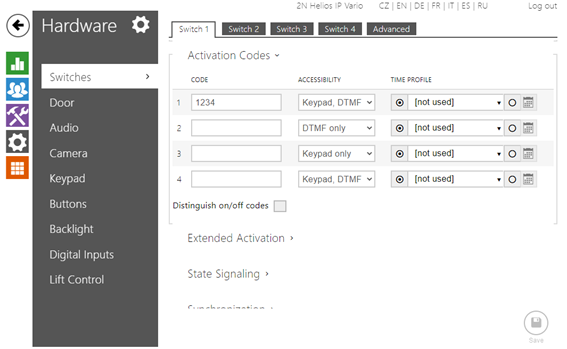
- Activation codes: (Activation code to open the door)
 |
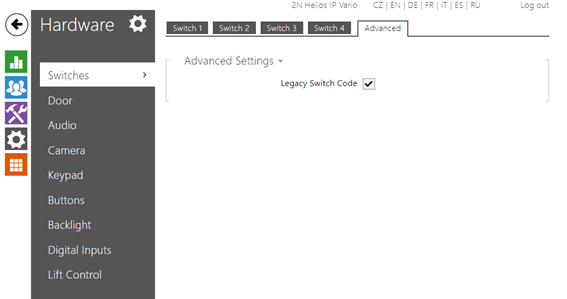
- Legacy Switch Code

 |
 .
.
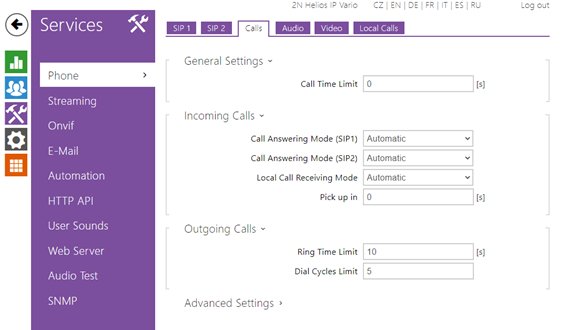
Go to Services/Phone/Calls
- Call Answering Mode (SIP1): Automatic
- Local Call Receiving Mode: Automatic
 |
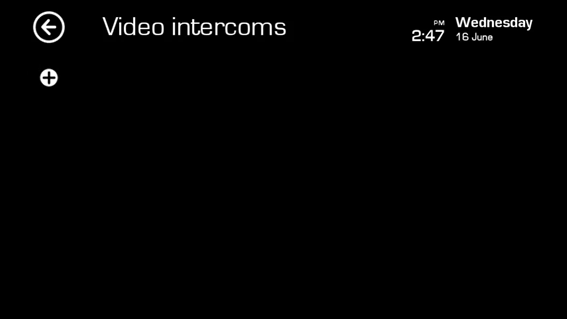
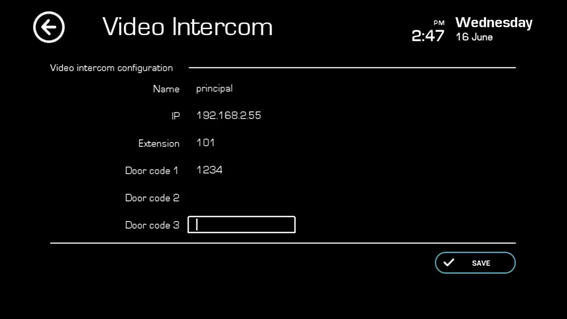
VIIP Screen configuration
To configure the VIIP device, go to the menu Settings / Connections / Video intercom configuration.
Click on the button + to add a device.
 |
- Name of the plate.
- IP of the board
- Extension (enter any 3 digit number e.g.:101)
- Door opener code, which has to coincide with the one configured on the panel (some panels have restrictions in this code that must be taken into account when configuring).
 |
 |