5.4.3 E-Mail
 |
To inform the intercom users of all missed and/or successfully completed calls, configure the 2N IP intercom to send an e-mail after every call to the called user. You can compile the e-mail subject and message text of your own. If your intercom is equipped with a camera, you can automatically attach one or more snapshots taken during the call or ringing.
The intercom sends e-mails to all the users whose valid e-mail addresses are included in the users list. If the E-Mail parameter in the user list is empty, e-mails are sent to the default e-mail address.
You can also send e-mails via Automation using the Action.SendEmail action.
Note
- The e-mail function is available with the Gold license only.
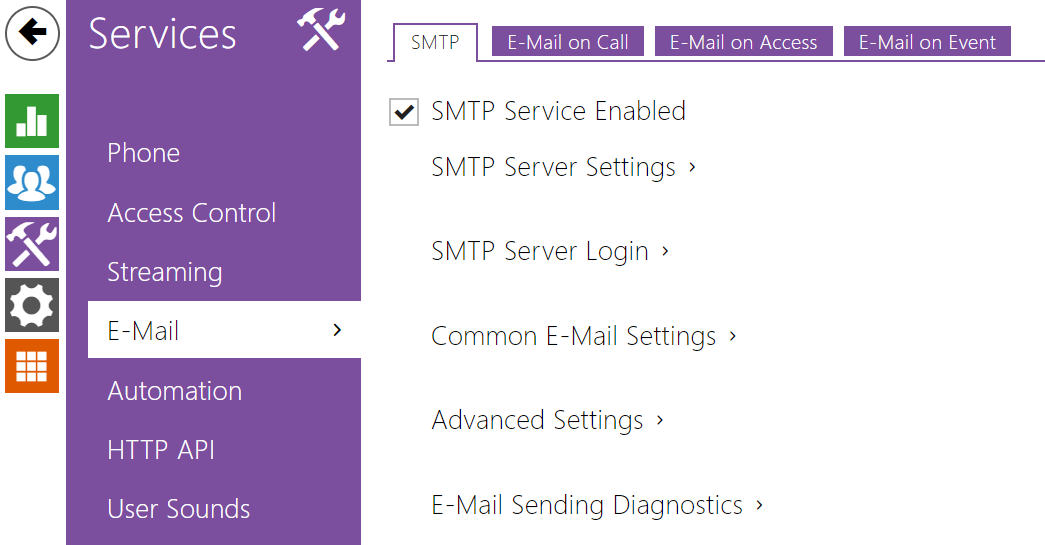
SMTP
 |
- SMTP Service Enabled – enable/disable sending e-mails from the intercom.
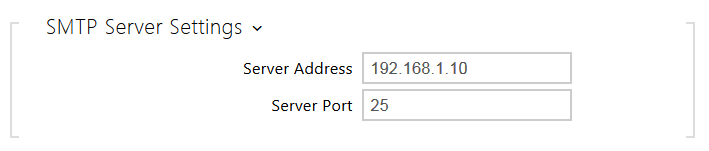 |
- Server Address – set the SMTP server address to which e-mails shall be sent.
- Server Port – specify the SMTP server port. Modify the value only if the SMTP server setting is substandard. The typical SMTP port value is 25.
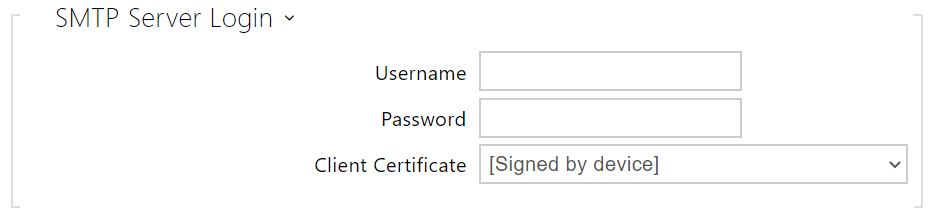 |
- Username – enter a valid username for login if the SMTP server requires authentication, or leave the field empty if not.
- Password – enter the SMTP server login password.
- Client Certificate – specify the client certificate and private key for the intercom – SMTP server communication encryption. Choose one of the three sets of user certificates and private keys (refer to the Certificates Subs.) or keep the SelfSigned setting, in which the certificate automatically generated upon the first intercom power up is used.
 |
- From Address – set the sender address for all outgoing e-mails from the device.
 |
- Deliver In – set the time limit for delivering an e-mail to an inaccessible SMTP server.
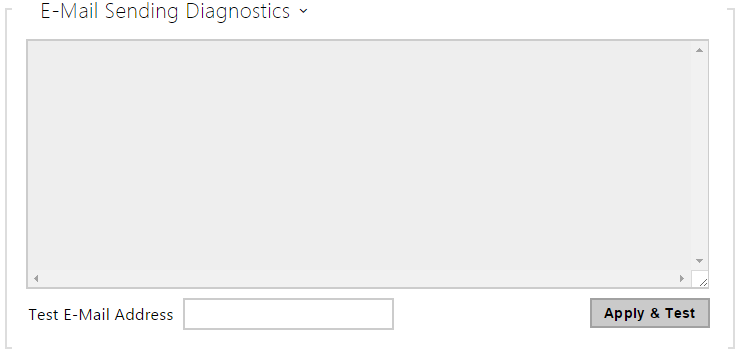 |
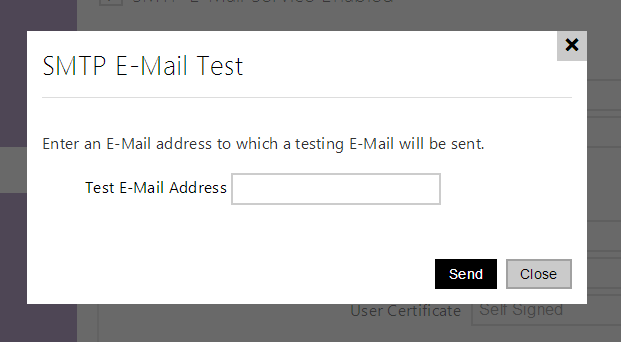
Click Apply & Test to send a testing e-mail to the defined address with the aim to test the functionality of the current e-mail sending setting. Enter the destination e-mail address into the Test e-mail address field and press the button. The current e-mail sending state is continuously displayed in the window for you to detect an e-mail setting problem if any on the intercom or another network element. One camera shot is always attached to the e-mail even in cameraless models where the image is sent with N/A.
 |
E-Mail on Call
Set e-mail sending during outgoing calls on this tab.
 |
- Send E-Mail to User at – set e-mail sending in the event of an accomplished / missed outoging call. The e-mail is sent when the connection is terminated. The following options are available:
- Do Not Send E-mail – no e-mail messages will be sent upon outgoing calls.
- Any Outgoing Call – an e-mail will be sent upon every outgoing call.
- Missed Outgoing Call – an e-mail will be sent upon every missed outgoing call.
Note
- An e-mail can always be sent via Automation.
 |
- Subject – set the e-mail subject to be sent.
- E-Mail Body – edit the text to be sent. Use the HTML formatting characters. Special symbols can be used to replace date and time, intercom identification and the number to be called. Special symbols can be used to replace date and time and intercom identification. These symbols will be replaced with the actual values before sending. The list of placeholders included in the template is shown in a table at the end of the section.
<p>Hello <b>$User$</b>
</p>
<p>You had a call on: <b>$DateTime$</b>
  <br>The number dialed was: <b>$DialNumber$</b>
</p>
<p>This e-mail message is generated automatically by device: <b>$DeviceName$</b>. Do not reply to this message.
</p>
Caution
- If the call is made to multiple users, the placeholder symbol for the name of the called user $User$ is empty.
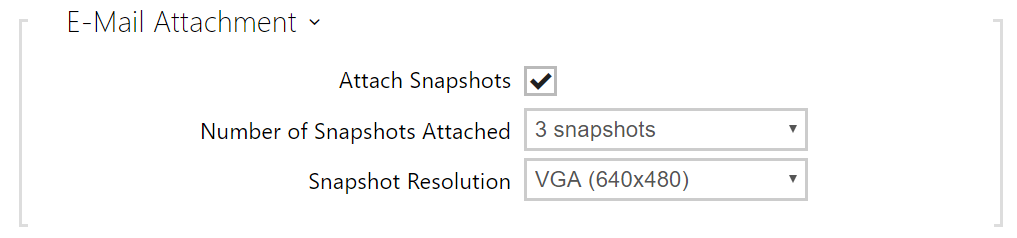 |
- Attach Snapshots – enable sending of an attachment including one or more camera snapshots taken during ringing or calling.
- Number of Snapshots Attached – set the count of snapshots to be attached to the e-mail message.
- Snapshot Resolution – set the snapshot resolution for the images to be sent.
E-Mail on Access
Set that an e-mail shall be sent whenever an RFID card is tapped on the card reader and/or Bluetooth/fingerprint reader identification is made.
 |
- Send to E-mail Address – administrator e-mail address.
- Send E-Mail at – set e-mail sending. The following options are available:
- Do Not Send E-Mail – no e-mail message will be sent.
- All Accesses – an e-mail is sent at all (valid/invalid) access attempts.
- Denied Accesses – an e-mail is only sent if the access is denied.
 |
- Subject – set the e-mail subject to be sent.
- E-Mail Body – edit the text to be sent. Use the HTML formatting characters. Special symbols can be used to replace date and time, intercom identification and the number to be called. Special symbols can be used to replace date and time and intercom identification. These symbols will be replaced with the actual values before sending. The list of placeholders included in the template is shown in a table at the end of the section.
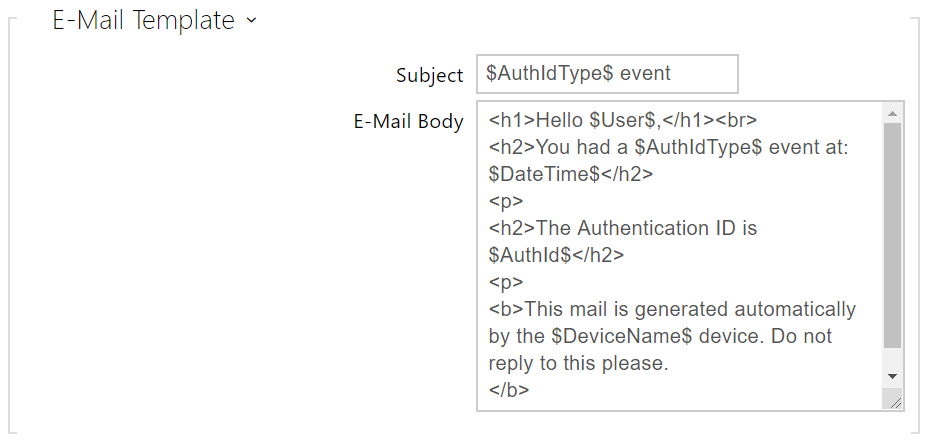
<p>Hello,
</p>
<p>User <b>$User$</b> generated a new access event on device <b>$DeviceName$</b> (IP: <b>$Ip4Address$</b>)
</p>
<ul>
  <li>Authentication Type: <b>$AuthIdType$</b>
  </li>
  <li>Authentication ID: <b>$AuthId$</b>
  </li>
  <li>Validity: <b>$AuthIdValid$</b>
  </li>
  <li>Reason: <b>$AuthIdReason$</b>
  </li>
  <li>Direction: <b>$AuthIdDirection$</b>
  </li>
  <li>Date/Time: <b>$DateTime$</b>
  </li>
</ul>
<p>This e-mail message is generated automatically by device: <b>$DeviceName$</b>. Do not reply to this message.
</p>
Caution
- An extended syntax can be used for the $AuthIdType$ and $AuthIdValid$ placeholders to replace the values in different languages.
- In the case of an invalid value of $AuthId$, the first half of the ID is masked, e.g.: ******11188, ****************792d9044158891fa etc.
- In the case of a valid value of $AuthId$, the whole ID is masked ****.
- If the placeholder value is not found in the string, the value is used directly.
 |
- Attach Snapshots – enable sending of an attachment including one or more camera snapshots taken during ringing or calling.
- Snapshot Resolution – set the snapshot resolution for the images to be sent.
E-Mail on Event
Set that an e-mail shall be sent whenever the SIP gets lost, the device is rebooted or the tamper switch is activated on the device.
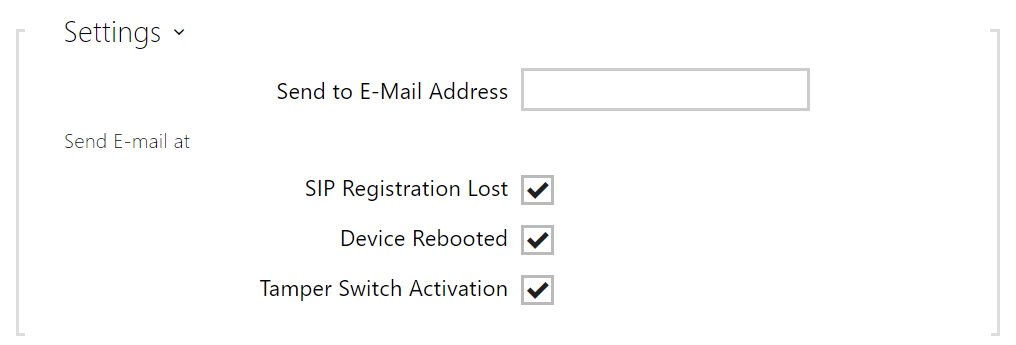 |
Send to E-Mail Address – set e-mail sending. The following options are available:
- SIP Registration Lost
- Device Rebooted
- Tamper Switch Activation
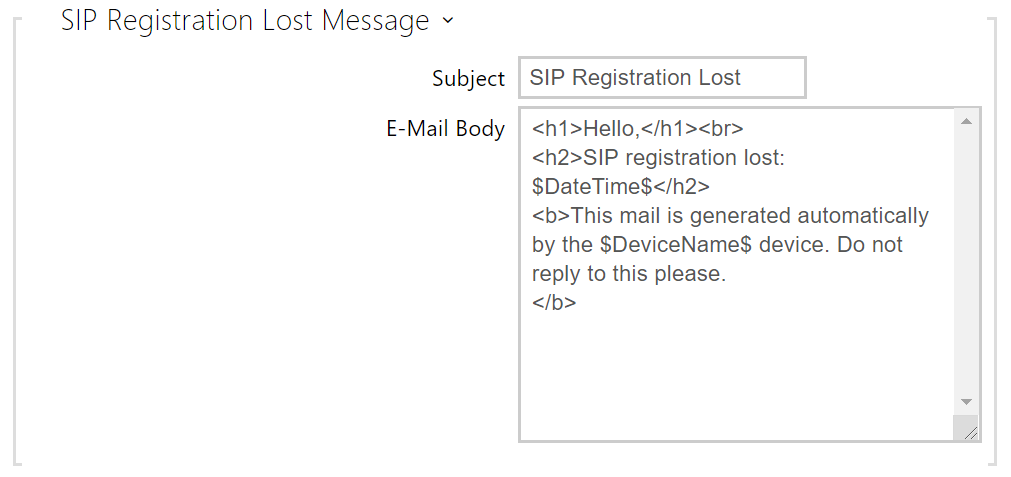 |
- Subject – set the e-mail subject to be sent.
- E-Mail Body – edit the text to be sent. Use the HTML formatting characters. Special symbols can be used to replace date and time, intercom identification and the number to be called. Special symbols can be used to replace date and time and intercom identification. These symbols will be replaced with the actual values before sending. The list of placeholders found in the template is shown in the overview table at the end of this chapter.
<p>Hello,
</p>
<p>SIP account <b>$SipAccountNumber$</b> of device <b>$DeviceName$</b> (IP: <b>$Ip4Address$</b>) got unregistered on <b>$DateTime$</b>
</p>
<p>This e-mail message is generated automatically by device: <b>$DeviceName$</b>. Do not reply to this message.
</p>
Caution
- If the placeholder value is not found in the string, the value is used directly.
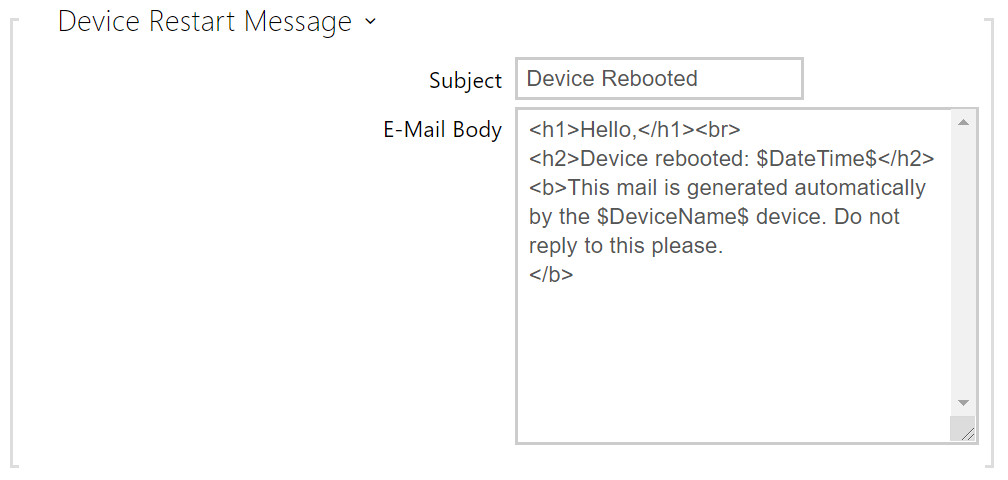 |
- Subject – set the e-mail subject to be sent.
- E-Mail Body – edit the text to be sent. Use the HTML formatting characters. Special symbols can be used to replace date and time, intercom identification and the number to be called. Special symbols can be used to replace date and time and intercom identification. These symbols will be replaced with the actual values before sending. The list of placeholders included in the template is shown in a table at the end of the section.
<p>Hello,
</p>
<p>Device <b>$DeviceName$</b> (IP: <b>$Ip4Address$</b>) rebooted on <b>$DateTime$</b>
</p>
<ul>
  <li>Reason: <b>$RebootReason$</b>
  </li>
  <li>Uptime: <b>$UpTime$</b>
  </li>
  <li>Firmware version: <b>$SoftwareVersion$</b>
  </li>
  <li>Build date: <b>$BuildTime$</b>
  </li>
</ul>
<p>This e-mail message is generated automatically by device: <b>$DeviceName$</b>. Do not reply to this message.
</p>
Caution
- If the placeholder value is not found in the string, the value is used directly.
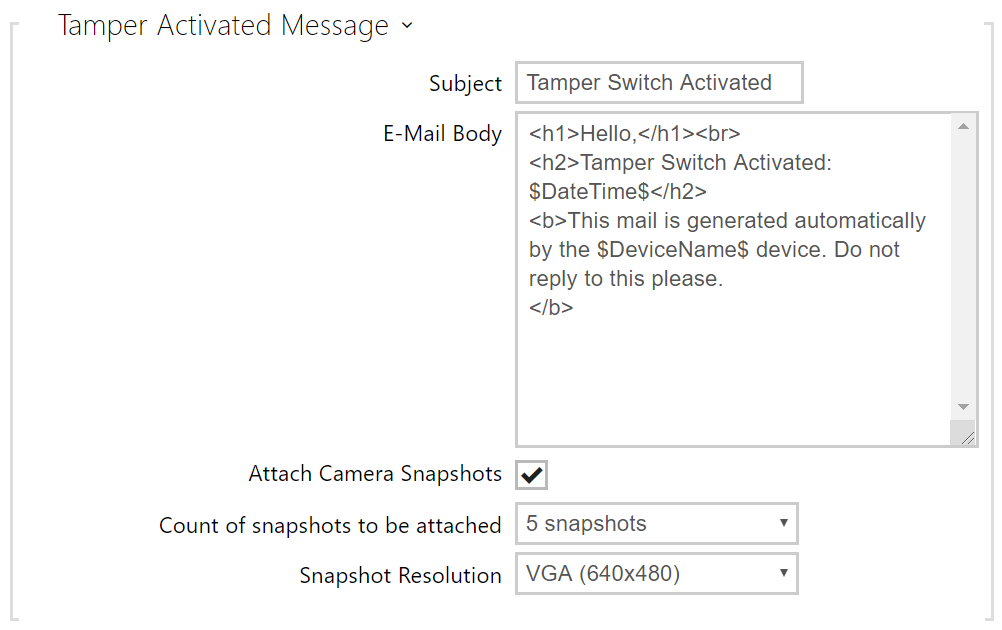 |
- Subject – set the e-mail subject to be sent.
- E-Mail Body – edit the text to be sent. Use the HTML formatting characters. Special symbols can be used to replace date and time, intercom identification and the number to be called. Special symbols can be used to replace date and time and intercom identification. These symbols will be replaced with the actual values before sending. The list of placeholders found in the template is shown in the overview table at the end of this chapter.
- Attach Camera Snapshots – enable sending of an attachment including one or more camera snapshots taken during ringing or calling.
- Count of Snapshots to Be Attached – set the count of snapshots to be attached to the e-mail message.
- Snapshot Resolution – set the snapshot resolution for the images to be sent.
<p>Hello,
</p>
<p>Tamper switch of device <b>$DeviceName$</b> (IP: <b>$Ip4Address$</b>) was activated on <b>$DateTime$</b>
</p>
<p>This e-mail message is generated automatically by device: <b>$DeviceName$</b>. Do not reply to this message.
</p>
Caution
- If the placeholder value is not found in the string, the value is used directly.
Caution
- The $DeviceName$ placeholder name is directly linked to the value of the Device name parameter in Services / Web Server / Basic Settings. We recommed that you use a name that defines the device uniquely.
List of Placeholders
| Occurrence | Placeholder | Description |
|---|---|---|
| Always available | $DateTime$ | current date and time |
| $DeviceName$ | device name | |
| $Ip4Address$ | device IP address | |
| $SoftwareVersion$ | FW version | |
| $BuildTime$ | build date and time | |
| $UpTime$ | device uptime | |
| Case dependent | $User$ | username |
| $RebootReason$ | reboot reason | |
| $DialNumber$ | dialed number, incoming or outgoing | |
| $SipAccountNumber$ | SIP account number | |
| $AuthId$ | authentication ID | |
| $AuthIdDirection$ | direction (entry/exit) | |
| $AuthIdType$ | credential type | |
| $AuthIdValid$ | in/valid | |
| $AuthIdReason$ | reason of rejection |
List of Placeholderrs in Events
| Placeholder / Function | E-Mail on Access | E-Mail on Call | E-mail on SIP Registration Lost | E-mail on Device Rebooted | E-mail on Tamper Switch Activation | E-mail on Diagnostics Sending | Automation |
|---|---|---|---|---|---|---|---|
| $DateTime$ | * | * | * | * | * | * | * |
| $DeviceName$ | * | * | * | * | * | * | * |
| $Ip4Address$ | * | * | * | * | * | * | * |
| $SoftwareVersion$ | * | * | * | * | * | * | * |
| $BuildTime$ | * | * | * | * | * | * | * |
| $UpTime$ | * | * | * | * | * | * | * |
| $User$ | * | * | * | * | |||
| $RebootReason$ | * | ||||||
| $DialNumber$ | * |
| CallStateChanged | ||||
| $SipAccountNumber$ | * | ||||||
| $AuthId$ | * | CardEntered, CardHeld | |||||
| $AuthIdDirection$ | * | CardEntered, CardHeld | |||||
| $AuthIdType$ | * | CardEntered, CardHeld | |||||
| $AuthIdValid$ | * | CardEntered, CardHeld | |||||
| $AuthIdReason$ | * |