2. 2N® NetStar Records Manager Configuration
Section content:
First Login
Having completed installation, enter the 2N® NetStar Records Manager server IP address or domain name into your Internet browser.
Note
- Use Microsoft Edge, Mozilla Firefox or Google Chrome for your web login.
For the first login, use the 2N® NetStar Records Manager server Superadmin account: name superadmin and password 2n. Click the logged-in user name in the right-hand upper screen corner to change the Superadmin password after login if necessary.
 |
 |
The following data are displayed after licence upload:
- SN - 2N® NetStar serial number
- Intercoms - count of licensed 2N® Helios intercoms
- NetStar servers - count of licensed 2N® NetStar platforms
- Date - last licence verification date
Expiration - licence time validity
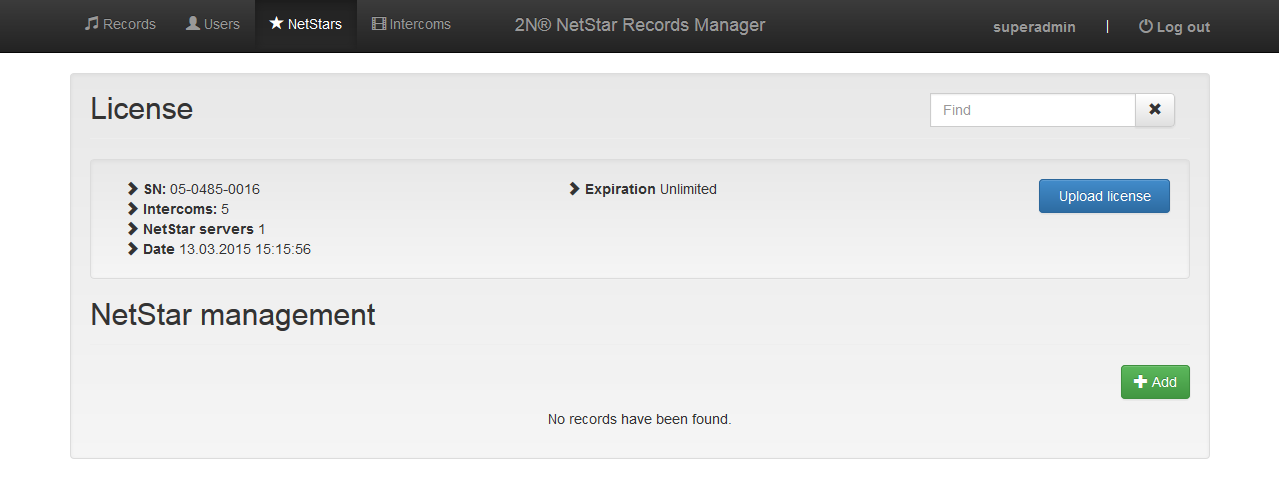
Add 2N® NetStar
Select NetStars in the upper tool bar and click Add to add 2N® NetStar.
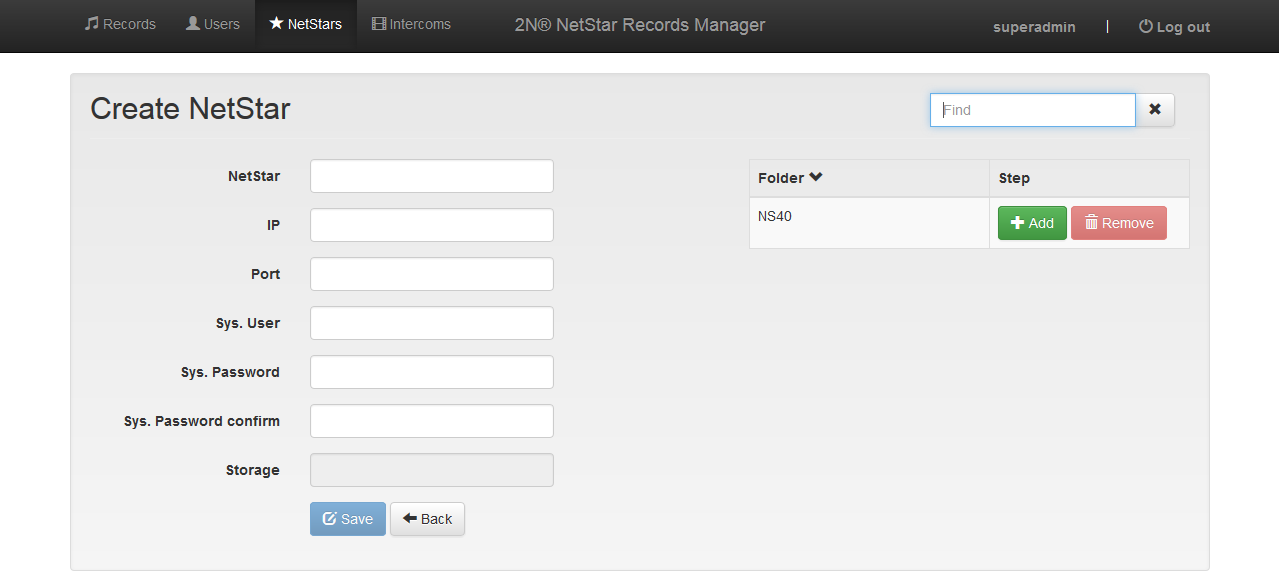 |
- NetStar - enter the connection name.
- IP - enter the 2N® NetStar IP address.
- Port - define the 2N® NetStar communication port (default port is 6543).
- System user - set the 2N® NetStar user for authentication (we recommend you to create a special user in 2N® NetStar for this purpose).
- System password - enter the system user password.
- System password (confirm) - re-enter the system user password for confirmation.
- Storage - select a folder from the list to the right to which recordings shall be saved.
 |
Add Intercom
The 2N® NetStar Records Manager server adds intercoms automatically based on the replies to the sent broadcast message. Thus, make sure that the intercoms are located in one and the same broadcast domain or that the broadcast message is resent by network elements.
 |
Having added the intercoms, click Edit to complete the settings and activate video recording from the intercom(s).
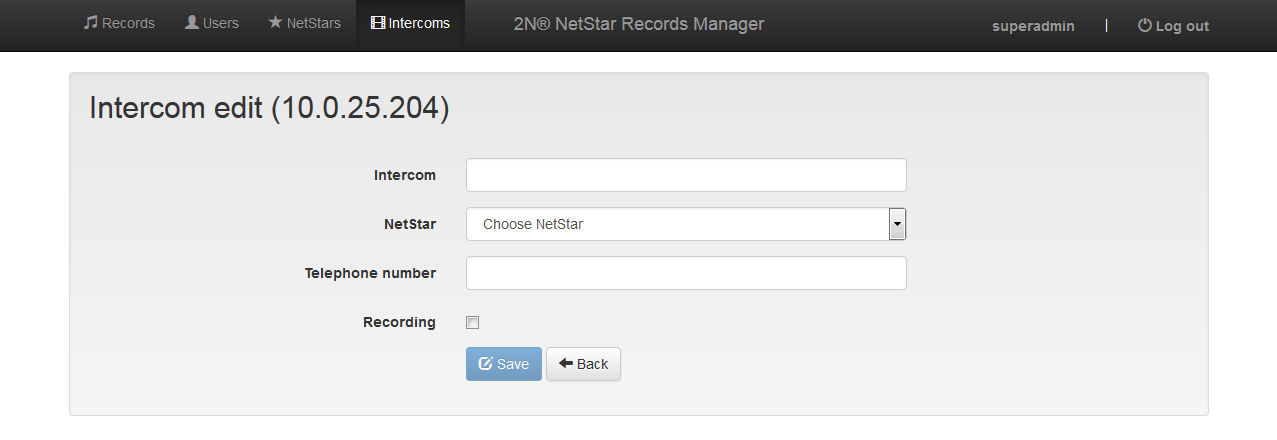 |
- Intercom - enter the 2N® Helios intercom name.
- NetStar - select the 2N® NetStar with which the 2N® Helios intercom is registered.
- Telephone number - enter the 2N® Helios phone number.
- Recording - activate / deactivate recording.
Caution
- Make sure that the phone number matches the number under which the intercom is registered with 2N® NetStar to avoid video recording error.
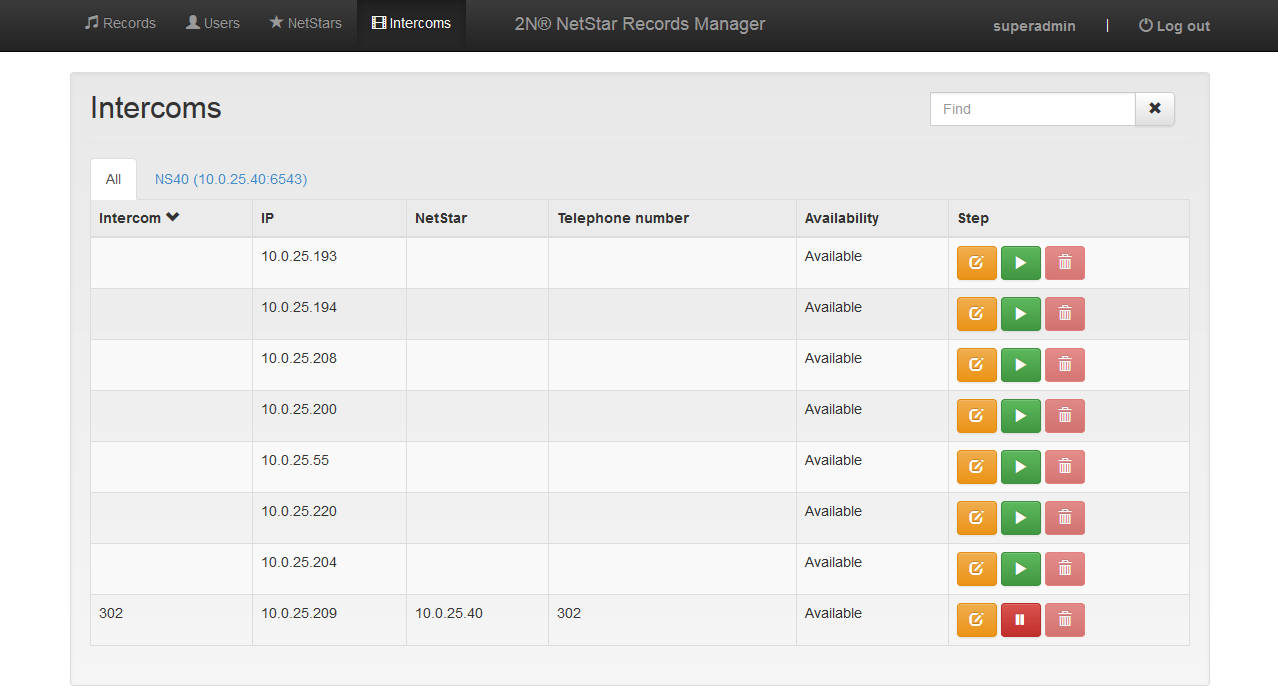
Use the Find field in the upper right-hand corner to search intercoms according to the following parameters (Intercom, IP, NetStar, Telephone number):
- Intercom - enter the 2N® Helios name.
- IP - enter the 2N® Helios IP address.
- NetStar - enter the IP address of the 2N® NetStar with which the 2N® Helios intercom is registered.
- Telephone number - enter the 2N® Helios phone number.
- Availability - display information on 2N® Helios availability.
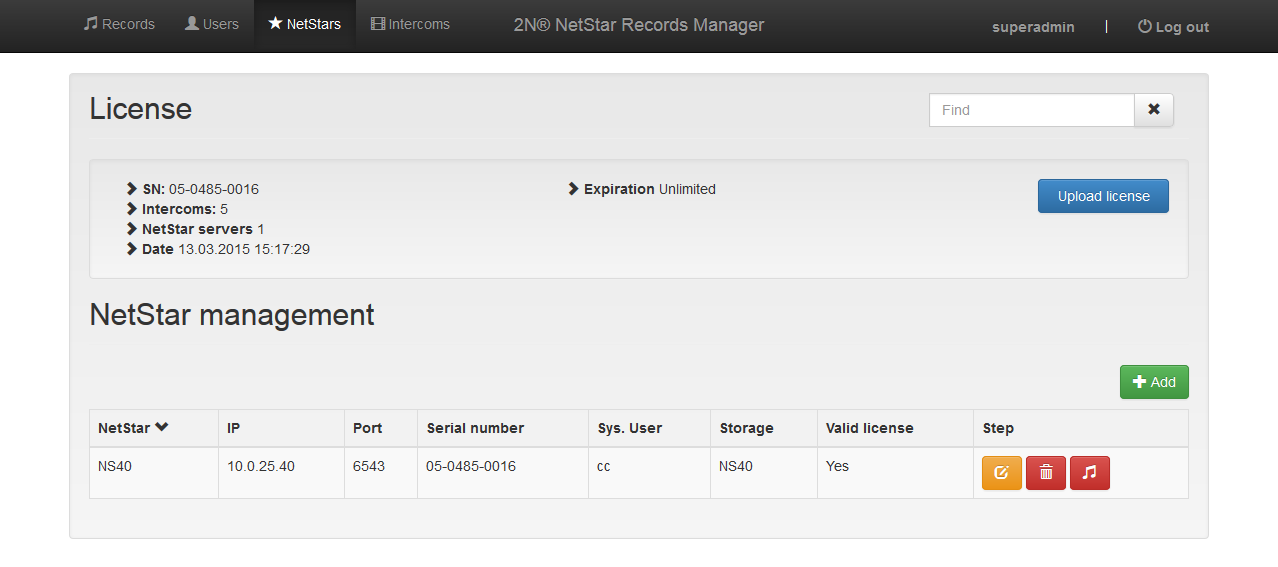
- Step
- Intercom edit
- Activate / Deactivate intercom
- Delete intercom
Arrange the 2N® Helios intercoms in any column. Click on the column name to display an arrow: arrow up means descending order and arrow down means ascending order.
Users
The Users tab provides a list of all users from all the 2N® NetStars added. The users are read automatically when the 2N® NetStar licence is added and can be updated manually by clicking the Update icon. Each user is automatically assigned the lowest role (Agent) at the beginning. Superadmin or Admin can change the user roles. The Admin, Manager and Agent roles have the following rights:
- Admin - has access to all records within the 2N® NetStar it is assigned to and may set user roles.
- Manager - has access to its records and records of the users assigned to its group.
- Agent - views its records only.
Note
- User login data and passwords are obtained from 2N® NetStar. Change the data and password via the Users – User rights menu in the NsAdmin configuration tool. A subsequent password change via the 2N® NetStar Records Manager web interface changes the password in 2N® NetStar too.
Storage Mapping in 2N® NetStar
Storage mapping in 2N® NetStar via the NsAdmin configuration tool is the next step. Add a physical storage in the Global data – Storage Manager menu displayed using the right mouse click (Add).
Caution
- Make sure that the network storage name does not include diacritics and spaces.
- Enter the storage name and confirm.
- Set Network as Storage type.
- Access port - set the 2N® NetStar Records Manager server address in the \\ip_address\share format.
- Free size (B) - define what space shall be used; enter -1 to use the whole disk capacity.
- Login - enter admin.
- Password - enter the password used for installation (refer to Section 1 of this manual).
- Connect attempt in (s) - define when connection attempt shall be repeated after storage failure.
After storage mapping, a row will be added to the Detected Storages table. If all the parameters have been set correctly, the State column will include the Operating value.
Now right-click on Voice Record, select Add physical storage mapping and select the currently added storage.
Having added the storage, select the Move evidence of files to storage and Keep files removed from records options.
Enter the name of the record-saving directory created during installation into the Path field.
Finally, set Record format .wav. Refer to the Global data - Global parameters menu for settings.
