1. 2N® NetStar Records Manager Installation Wizard
Installation
Install the 2N® NetStar Records Manager directly on a hardware PC or virtualisation platform (VMware, Oracle VM VirtualBox, etc.).
Caution
- Make sure that the following minimum PC/virtualisation platform configuration requirements are met while installing the 2N® NetStar Records Manager to avoid system malfunction!
- 64bit processor
- 4 GB RAM
- 100 GB free hard disk space
Caution
- The size of recordings made by 2N® NetStar is approximately 1 MB per 1 minute record. Therefore, check the capacity of your hard disk.
Note
- Make sure before installing the 2N® NetStar Records Manager onto a virtualisation platform that VT-x or AMD-V or any other similar virtualisation function is enabled according to the hardware PC processor type .
Example of Virtualisation Platform Installation
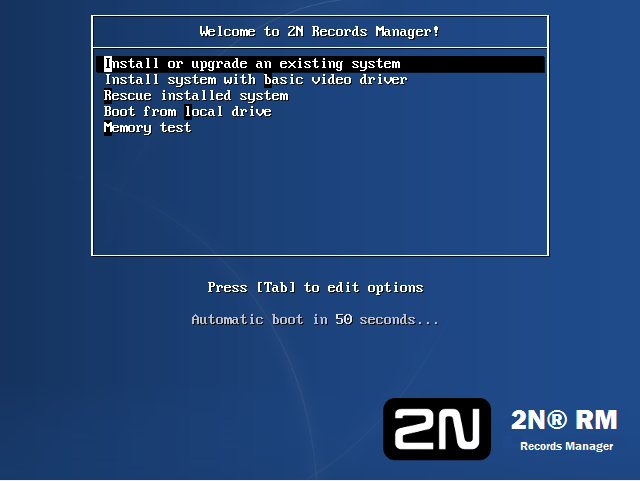
Connect the received ISO file with the 2N® NetStar Records Manager installation to the CD/DVD drive in the virtualisation platform that meets the minimum configuration requirements mentioned above. Set booting from the CD/DVD drive and start the virtual PC. When the ISO file has been read, the following screen will be displayed:
 |
 |
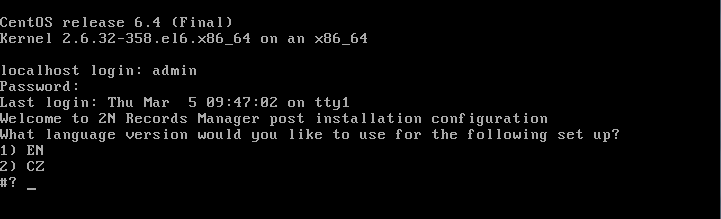
After booting from hard disk is completed, you will see the login window:
 |
Upon login, the post-installation script will start automatically to complete the 2N® NetStar Records Manager installation.
Caution
- The post-installation script takes a few minutes. Be very careful while entering data and do not interrupt or skip over the script to avoid the 2N® NetStar Records Manager malfunction.
Language is the first script selection.
 |
 |
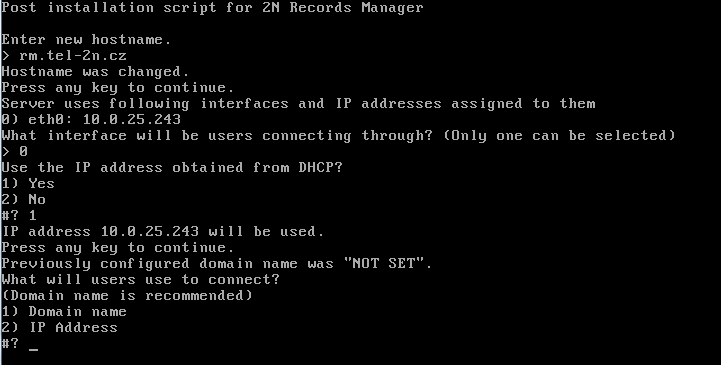
If the DHCP server is available in the network, you can keep the assigned IP address or set the static IP address. If you select No, you will be invited to enter a new IP address, network mask, default gateway and primary and secondary DNS.
Now choose the type of user connection to the 2N® NetStar Records Manager : IP address or Domain name. If you select the latter option, you will be asked to enter the domain name.
 |
Caution
- Make a corresponding record in your DNS server if the users are connected via their domain names.
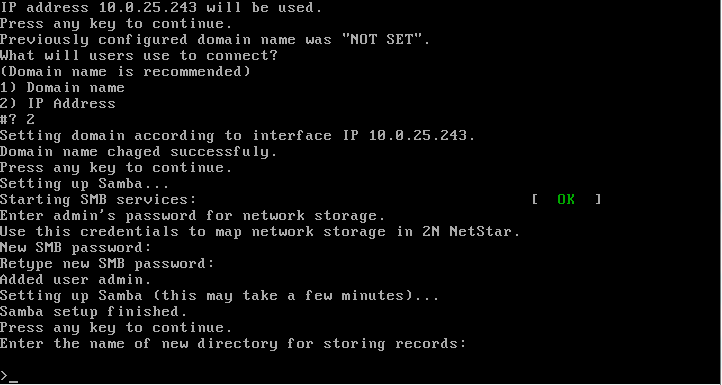
Press any key to continue. Enter the admin user password to authorise the 2N® NetStar Records Manager server storage. Use these access data for storage mapping in 2N® NetStar. The password can differ from the 2N® NetStar Records Manager server access password.
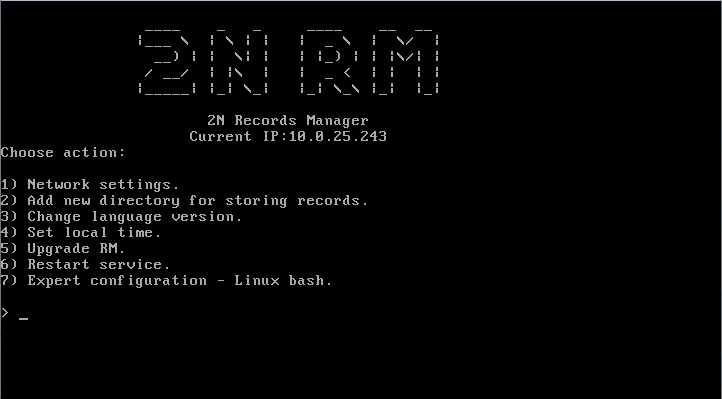
Note
Do not change the admin password for authorisation of the 2N® NetStar Records Manager server storage until the post-installation script is completed in the configuration menu (console) displayed upon every Admin login. To change the password, select 7 in the configuration menu and enter the following:
smbpasswd -a admin
Having entered the command, you will be invited to enter a new password.
Now create the folder for saving records.
 |
The service will be enabled when all the required data have been set.
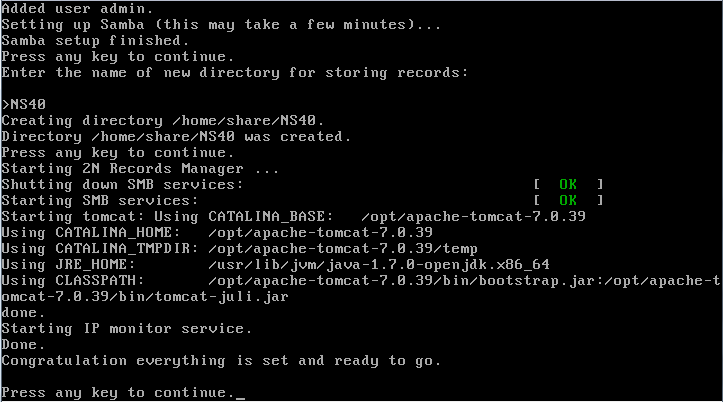 |
 |
Caution
- Please set the correct time (via the NTP server - option 4, e.g.) before using the 2N® NetStar Records Manager as correct time setting is crucial for some functions.