1.2 Configuration Menu
Main Menu
After a successful connection to the PBX, the configuration part of the application is displayed. The main menu of this view is shown in figure below and contains the following options:
- Administrator
- Logout PBX – log out the configuration tool from the PBX and return to the previous menu for another connection as described above.
- Connect/Disconnect – use these options off-line to connect/disconnect the configuration tool to/from the PBX.
- Save changes – save all changes made since the last save.
- Undo changes – cancel all changes made since the last save in a menu.
- Settings – invoke a global setting dialogue as described in Chapter 1. About Application.
- Language – choose one of the supported languages.
- Exit – exit the configuration tool.
- Trace
- Load trace from file – load a trace from the file, thus clearing the previous one.
- Add trace from file – load a trace from the file and add it to the existing one. You can interconnect traces for easy analysis.
- Save trace to file – save the current on-line trace to a file. The configuration tool always saves an entire trace independently of whether the filter is being applied or not.
- Start trace analyser – open the trace analysis window.
- PBX
- Upgrade – display a firmware upgrade dialogue. Having been chosen, the firmware file is uploaded into the PBX and unpacked. After a restart, the new firmware is used.
- Import logs from PBX – get an easy access to the PBX logs without using other applications. You can import All logs or selected logs only (Selectively).
- All – after selecting a directory, the config.db and aoc.db files and the contents of the internal/log and /var/log directories are imported.
- Selectively – select this item to display a dialogue for downloading selected logs from the PBX. The user can enter the files through a storage as defined in theGlobal Data – Storage Manager menu.
- Restart PBX – use this option to initiate the PBX restart.
- Restore factory settings – delete all the PBX settings. After selection, a dialogue window will appear with 2 options. Having selected one of them, confirm the selection by clicking OK twice.
- Wizards
- Activation wizard – refer to the next subsection, 1.3 PBX Activation, for details.
- Import/export company structure – invoke the company structure import/export dialogue. The csv and xml files are supported.
- Database import – open the database importing window. There are 2 options in the dialogue window: import database From file or From PBX. If From PBX is selected, all the created PBXs will be displayed with available databases. The Rule parameter specifies the parameters that must not be overwritten by the import. This option is available for the off-line mode only .
- Database export – export the PBX database to a file in the xml format. This option is available for the off-line mode only.
- VoiceMail wizard – add automatically routers, DISA dial-in and progress tones for user VoiceMail.
- Help – start the help menu in the chosen language.
 |
View of Configuration Tool Main Menu
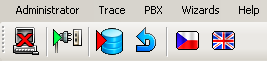
The figure above also includes all configuration menu icons. Icon meanings from the left:
- Logout PBX – log out the configuration tool from the PBX and return to the previous menu for another connection as described above.
- Connect/Disconnect – use these icons off-line to connect/disconnect the configuration tool to/from the PBX.
- Save changes – save all changes made since the last save.
- Undo changes – cancel all changes made since the last save in a menu.
- Language – flags are used to mark the configuration tool language versions.
- Eject to window – open the current tool indication in a separate window.
Windows
On the left-hand side of the configuration tool you can find the TreeView where you can choose a menu item to be configured. The selected menu then opens on the right-hand side and is mostly divided into two subwindows; one for selecting and the other for configuring an object. The configuration is divided into tabs for easier orientation. All the above mentioned windows are shown in the figure below.
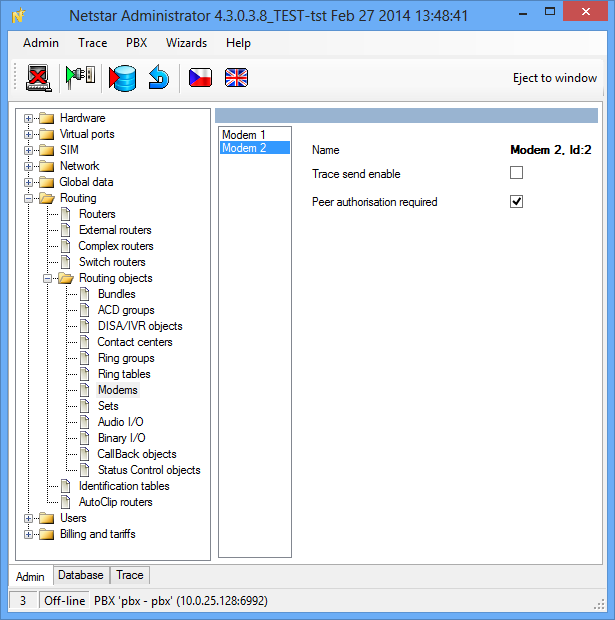 |
Figure: View of Configuration Tool Tabs and Windows
The Trace and Database sections situated in the lower part of the screen above the status bar are important configuration tool components. Trace helps you monitor calls and analyse configuration errors if any. Database provides a direct view of the data stored (depending on the connection mode). We strongly recommend that you should not change the data in this view if you do not know how! This menu tab is governed by the read & write rights assigned to each login.
Status Bar
The status bar is a lower task bar in the configuration tool. It provides two important pieces of information. The first one is the connection mode, which is either on-line or off-line. The other is the connected PBX name, which includes the PBX and connection data separated with a dash.
 |
Figure: View of Configuration Tool Status Bar