VAPIX announcing is similar to multicast announcing. The difference is that VAPIX plays announcements to one device only. It is a proprietary protocol, which enables an RTP stream to be sent to the set address. The advantage is that the communication is secure and every connection is authenticated. Be sure to create a user with operator rights at least in the device. And remember to select Unencrypted only in the HTTP/RTSP Password Settings / Allow password type in the VAPIX settings in the AXIS product.
Further settings relate to 2N® SIP Mic only. You can use the steps included in the preceding subsection. Just change Multicast zone to VAPIX zone. Having set the parameters, adjust steps 2 and 3. If you have not tried express settings, follow steps 1 and 2. Just select VAPIX as the zone in Action settings. Step 3 is as follows for VAPIX:
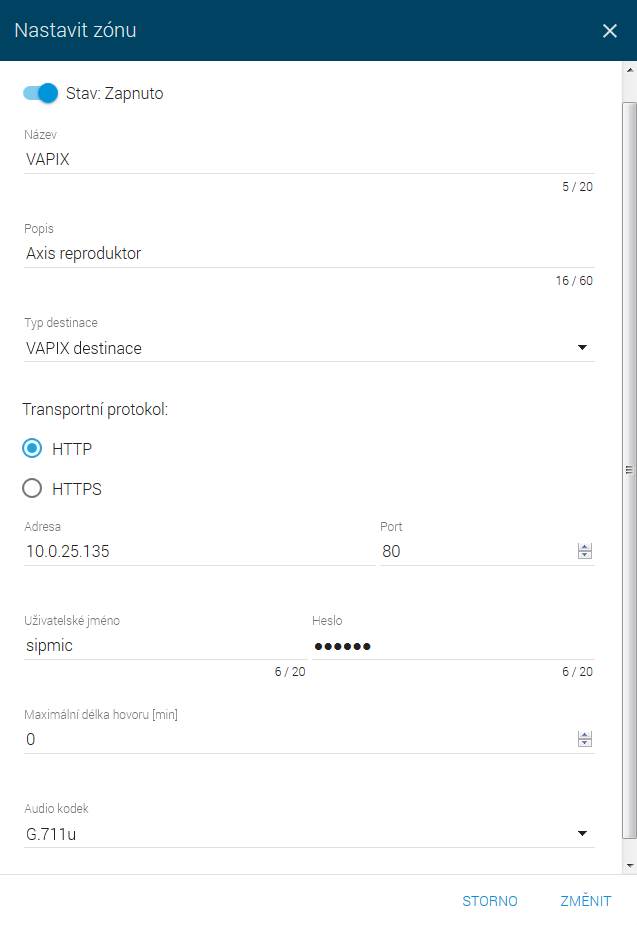
To generate an action via the set button, set the zone to be announced in the Zones menu. There is a list of 12 zones in the menu. Activate zone 1, which you chose while setting the button. Click Edit to open the following dialogue:
Select the zone name and description. Choose VAPIX destination as the Destination type. There are two Transport protocol options: HTTP or HTTPS. Choose HTTP for simplicity as some additional changes have to be done for HTTPS. Add the speaker IP address into the Address field. Port is set automatically: 80 for HTTP and 443 for HTTPS. If you use other ports for speaker communication for some reason, change the setting accordingly. For VAPIX verification, set the user name and password for 2N® SIP Mic authentication. Make sure that the AXIS user has operator rights at least. Now define the Maximum call duration and Audio codec to be used for transmission. G.711u (uLAW) is the only supported codec for VAPIX at present. Click Change to save the settings. Now you can play announcements to the VAPIX zone as well as to the multicast zone. Refer to step 4 in the preceding subsection.
HTTPS Settings
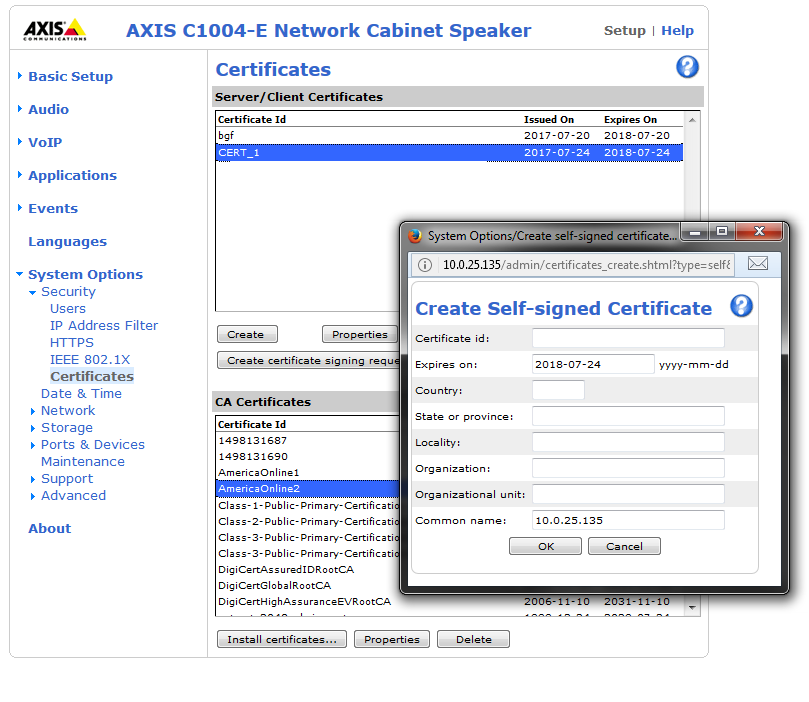
A security certificate has to be generated in AXIS for HTTPS. Select Create self-signed certificate in the System Options/Security/Certificates menu to create a new certificate.
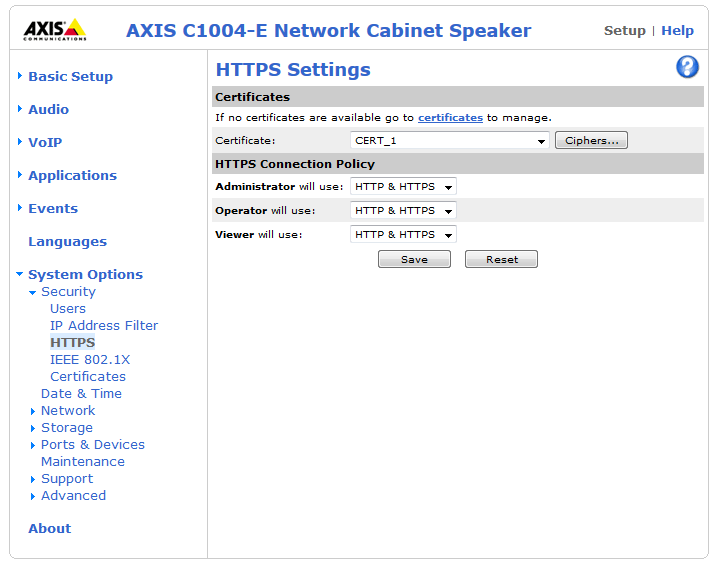
Go to the System Options/Security/HTTPS menu. Select the new certificate and set the required roles in HTTPS Connection Policy: Operator, HTTP & HTTPS in our case. Click Save for confirmation.
Once you save the changes, you can select HTTPS as the transport protocol in the 2N® SIP Mic settings. Refer to step 4 in the preceding subsection.