2N® IP Audio Console Application
What you should know
- The 2N® IP Audio Console application helps you send audio from a microphone or play files.
- 2N IP Audio System recognises 3 levels of rights managed by the system administrator.
- CAUTION: Freeride is the highest priority user role and shall be preferred in all zones.
The Console program is used for broadcasting to predefined sessions or inputs for
2N IP Audio System users. It is primarily designed for broadcasting audio from your microphone or music in the mp3 format.
Connection and Setting
The login screen is displayed upon the 2N® IP Audio Console start. Create the user name and password using the 2N® IP Audio Control Panel program or ask your system administrator to create and assign the rights to you.
Enter the username and password into the dedicated fields in the Console window upon start. Moreover, configure the correct host name or IP address for login. Click on the setting pictogram in the program header, see the figure below, and then on Server settings to get into configuration.
Use the Language settings to modify the application language.
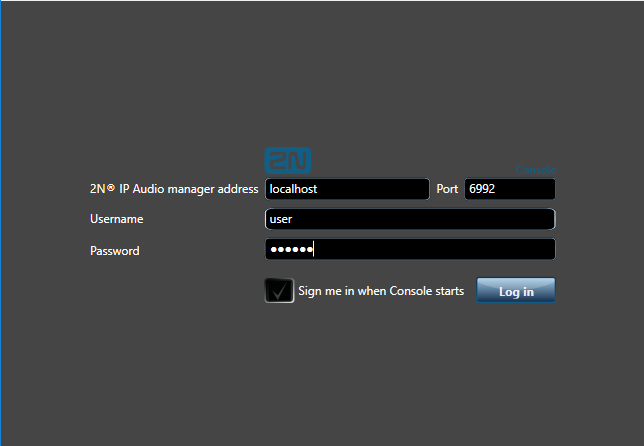 |
Login via 2N® IP Audio Console
Having set all the necessary parameters and entered your username and password, log in. If your login is successful, you get to the 2N® IP Audio Console screen to select your role.
User Roles
This screen helps you select a role after login to the 2N® IP Audio Console program. The figure below shows the window for a user with all roles. Refer to other parts of the manual for role details.
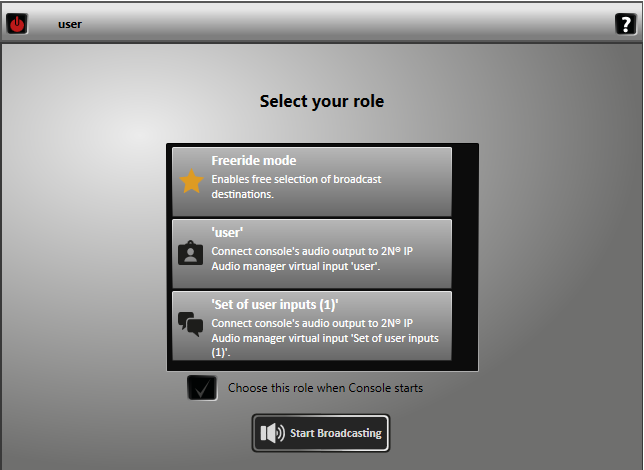 |
2N® IP Audio Console Roles
When you have selected a role, the screen will display the selected role, but the appearance is similar in all cases. New pictograms and the role name get displayed in the application header. To change the role, use the "figure" symbol, which returns you to the role selecting window. The "power off" pictogram is used for logout from the
2N® IP Audio Console application.
General Console Control
Primarily, the Console is designed for broadcasting sounds via a microphone or audio/music in the .mp3 format. The left section with the microphone picture controls the microphone and the middle section – List of sounds – helps play audio files. Click the Add button to add a sound to the application. The right–hand section is used for input check and control. Refer to the figure below for the 2N® IP Audio Console program control.
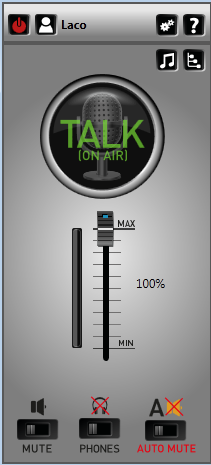 |
View of 2N® IP Audio Console Control
Output – there are different outputs for different roles.
List of sounds – or list of audio/music sources in files. Click Add and select the required file. Play this file using the Play button.
Microphone – the left window section controls the hardware microphone of the PC where Console is running.
- TALK button – used for microphone activation. Upon activation, the ON AIR sign goes on and the button changes into MUTE. You can broadcast even during audio playing from a file.
- AUTOMUTE button – used for enabling the "Automatic microphone activation" function. When you press the button, the Automute sign goes on. Let us give an example: The "College radio" broadcasts a few songs every evening and the presenter announces every song. In this case, the presenter selects a song from the file at the beginning of broadcasting. He or she selects Automute and can talk when the song is over – Automatic microphone activation. When the Play button is pushed for another song, the microphone is automatically deactivated and the listeners do not hear the studio noise.
You can enable Listening in in the 2N® IP Audio Console application too. To do so, push the ON button to the right of the lower screen. Listening in is used for activation of local listening to played files or microphone sound. Select the device to listen in via the Setting icon in the right-hand upper corner.
Settings
Settings allows you to select the application language, set the microphone and device for listening in. Also, you can define the sound path delay to increase the audio transmission quality.
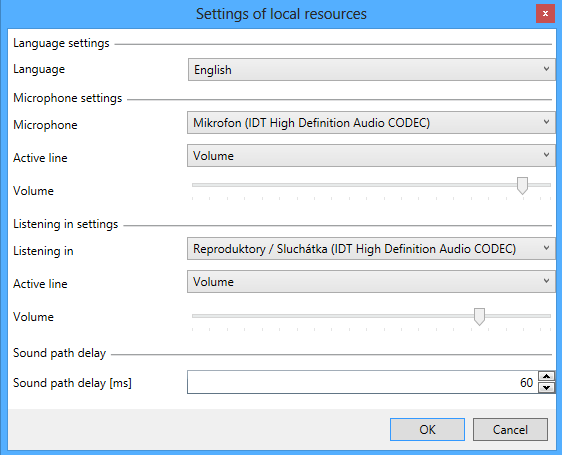 |
2N® IP Audio Console Settings
Freeride Mode Broadcasting
The Freeride user is assigned the highest user rights and can thus broadcast and play with the highest priority. This user selects the destination itself by ticking off the
2N® Net Audio Decoder or 2N® Net Speaker units in the List of devices/zones. Refer to the figure below.
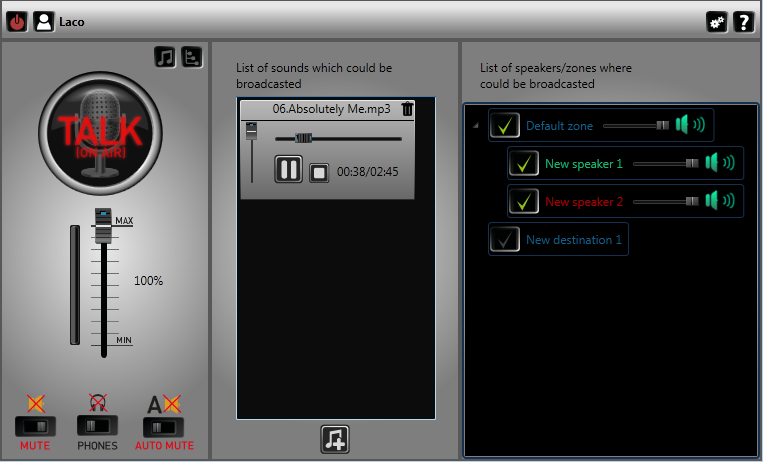 |
Freeride Role
Broadcast as User
Logged in as a user, you cannot choose where to broadcast. Your user role authorises you to broadcast to sessions to which you are assigned as a user input. Contact your system administrator for more information.
Broadcast as Set of User Inputs
Logged in as a set of user inputs, you cannot choose where to broadcast. Your user role authorises you to broadcast to sessions which contain the set of user inputs assigned to you. Contact your system administrator for more information details on the roles.