2.5 Configuration
Device Configuration
Configure 2N® IP Video Kit using a PC equipped any web browser as follows:
- Launch your web browser (Internet Explorer, Firefox, etc.).
- Enter the IP address of your intercom (http://192.168.1.100/, e.g.).
- Log in with username Admin and password 2n.
You have to know the IP address of your device to log in to the integrated web server. Upon purchase, 2N® IP Video Kit is in the Dynamic IP address mode, i.e. it obtains the IP address automatically if there is an adequately set DHCP server in the LAN. If no such server is available, set the Static IP address mode to your 2N® IP Video Kit.
If the device remains inaccessible (you have forgotten the IP address or the LAN configuration has changed, e.g.), change the network settings using the RESET button on the device.
LAN Setting Change and Default Reset
2N® IP Video Kit is equipped with a RESET button. Press the button shortly (< 1 s) to restart the system without changing configuration.
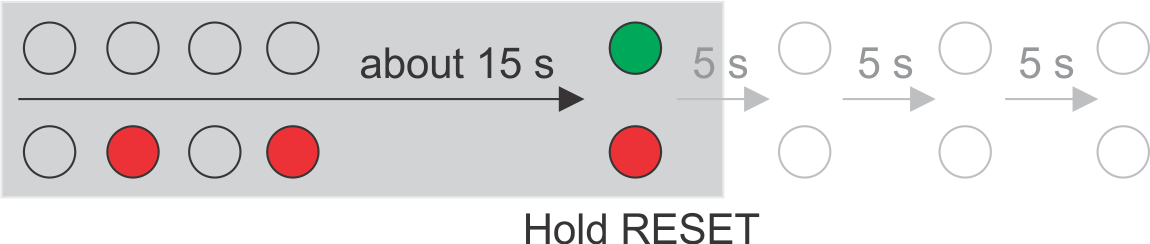
Follow the instructions below to identify the current IP address:
- Connect the loudspeaker to the SPEAKER terminals.
- Press and hold the REST button.
- Wait until the red and green LEDs on the device come on simultaneously (approx. 15 s).
- Release the RESET button.
- The device announces the current IP address via the loudspeaker connected automatically.
 |
Follow the instructions below to switch on the Static IP address mode (DHCP OFF):
- Press and hold the REST button.
- Wait until the red and green LEDs on the device come on simultaneously (approx. 15 s).
- Wait until the red LED goes off (approx. 5 s).
- Release the RESET button.
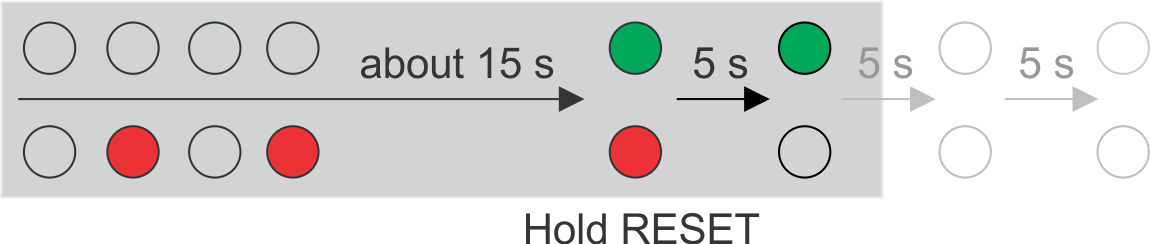 |
The following network parameters will be set after restart:
- IP address: 192.168.1.100
- Nework mask: 255.255.255.0
- Default gateway: 192.168.1.1
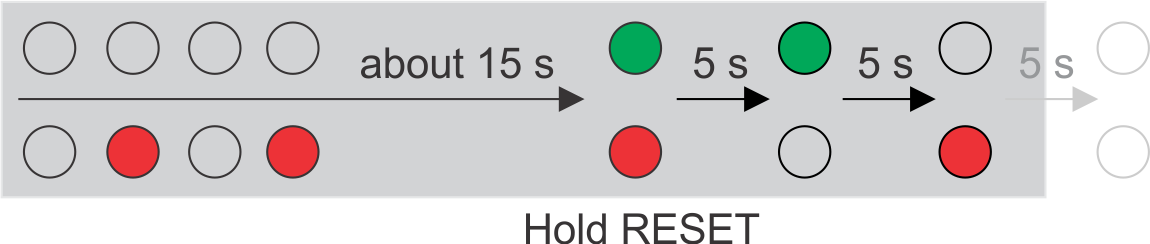
Follow the instructions below to switch on the Dynamic IP address mode (DCHP ON):
- Press and hold the REST button.
- Wait until the red and green LEDs on the device come on simultaneously (approx. 15 s).
- Wait until the red LED goes off (approx. 5 s).
- Wait until the green LED goes off and the red LED comes on again (another 5 s).
- Release the RESET button.
 |
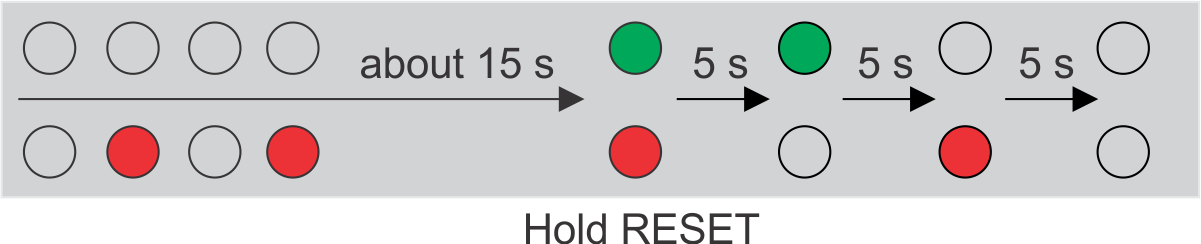
Follow the instructions below to reset the factory default values:
- Press and hold the REST button.
- Wait until the red and green LEDs on the device come on simultaneously (approx. 15 s).
- Wait until the red LED goes off (approx. 5 s).
- Wait until the green LED goes off and the red LED comes on again (approx. 5 s).
- Wait until the red LED goes off (another 5 s).
- Release the RESET button.
 |
Caution
- In case of resetting the factory default settings on a device with a version of firmware 2.18 or higher it is necessary to reprogram the
2N® Security Relay using the instructions from section 2.4.