2.2 Mechanical Installation
Mounting Types
Refer to the table below for a list of mounting types and necessary components. Make sure that the installation site is not exposed to flowing or condensed water.
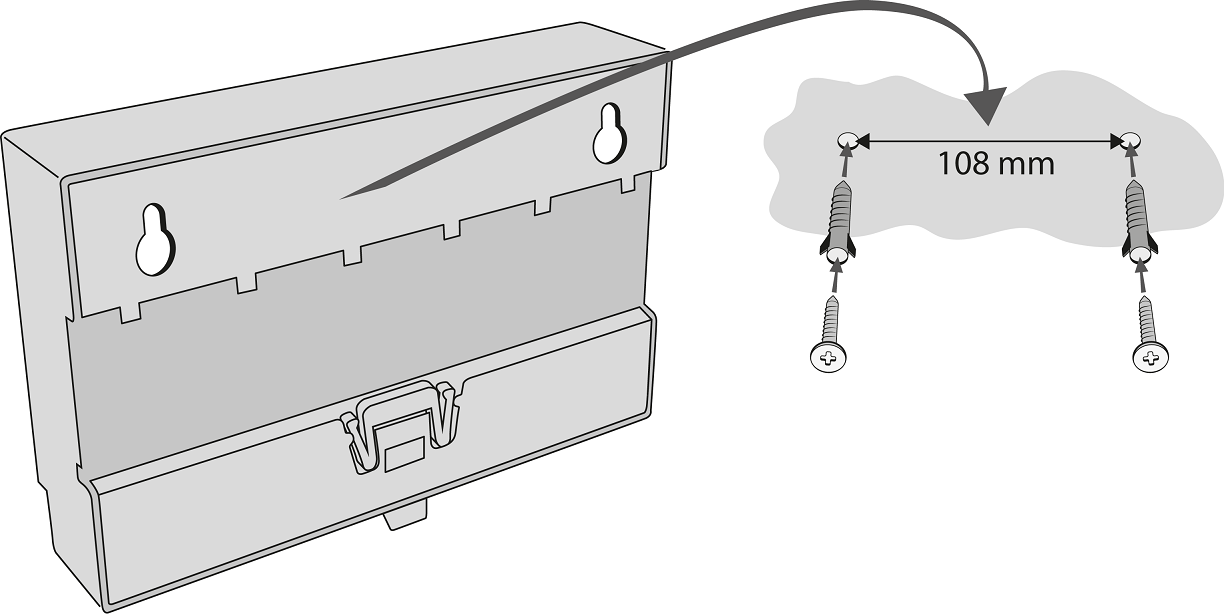
Wall mounting
Use the proper wall mounting screws and dowels (not included in the delivery). Hang the device on the wall using the cover bottom holes.
 |
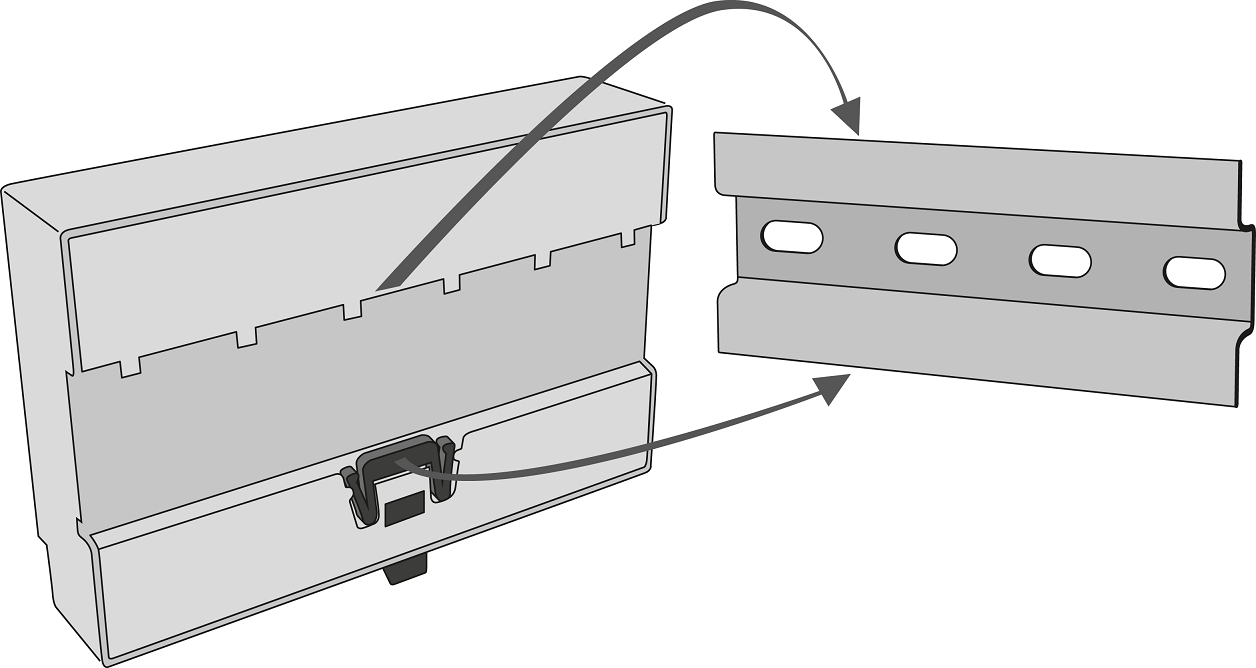
DIN rail mounting
Mount the device to a standard TS 35 DIN rail. The recommended minimum DIN rail length is 14 cm.
 |
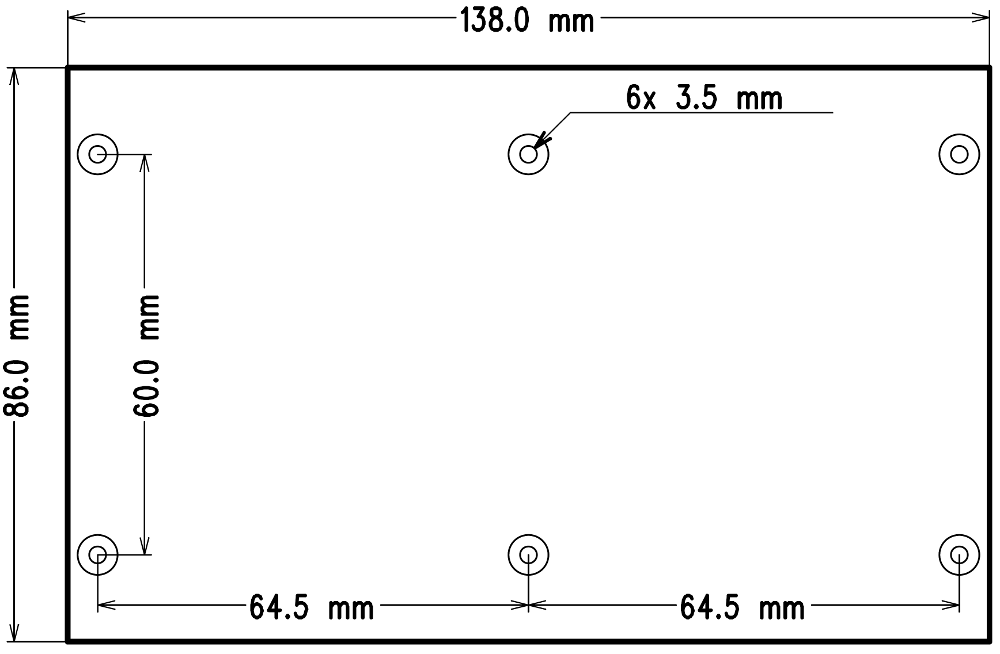
PCB mounting (for Part No. 9154101 only)
Use 4–6 distance columns and proper screws (not included in the delivery) to mount the PCB to the support. Fix the distance columns as shown in the figure.
 |
Caution
Before starting the mechanical installation on a selected place, make sure carefully that the preparations connected with it (drilling, wall cutting) cannot damage the electrical, gas, water and other existing wires and pipes.
- The warranty does not apply to the product defects and failures arisen as a result of improper mounting (in contradiction herewith). The manufacturer is neither liable for damage caused by theft within an area that is accessible after the attached electric lock is switched. The product is not designed as a burglar protection device except when used in combination with a standard lock, which has the security function.
- When the proper mounting instructions are not met, water might get in and destroy the electronics. It is because the intercom circuits are under continuous voltage and water infiltration causes an electro-chemical reaction. The manufacturer's warranty shall be void for products damaged in this way!
- To avoid injury due to accidental drop of the equipment, do not mount it higher than 2 meters.