3.1 Configuration
Use a PC equipped with any web browser to configure 2N® IP Vario:
- Launch your web browser (Internet Explorer, Firefox, etc.).
- Enter the IP address of your intercom (http://192.168.1.100/, e.g.).
- Log in using the Admin user name and 2n password.
You have to know the IP address of your device to log in to the integrated web server. By default, 2N® IP Vario is switched into the dynamic IP address mode, i.e. it obtains the IP address automatically if a properly set DHCP server is available in your LAN. If no such DHCP server is available, you can operate 2N® IP Vario in the static IP address mode.
IP Address Retrieval
If your device remains inaccessible (you have forgotten the IP address, or the LAN configuration has changed, for example), change the LAN settings using the buttons on the device.
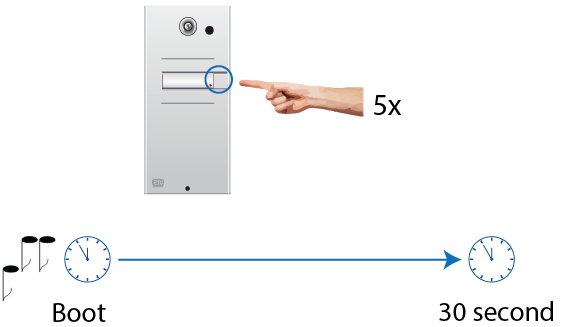
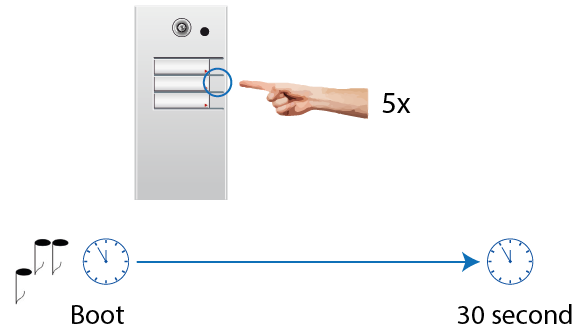
Take the following steps to retrieve the 2N® IP Vario IP address:
- Connect (or, if connected, disconnect and reconnect) 2N® IP Vario to the power supply.
- Wait for the second sound signal
 .
.1-button models: Press the quick dial button on the basic unit five times.
3-buttons models: Press the second quick dial button on the basic unit five times.
6-buttons models: Press the fifth quick dial button on the basic unit five times.
- 2N® IP Vario will read its IP address.
- If the address is 0.0.0.0, it means that the intercom has not obtained the IP address from the DHCP server.
Note
- Be sure to press the button sequence within thirty seconds after the sound signal for security reasons. Up to 2 s intervals are allowed between the presses.
Static IP Address Setting
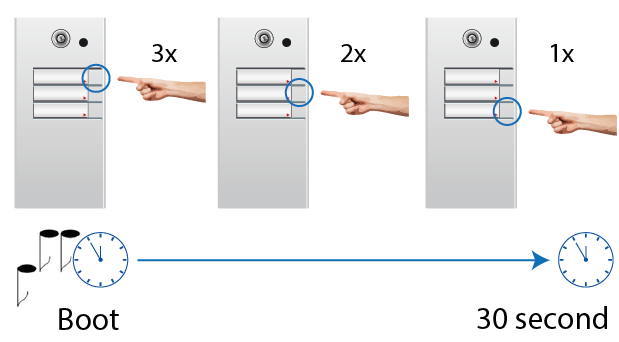
Follow the instructions below to enable the static IP address mode:
- Connect 2N® IP Vario to the power supply (or, disconnect and reconnect it if already connected).
- Wait for the first acoustic signal .
- Press following buttons sequentially:
1, 1, 1, 2, 2, 3 for 3-buttons models
Switching to static IP address
- 4, 4, 4, 5, 5, 6 for 6-buttons models
- The acoustic signal
 indicates mode switching.
 - Wait until the device is restarted automatically.
Note
- The 1, 1, 1, 2, 2, 3 sequence must be entered within 30 seconds after the first sound signal for security reasons. The inter-digit delay may be 2 s at most.
The device will have the following network parameters after restart:
- IP address – 192.168.1.100
- Network mask – 255.255.255.0
- Default gateway – 192.168.1.1
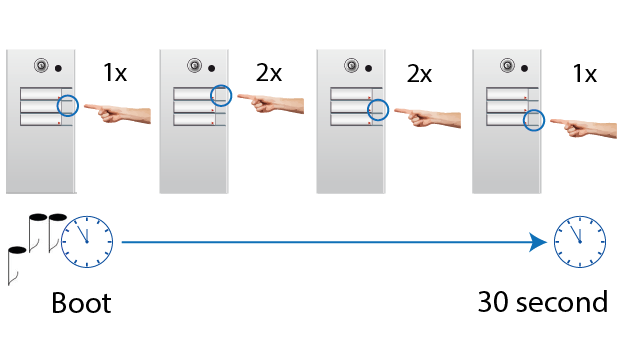
Dynamic IP Address Setting
Connect 2N® IP Vario to the power supply (or, disconnect and reconnect it if already connected).Follow the instructions below to enable automatic getting of network parameters from the DHCP server:
- Wait for the first acoustic signal
- Press following buttons sequentially:
2, 1, 1, 2, 2, 3 for 3-buttons models
5, 4, 4, 5, 5, 6 for 6-buttons modely
- The acoustic signal indicates mode switching.
- Wait until the device is restarted automatically.
Note
- The 2, 1, 1, 2, 2, 3 sequence must be entered within 30 seconds after the first sound signal for security reasons. The inter-digit delay may be 2 s at most.
2N® IP Vario gets the IP address upon restart only if the DHCP server is configured properly.
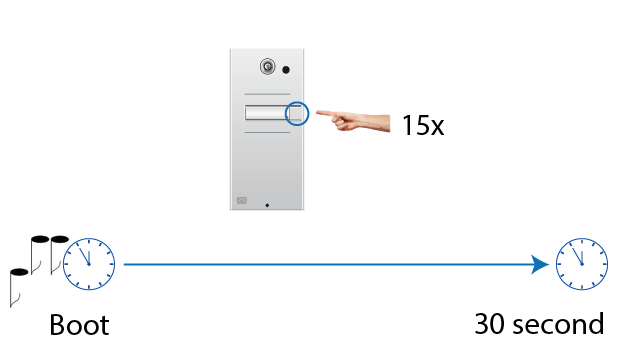
Mode Switching with 1-Button Models
Connect 2N® IP Vario to the power supply (or, disconnect and reconnect it if already connected).In case your 2N® IP Vario device is equipped with 1 button, you can switch the modes using one button only.
- Wait for the first sound signal
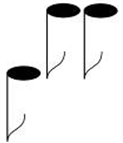 .
. - Press the quick dial button on the main unit 15 times.
- Network parameter reset and DHCP switch are signaled by the
 sound.
 - For devices with FW versions 2.33 and lower, wait until the device is automatically restarted.
- After restart, the static IP address mode is switched into the dynamic IP address and vice versa.
- Simultaneously, all the System / Network parameters are reset to default values. This is useful where it is impossible to connect to the device due to wrong VPN configuration, for example.
|
Switching between static and dynamic IP address
Note
- The 15 times 1 sequence must be entered within 30 seconds after the first sound signal for security reasons. The inter-digit delay may be 2 s at most.
The static IP address mode will be switched into the dynamic IP address mode and vice versa upon restart.
Firmware Upload
We also recommend you to update your intercom firmware upon the first login to the intercom. Use the device web interface in the System > Maintenance > System configuration section for firmware upgrade (see Configuration manual for 2N IP intercoms). Refer to 2N.com for the latest firmware version. The device restarts automatically after the upgrade is completed successfully. The whole process takes almost one minute.