Geovision GV-VMS
Content
About
GV-VMS is a comprehensive video management system that records up to 64 channels of GeoVision and/or third-party IP devices. The live view and playback layout can be easily adjusted with the intuitive drag-and-drop function. GV-VMS comes with a variety of intelligent video analytics to offer precise monitoring and to reduce the need for manual supervision. The built-in Webcam Server allows users to remotely access live view and recordings from anywhere using Web browsers, mobile app and Remote ViewLog. Compatibility with GV-CMS (GeoVision Central Monitoring Station) and interoperability with a wide selection of third party IP cameras through ONVIF and PSIA make GV-VMS a versatile and effective surveillance solution.
http://www.geovision.com.tw/product/GV-VMS
Version
Tested Functions
| GV-VMS | 2N IP Intercom Version | Scan device | Video from 2N IP Intercom | Audio from 2N IP Intercom | Audio to 2N IP Intercom | Switch control | Events from 2N IP Intercom |
|---|---|---|---|---|---|---|---|
16.11.0.0 | 2.20.5.29.10 | N/A | N/A | N/A |
2N IP Intercom Settings
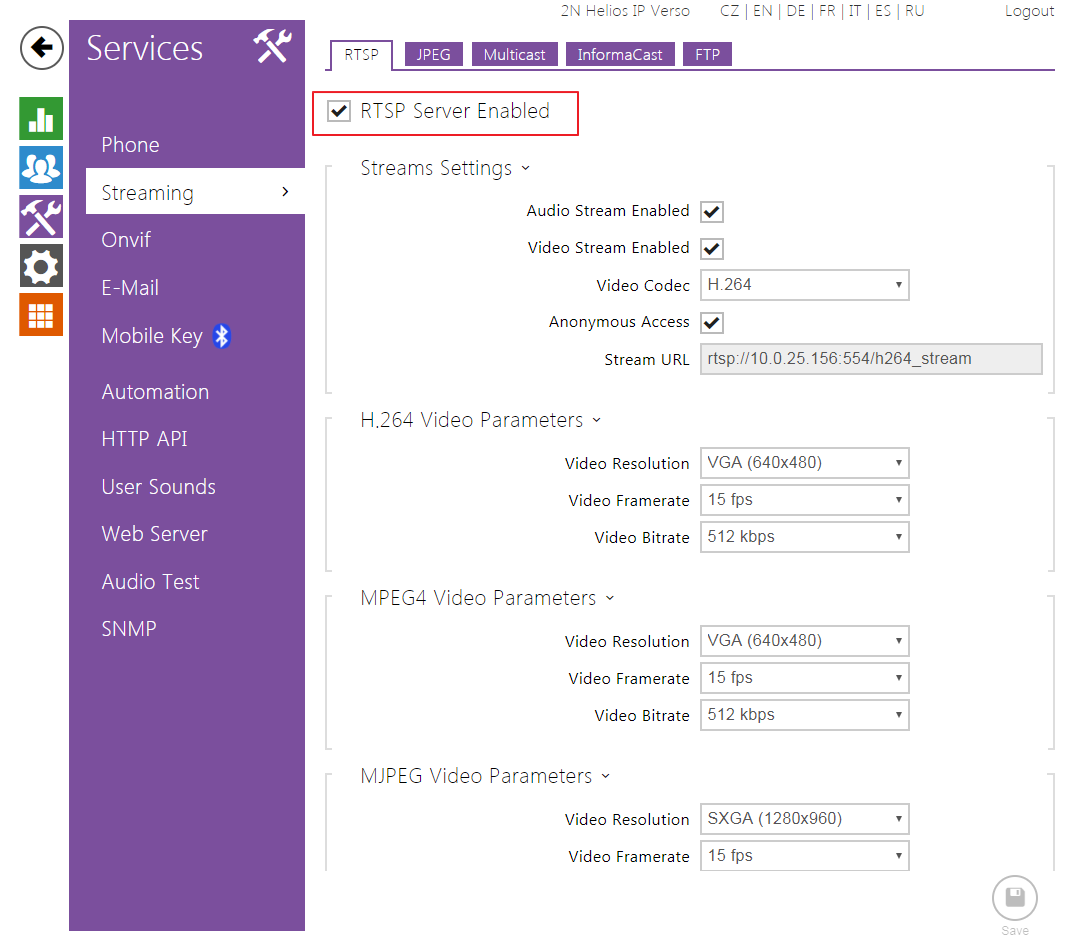
Enable parameter RTSP Server Enabled in menu Services / Streaming.
 |
 |
Tested Features
It is possible to discover 2N IP intercom using the VMS scanner, although it is not possible to add them afterwards, because it is not possible to enter ONVIF username and password to a device discovered by scan.
Manual addition is therefore necessary.
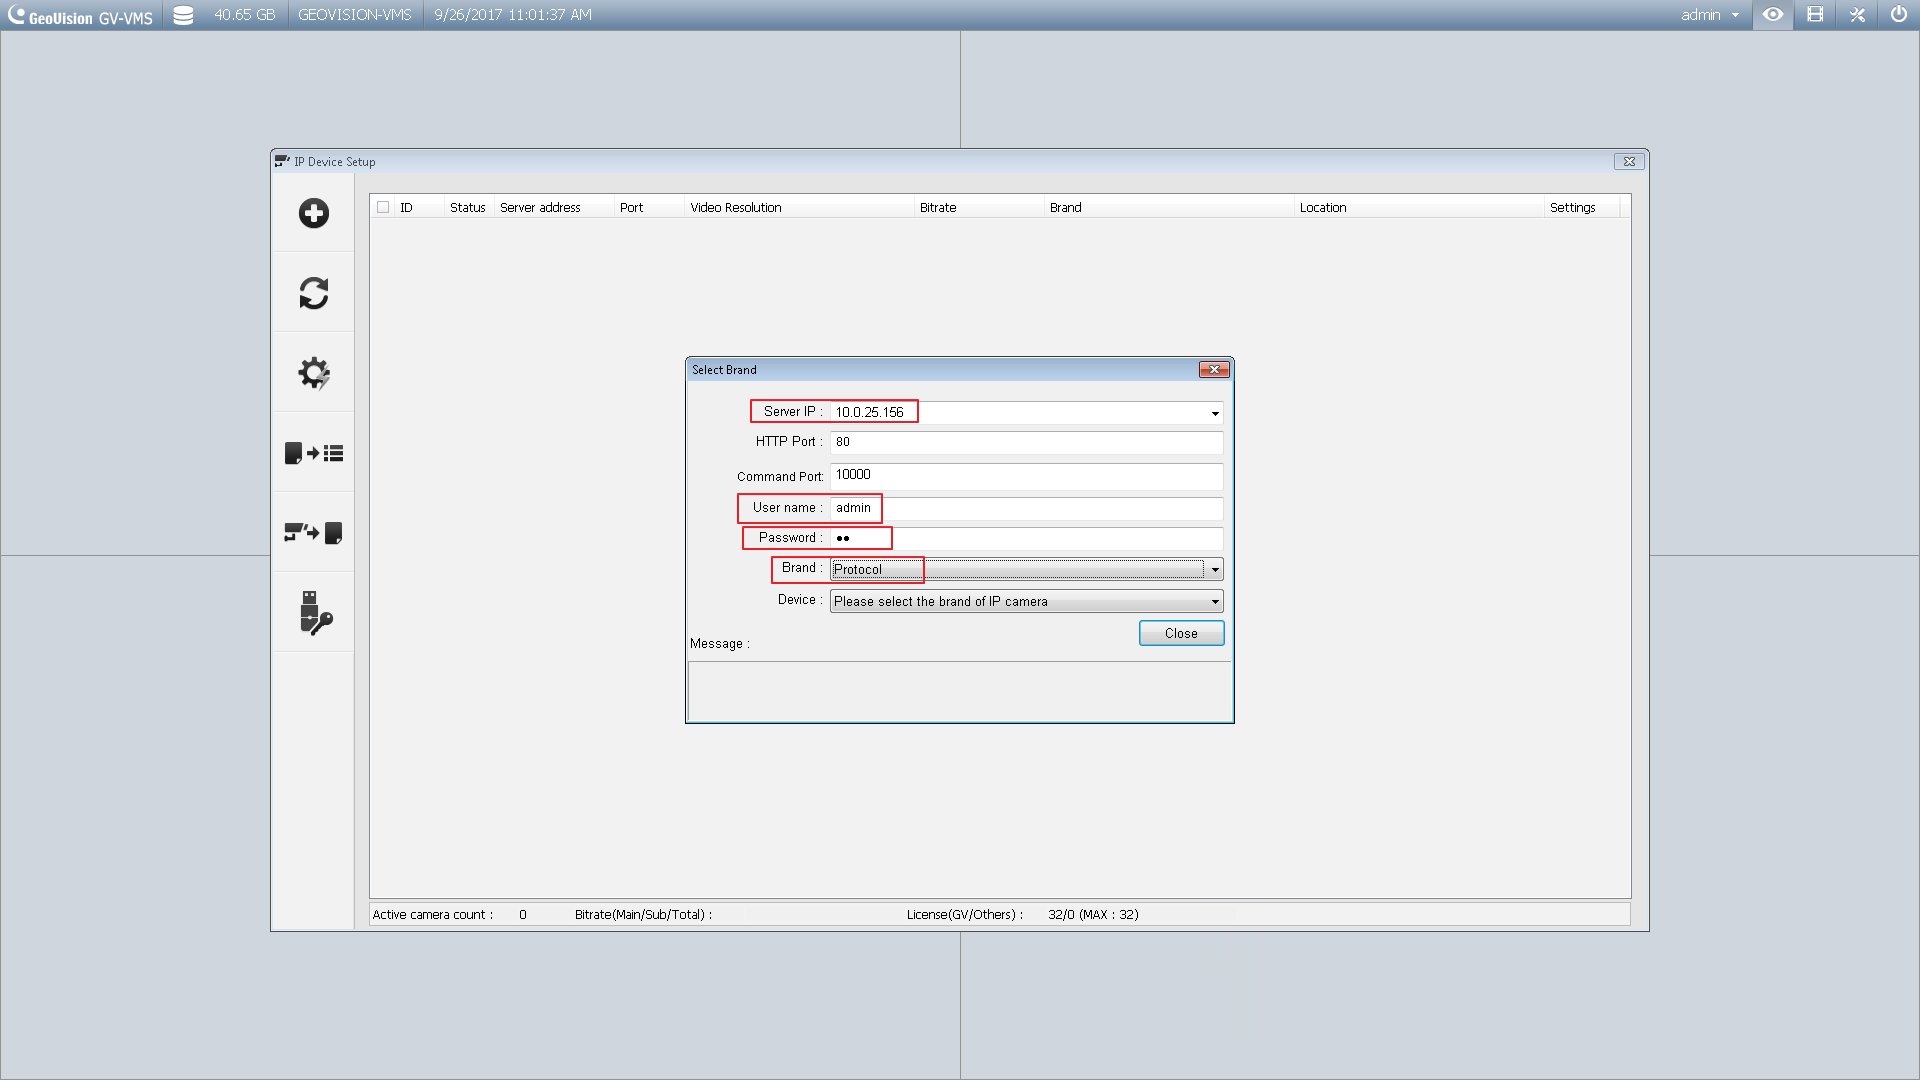
Go to Toolbar → Configure → Camera Install
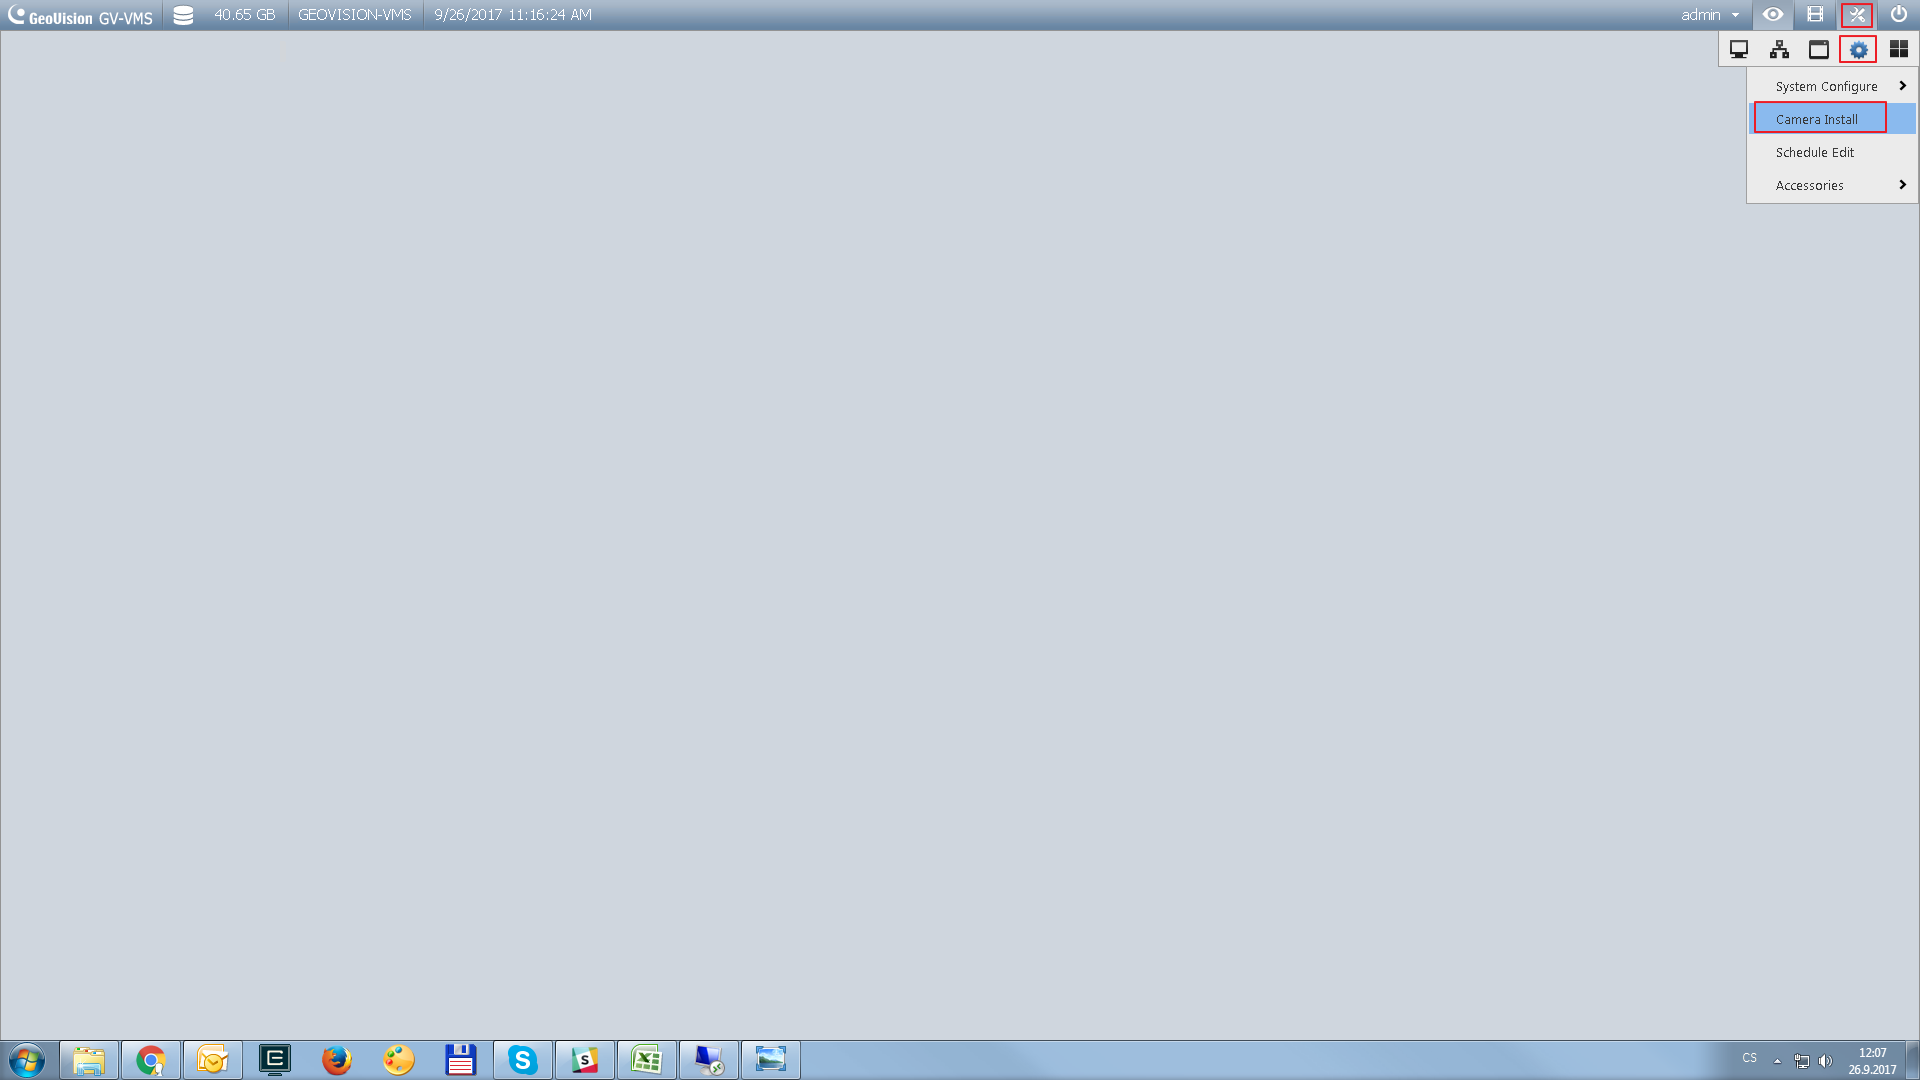
Click the Add Camera button
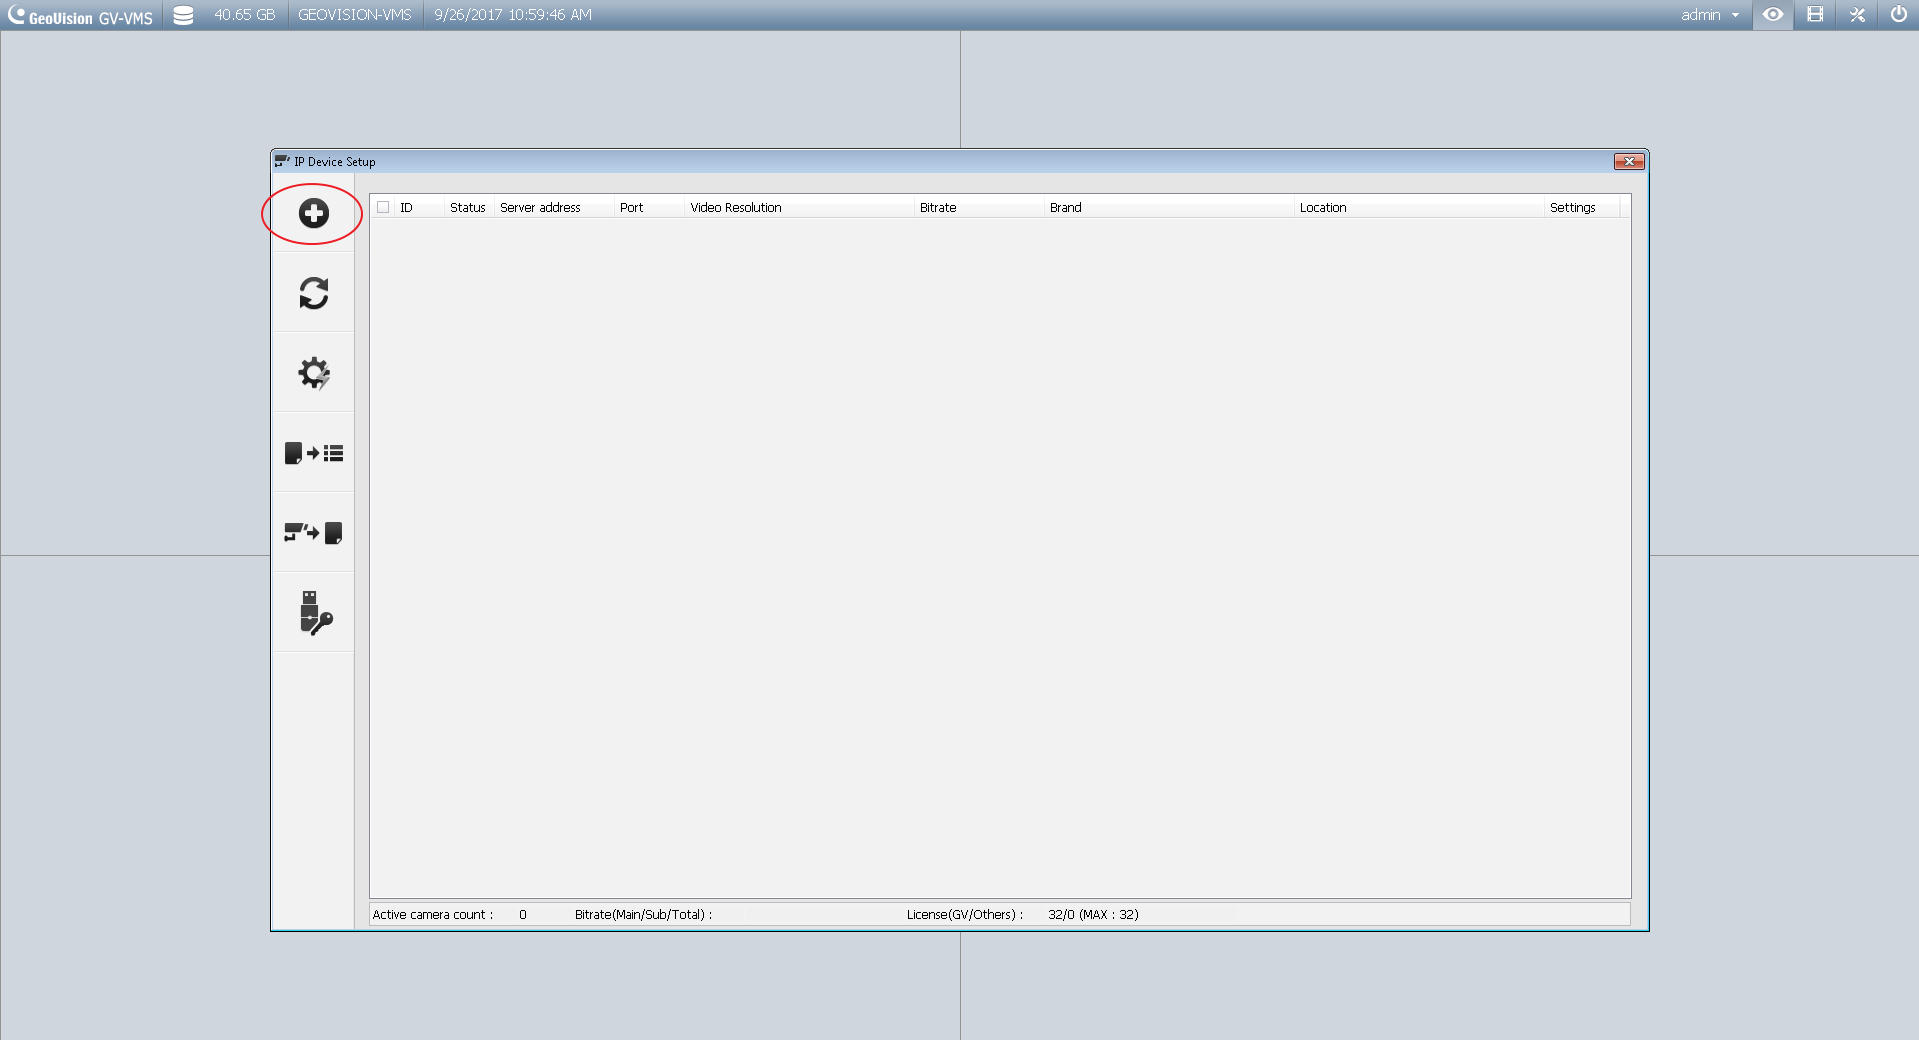
Enter the IP address of your 2N IP Intercom and username and password of the ONVIF account configured before. As a Brand select "Protocol", as a Device select "ONVIF".
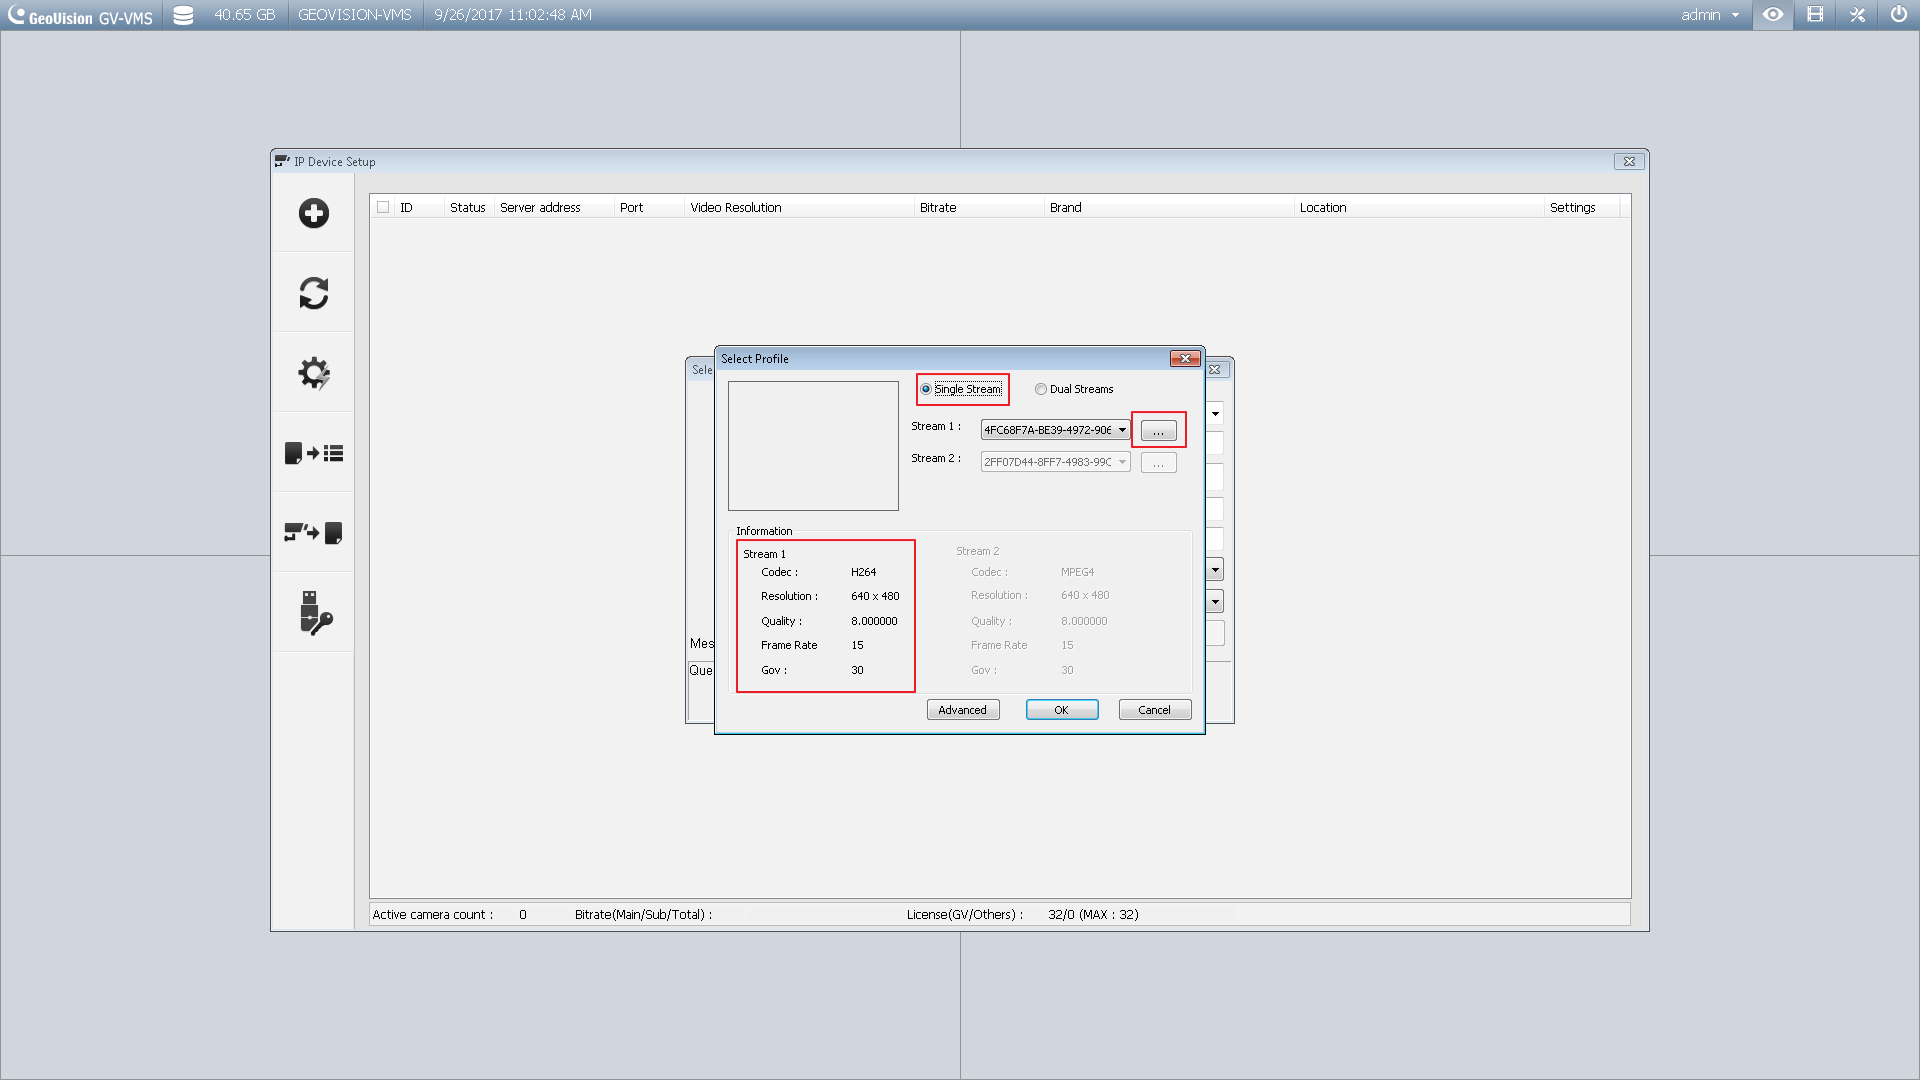
Select single stream. Make sure the resolution of the stream is 640x480. If not click the highlighted "..." button and select 640x480 as a resolution.
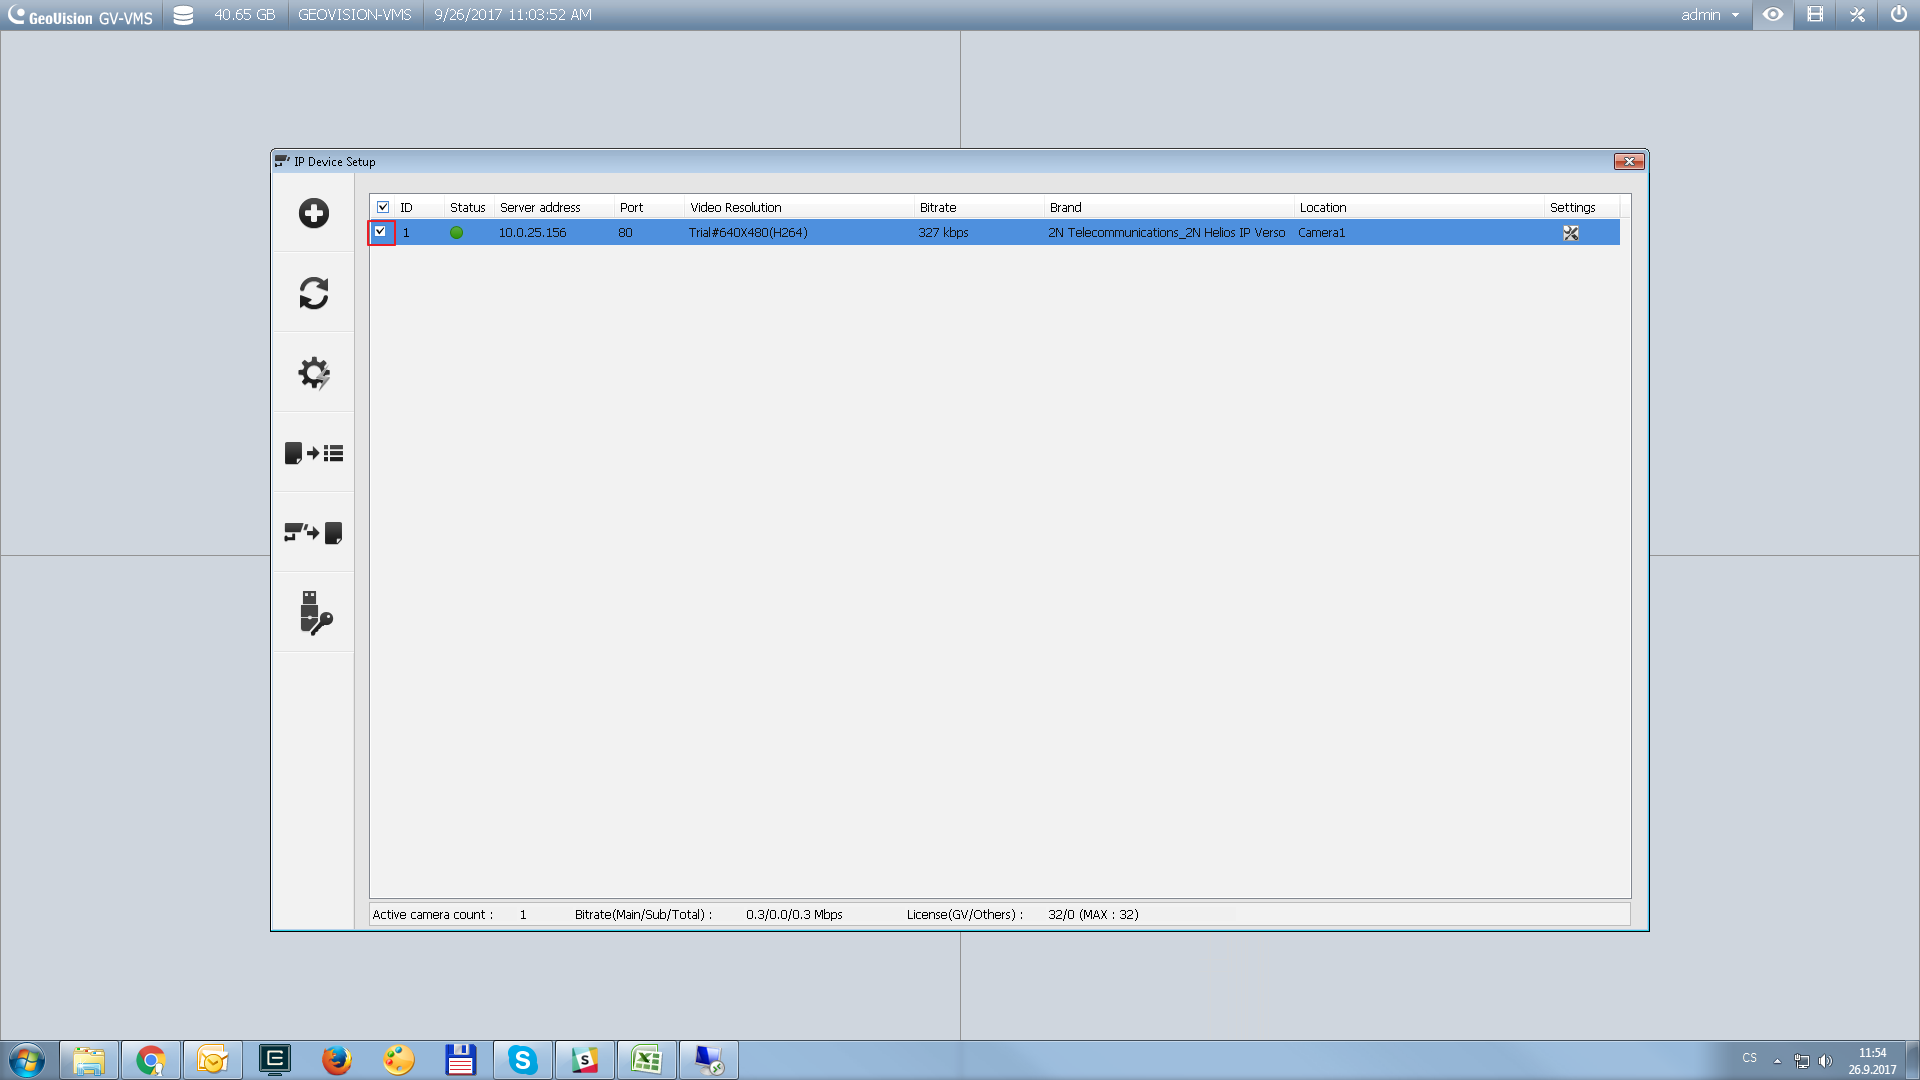
Enable the camera by ticking the highlighted checkbox, the circle in the Status column should turn green.
After adding the camera it will appear in the content list, which can be displayed by pressing the highlighted buttons.
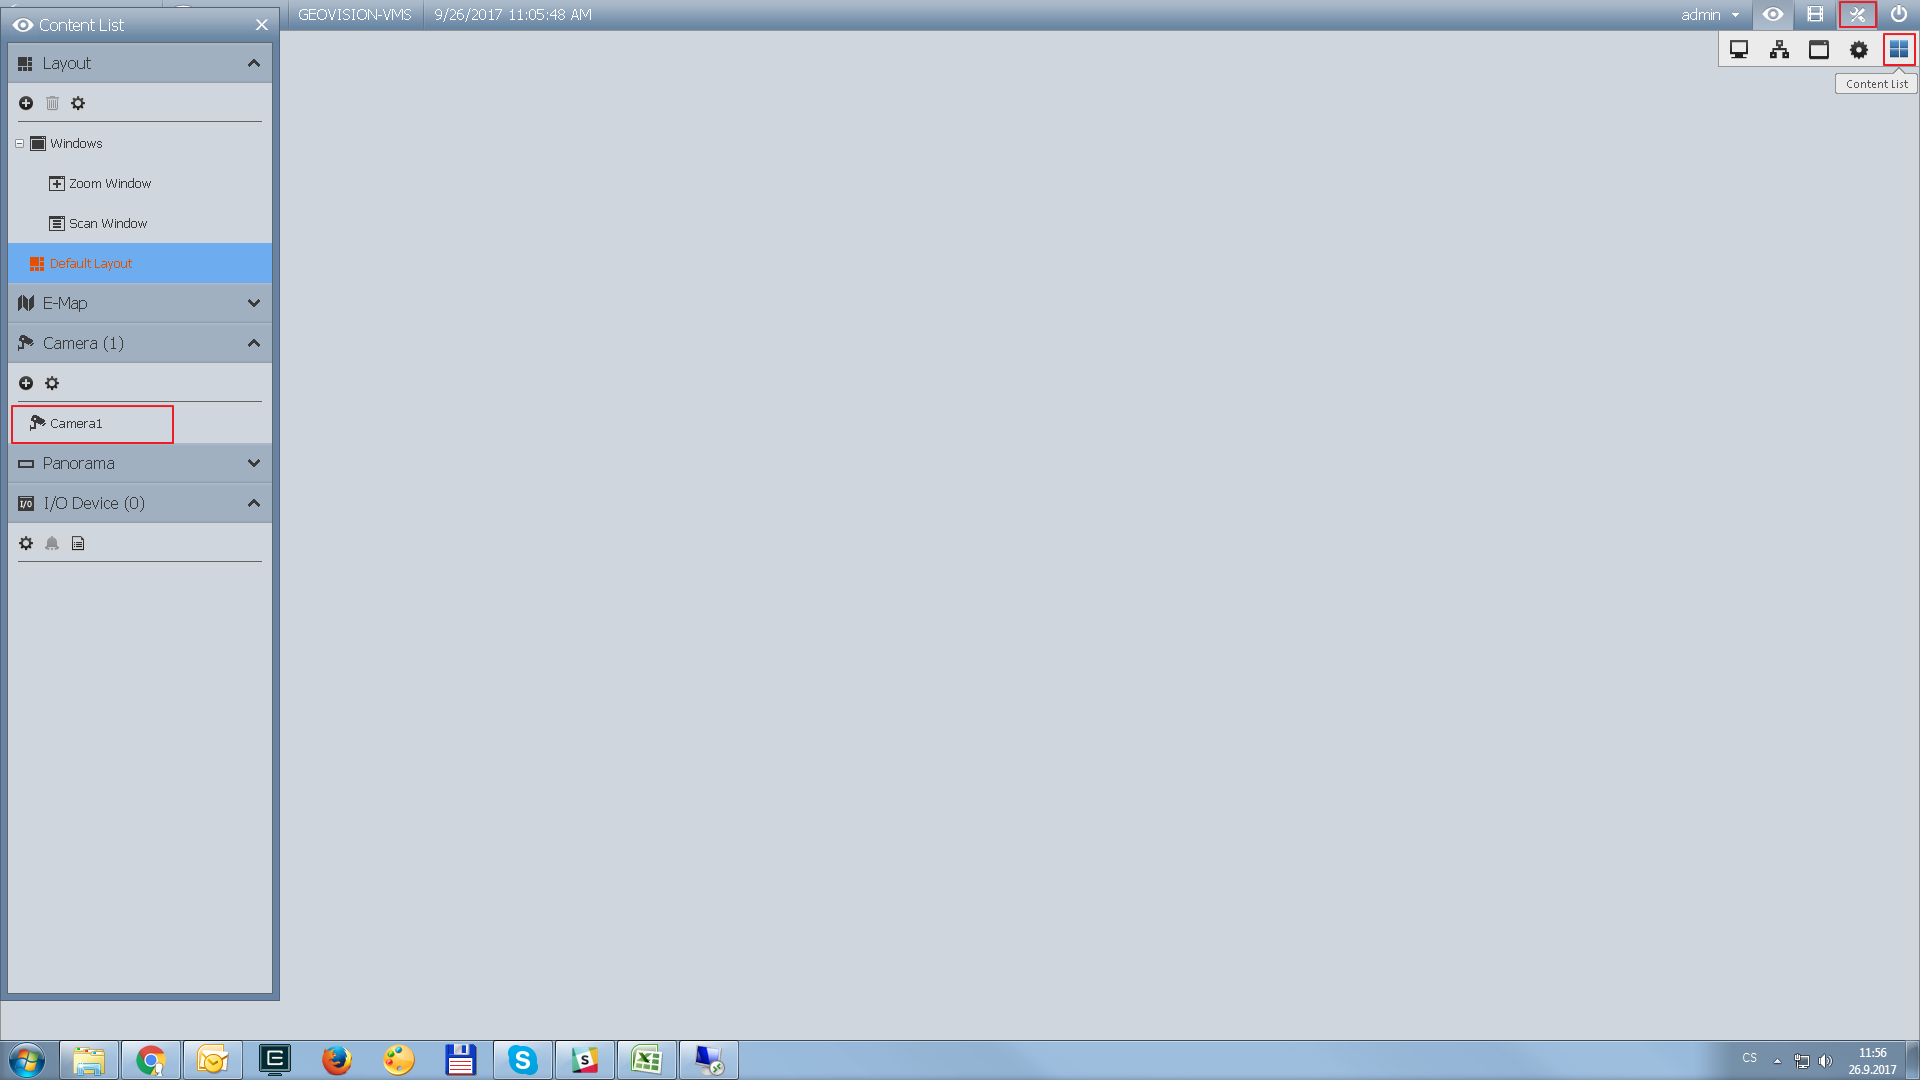
Drag it and drop on the screen.
Used Symbols
![]() - Compatible
- Compatible
![]() - Work with limitation
- Work with limitation
![]() - Incompatible
- Incompatible