AXIS Camera Station
Content
About
- A proven video management system
- Optimized for Axis’ network video products
- Quick system setup and intuitive operation
- Efficient investigation and high definition identification in up to 4K Ultra HD
- Extensive support organization
Version 5
Tested Functions
| Axis Camera Station | Axis Camera Station - iOS device | Axis Camera Station - Android device | 2N IP Intercom Version | Scan device | Video from 2N IP Intercom | Audio from 2N IP Intercom | Audio to 2N IP Intercom | Switch control | Events from 2N IP Intercom | Access intercom's web interface via Axis Camera Station |
|---|---|---|---|---|---|---|---|---|---|---|
5.54 and higher | 2.39.3 and higher |
|
| |||||||
5.45 and higher | - | - | 2.34.1.43.7 |
| ||||||
5.44 | - | - | 2.34.0.43.6 |
| ||||||
5.37 | 2.3.1 | 2.2.4 | 2.32.0.41.2 |
| ||||||
| 5.33 | - | - | 2.30.0.39.4 | N/S | ||||||
| 5.27 | - | - | 2.27.0.36.6 | N/S | ||||||
5.18 | - | - | 2.24.0.33.2 | N/S | ||||||
5.13 | - | - | 2.21.0.30.3 | N/S | ||||||
5.11 | - | - | 2.19.1.28.8 | N/S | ||||||
5.05 | - | - | 2.17.0.26.1 | N/S |
License
No License required from version 2.32
* Intercom Web Interface Access from ACS
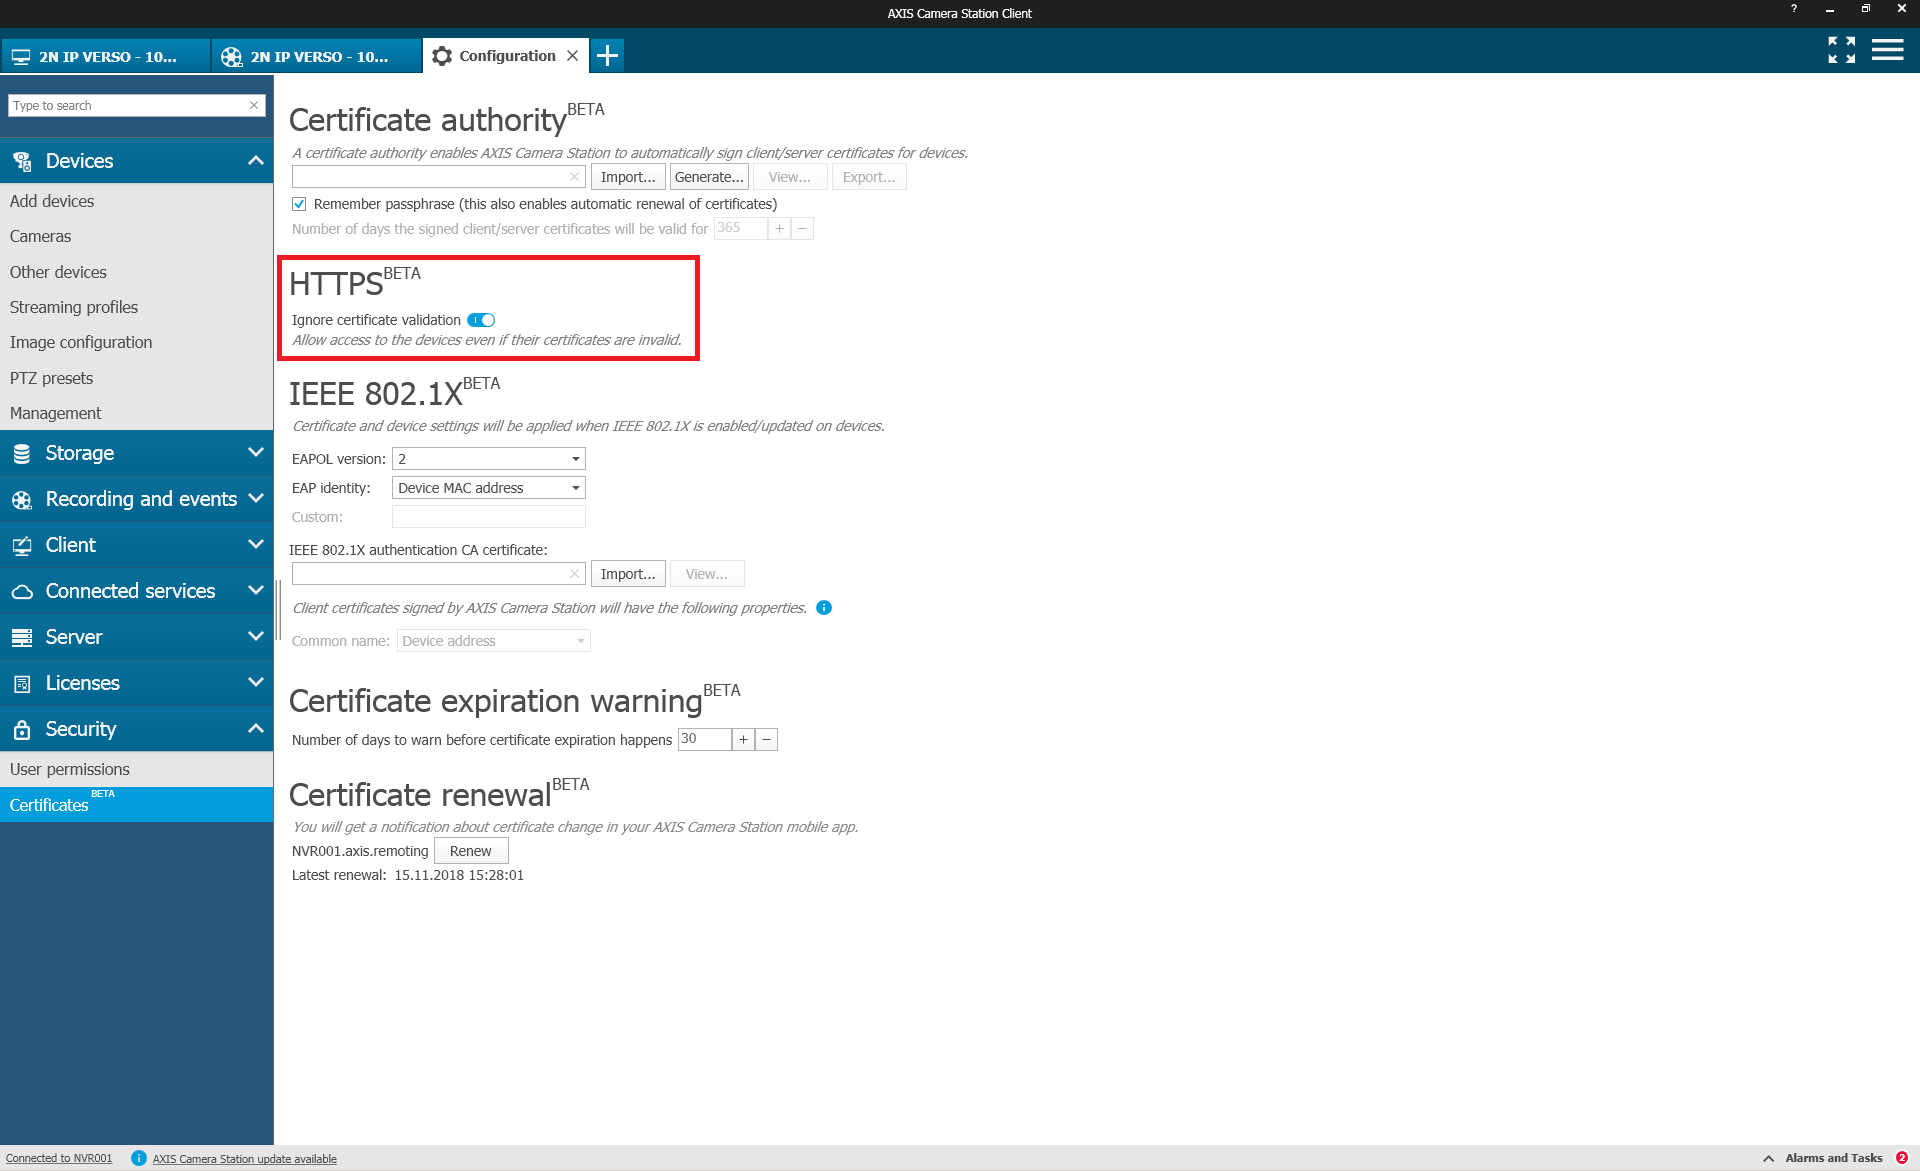
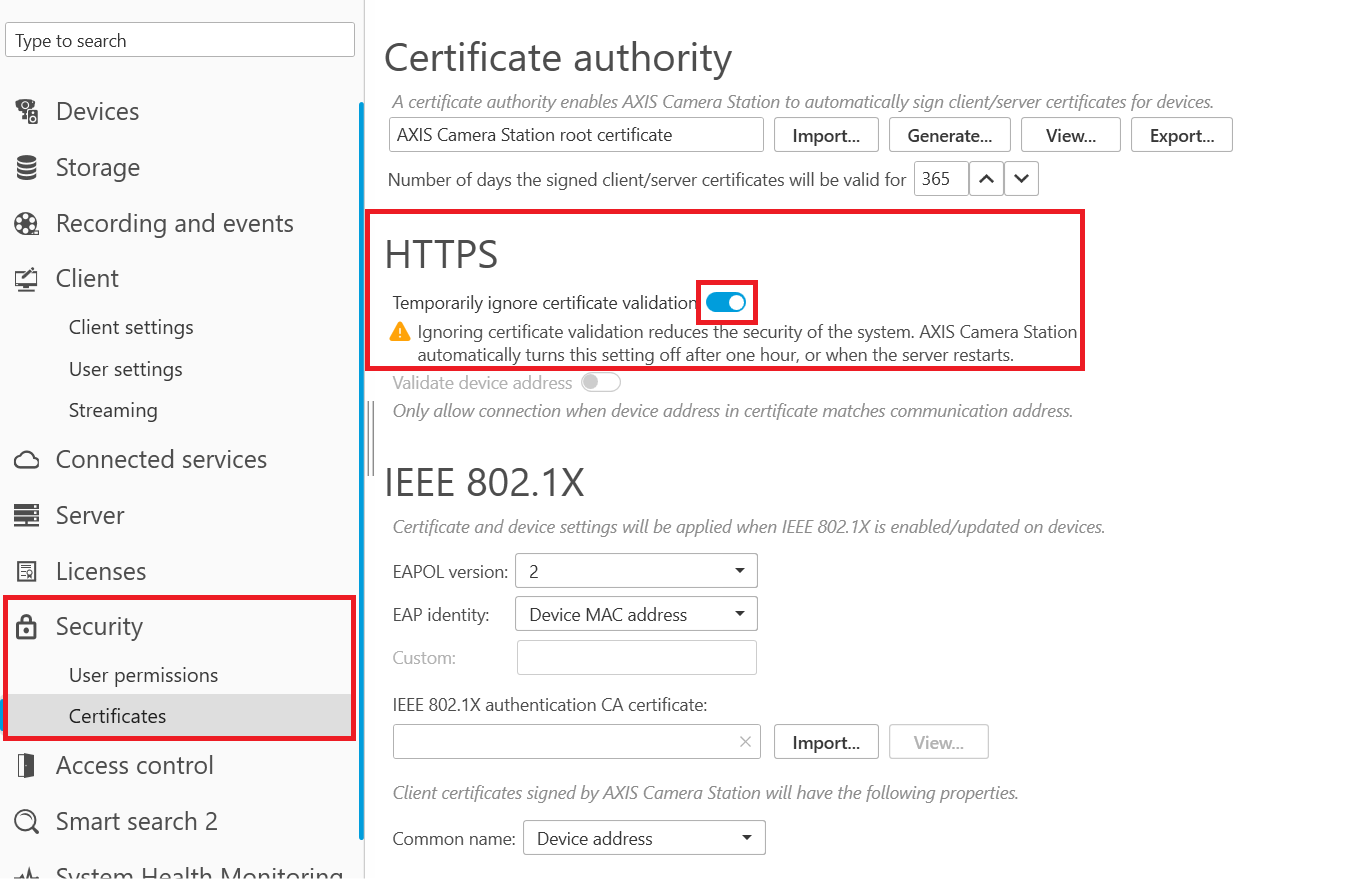
Information on how to access the intercom's web interface from ACS is listed in the chapter Tested Features (5.33 and higher) > Scan Device as it might require temporarily disabling certificate validation in ACS settings Security > Certificates.
2N IP Intercom Settings
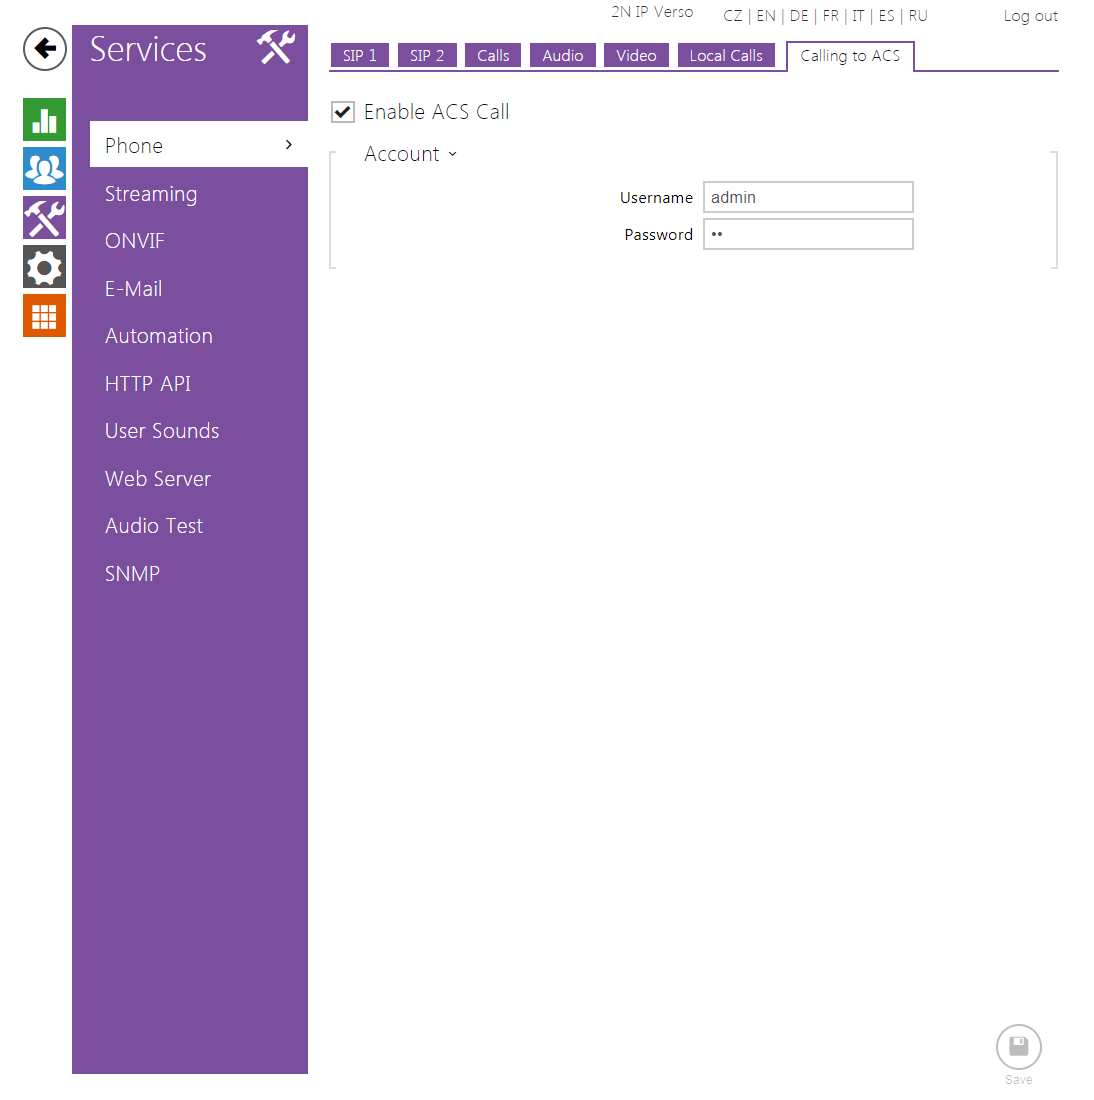
Enable ACS Call in menu Services / Phone / Calling to ACS. Set Username, Password and save it.
 |
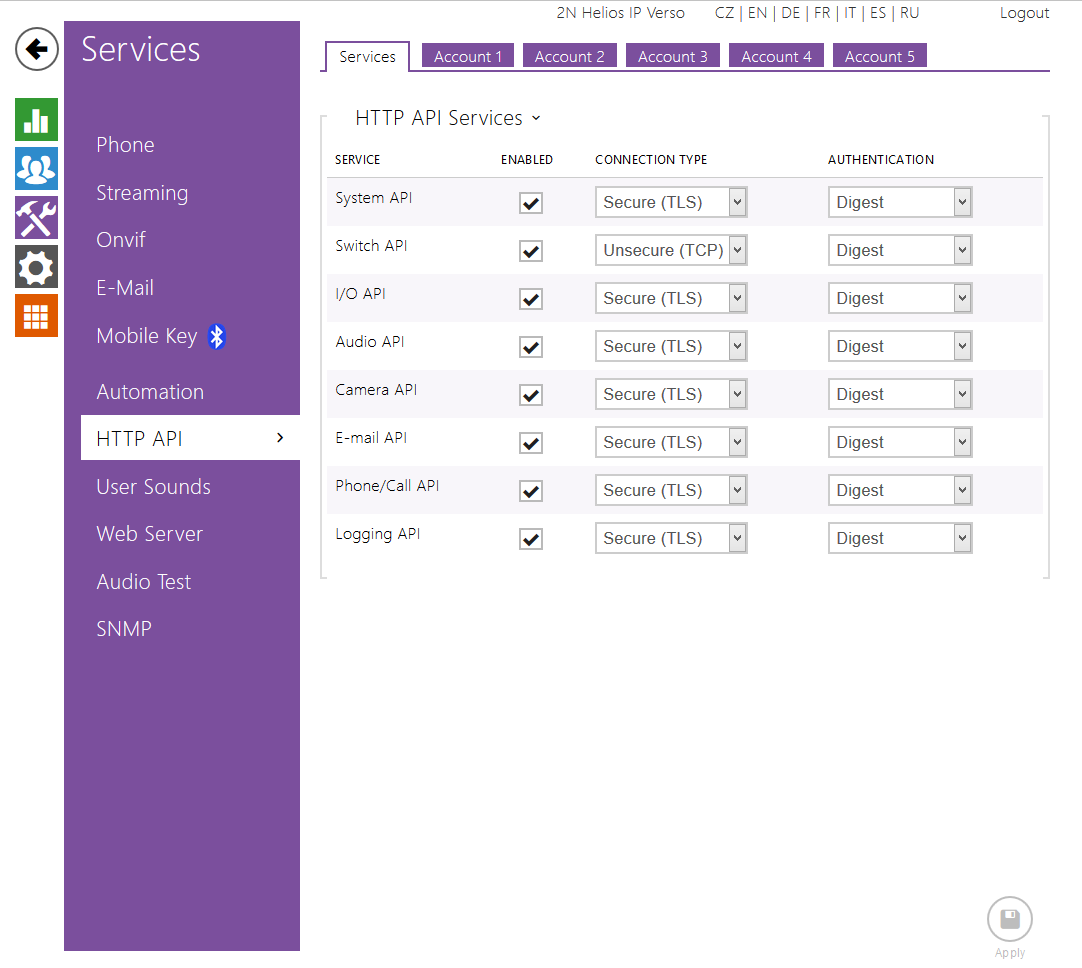
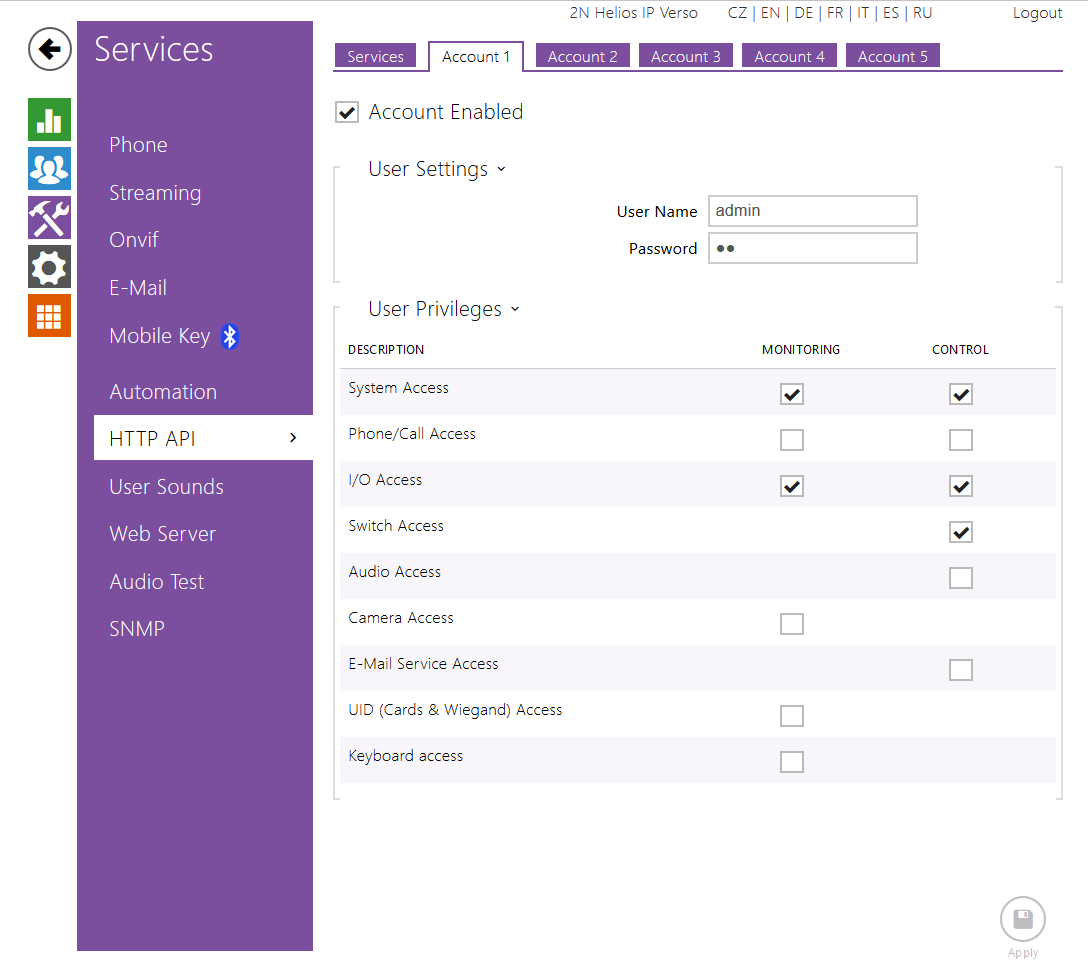
From firmware version of 2N IP Intercom you need not set any function in menu Services / HTTP API. The rule for control switch, recording will be set automatically after 2N IP Intercom is added to Axis Camera Station.
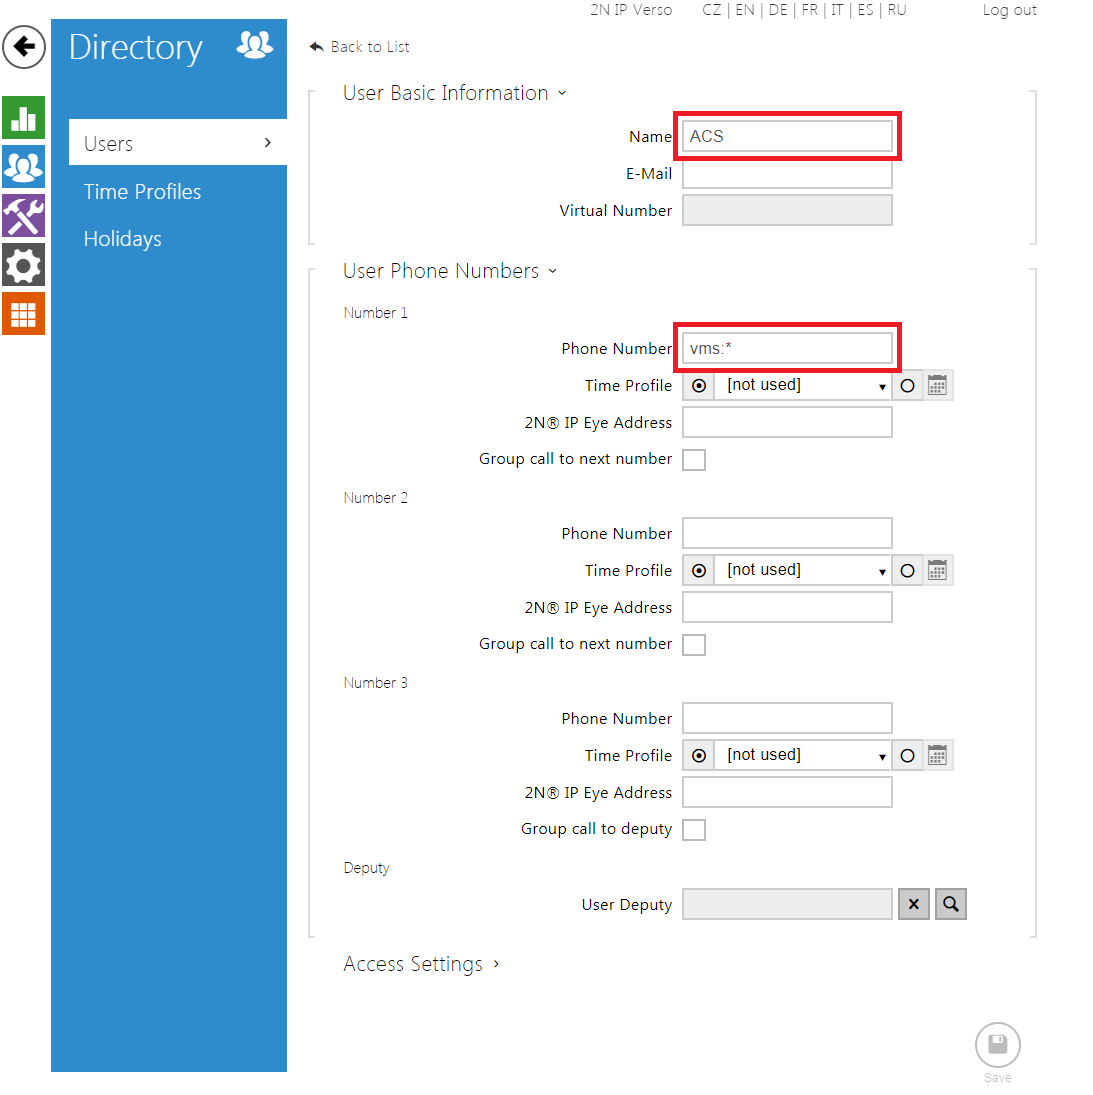
Go to menu Directory and create user, which calls to Axis Camera Station.
 |
Add user to quick dial button in menu Hardware/Buttons.
 |
 |
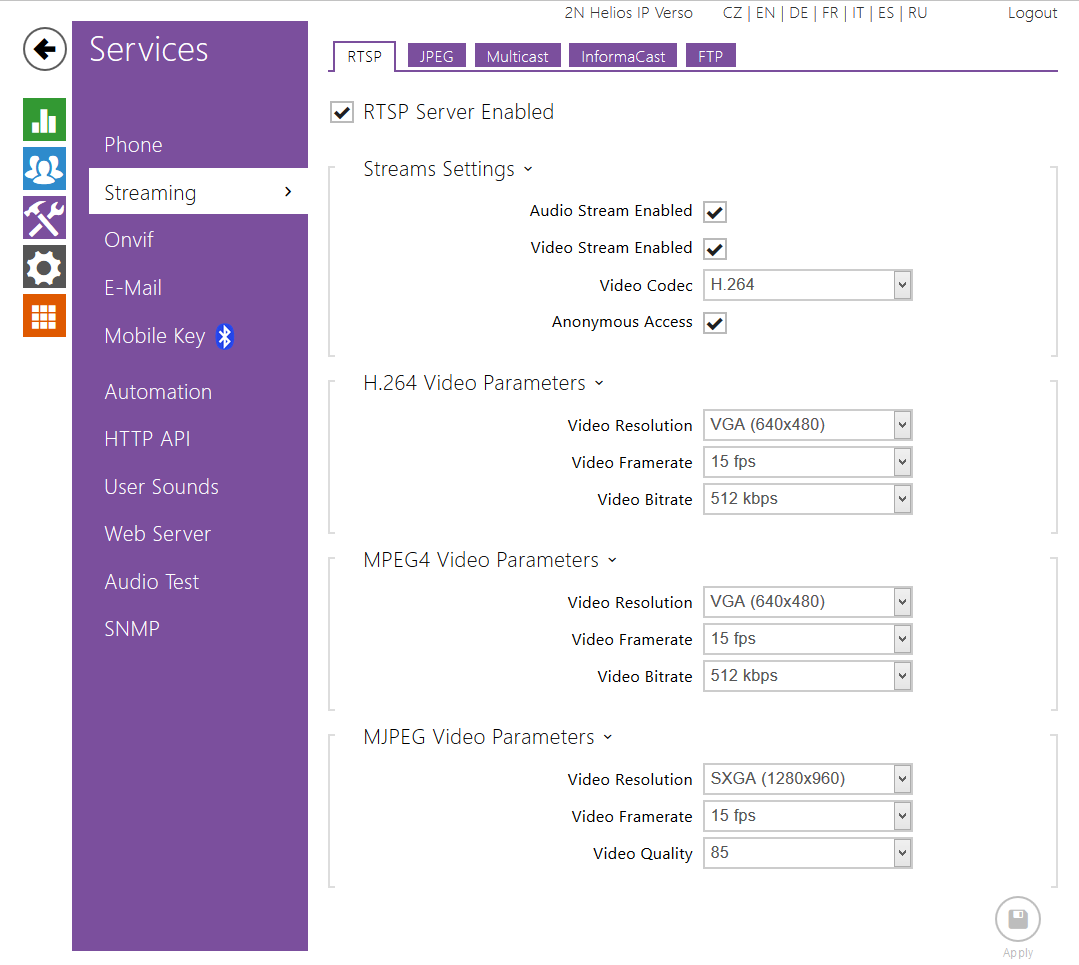
Enable parameter RTSP Server Enabled in menu Services / Streaming.
 |
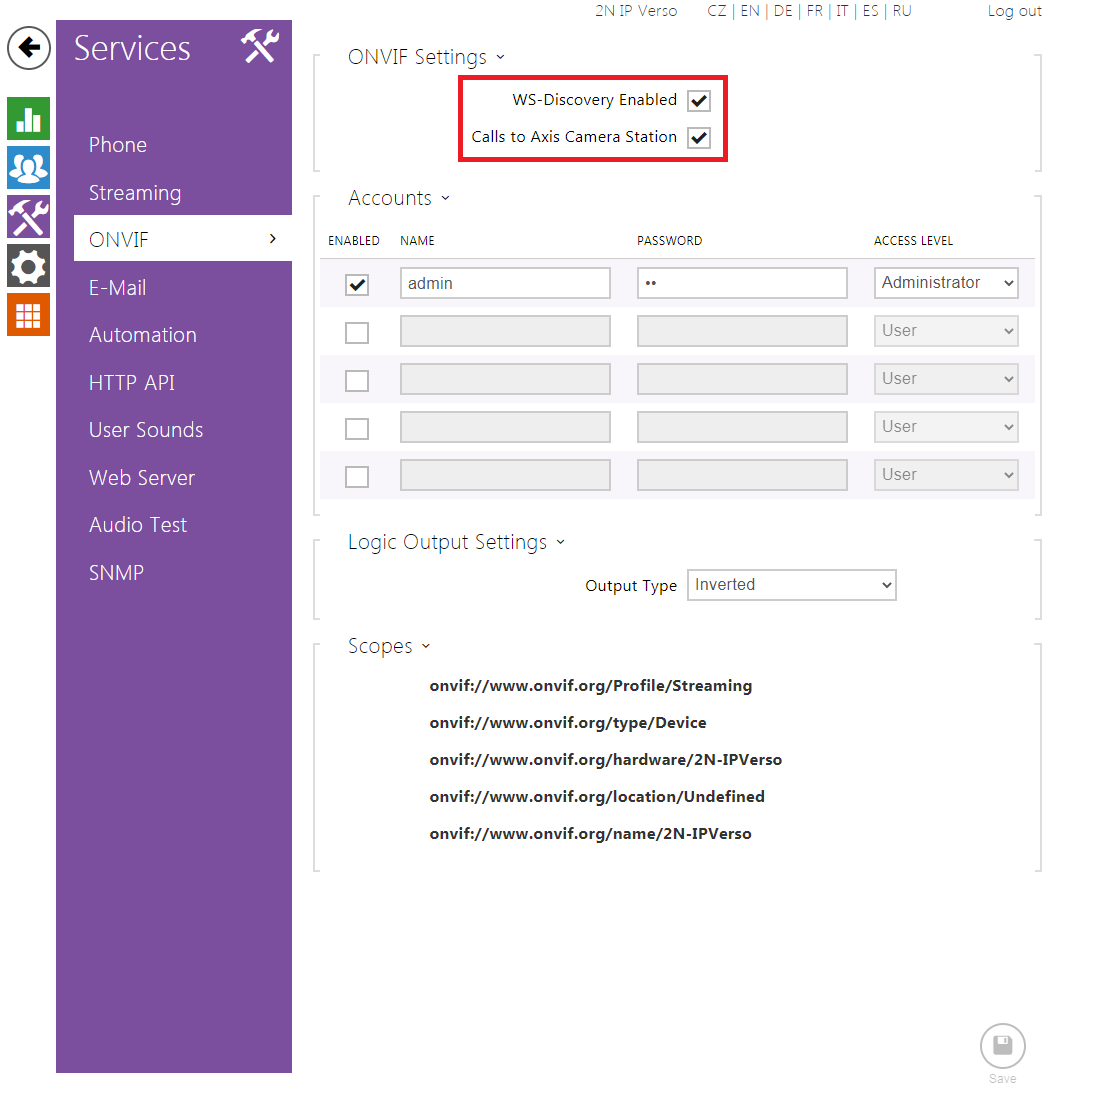
Enable Onvif and set authorisation data in menu Services / Onvif. And enable function "Calls to Axis Camera Station" - new function from firmware of 2N IP Intercom version 2.30.
 |
Go to menu Directory and create user, which calls to Axis Camera Station.
|
Add user to quick dial button in menu Hardware/Buttons.
|
Enable parameter RTSP Server Enabled in menu Services / Streaming.
|
Enable Onvif and set authorisation data in menu Services / Onvif.
 |
 |
 |
Tested Features (5.33 and higher)
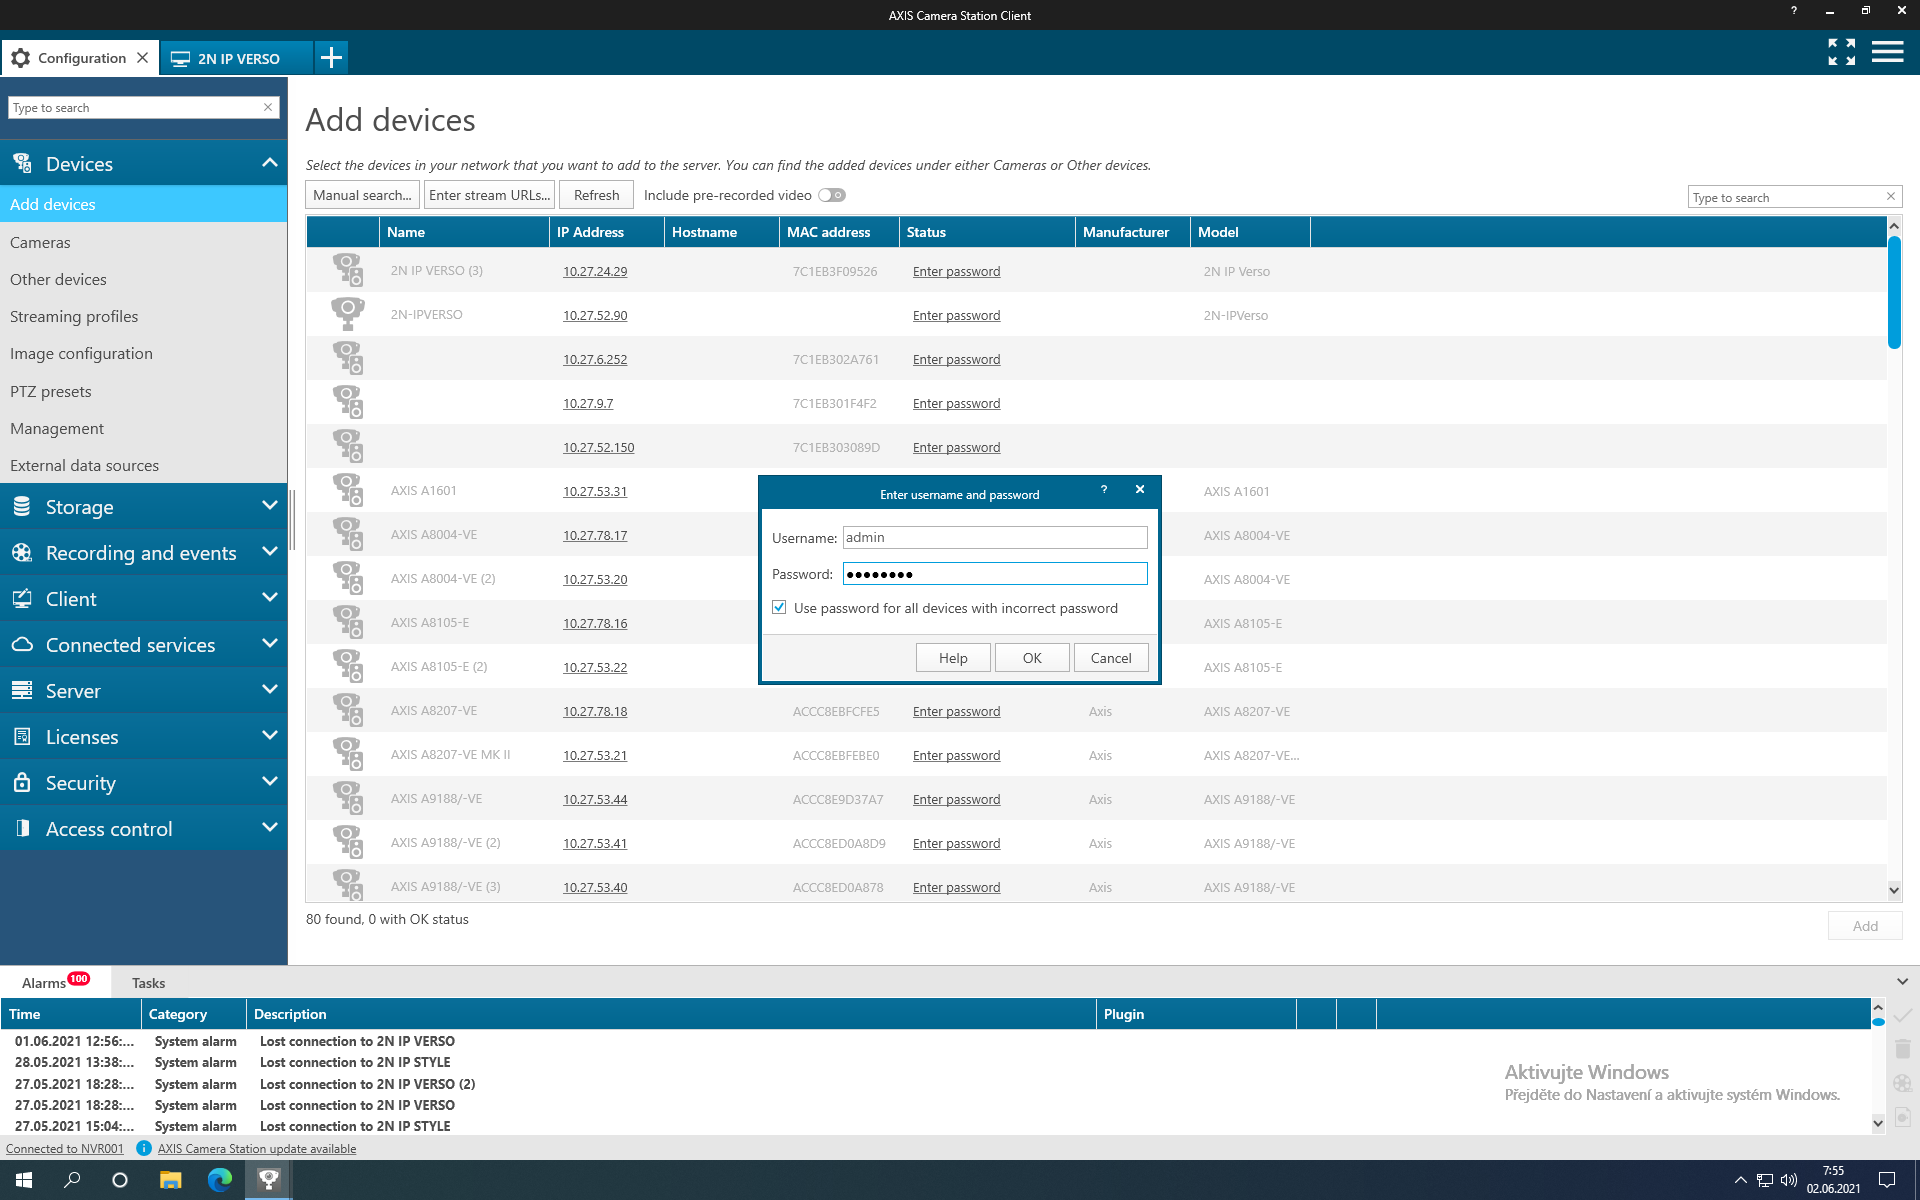
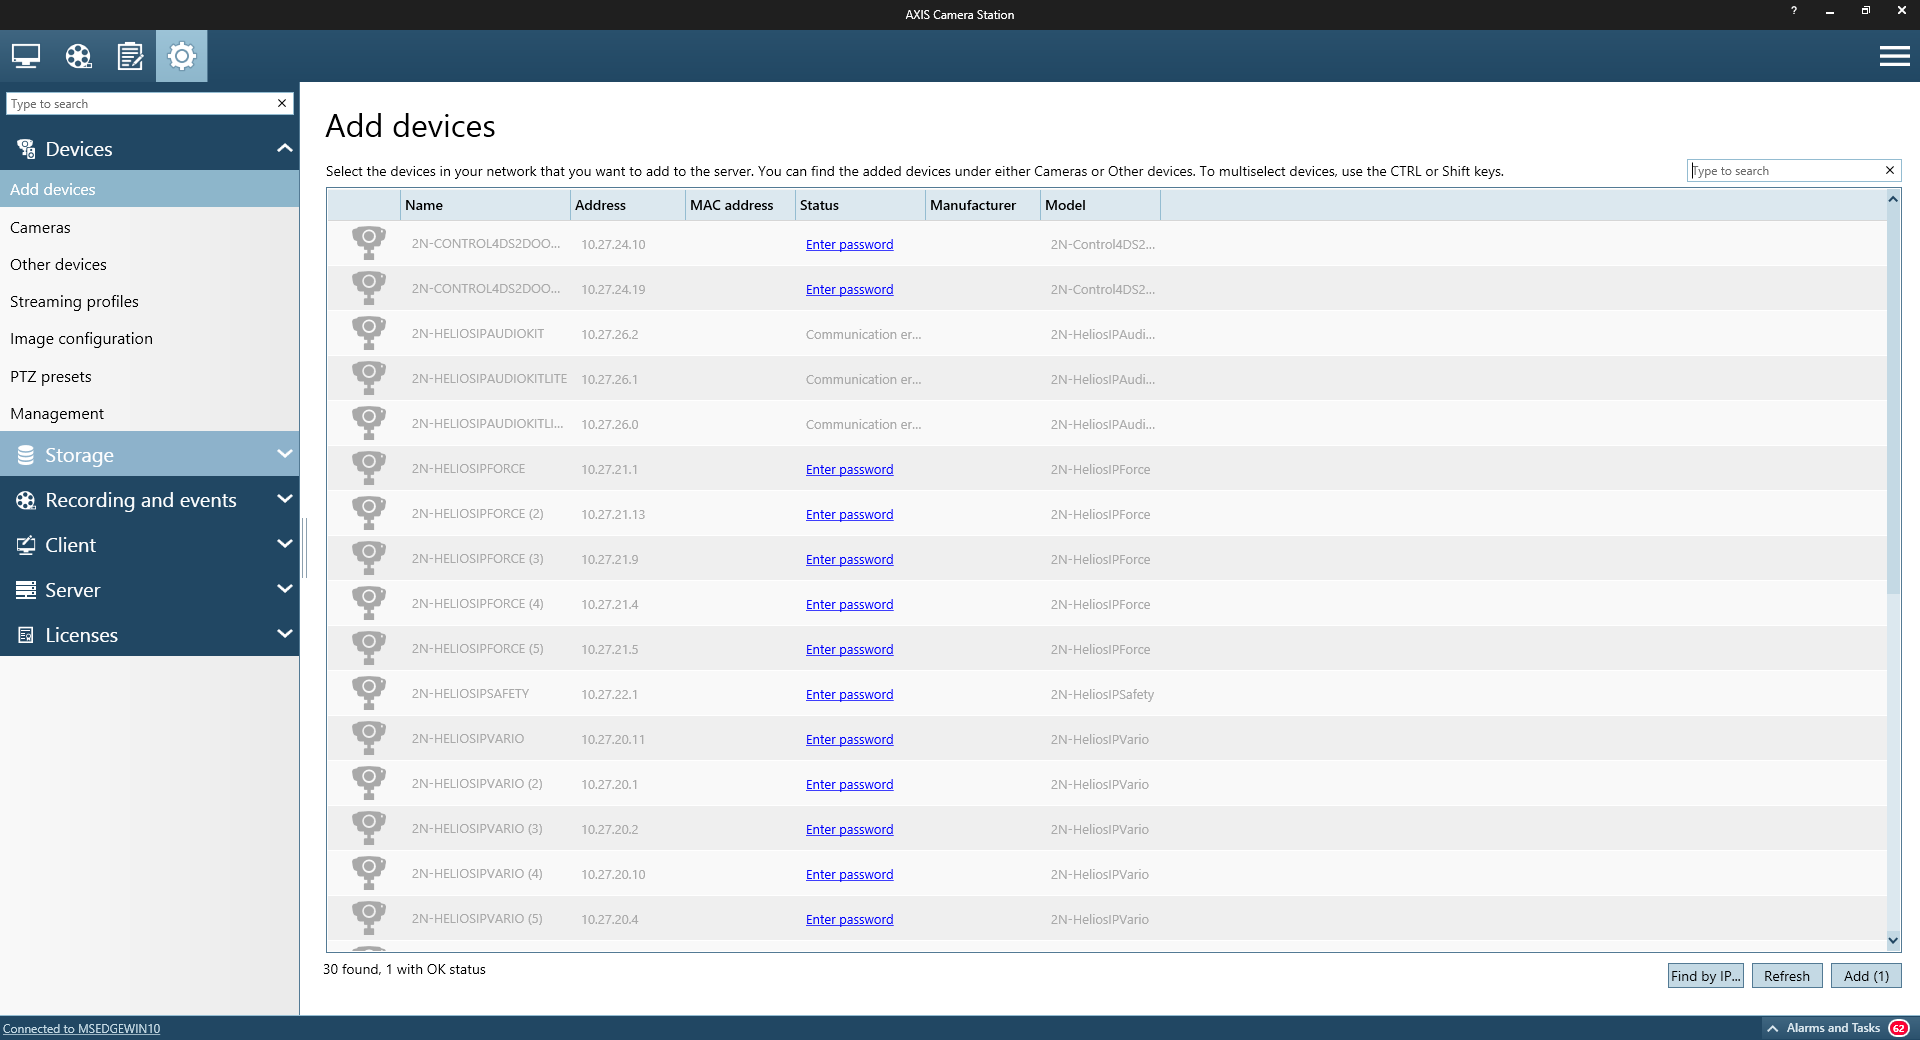
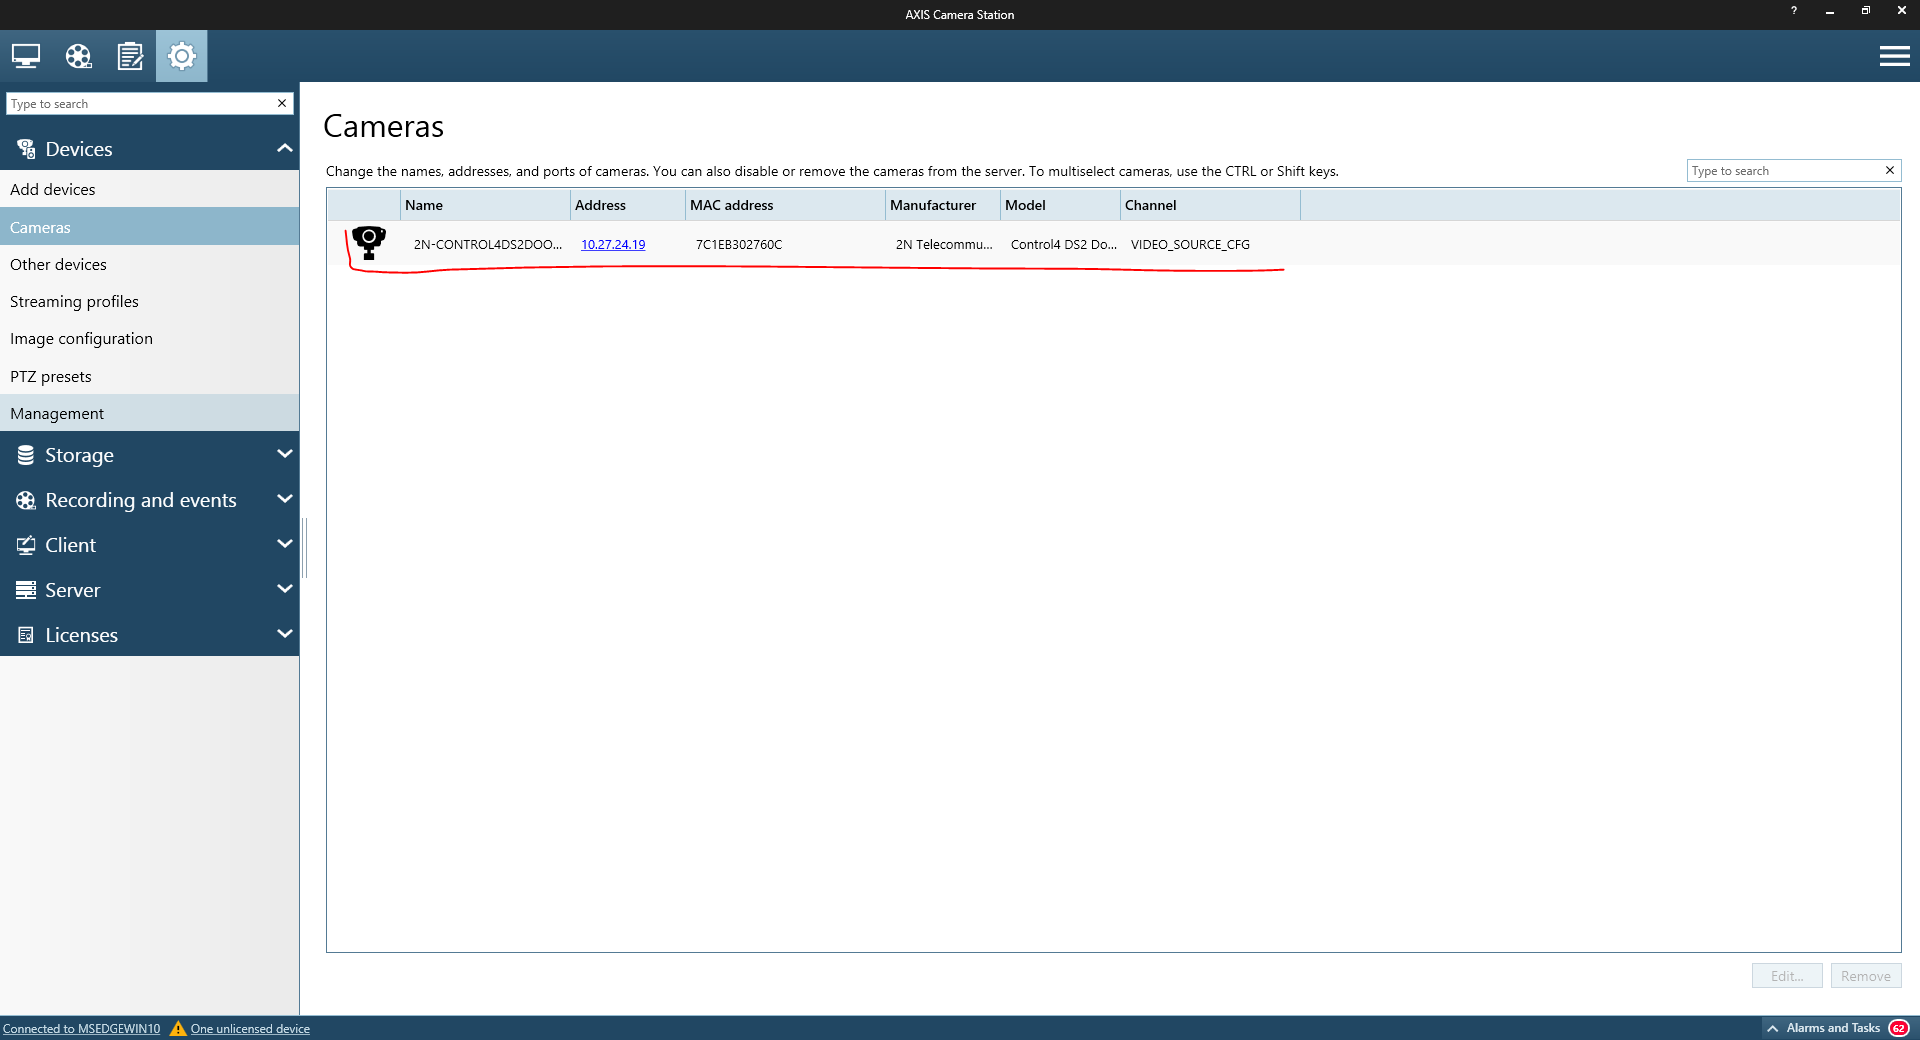
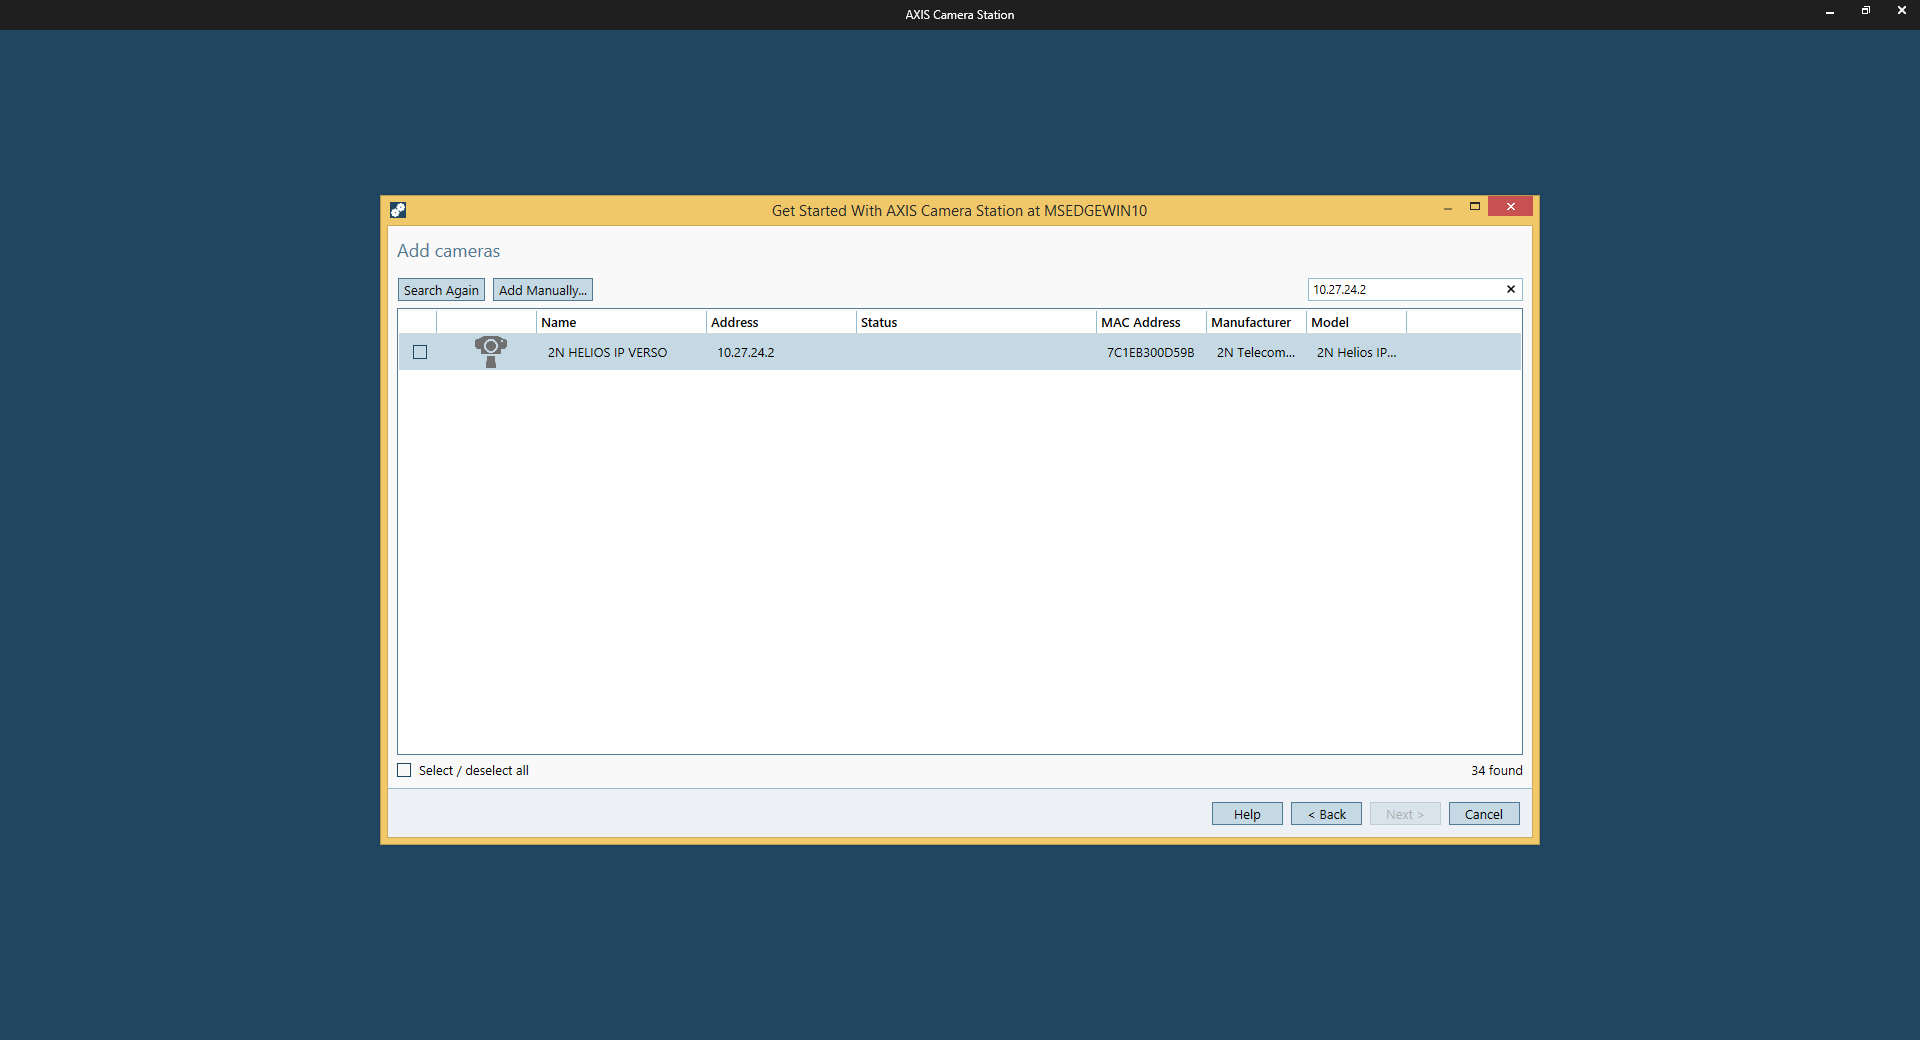
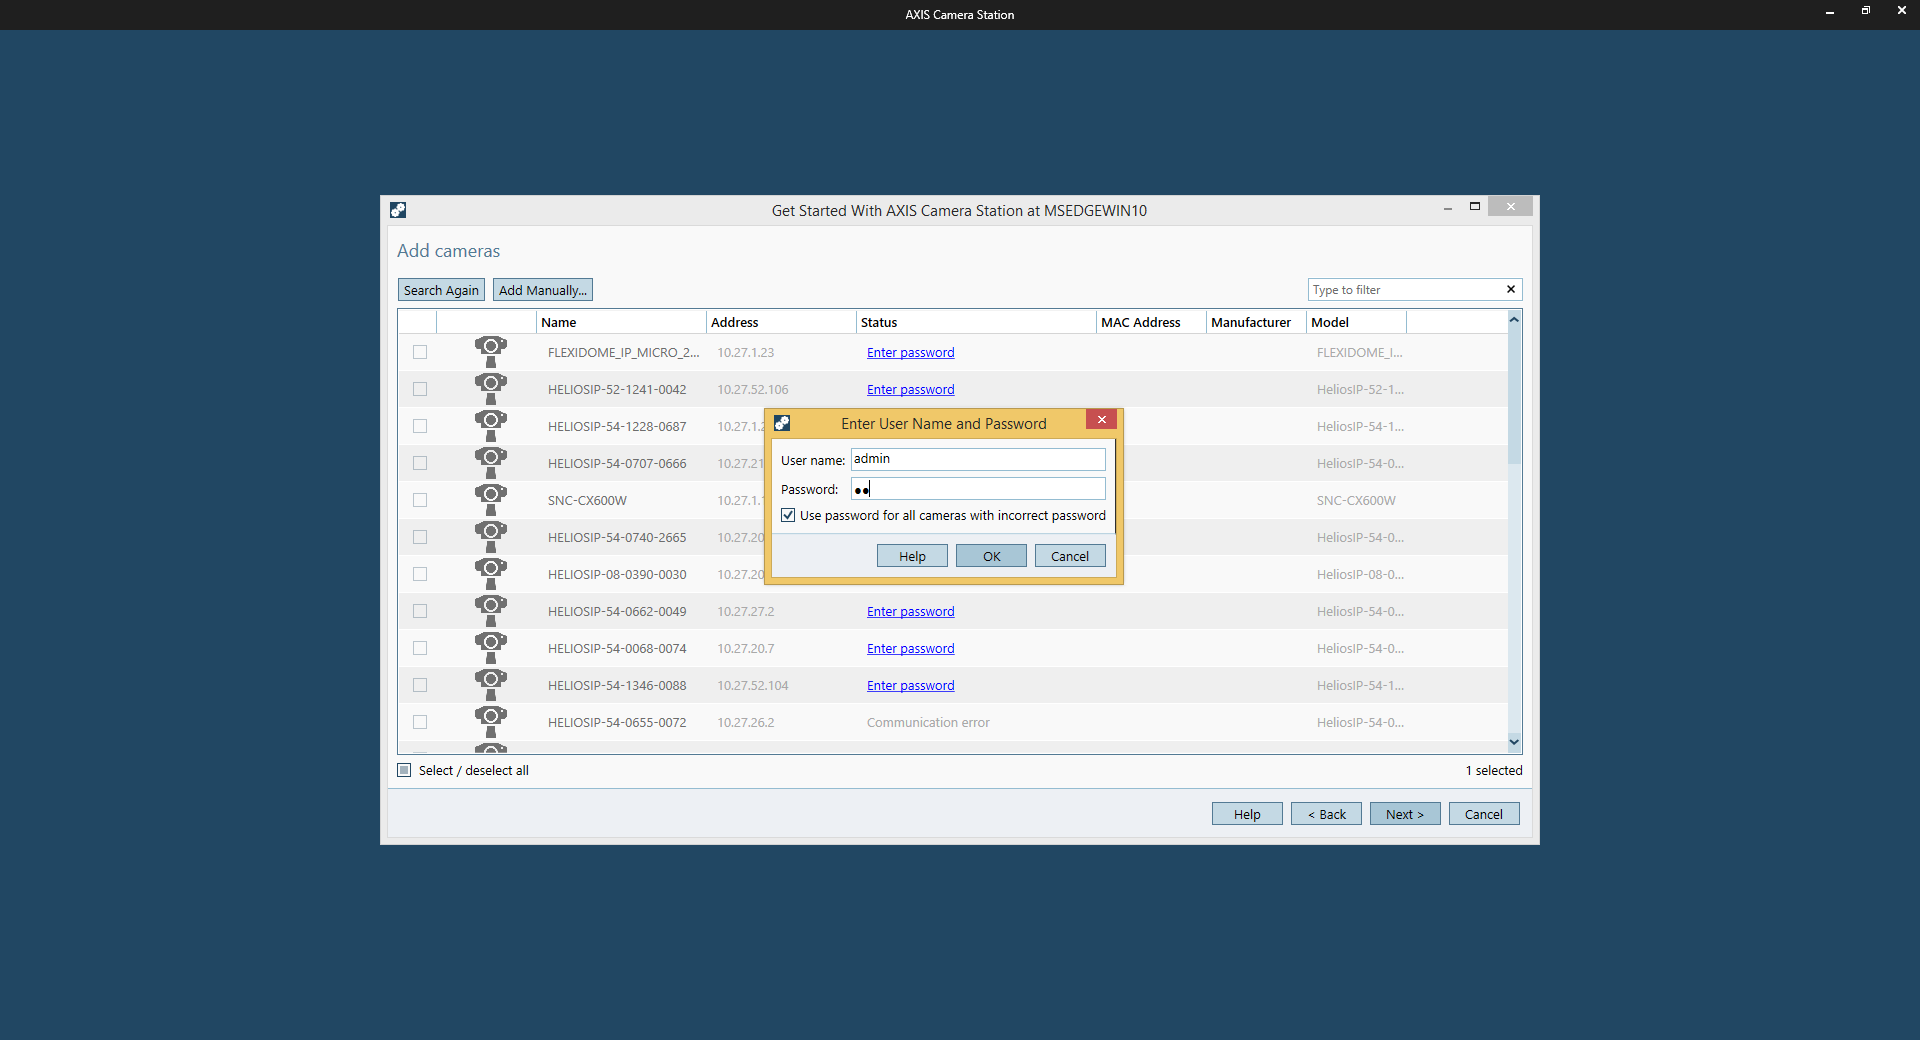
2N IP Intercom should be found by tool for adding cameras into the AXIS Camera Station VMS. Go to Configuration tab, Devices and Add devices. Choose your 2N IP Intercom and click "Enter password".
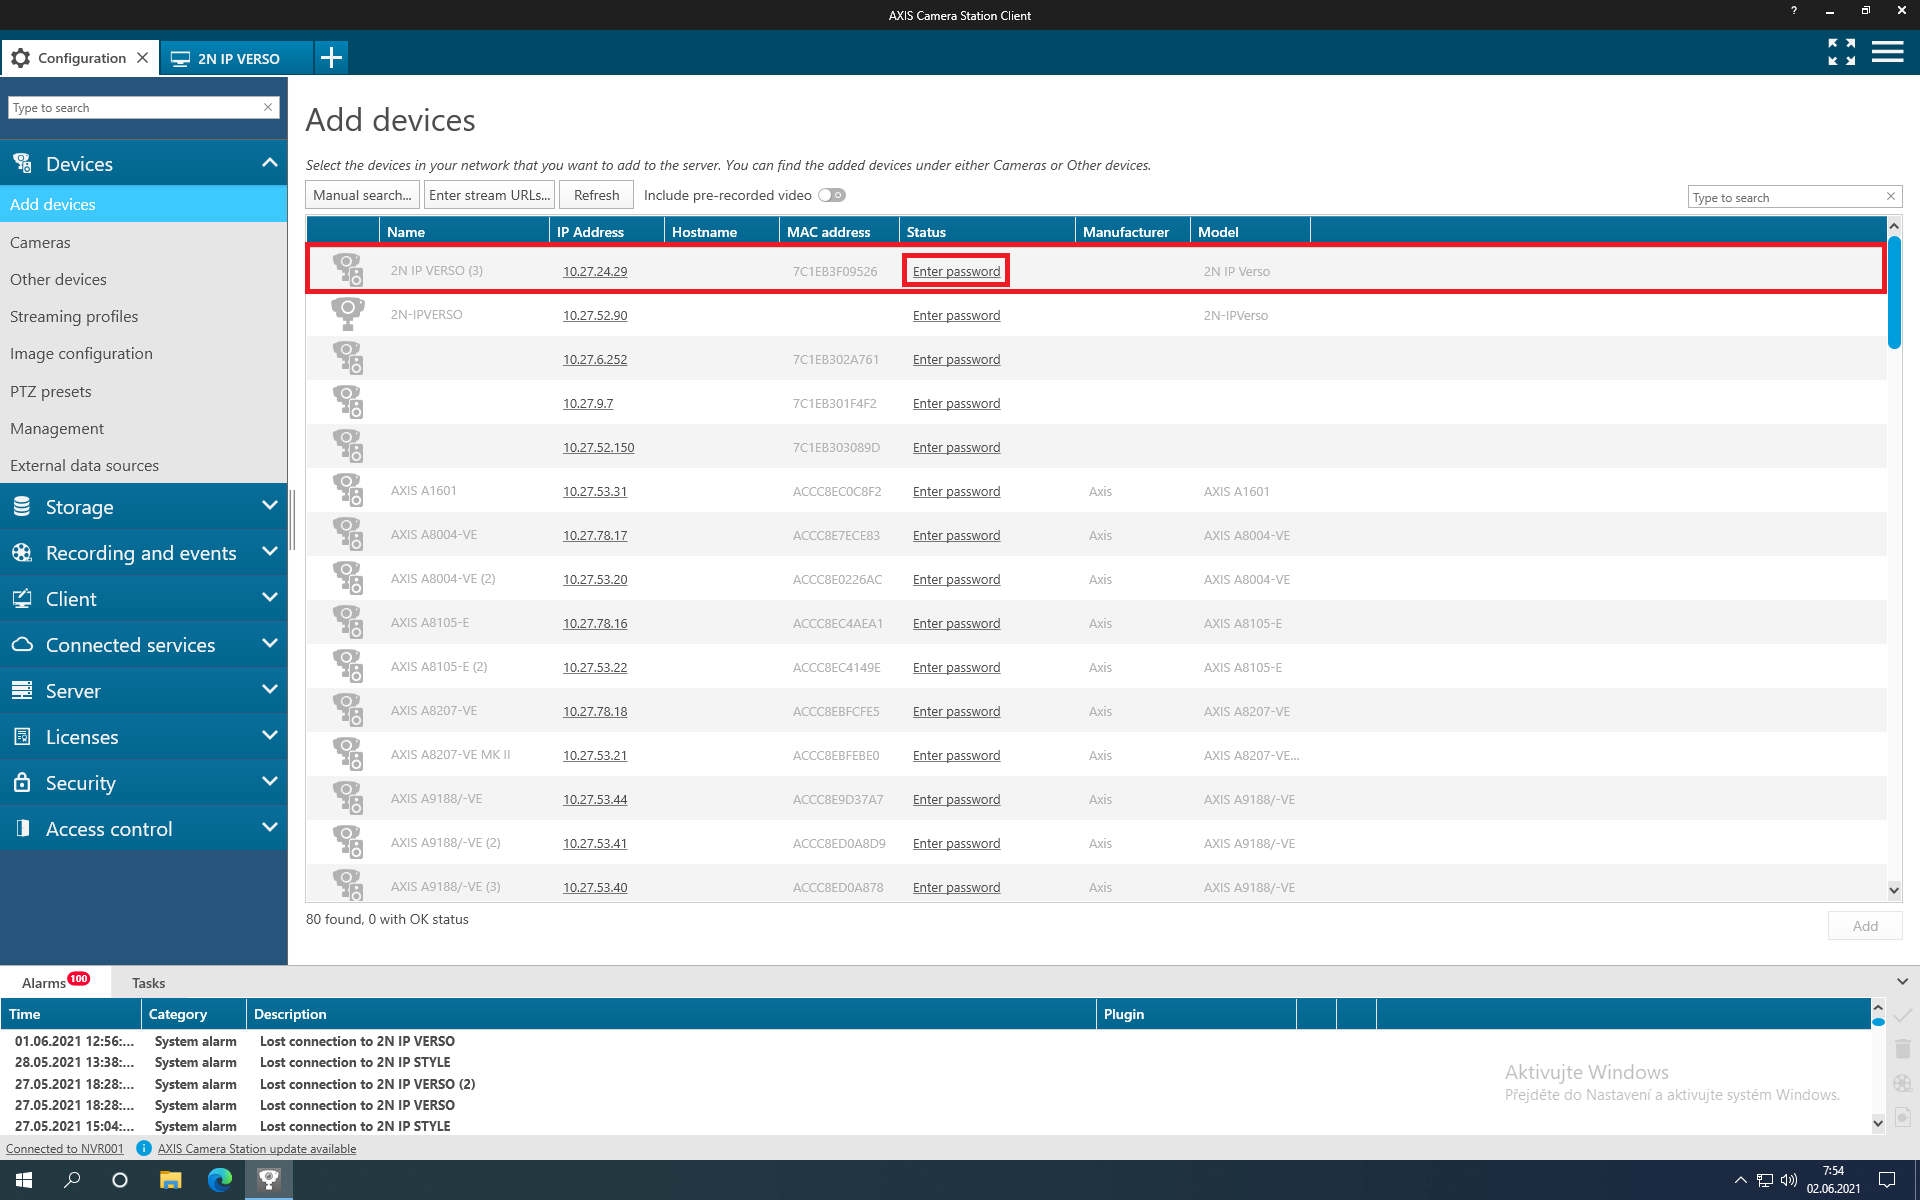 |
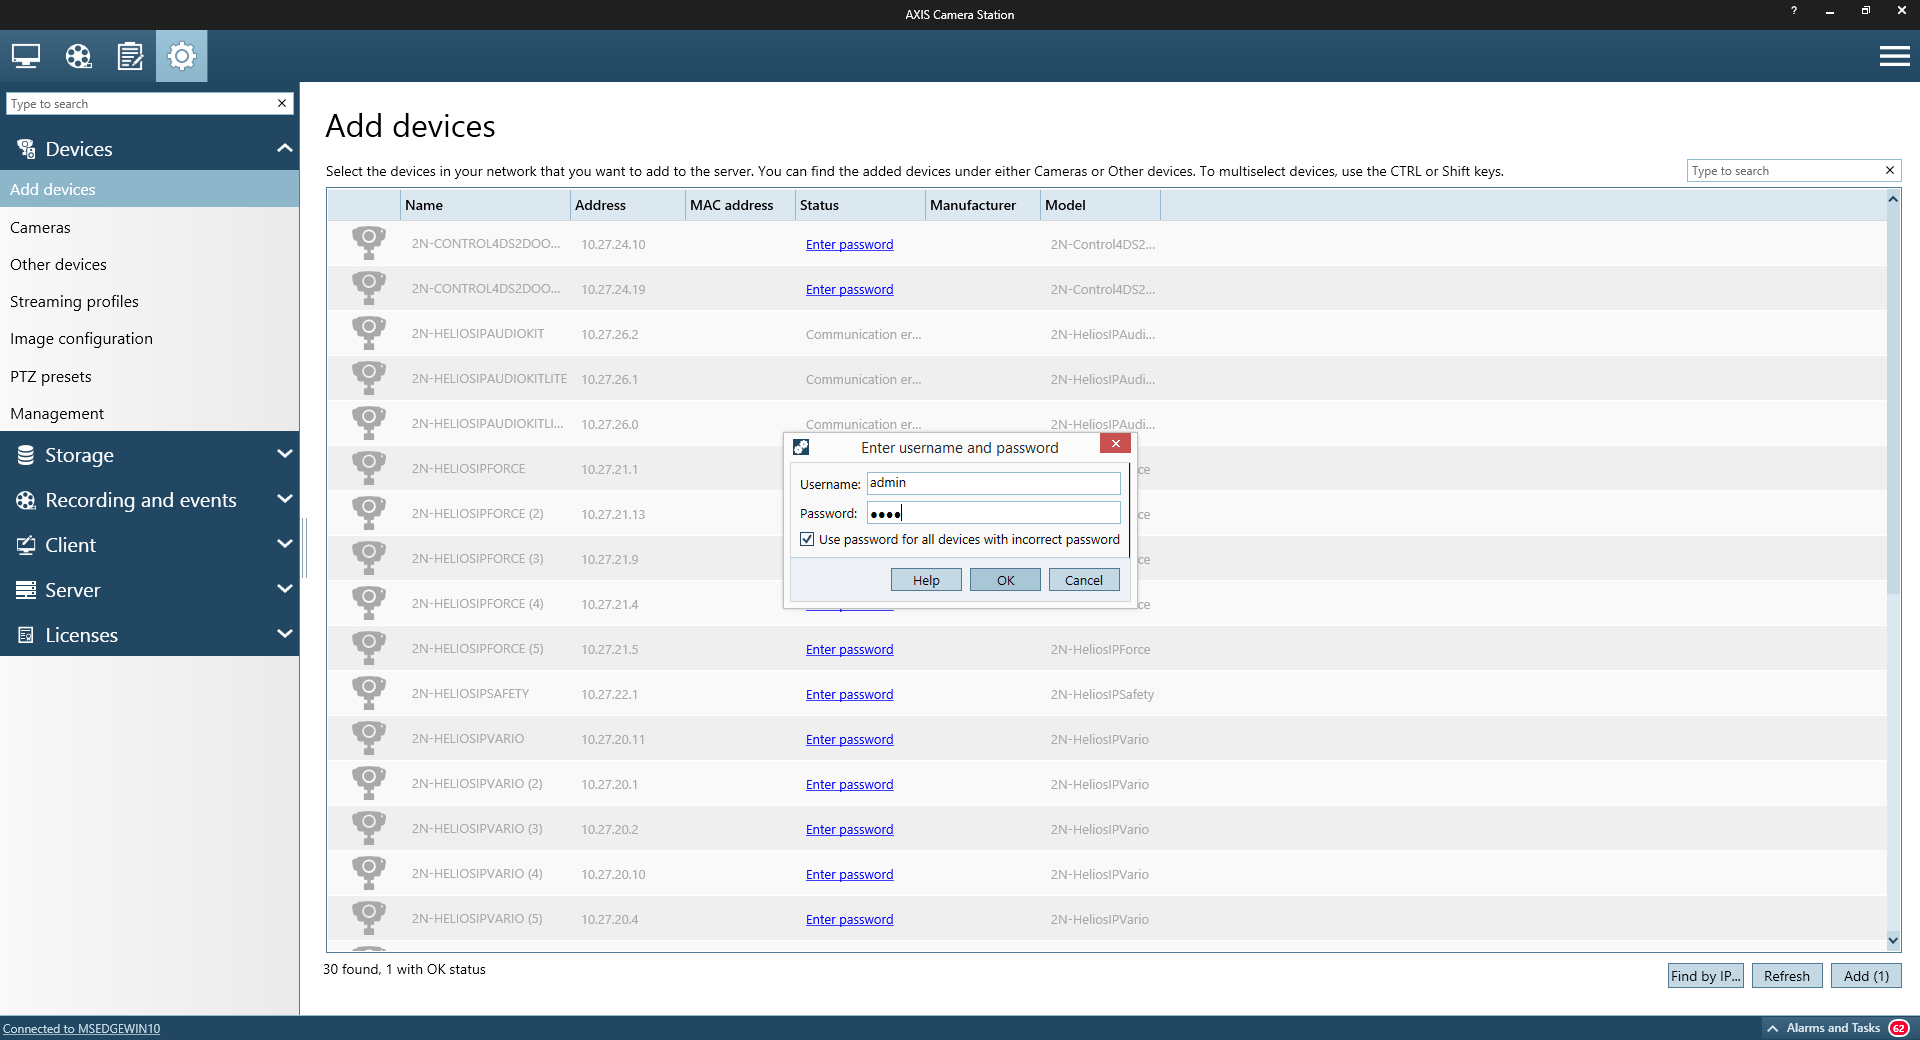
And in the following dialog enter ONVIF login and password set-up previously on 2N IP Intercom and confirm with "Ok" button.
 |
 |
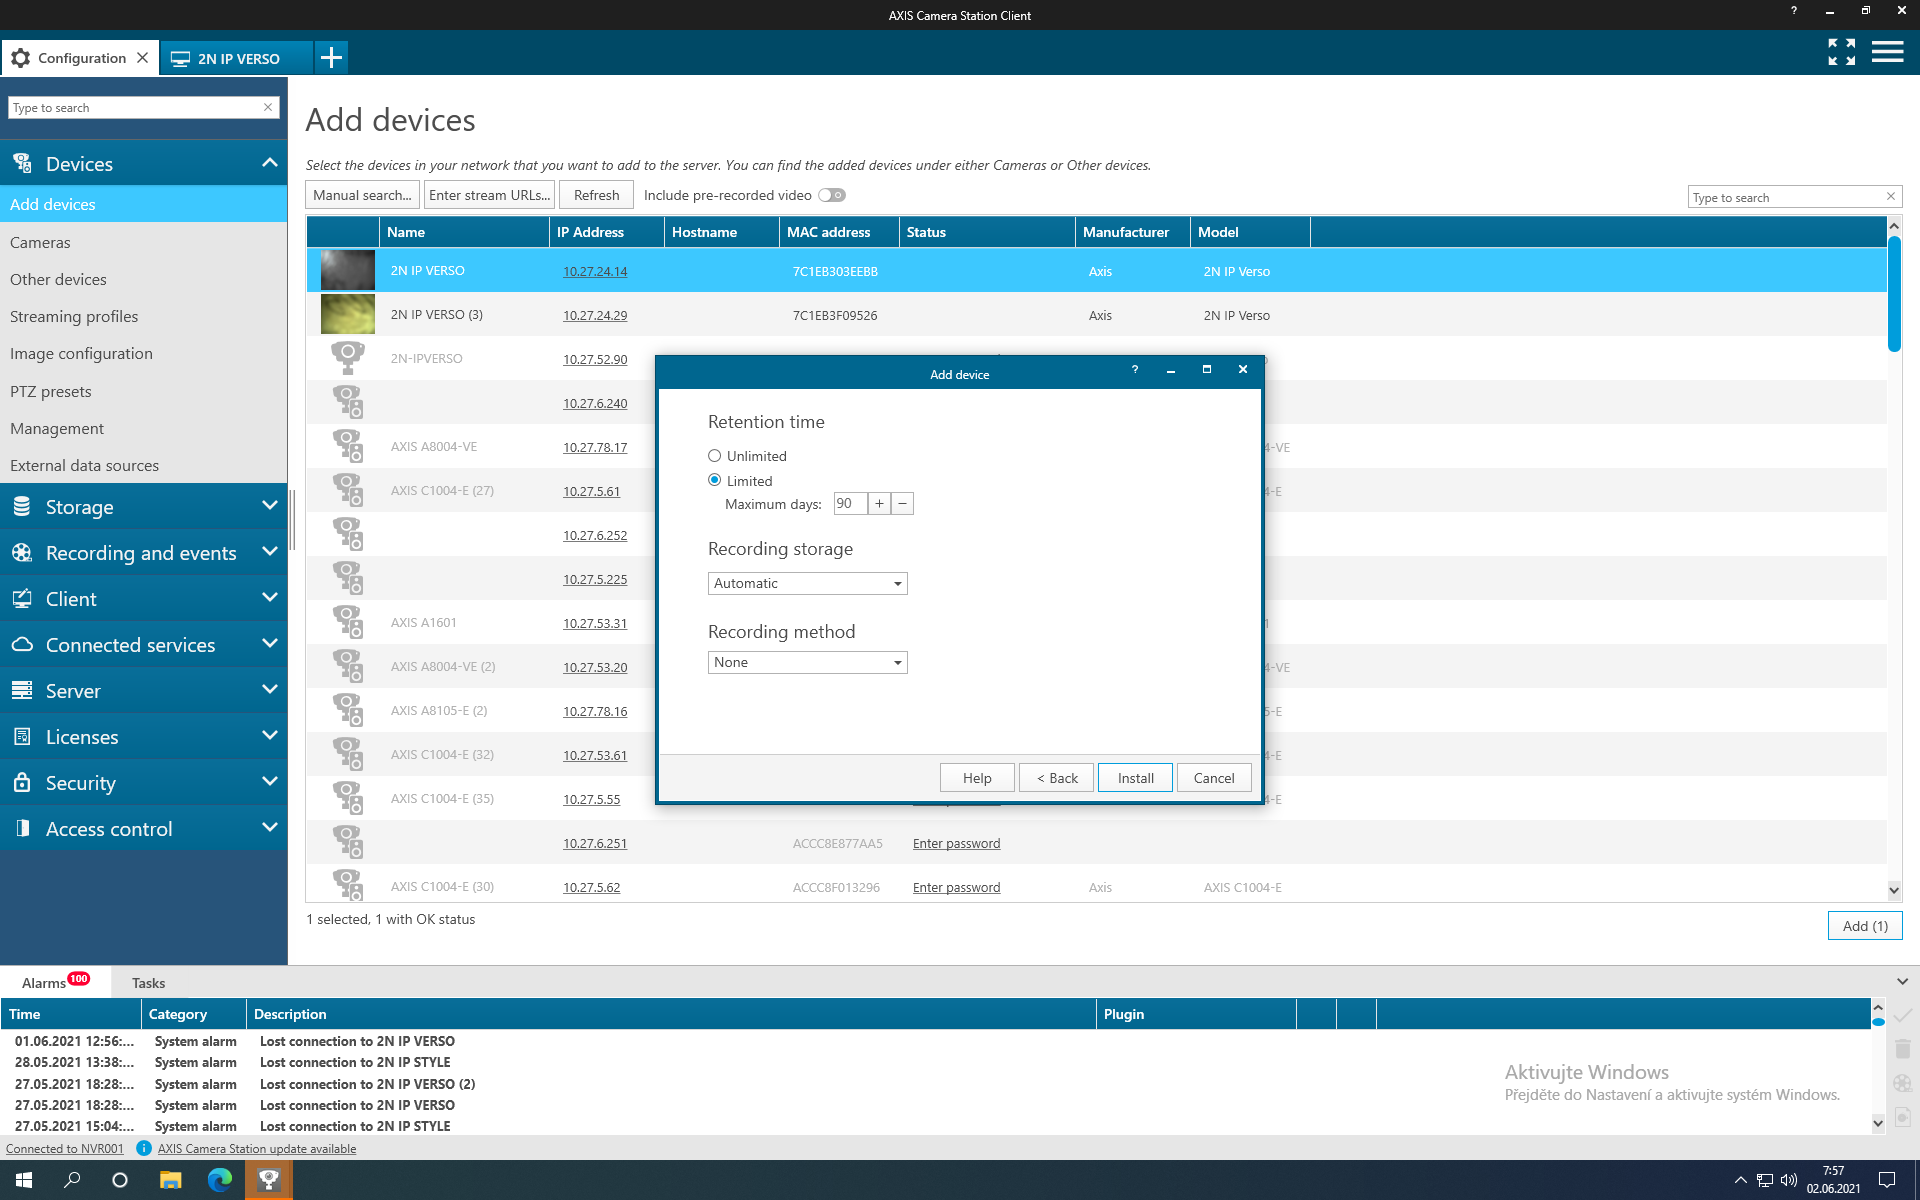
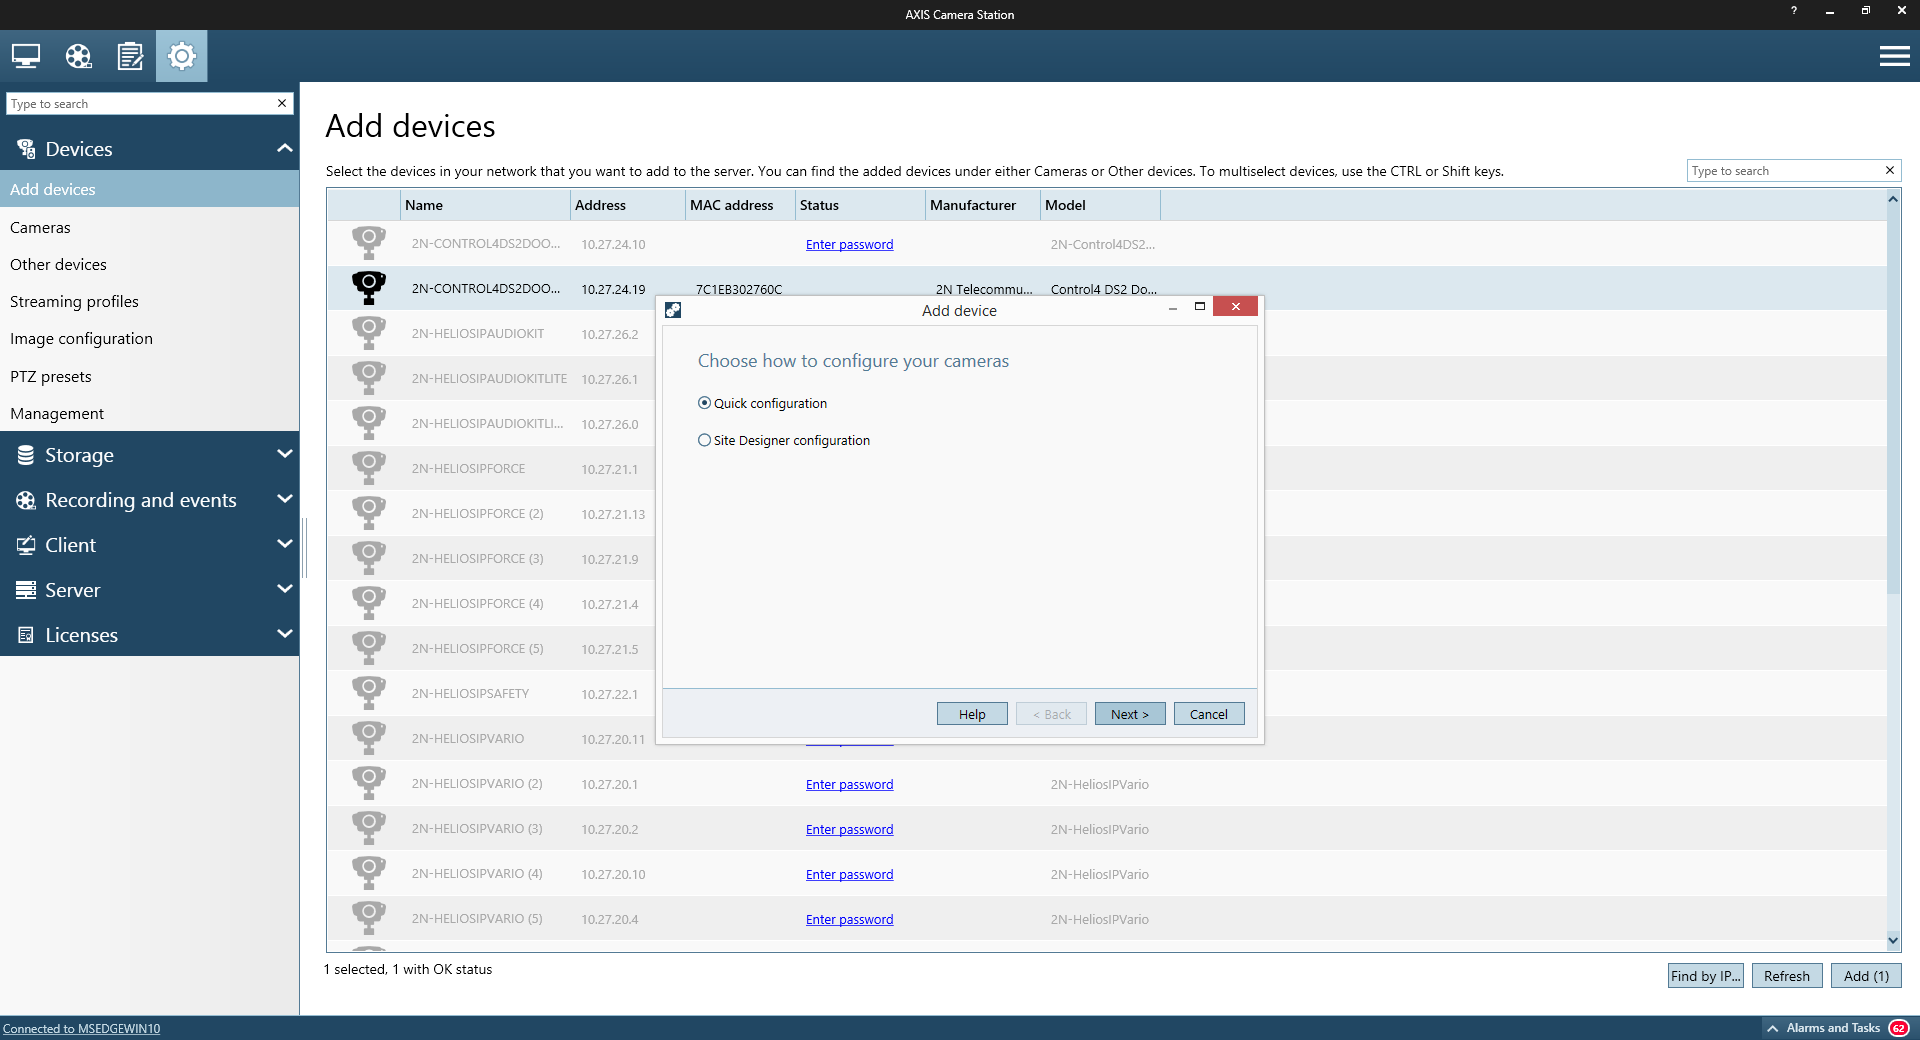
In the following dialog choose "Quick configuration" and go the next dialog window with button "Next".
 |
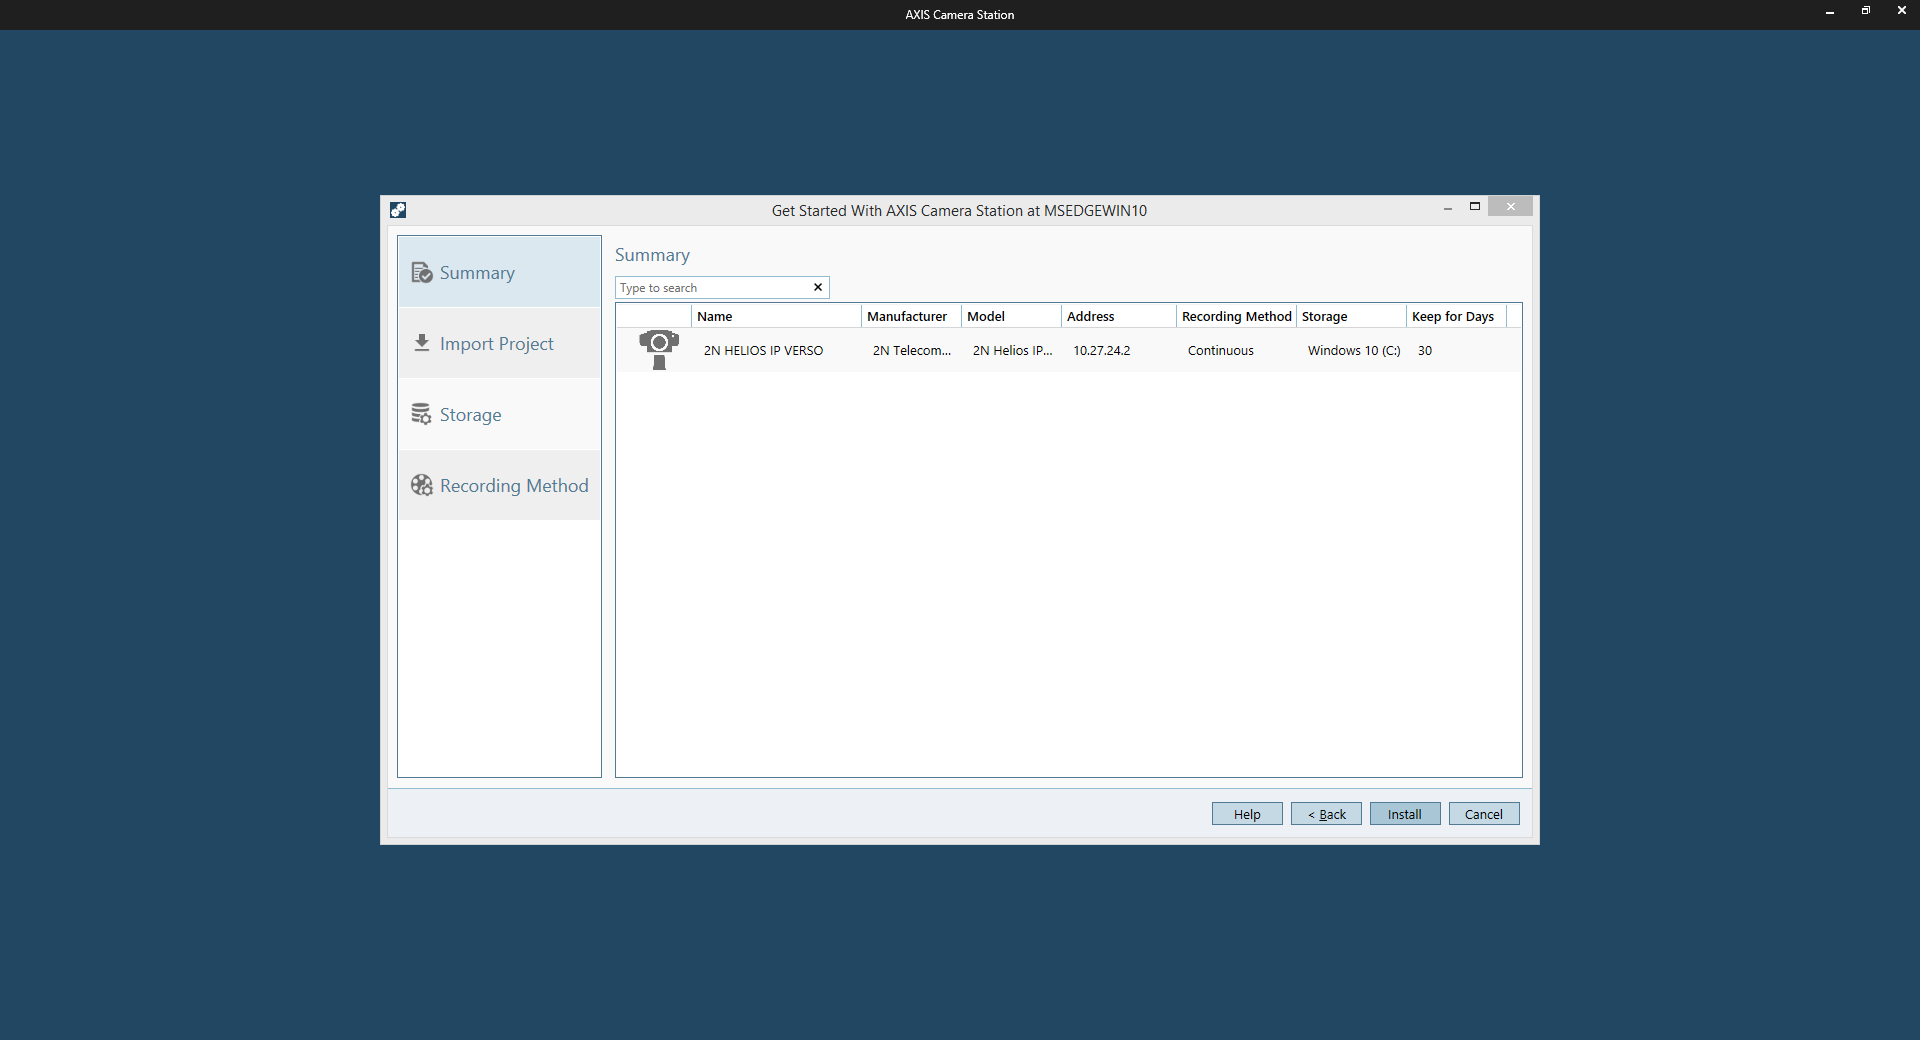
In the following dialog window fill in desired set-up for camera recordings and confirm with "Install".
 |
 |
 |
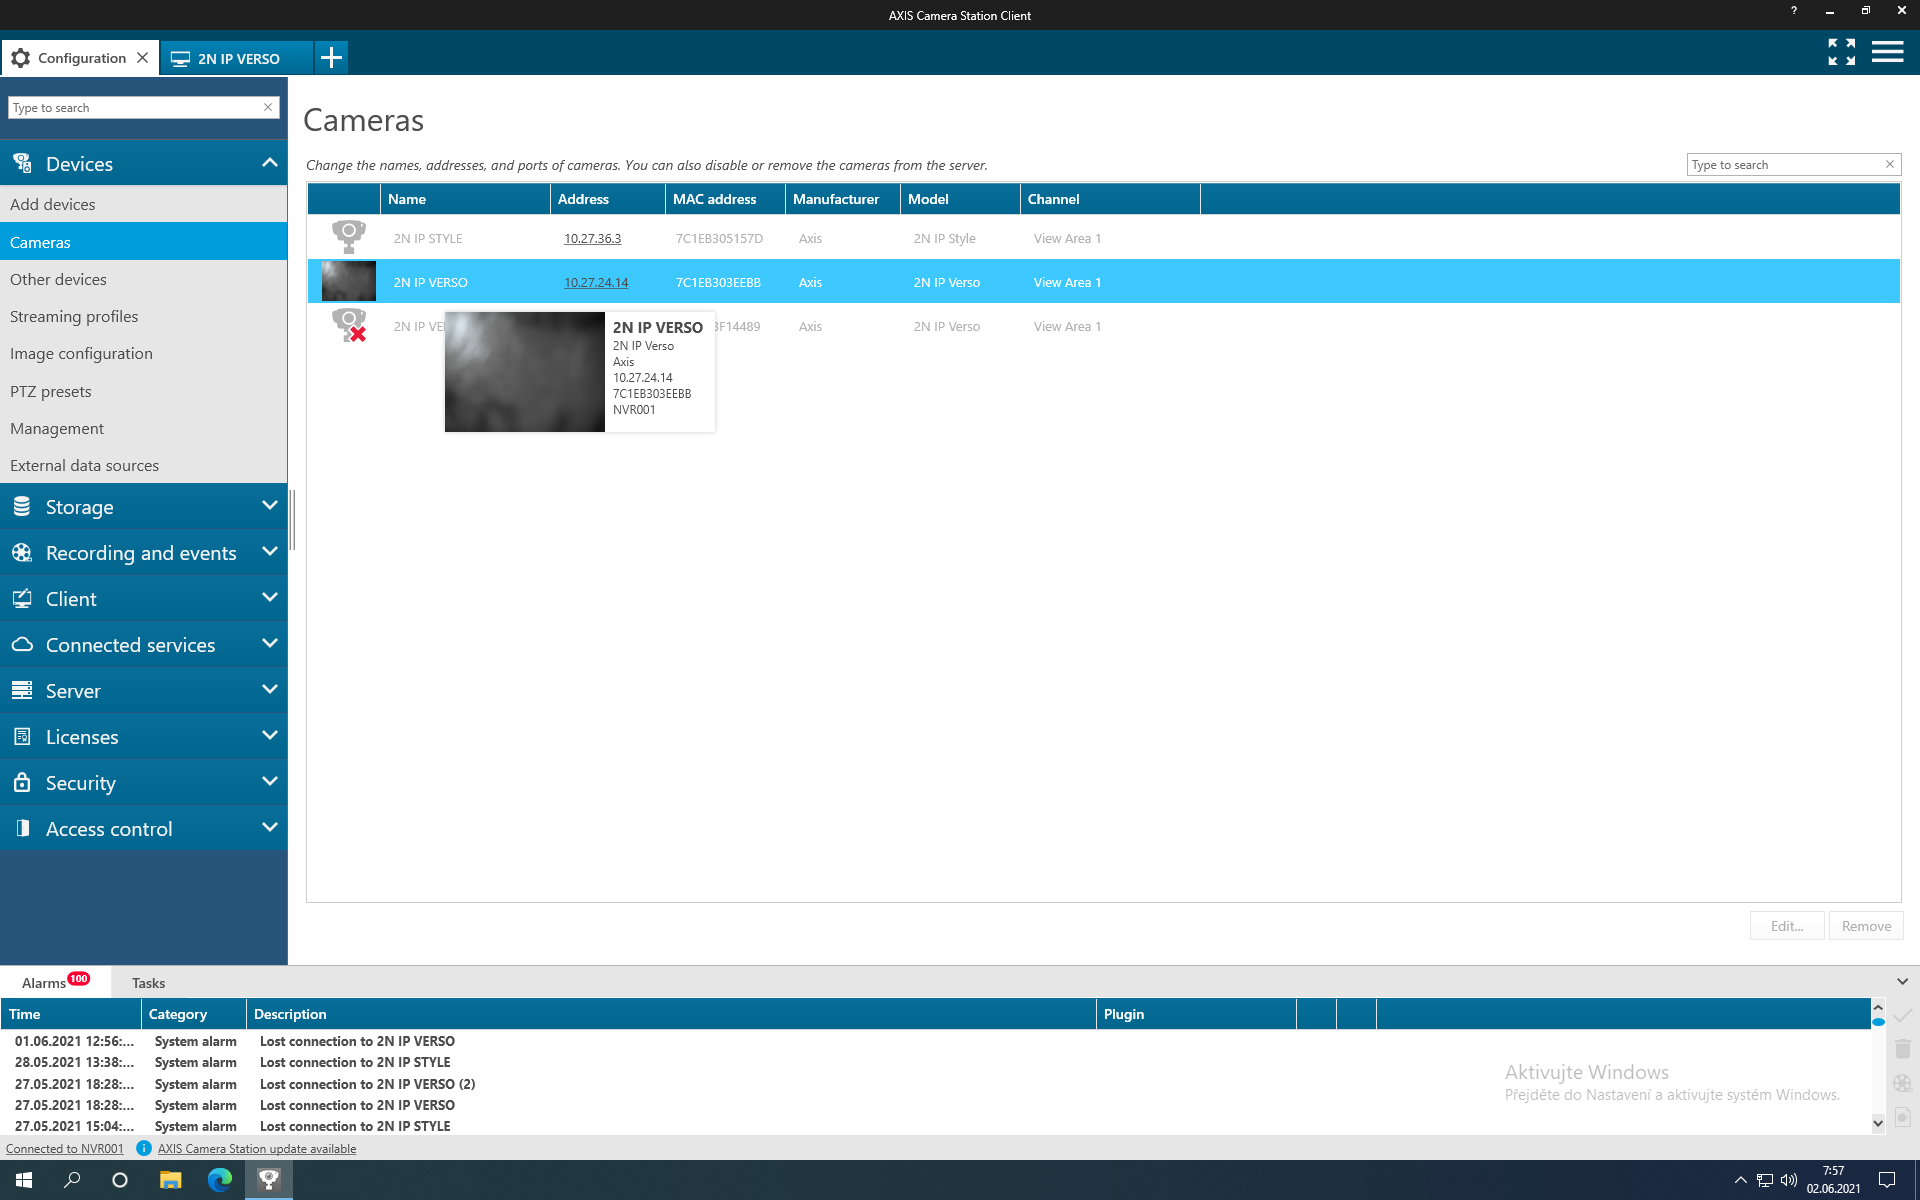
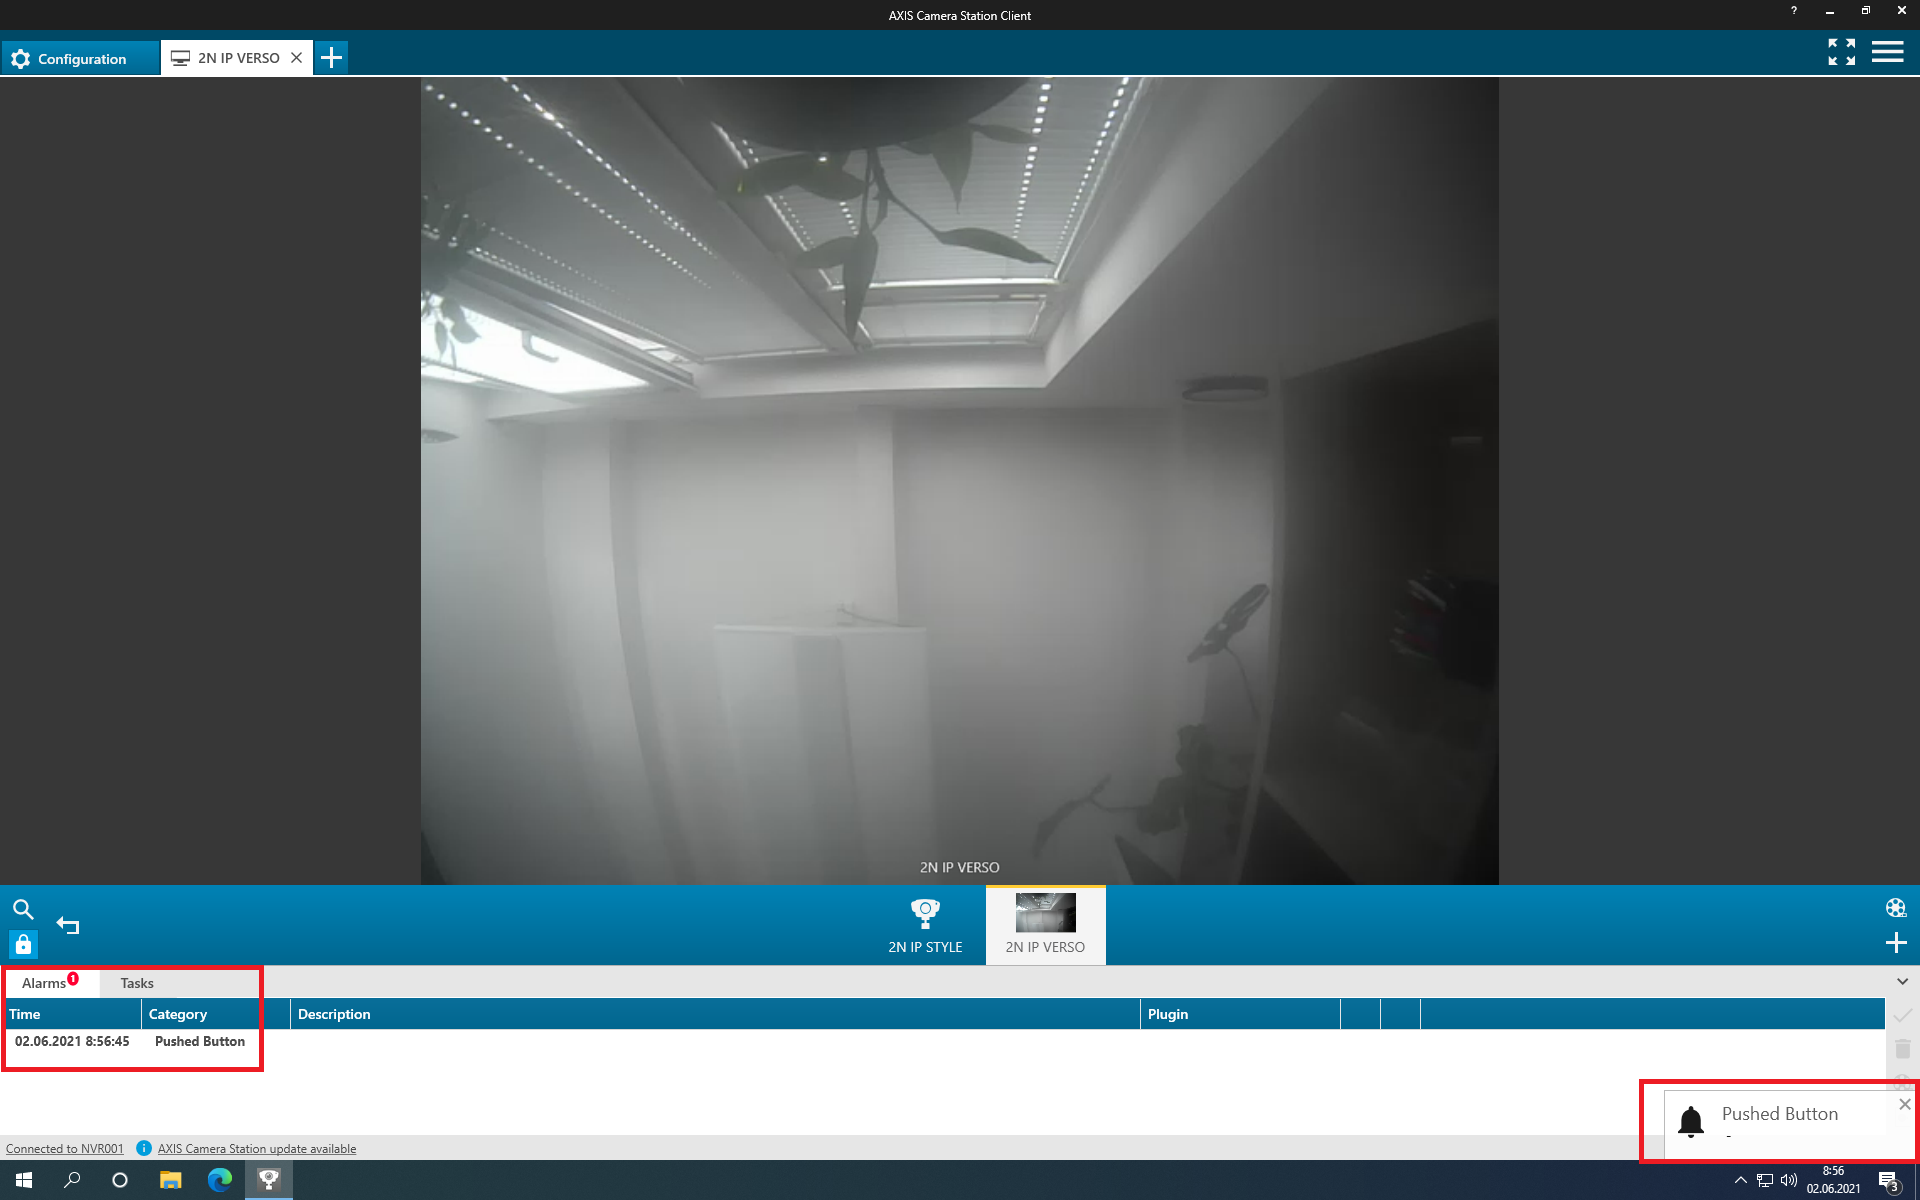
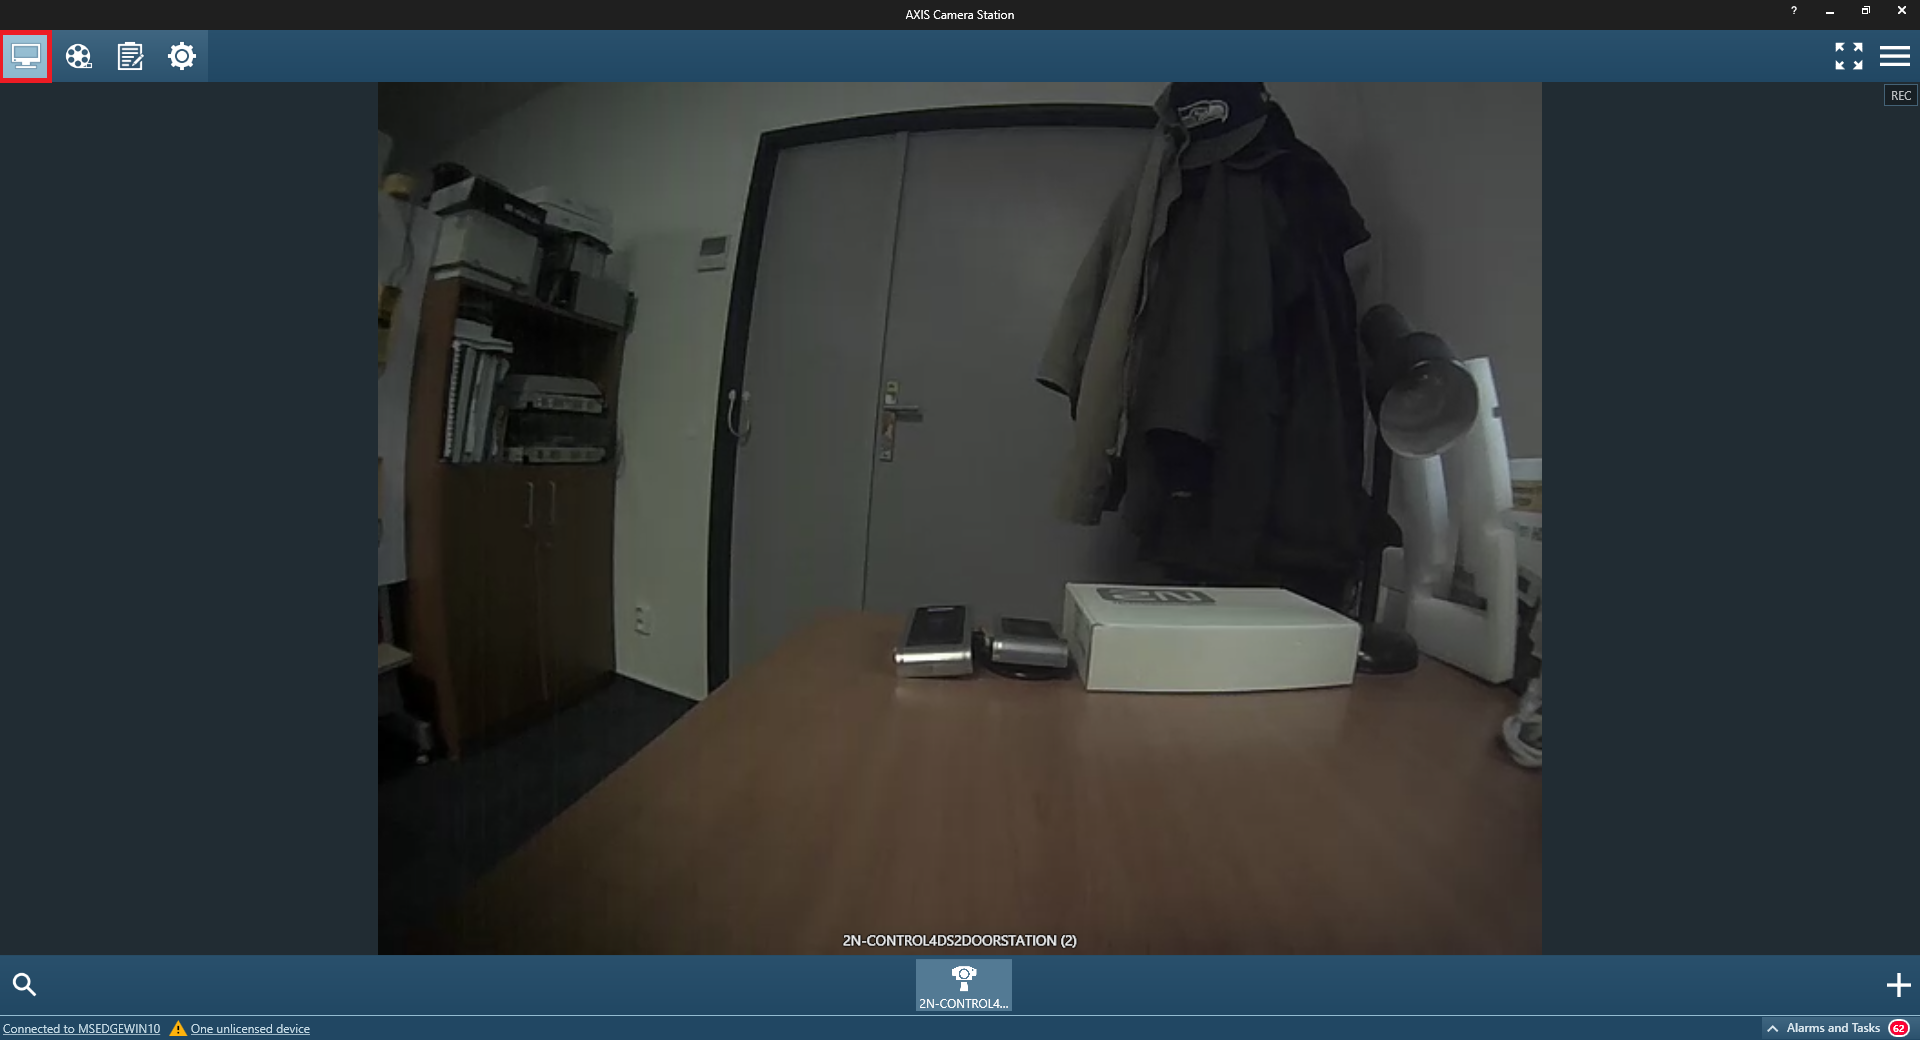
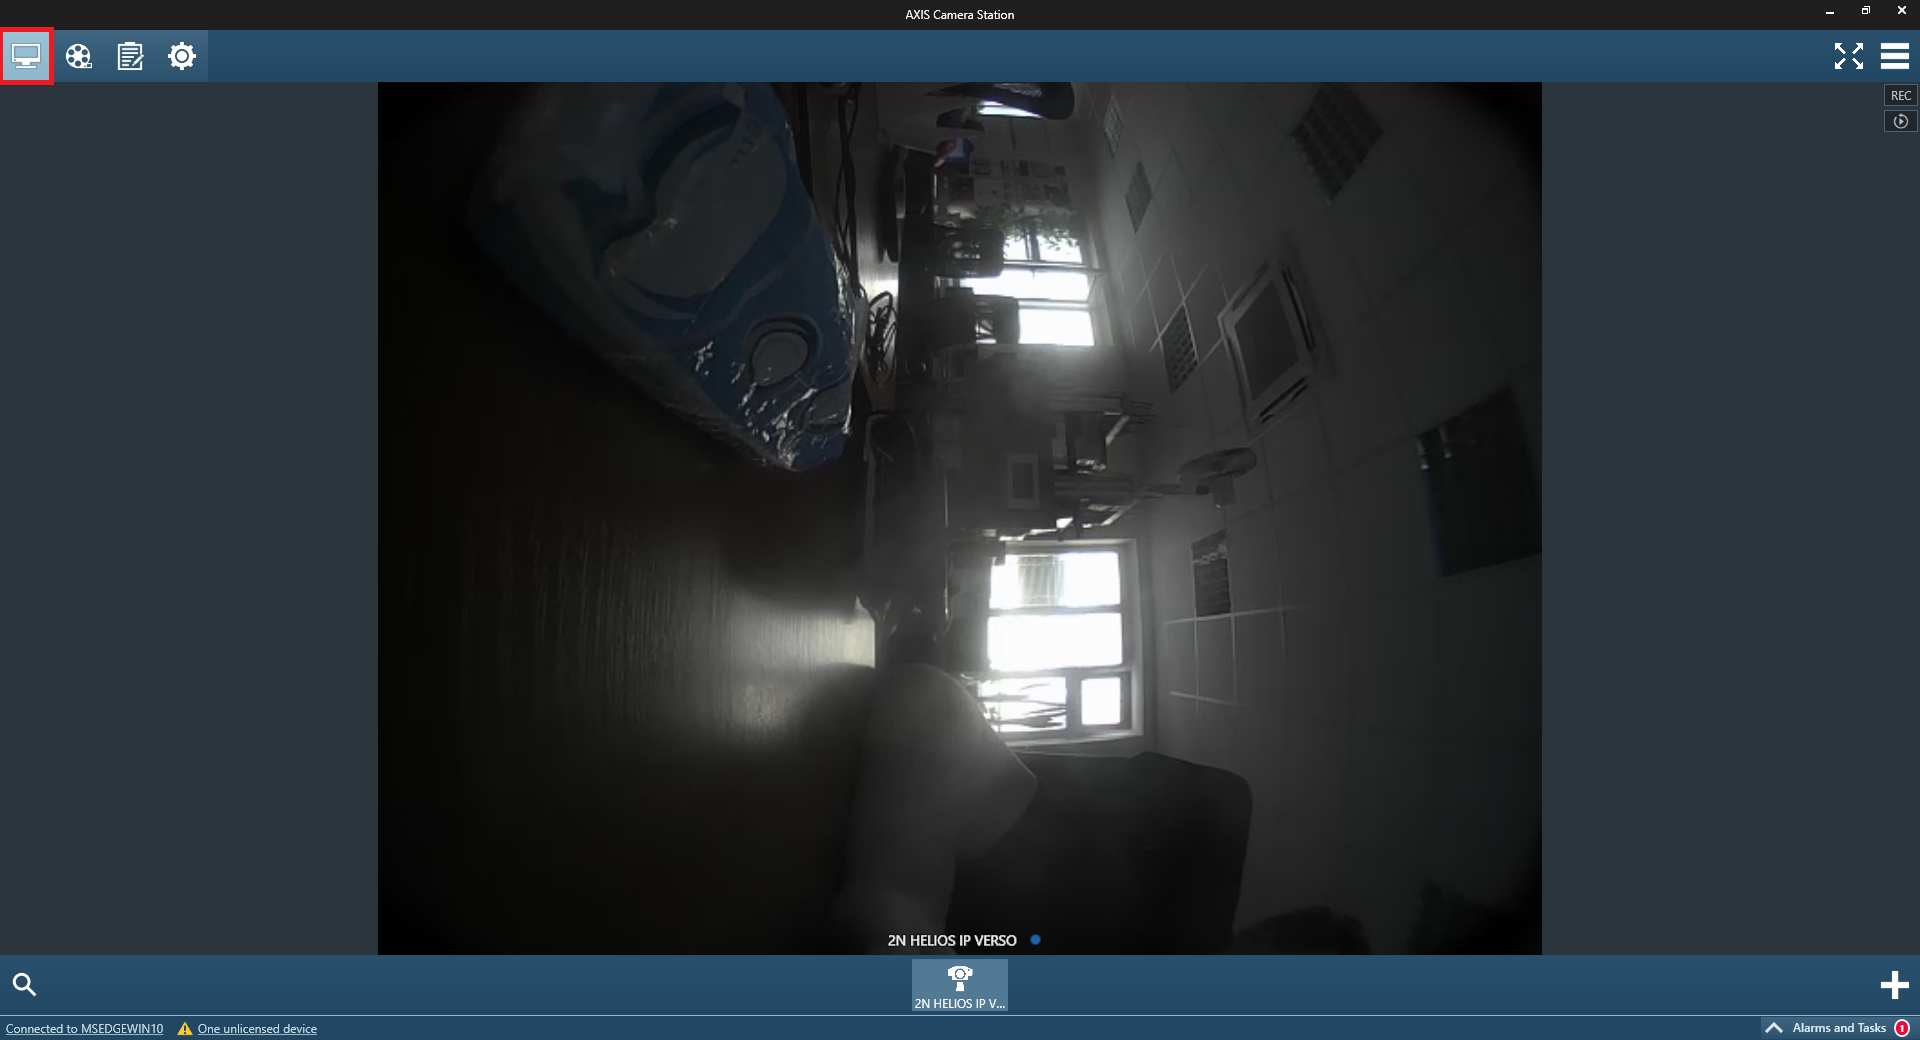
Live Video stream from your 2N IP Intercom can be see in "Live view" tab, to add "Live view" tab click "+" button next to the "Configuration" tab.
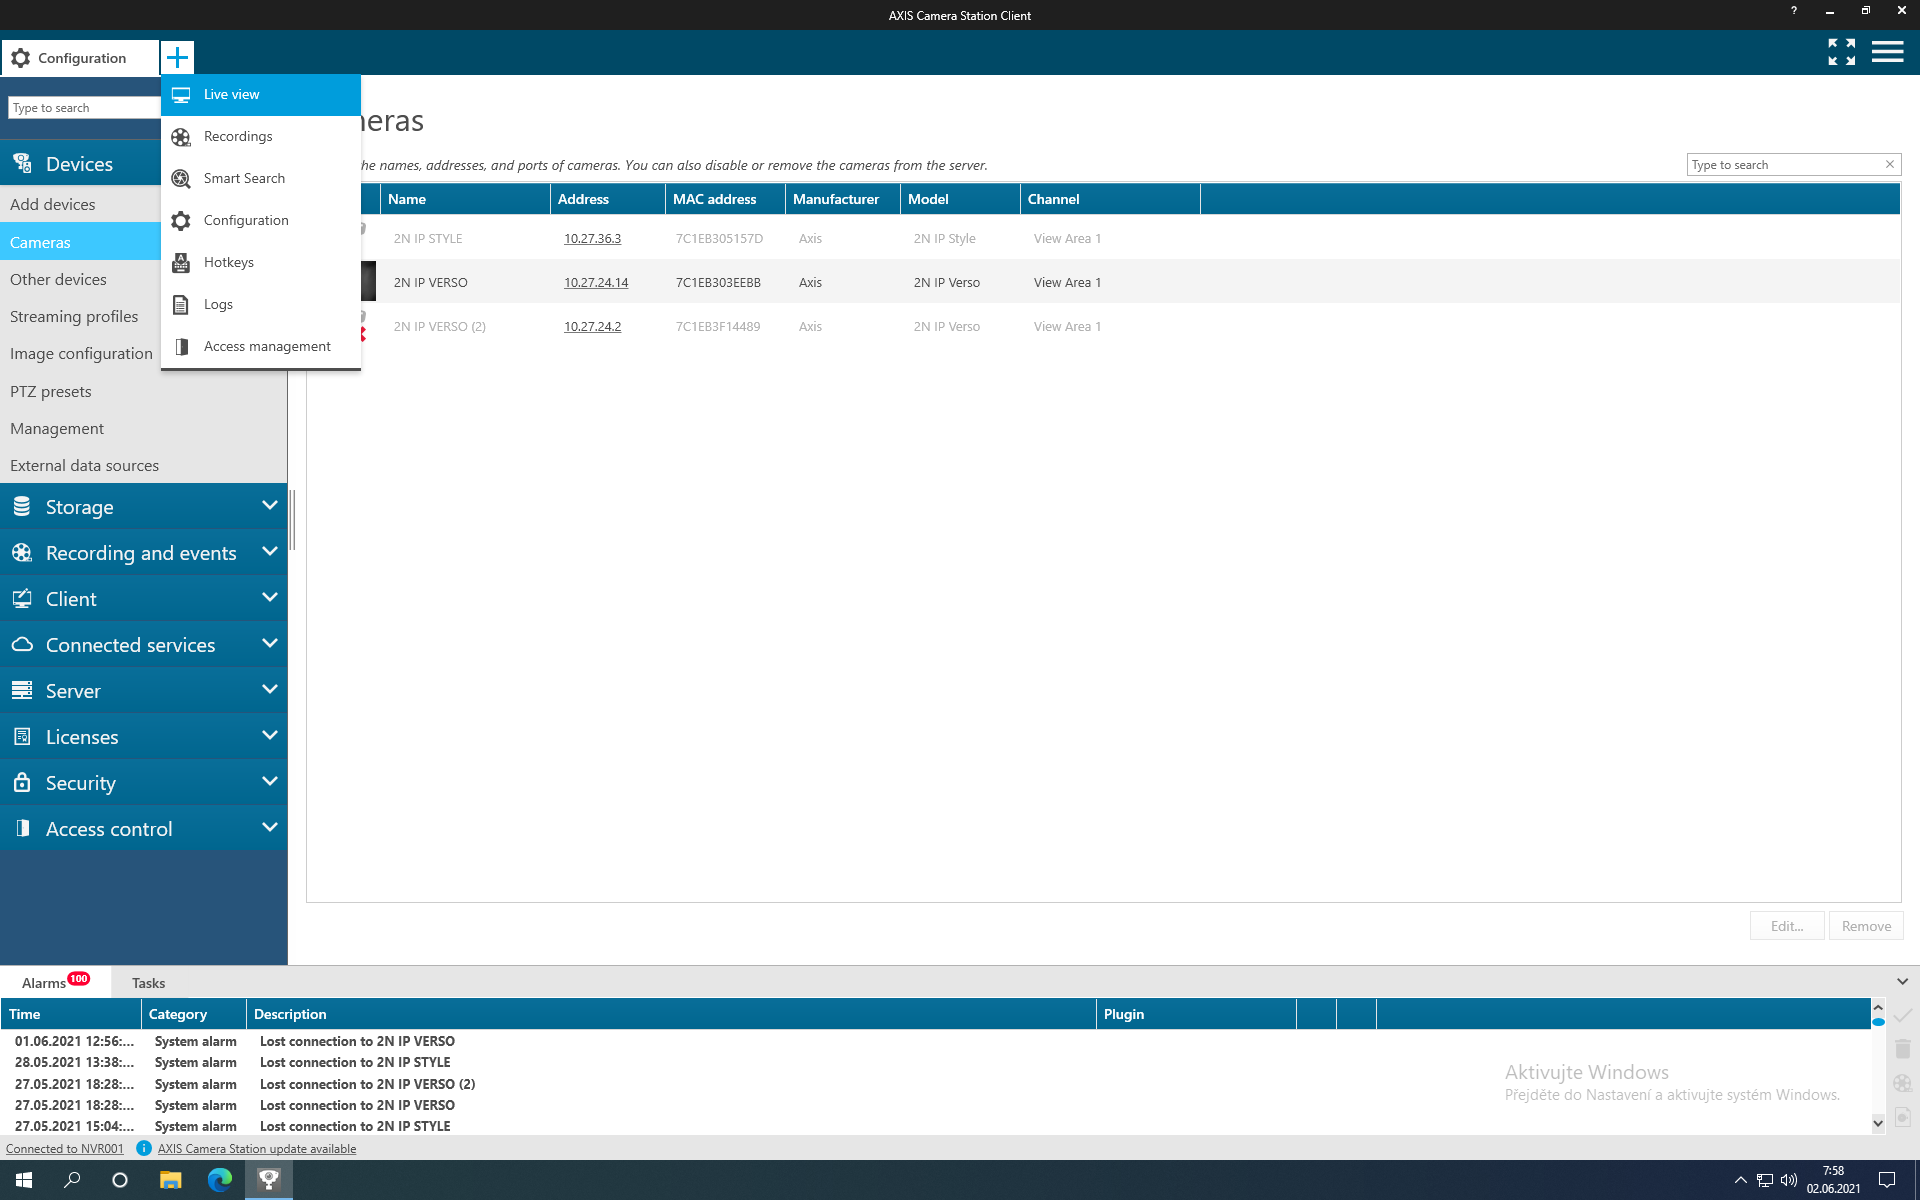 |
After switching to this new tab, video from 2N IP Intercom camera, should be seen.
 |
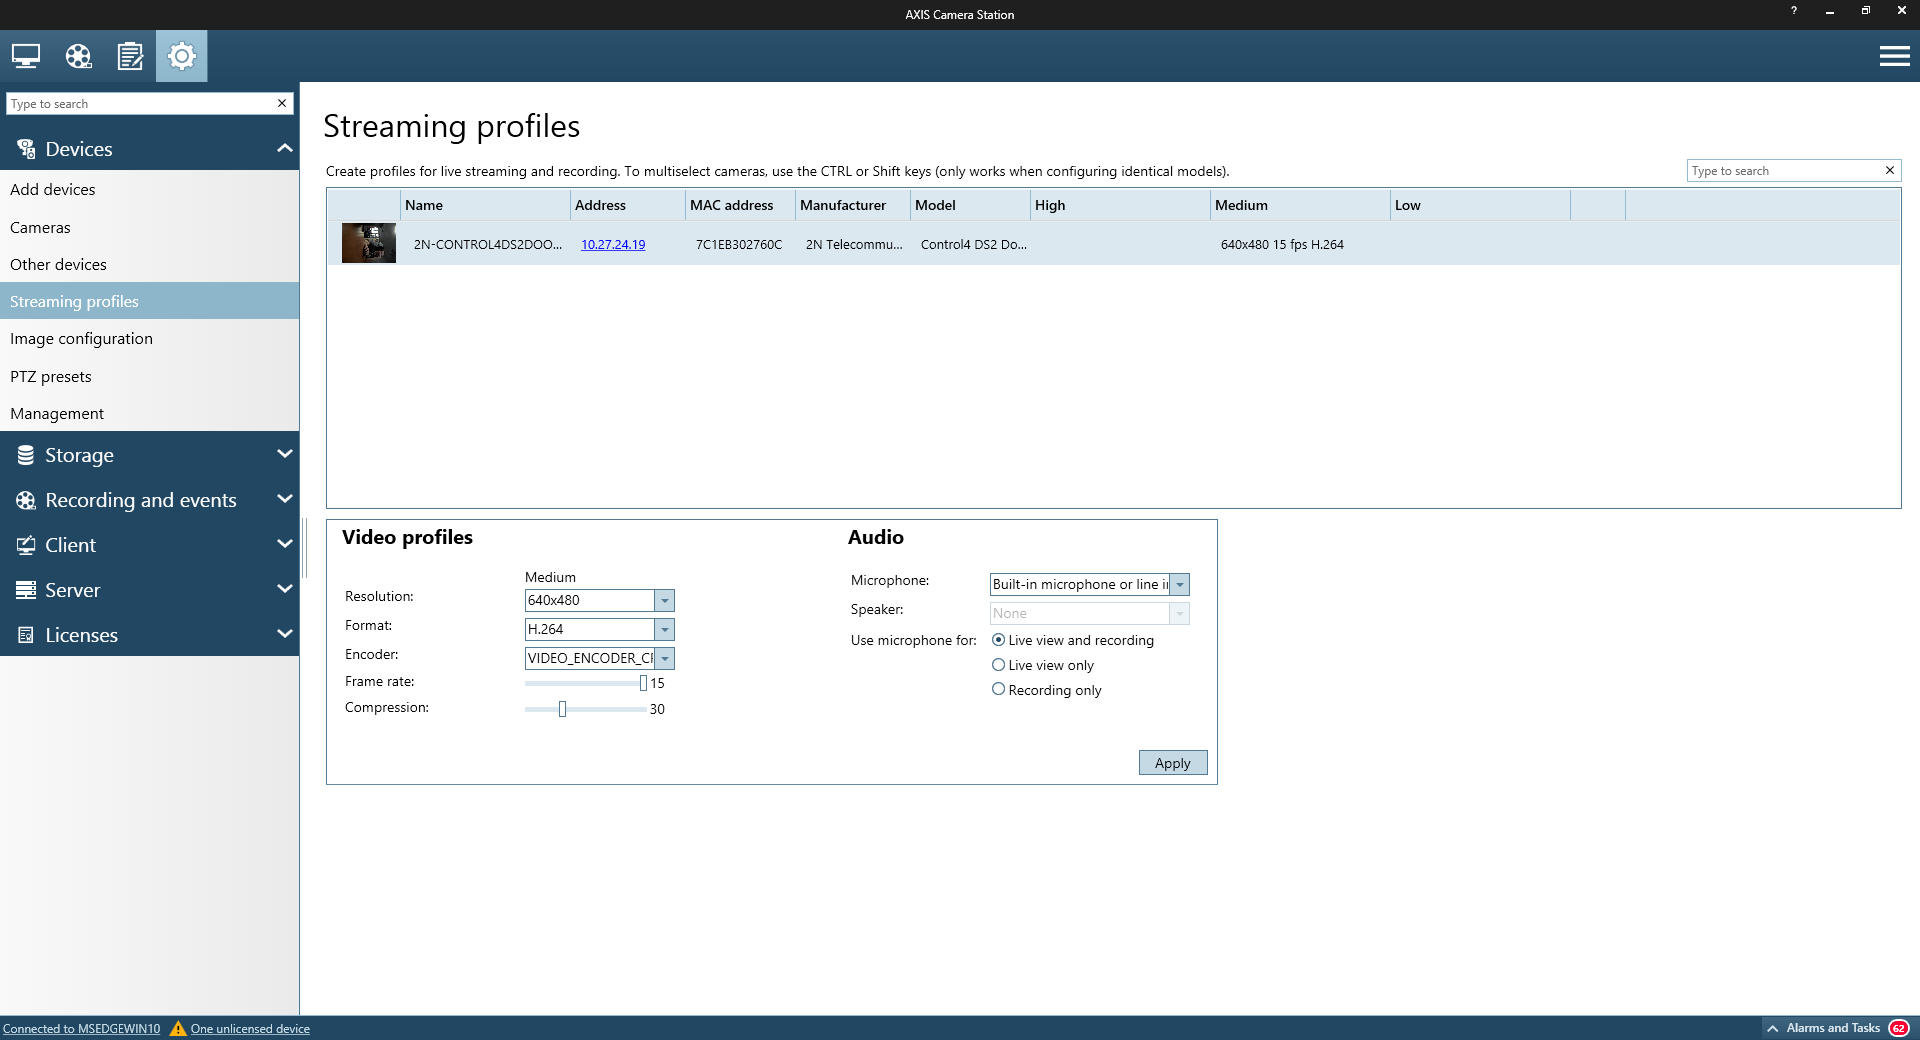
Audio from 2N IP Intercom is set automatically. You can check the parameter in the Menu Devices / Streaming profiles.
 |
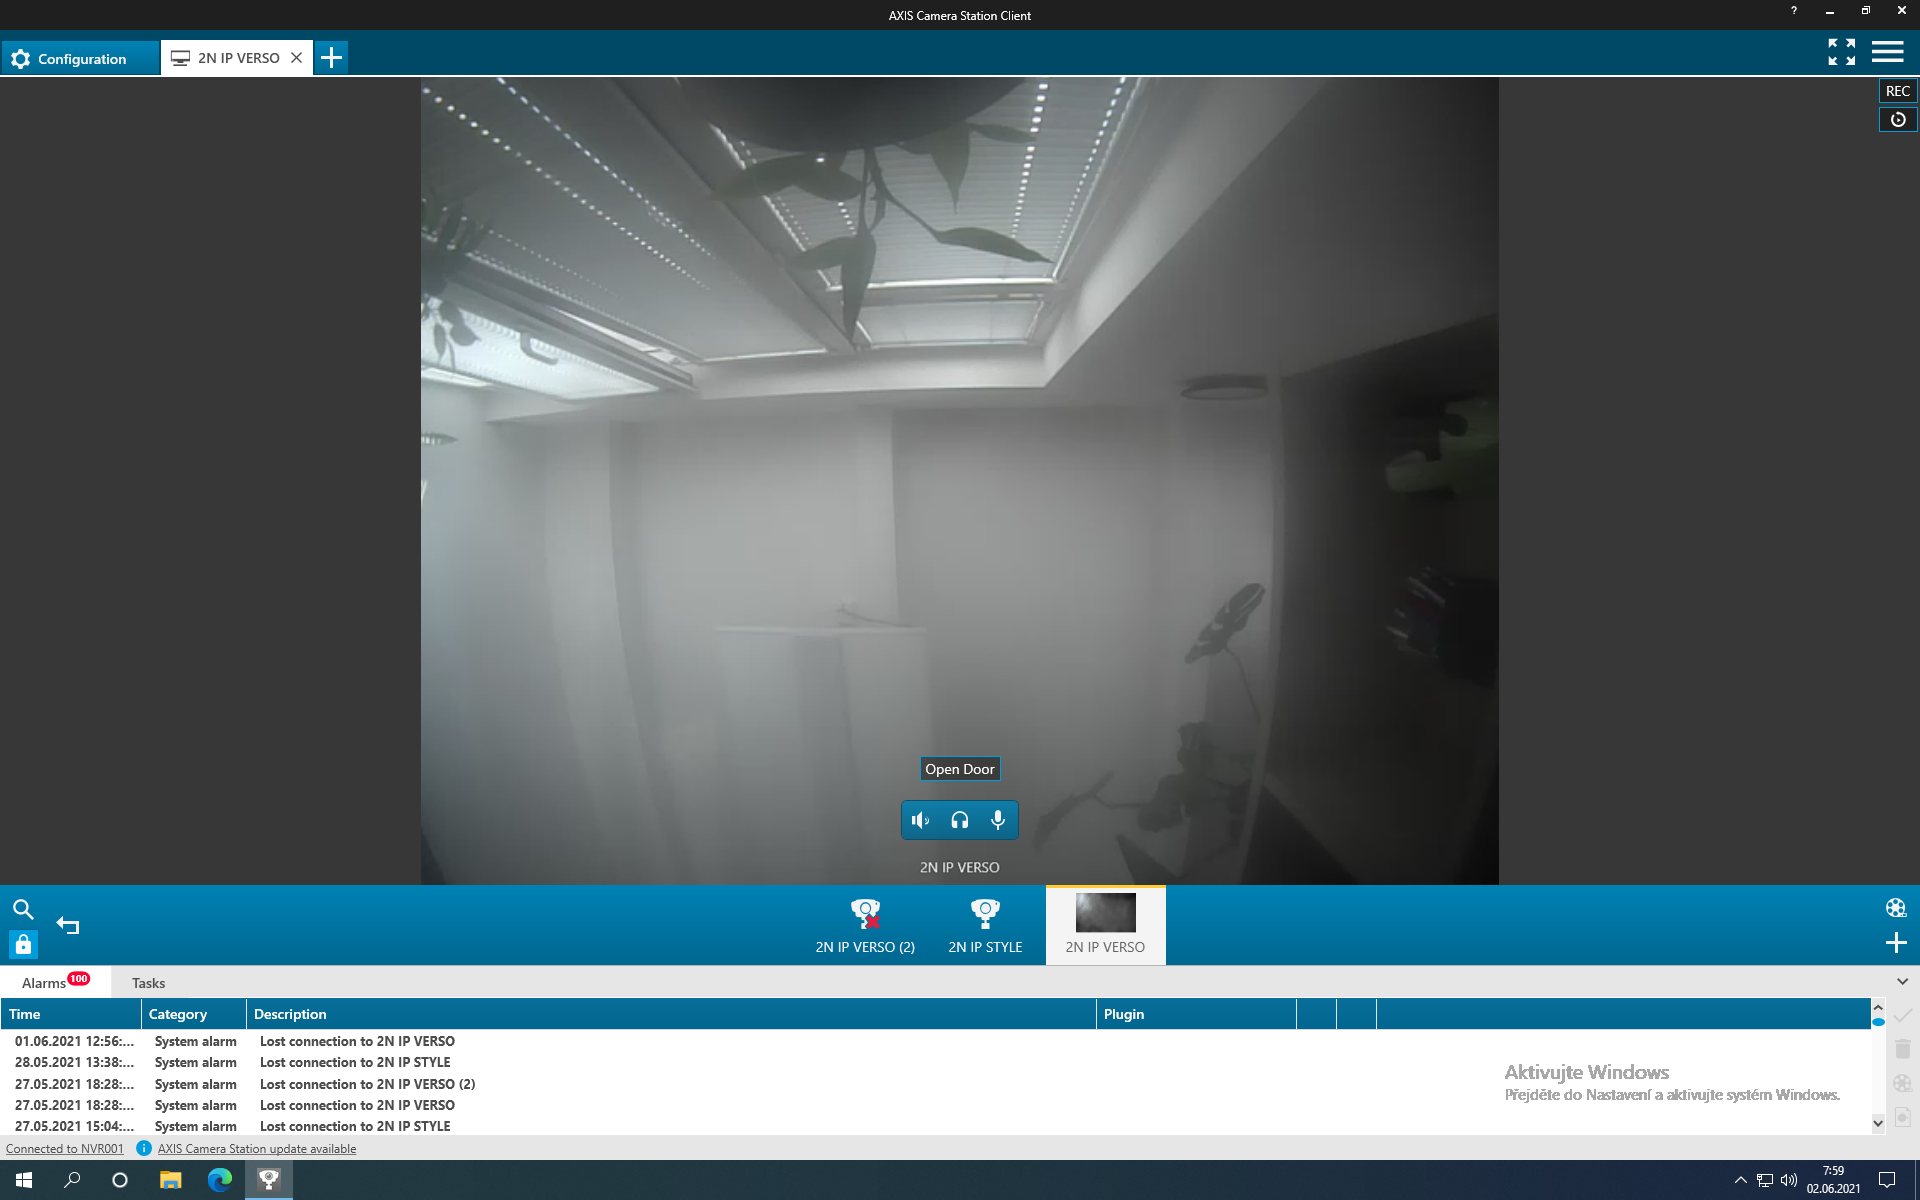
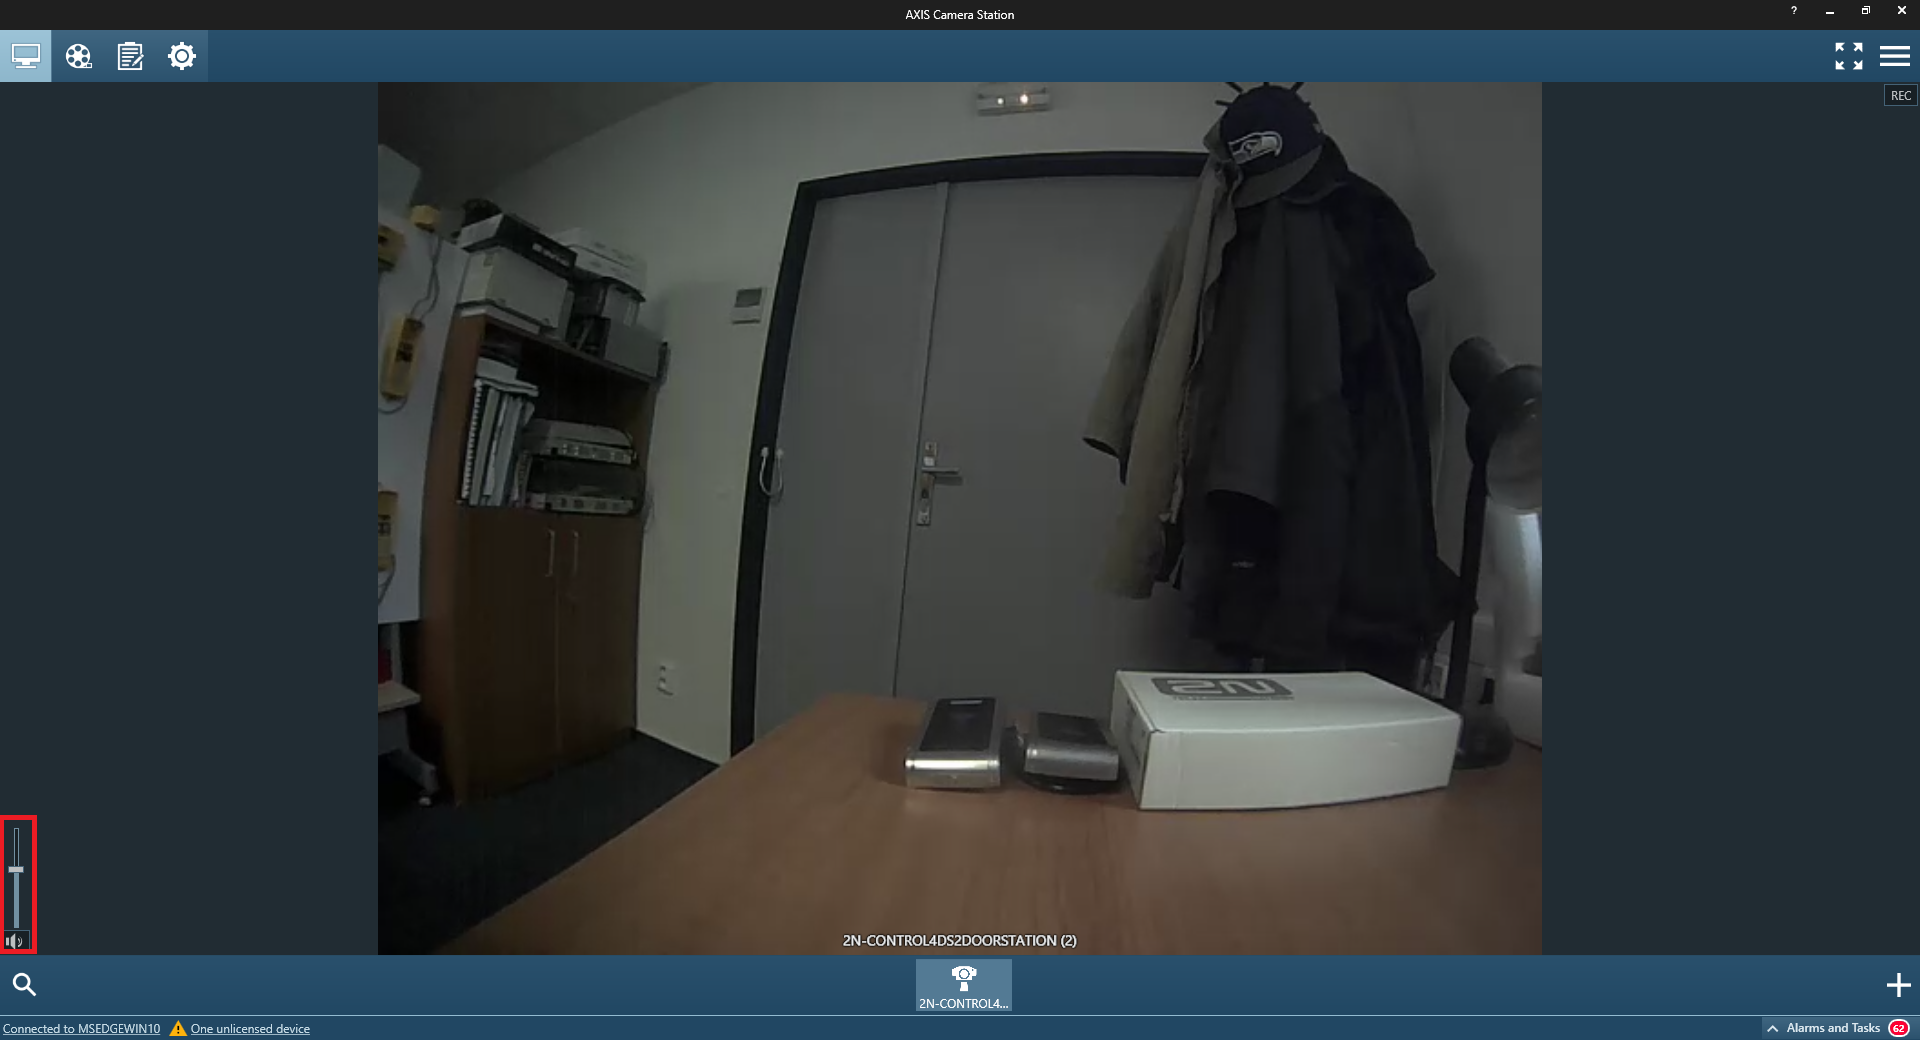
Now in live view, you can see panel for manipulating Volume of audio from 2N IP Intercom.
 |
From firmware version of 2N IP Intercom 2.30 please go to menu Streaming and enable function "Always allow audio for door stations".
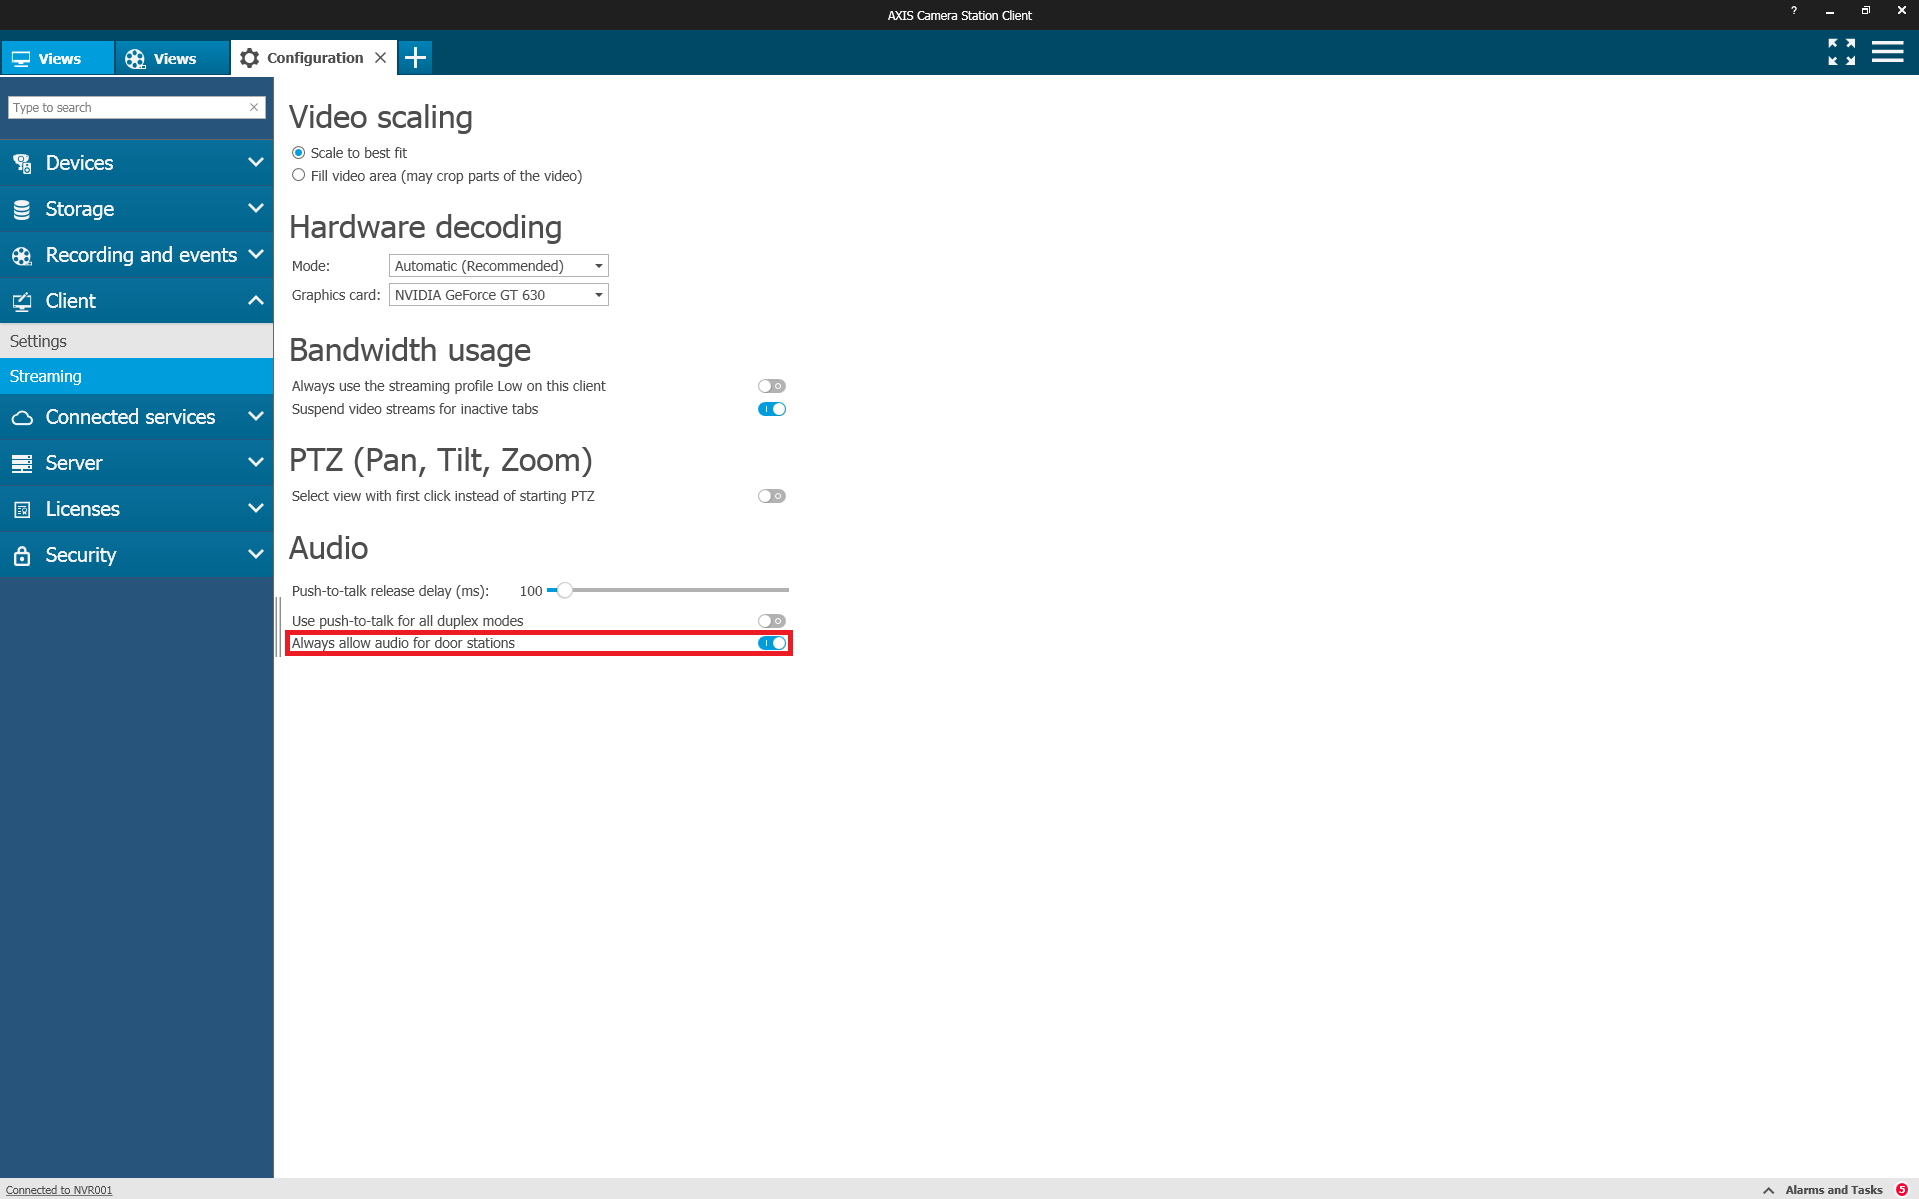 |
Go to menu View. In live view you can see button for speaking. The function is supported only for 2N IP Intercoms (not for 2N SIP devices - SIP Audio Converter, SIP Speaker Horn, SIP Speaker Wall Mounted).
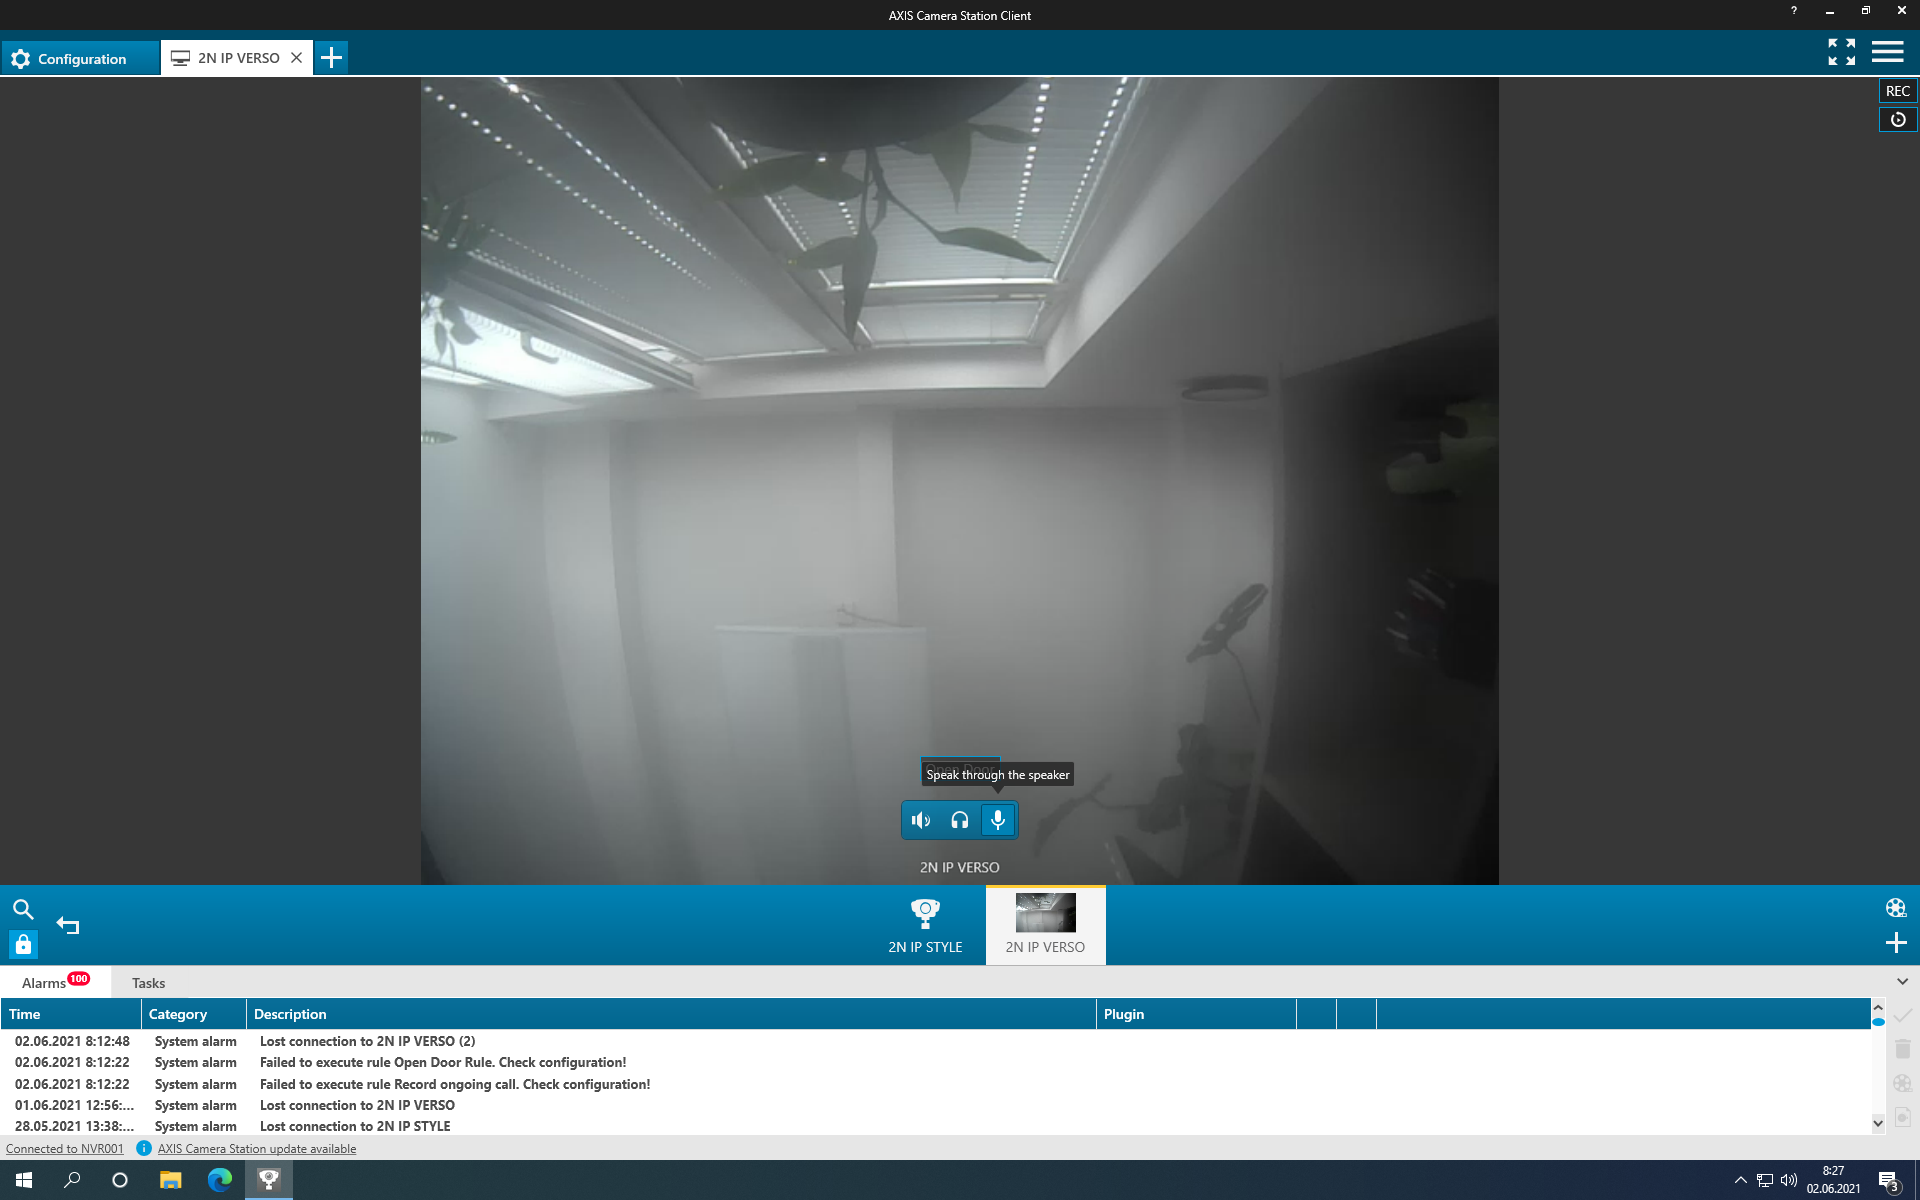 |
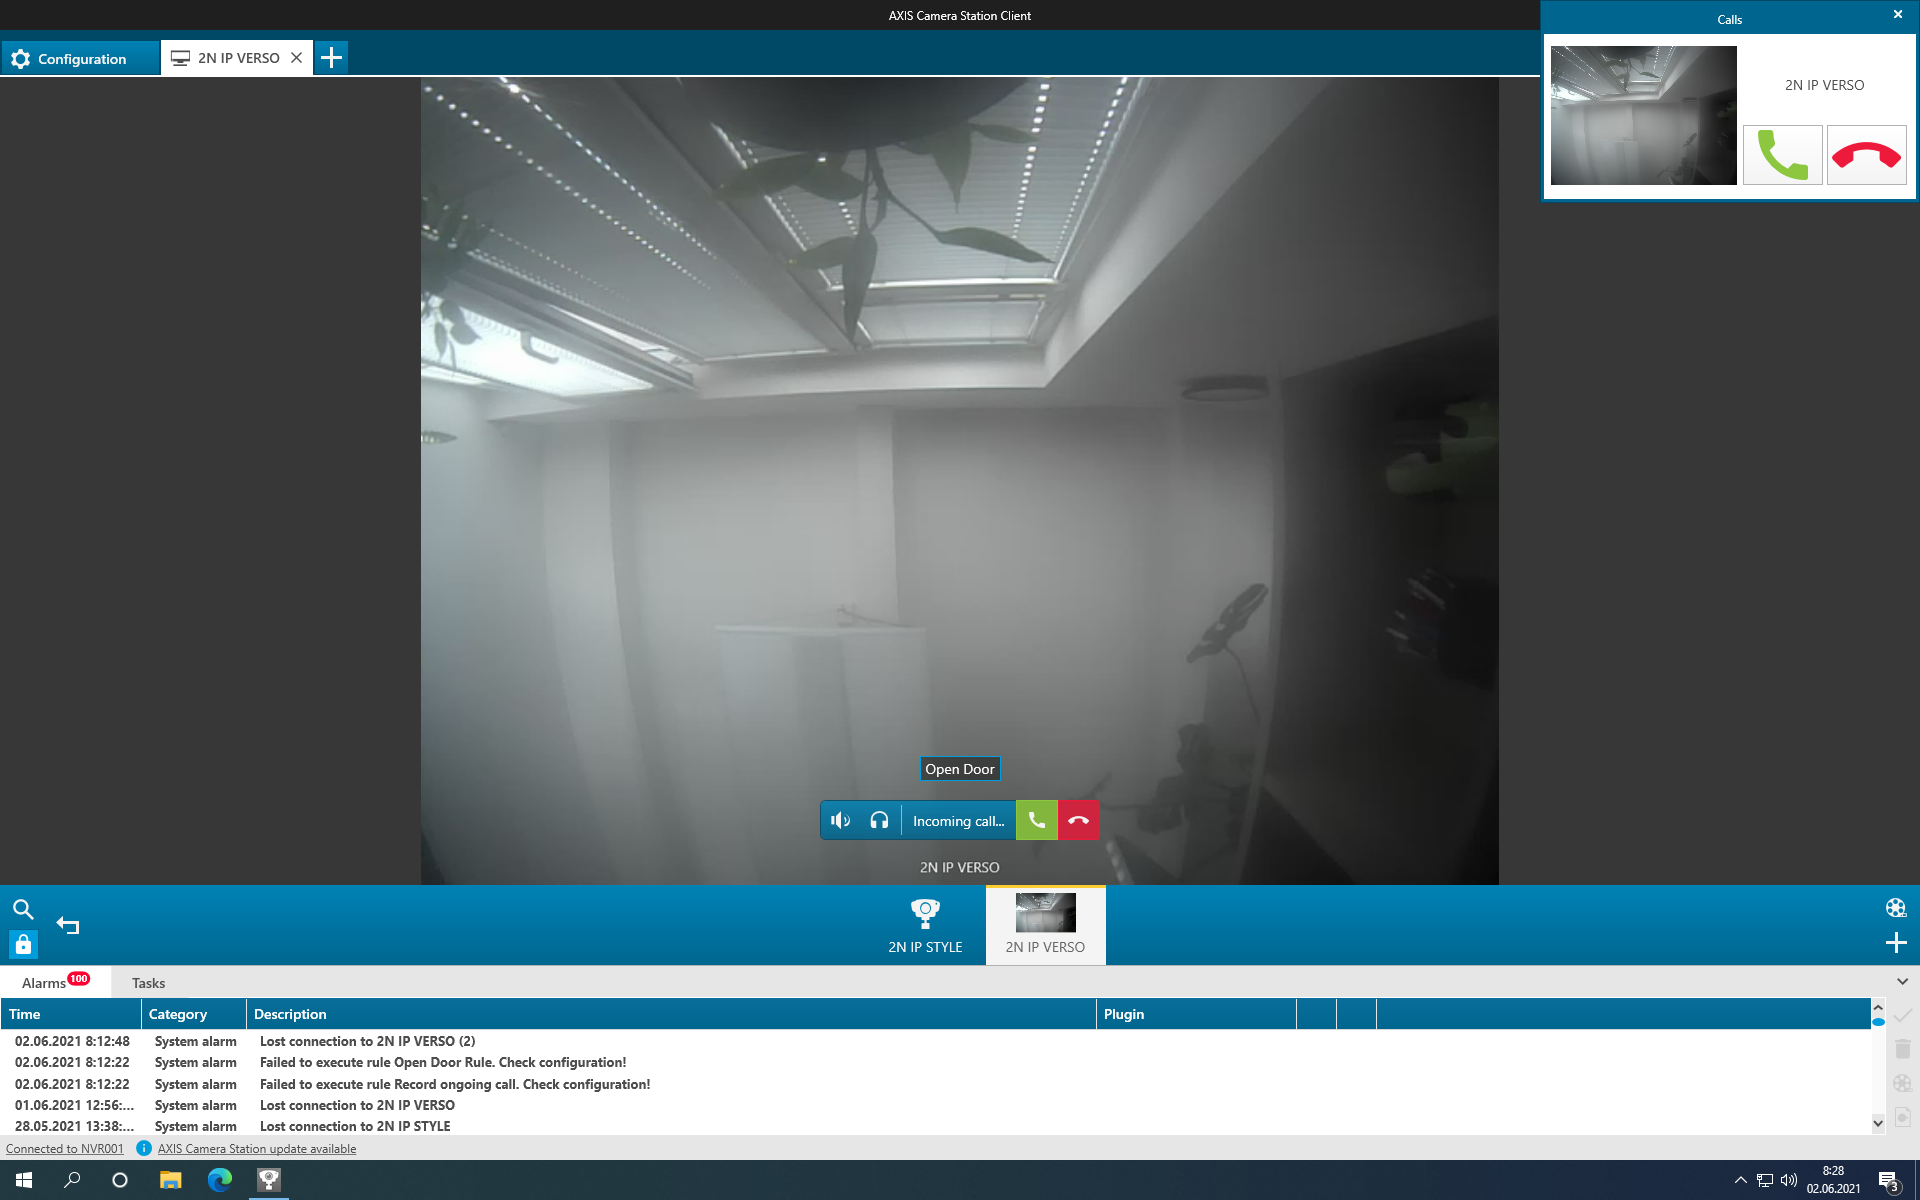 |
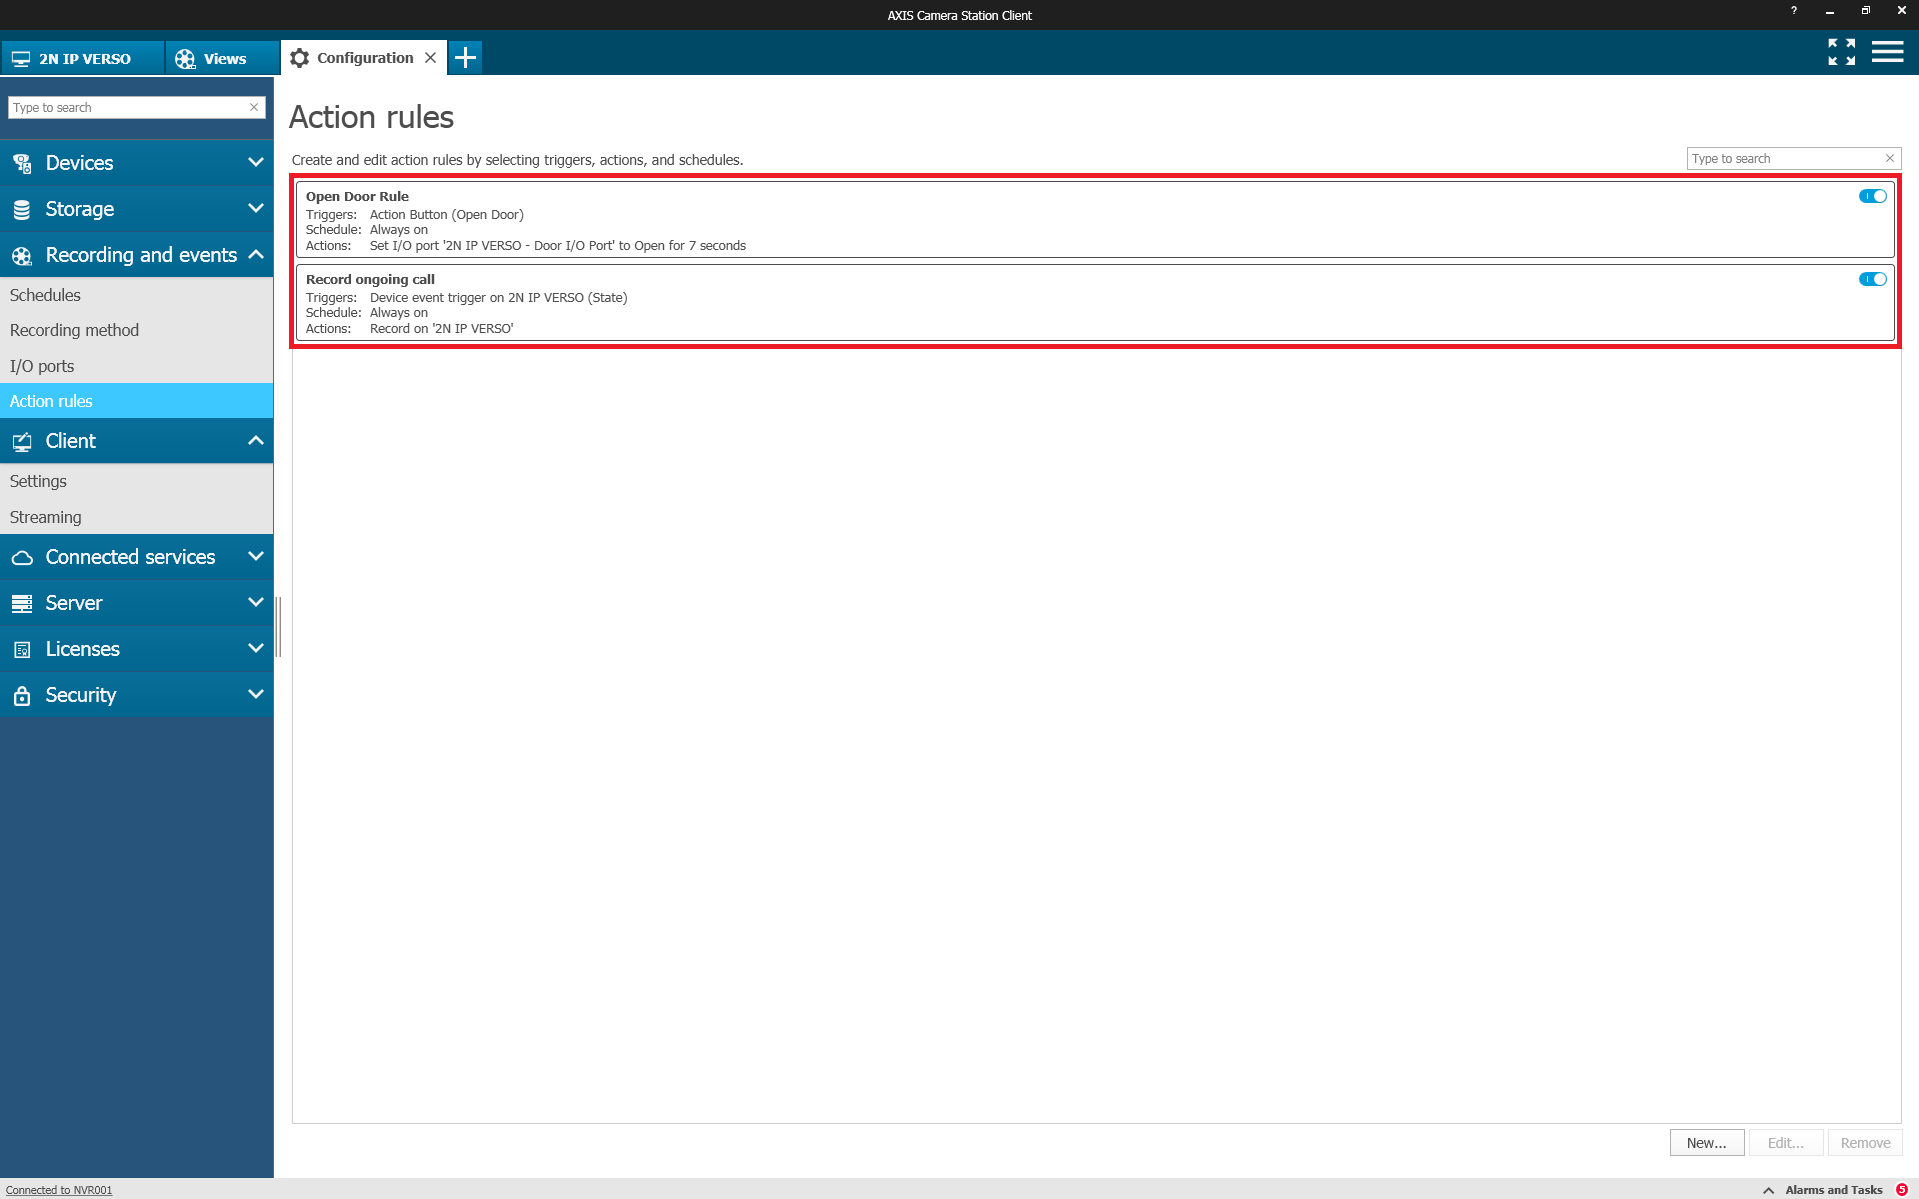
From firmware version of 2N IP Intercom 2.30 all settings are set automatically. Action rule for "Open Door Rule" and "Record ongoing call".
 |
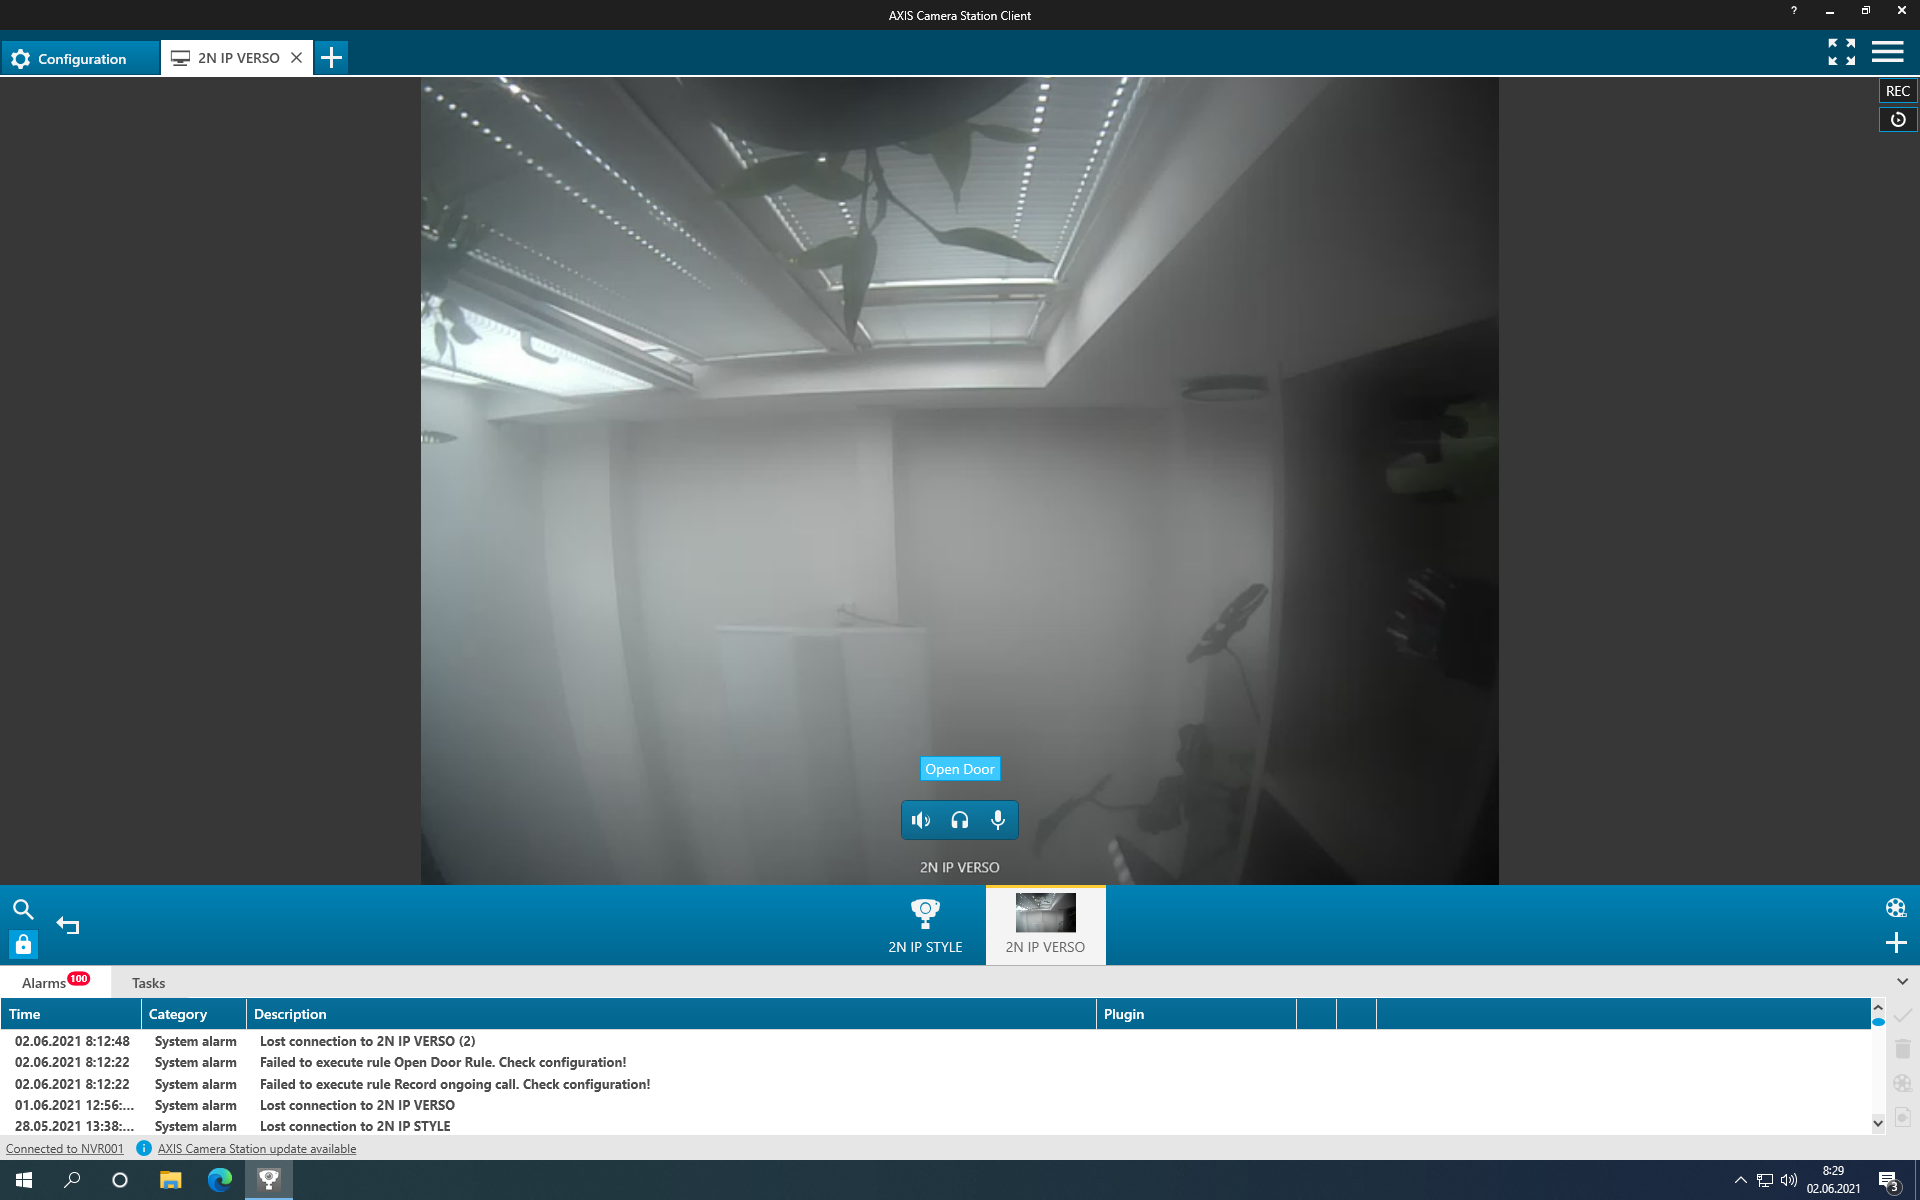
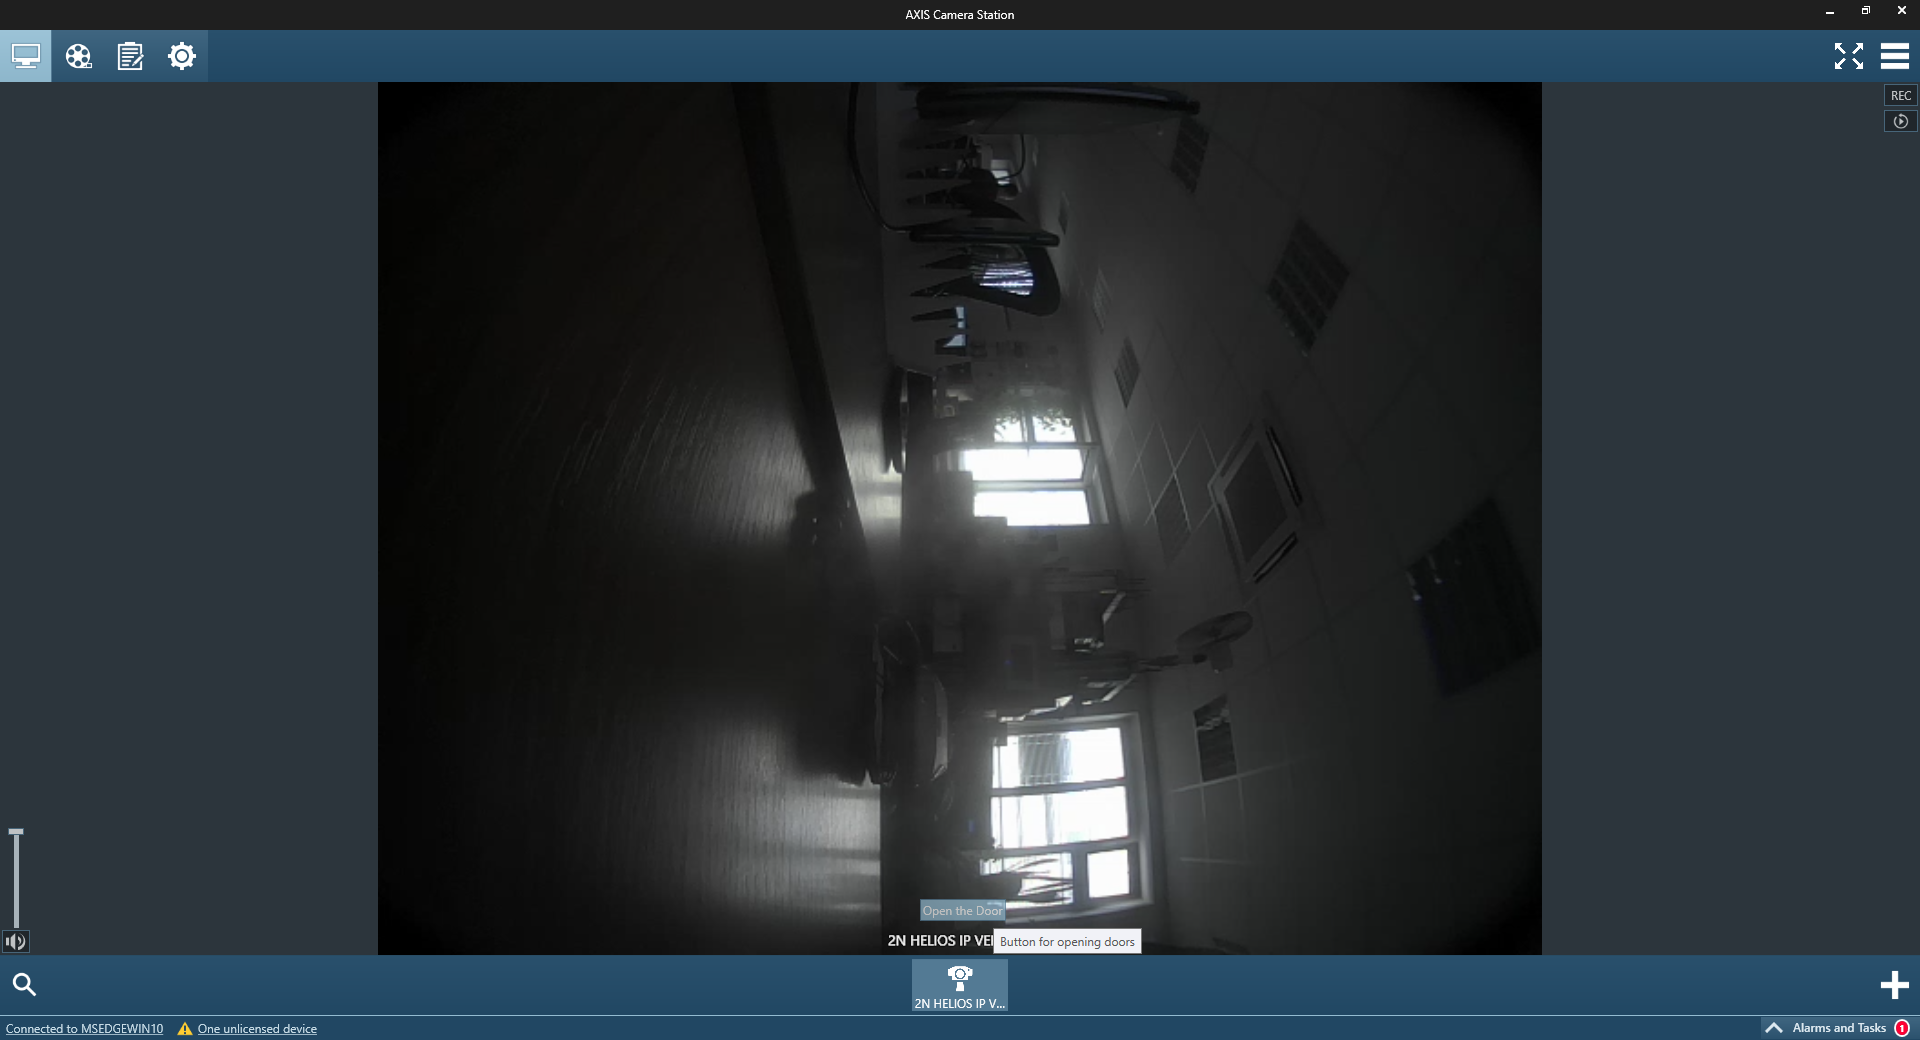
Go to menu View. In live view you can see button for "Open Door".
 |
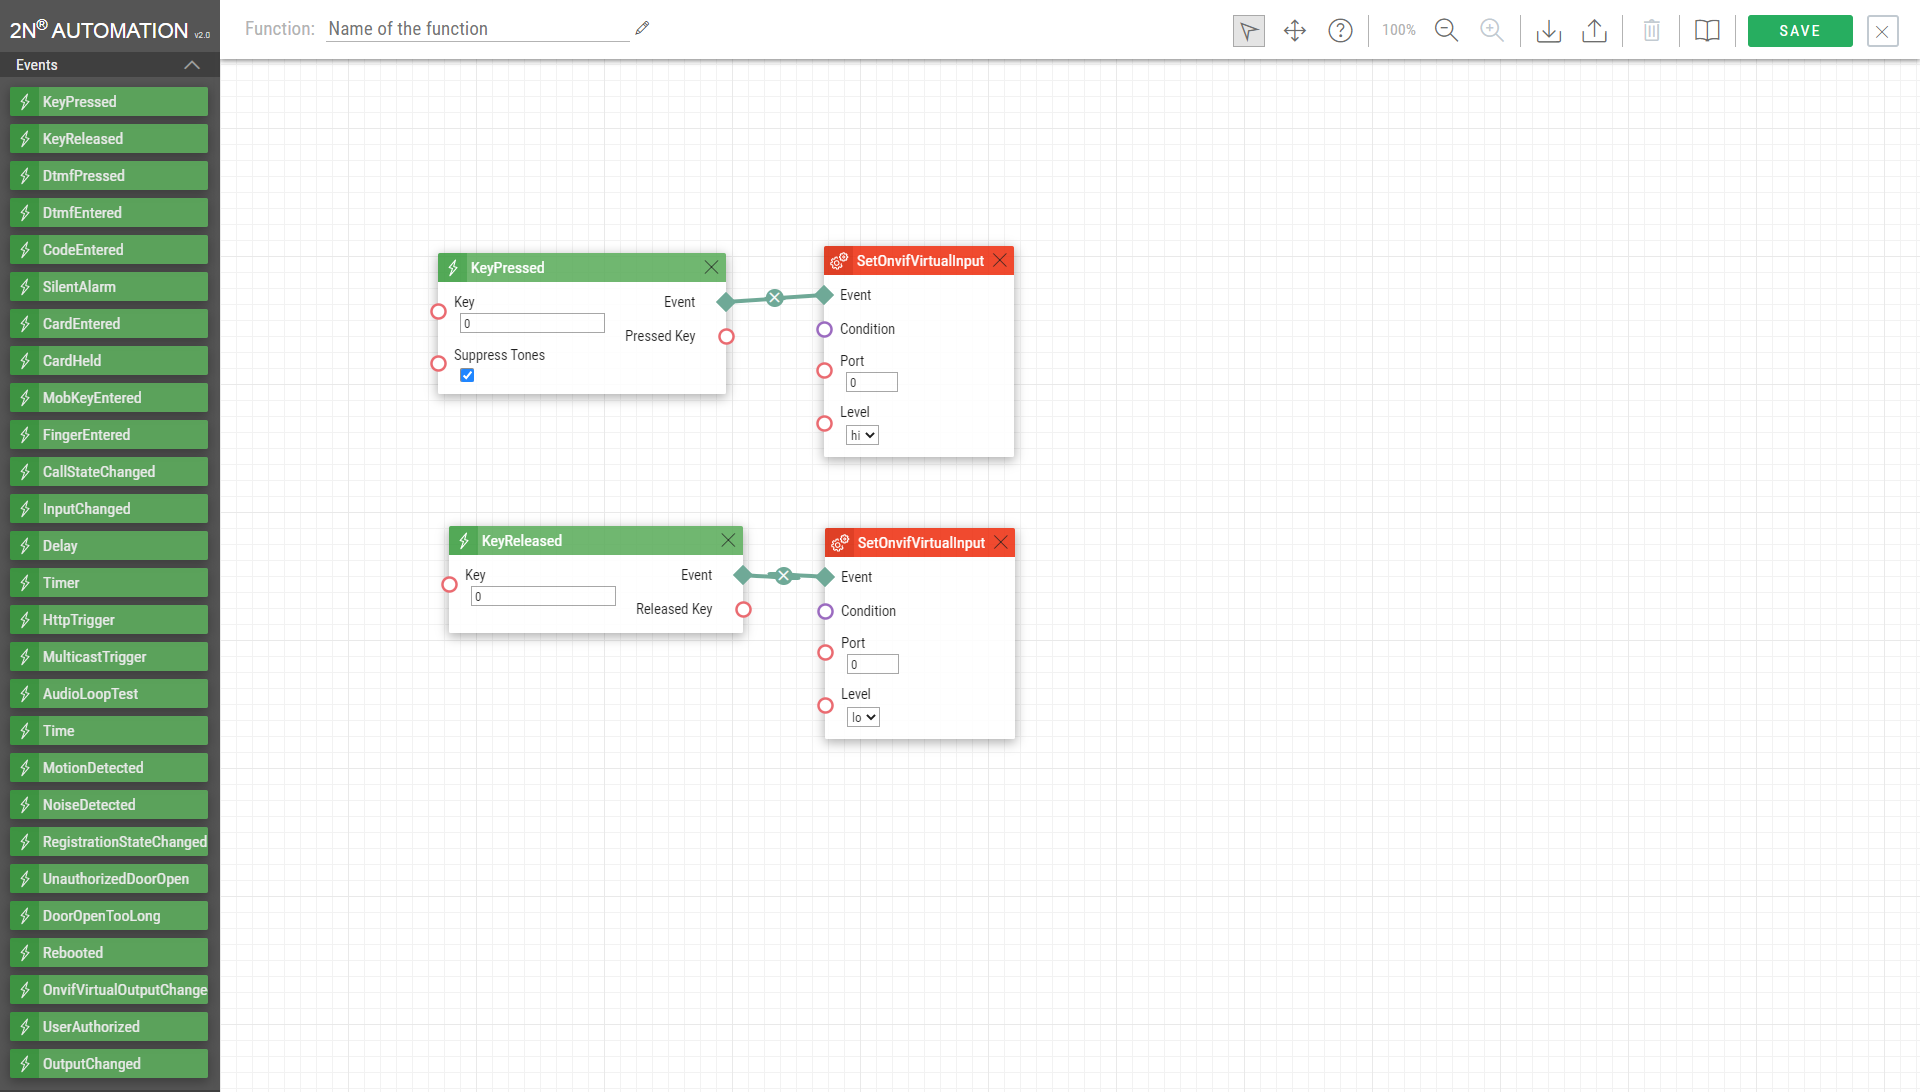
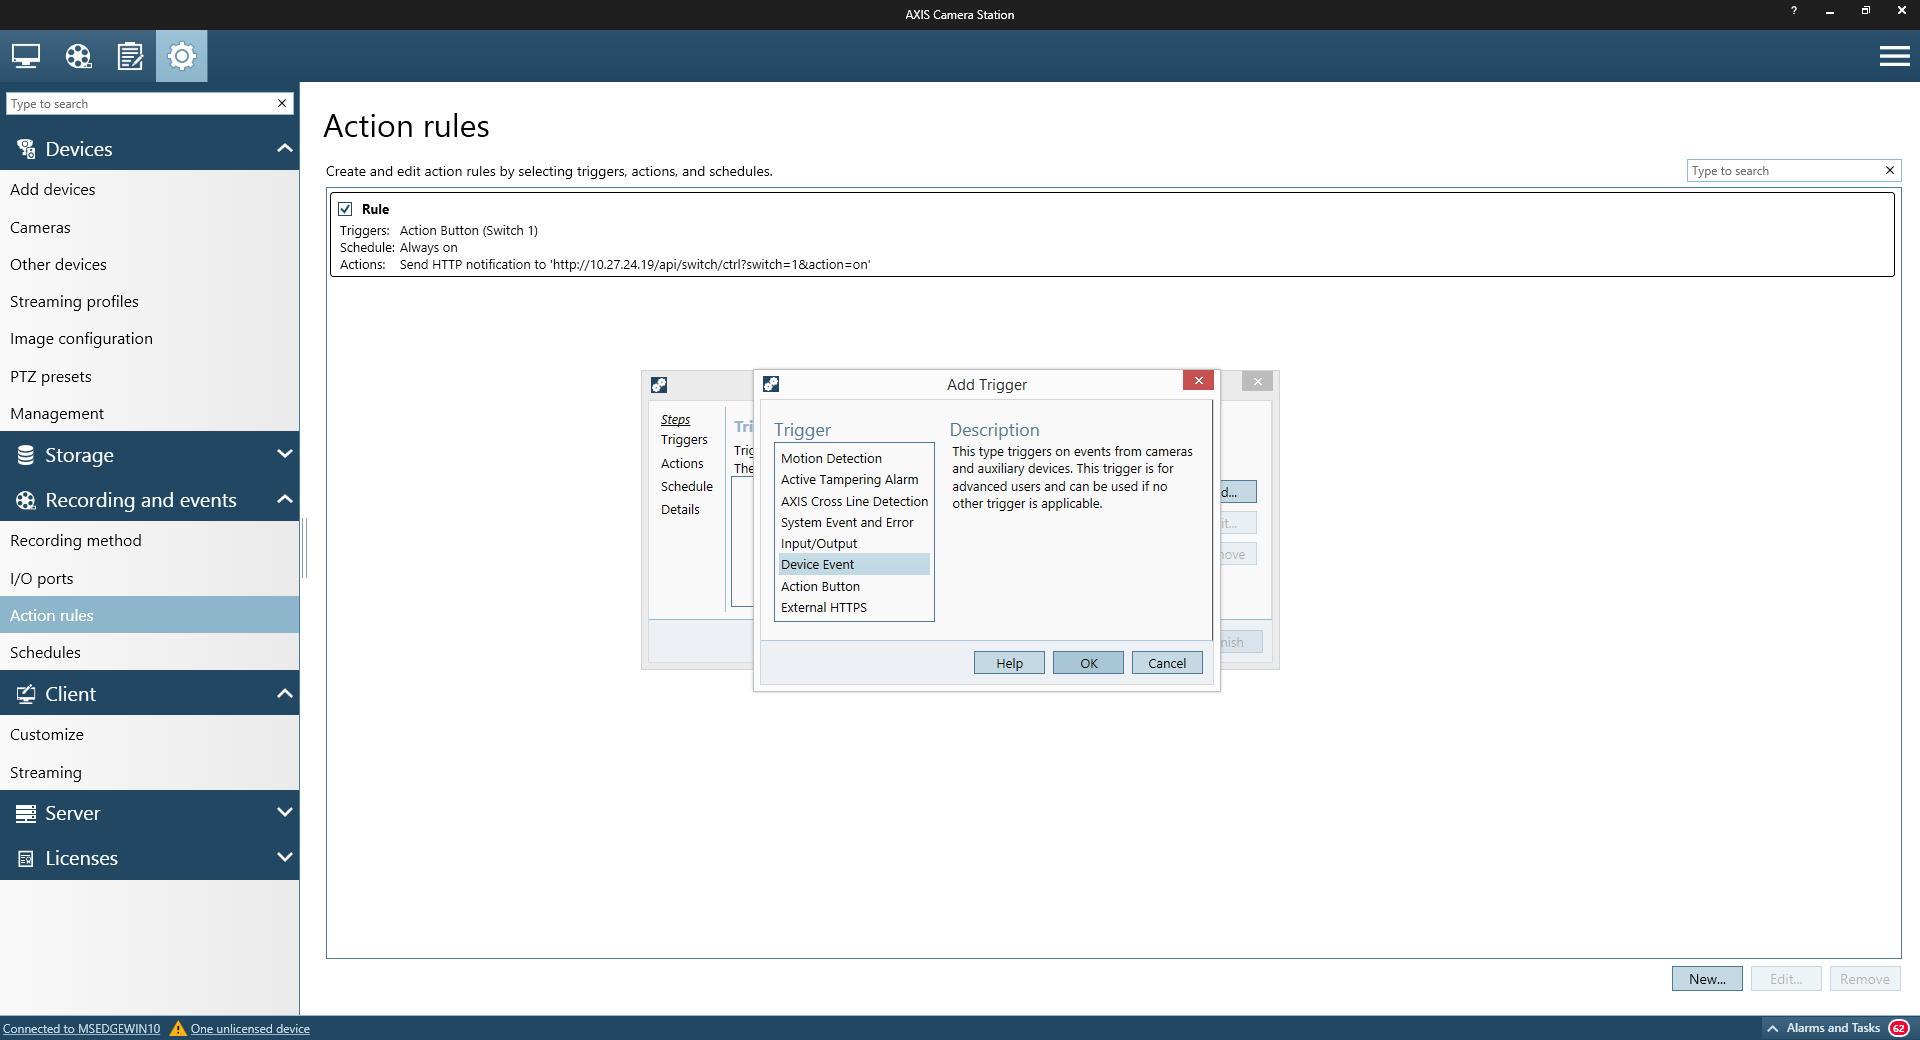
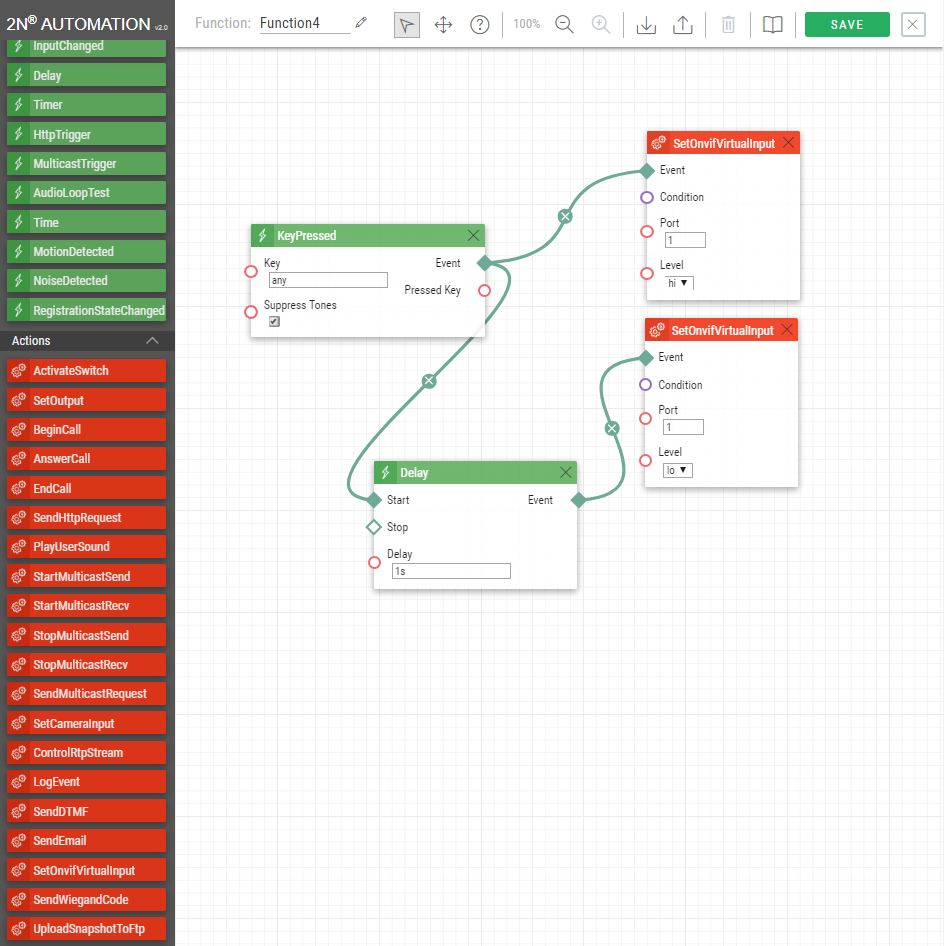
2N IP Intercom can send changes of inputs, this can be used to carry out some action, or to log such an event on side of Axis Camera Station. At first it is needed to set another Action rule in "Gears" section / Recording and events/ Action rules. To add new Rule on switch click on New. In pop-up dialog click on Add to add trigger. And choose Device Event and confirm with OK.
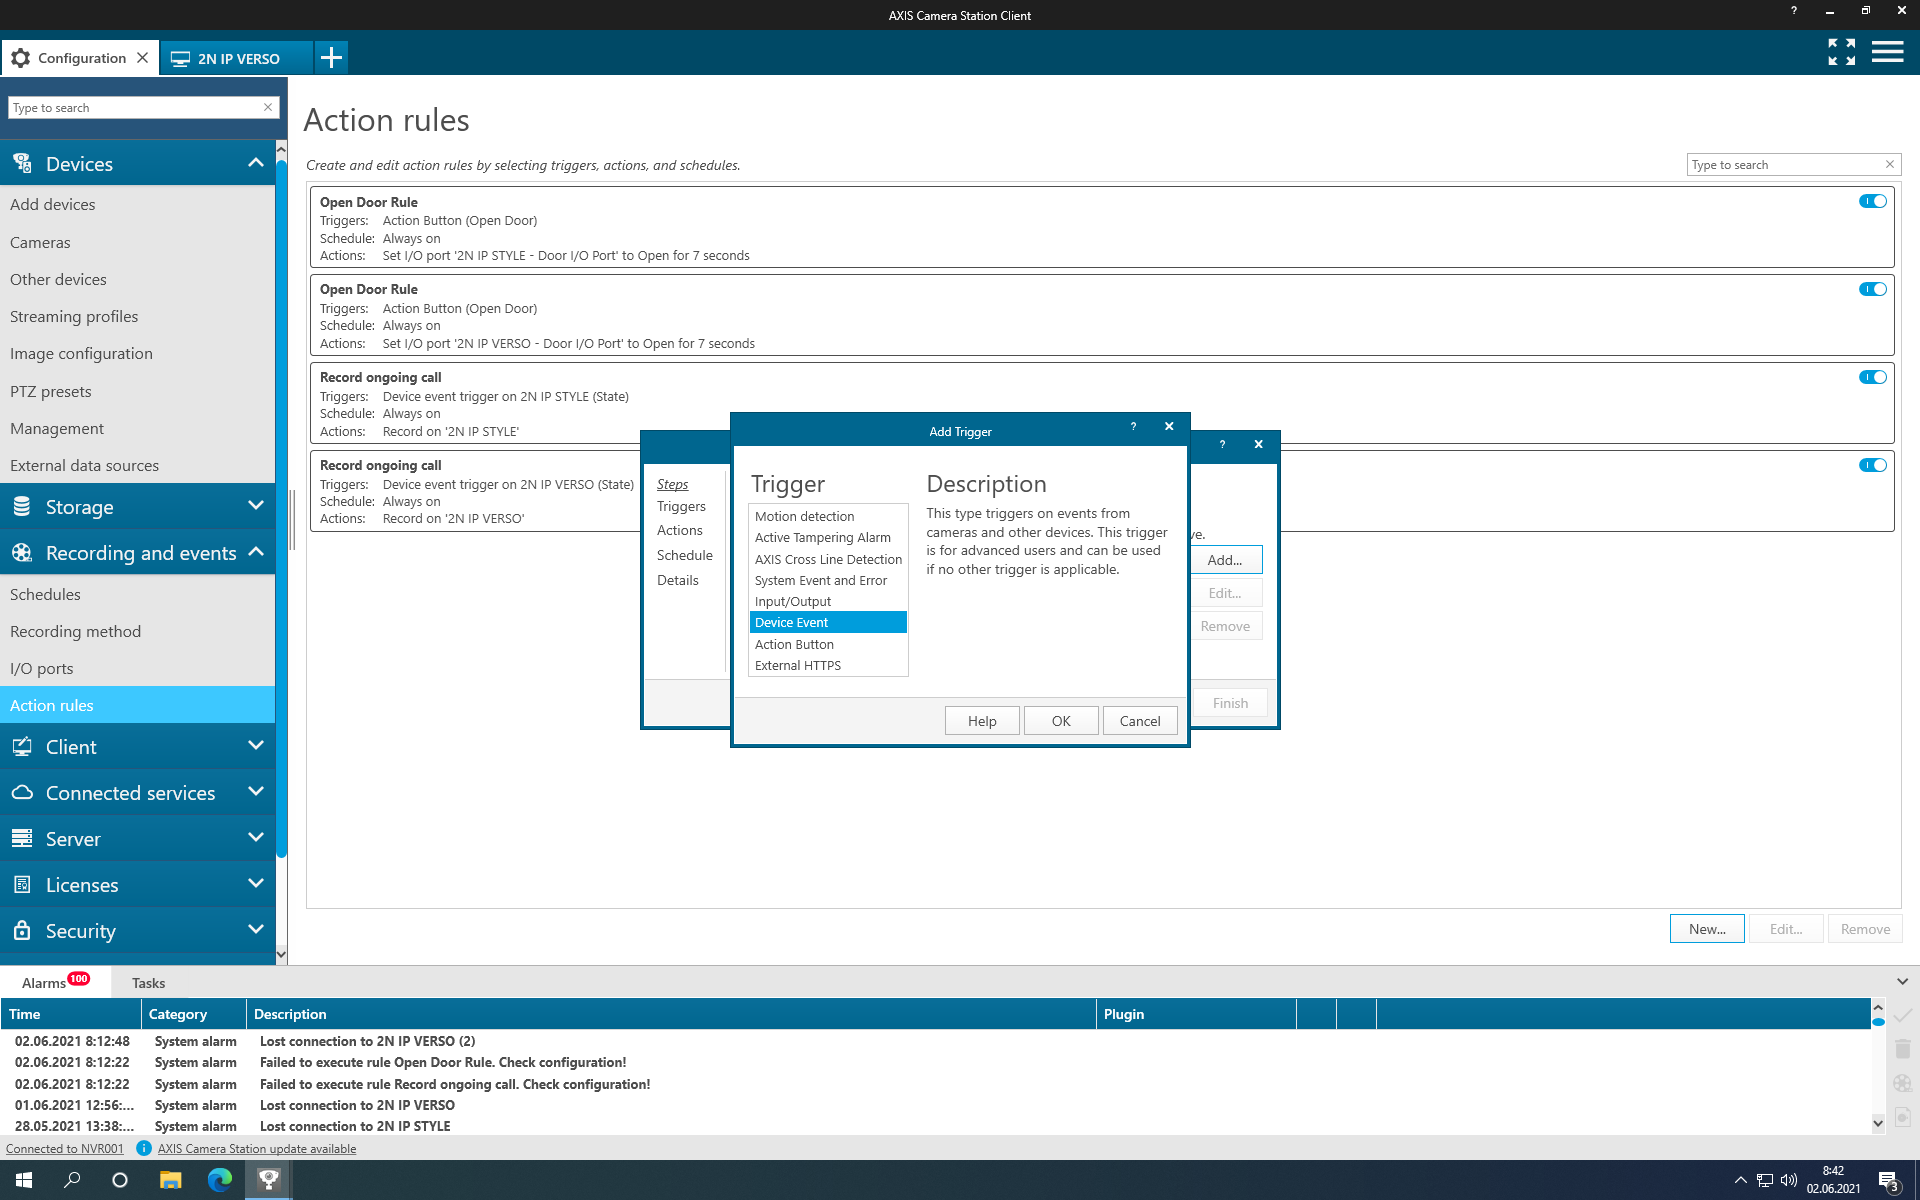 |
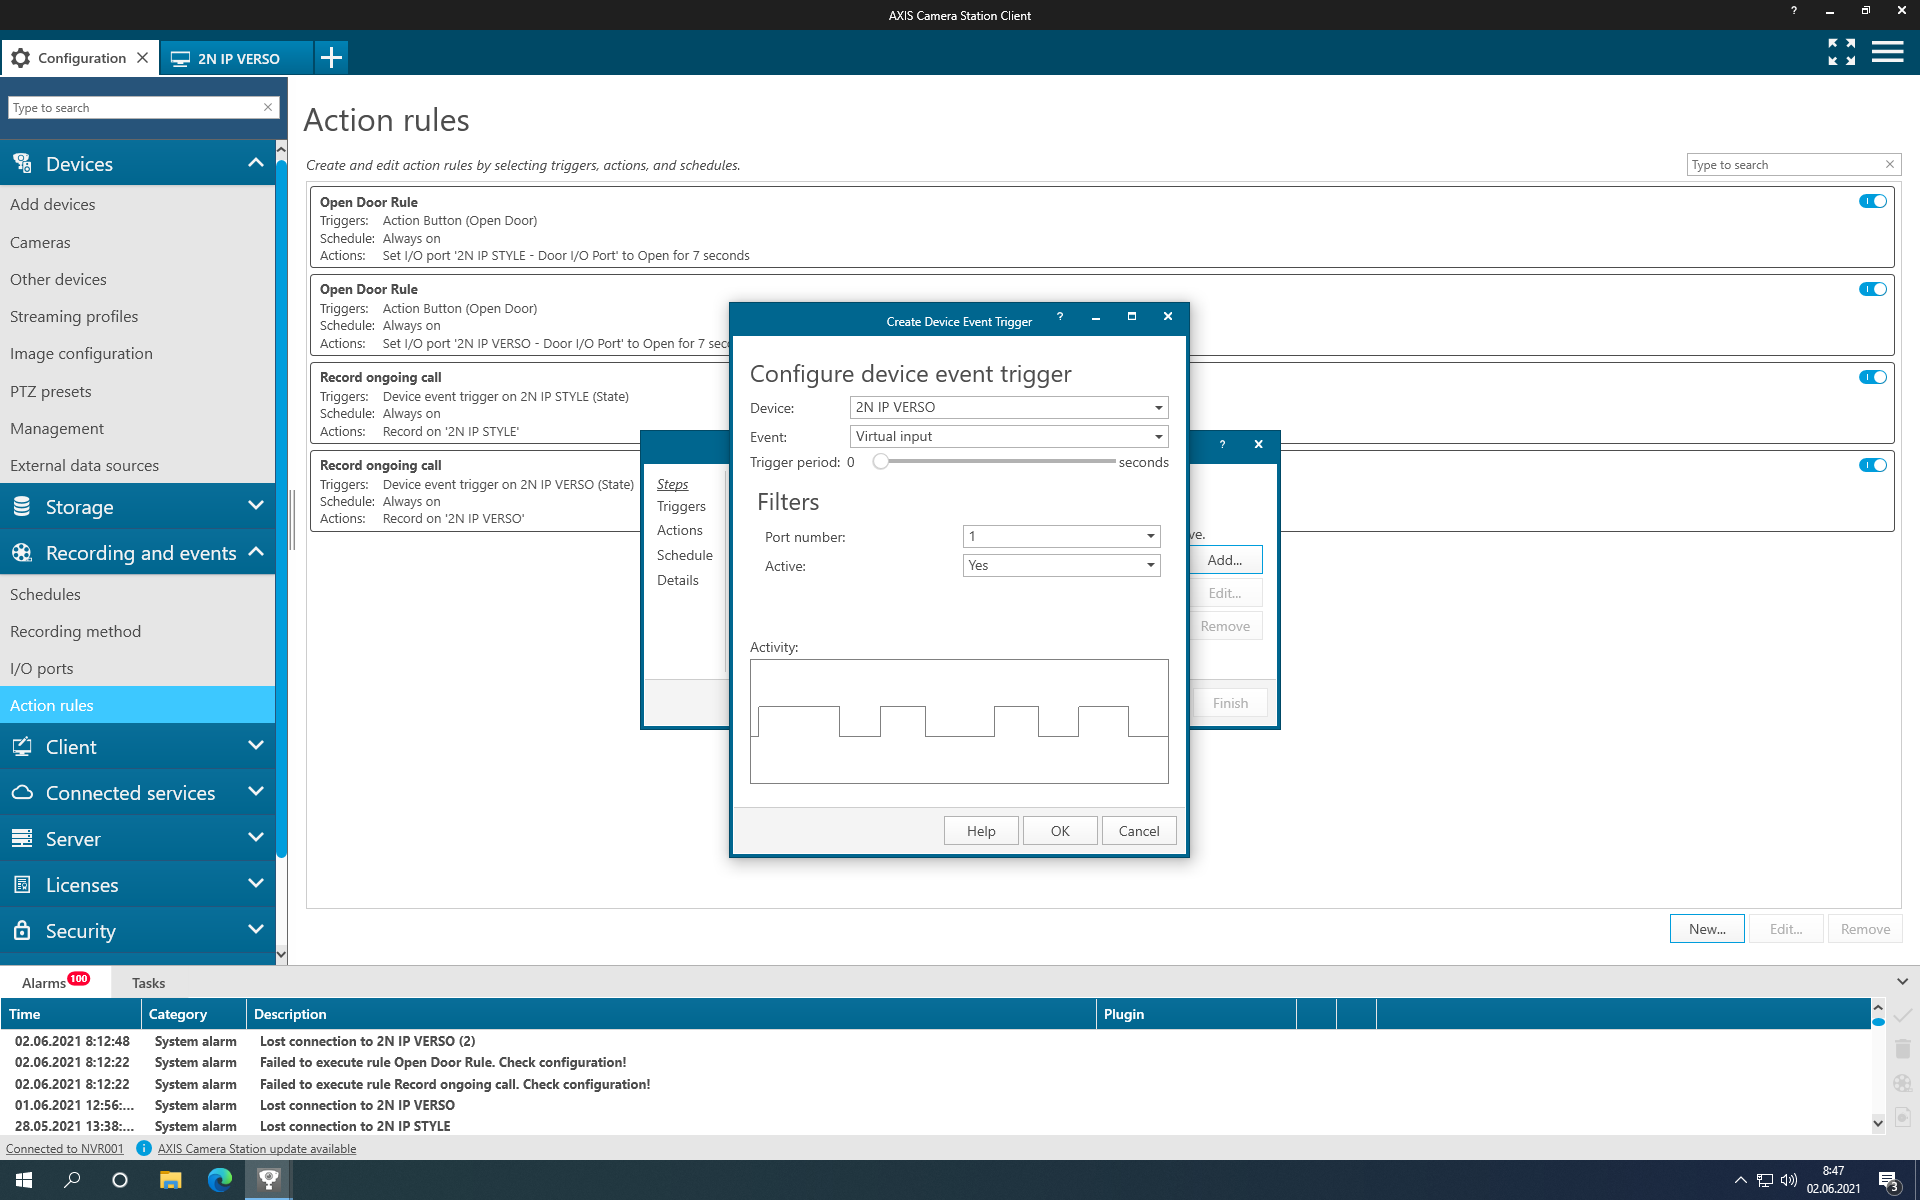
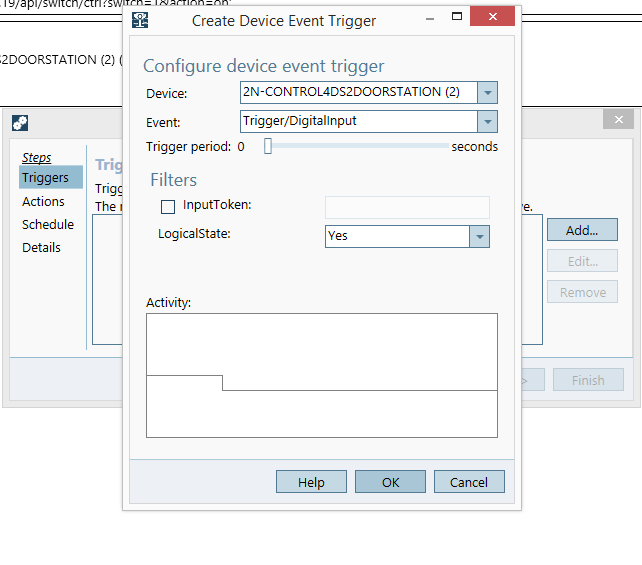
In following window choose appropriate device (2N IP Intercom), Event "Virtual input", Port number, Active (State) and confirm with OK.
 |
 |
 |
 |
Documents
HOW TO - Add 2N Intercoms to AXIS Camera Station
Tested Features (from 5.13 to 5.27)
2N IP Intercom should be found by tool for adding cameras into the AXIS Camera Station VMS. Go to "Gears" menu, Devices and Add devices. Check your 2N IP Intercom and click Add.
 |
In case you cannot check your 2N IP Intercom click on blue text "Enter password" and enter ONVIF credentials created on 2N IP Intercom.
 |
 |
 |
 |
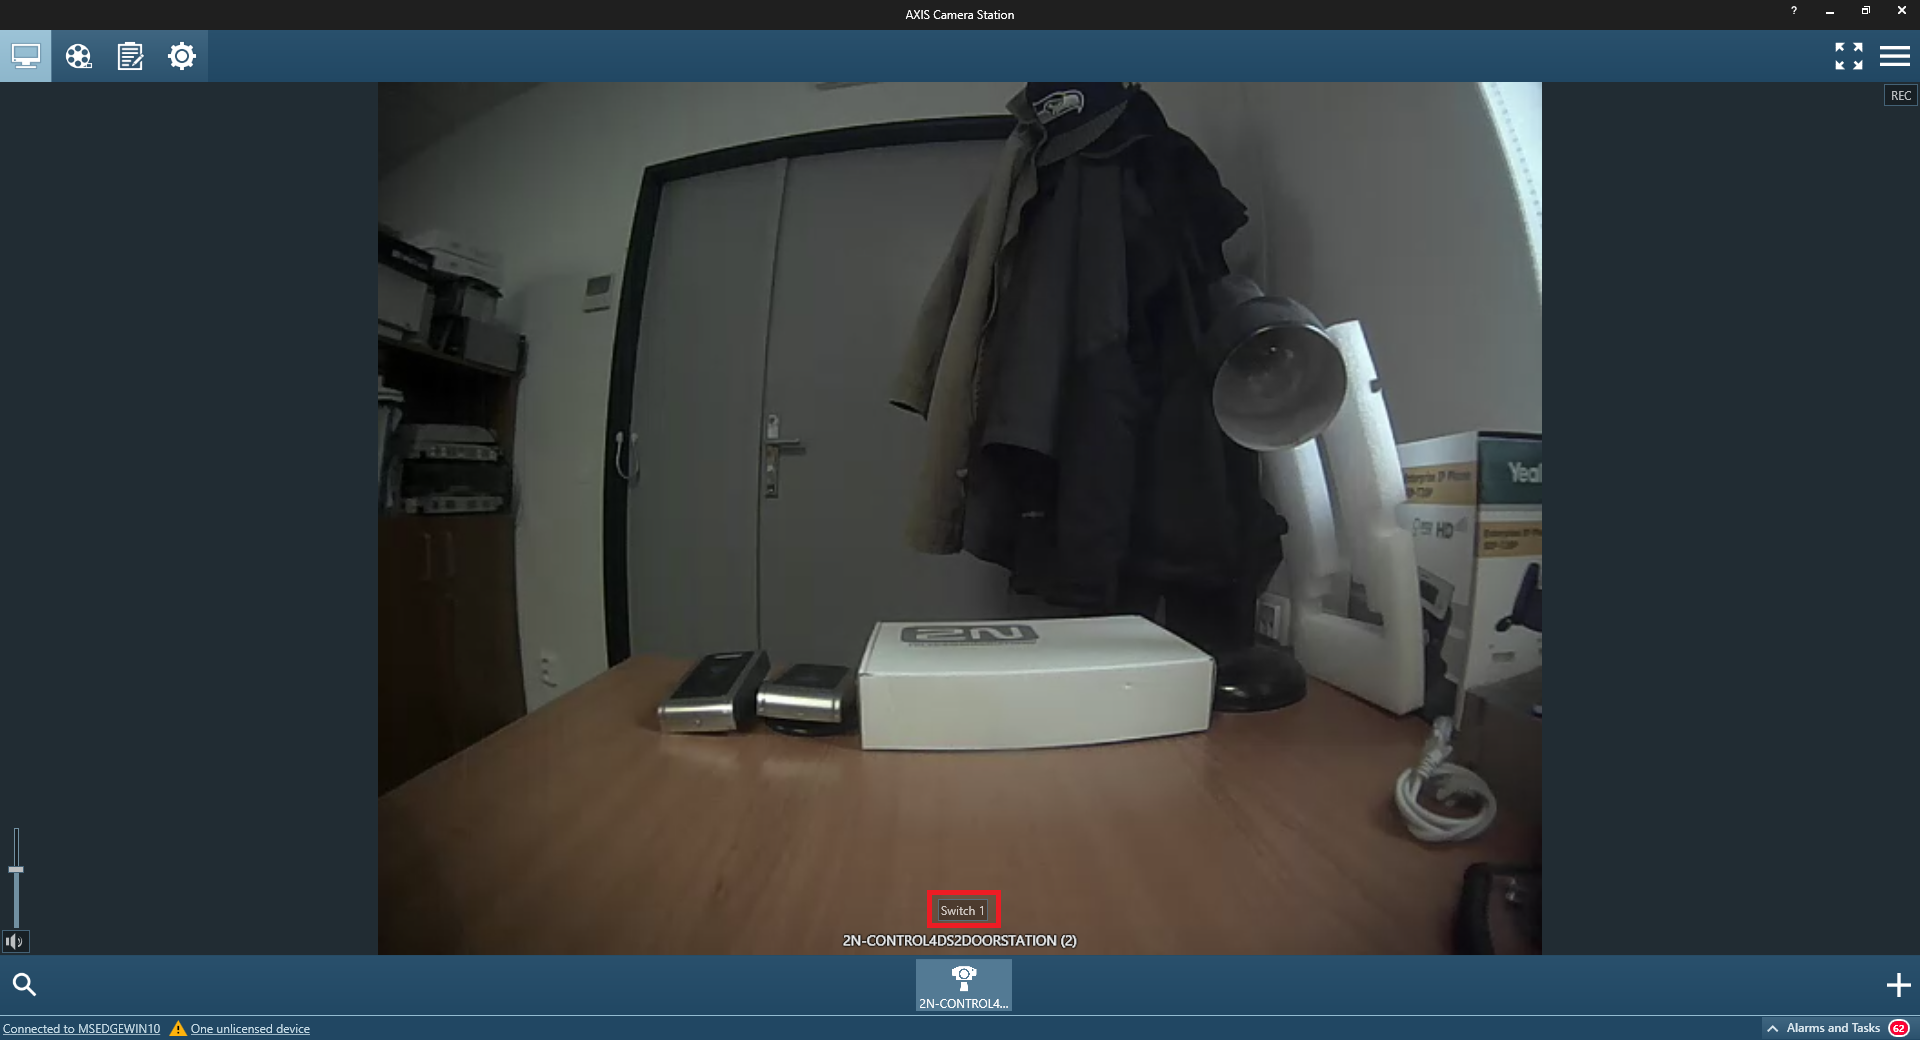
Live Video stream from your 2N IP Intercom can be see by clicking on upper leftmost corner of the AXIS Camera Station GUI as highlighted on following picture.
 |
To enable Audio from 2N IP Intercom go to Devices/ Streaming profiles and check the 2N IP Intercom. In lower section of the screen in Audio se Microphone to "Built in microphone or line-in" and click Apply.
 |
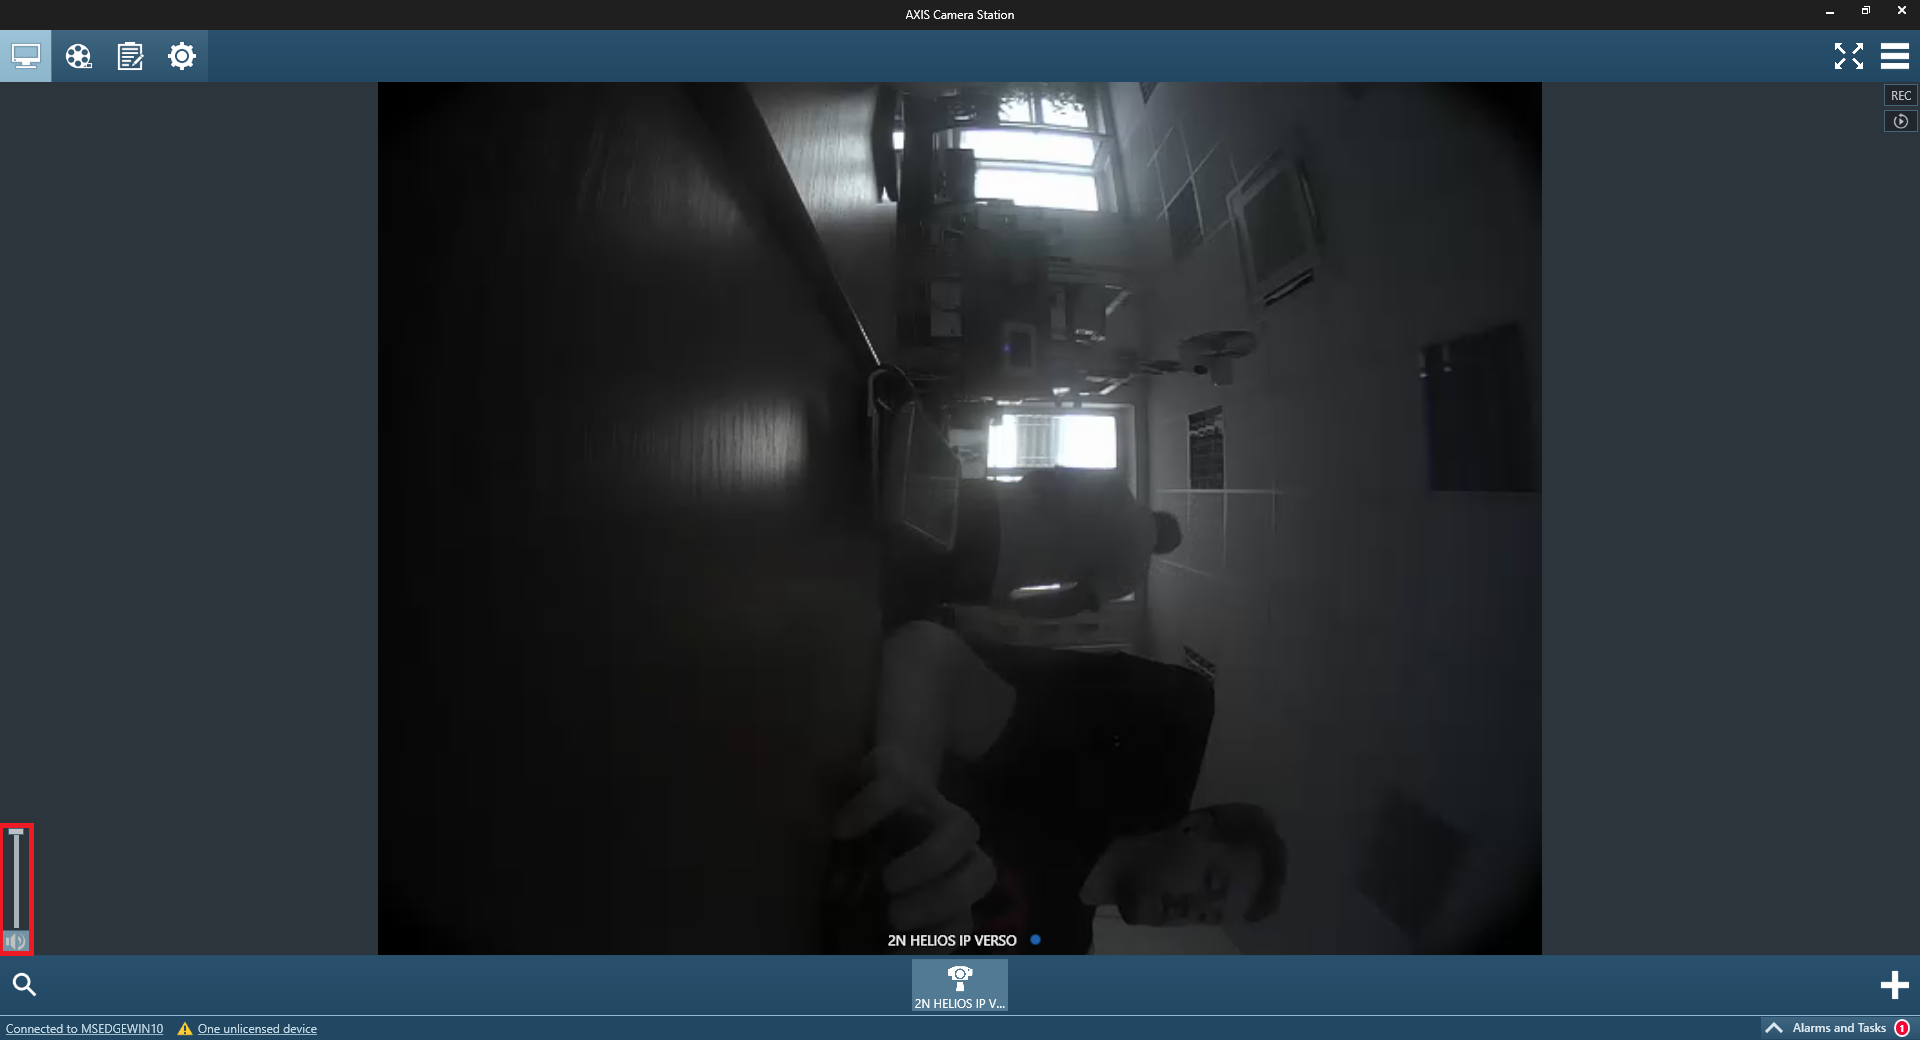
Now in live view, you can see panel for manipulating Volume of audio from 2N IP Intercom.
 |
To enable switch control from live view, go to settings through "gears" menu / Recording and events / Action Rules.
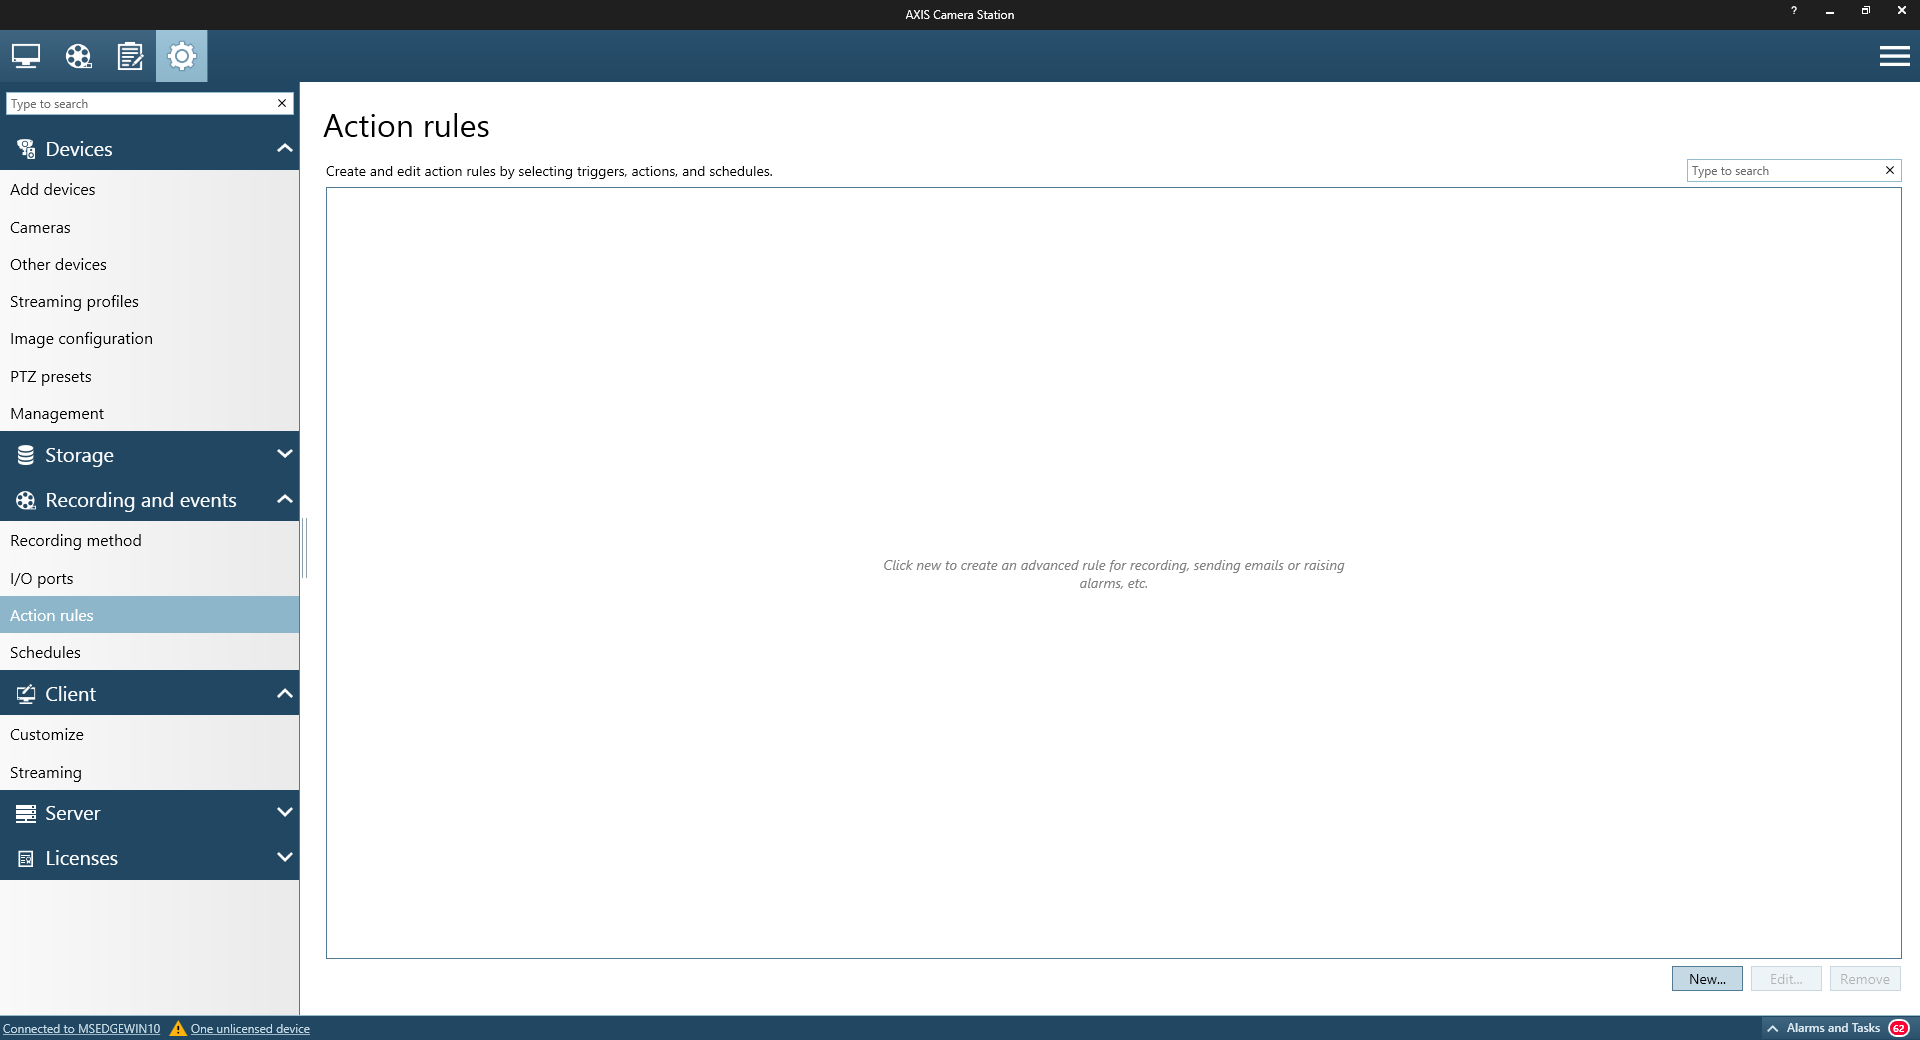 |
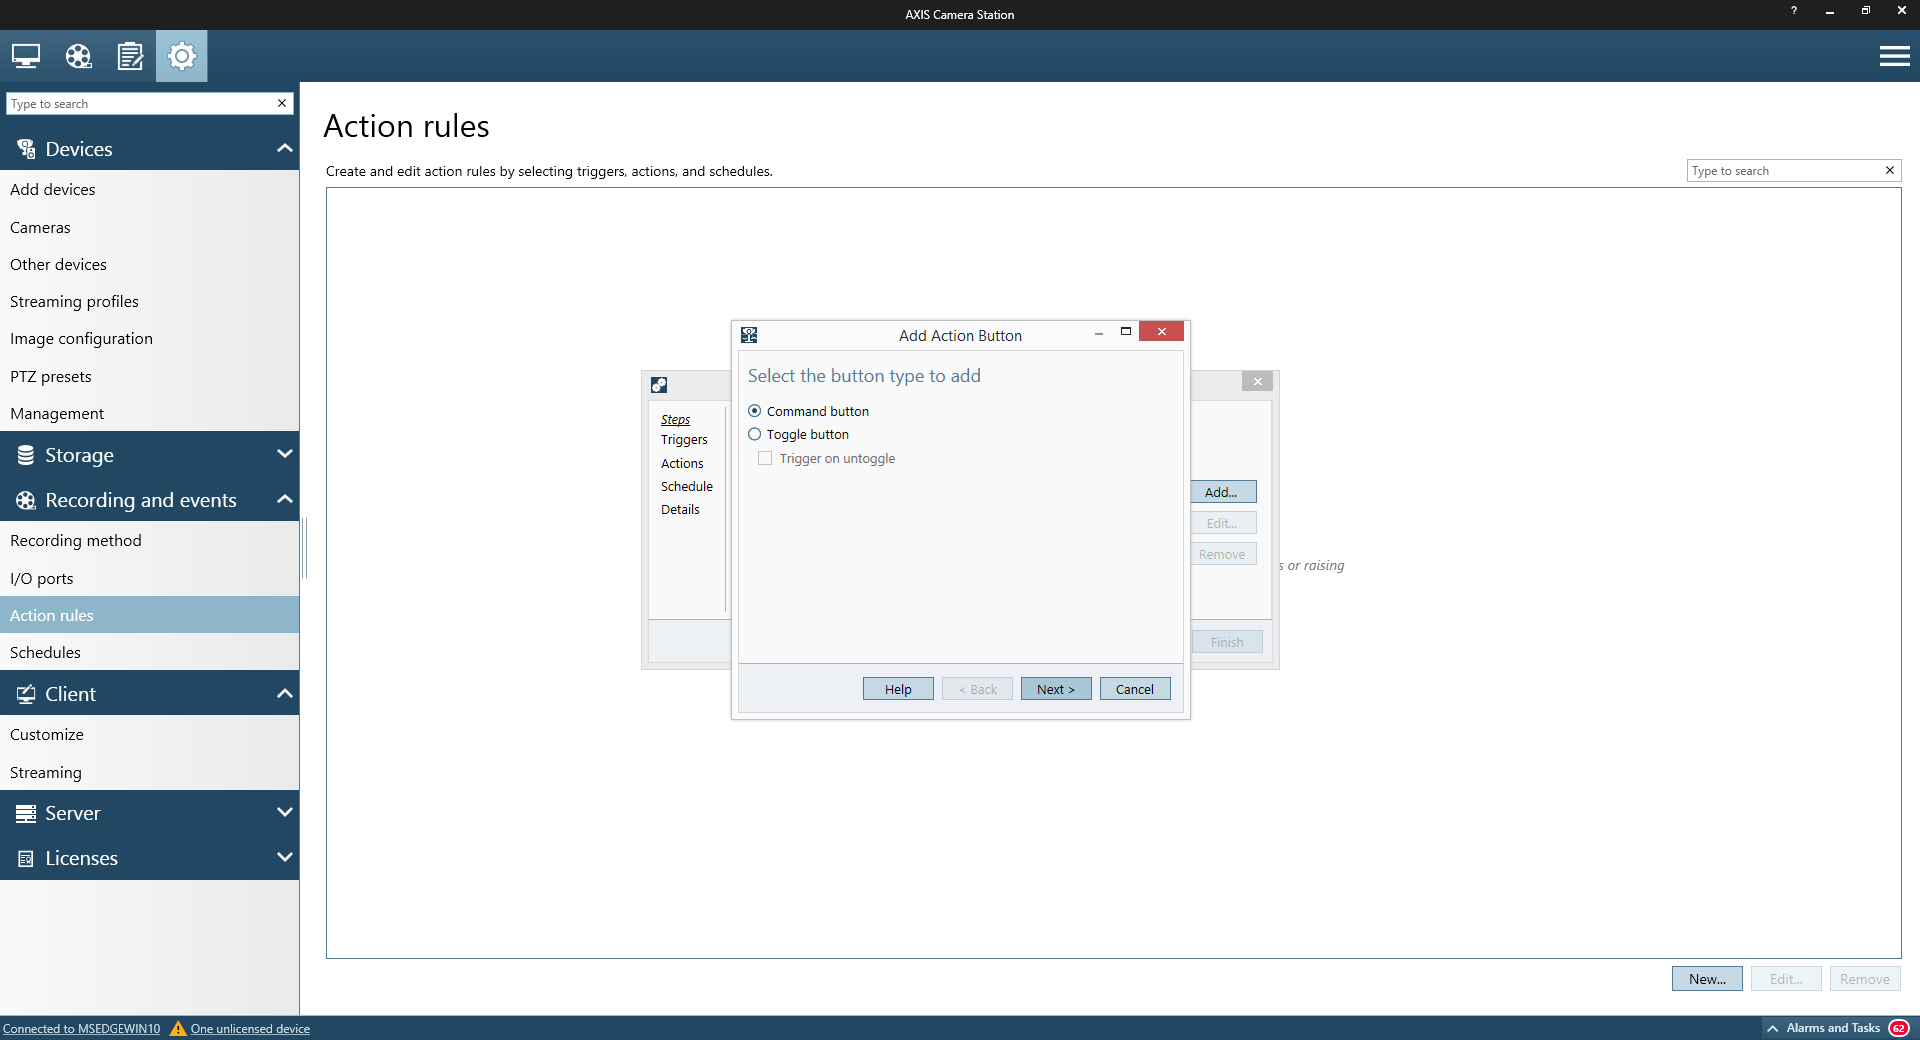
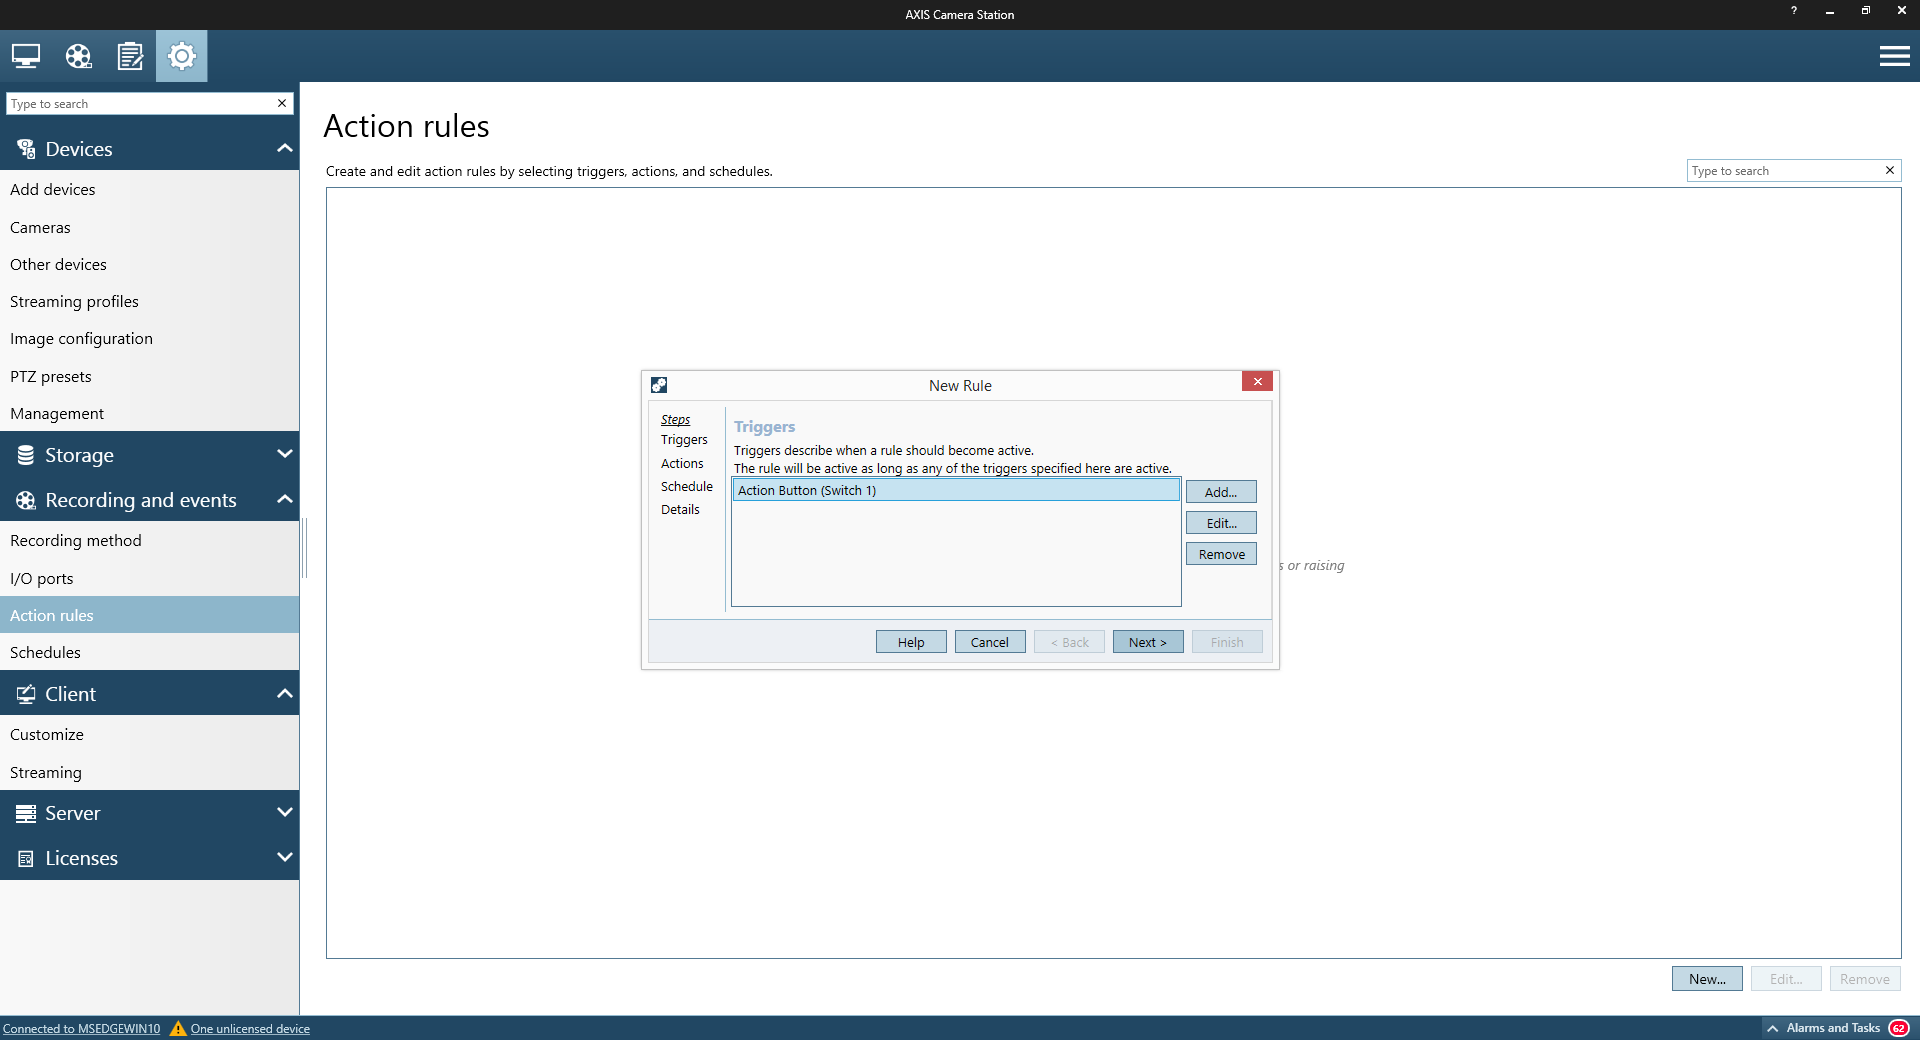
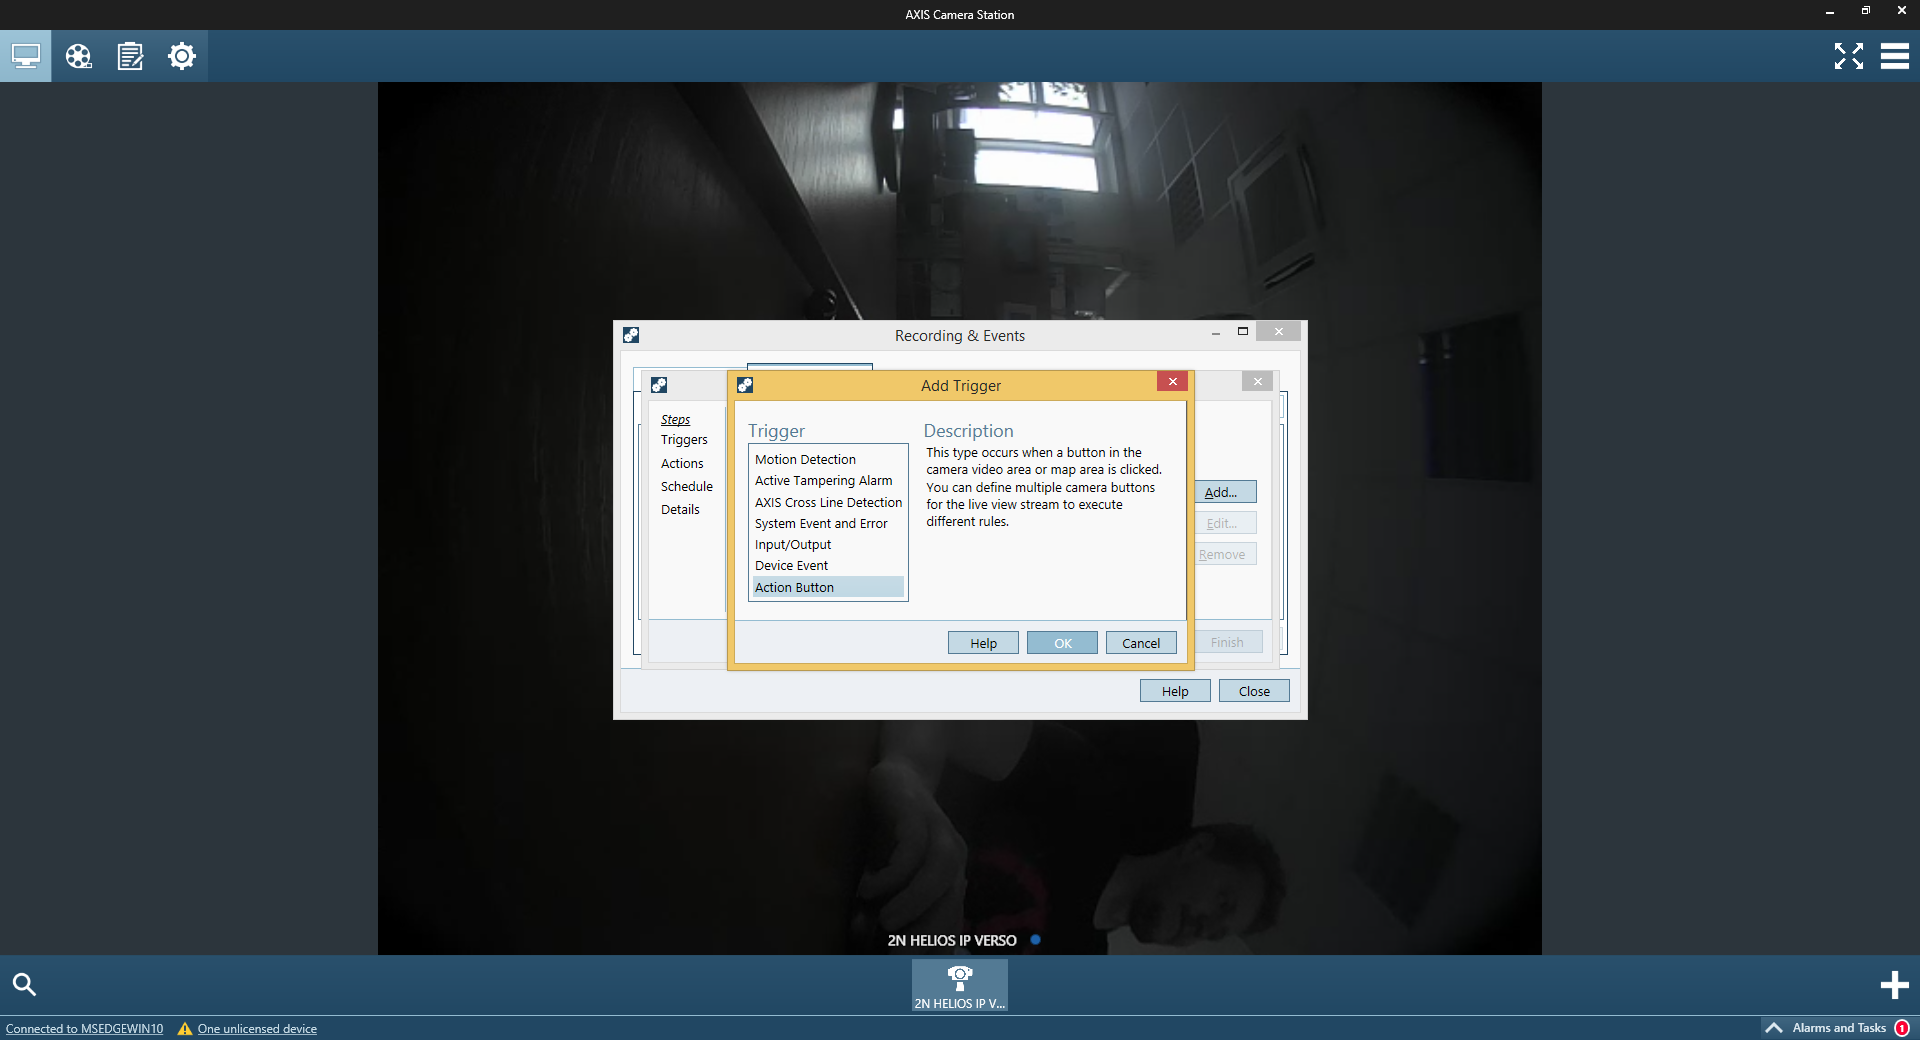
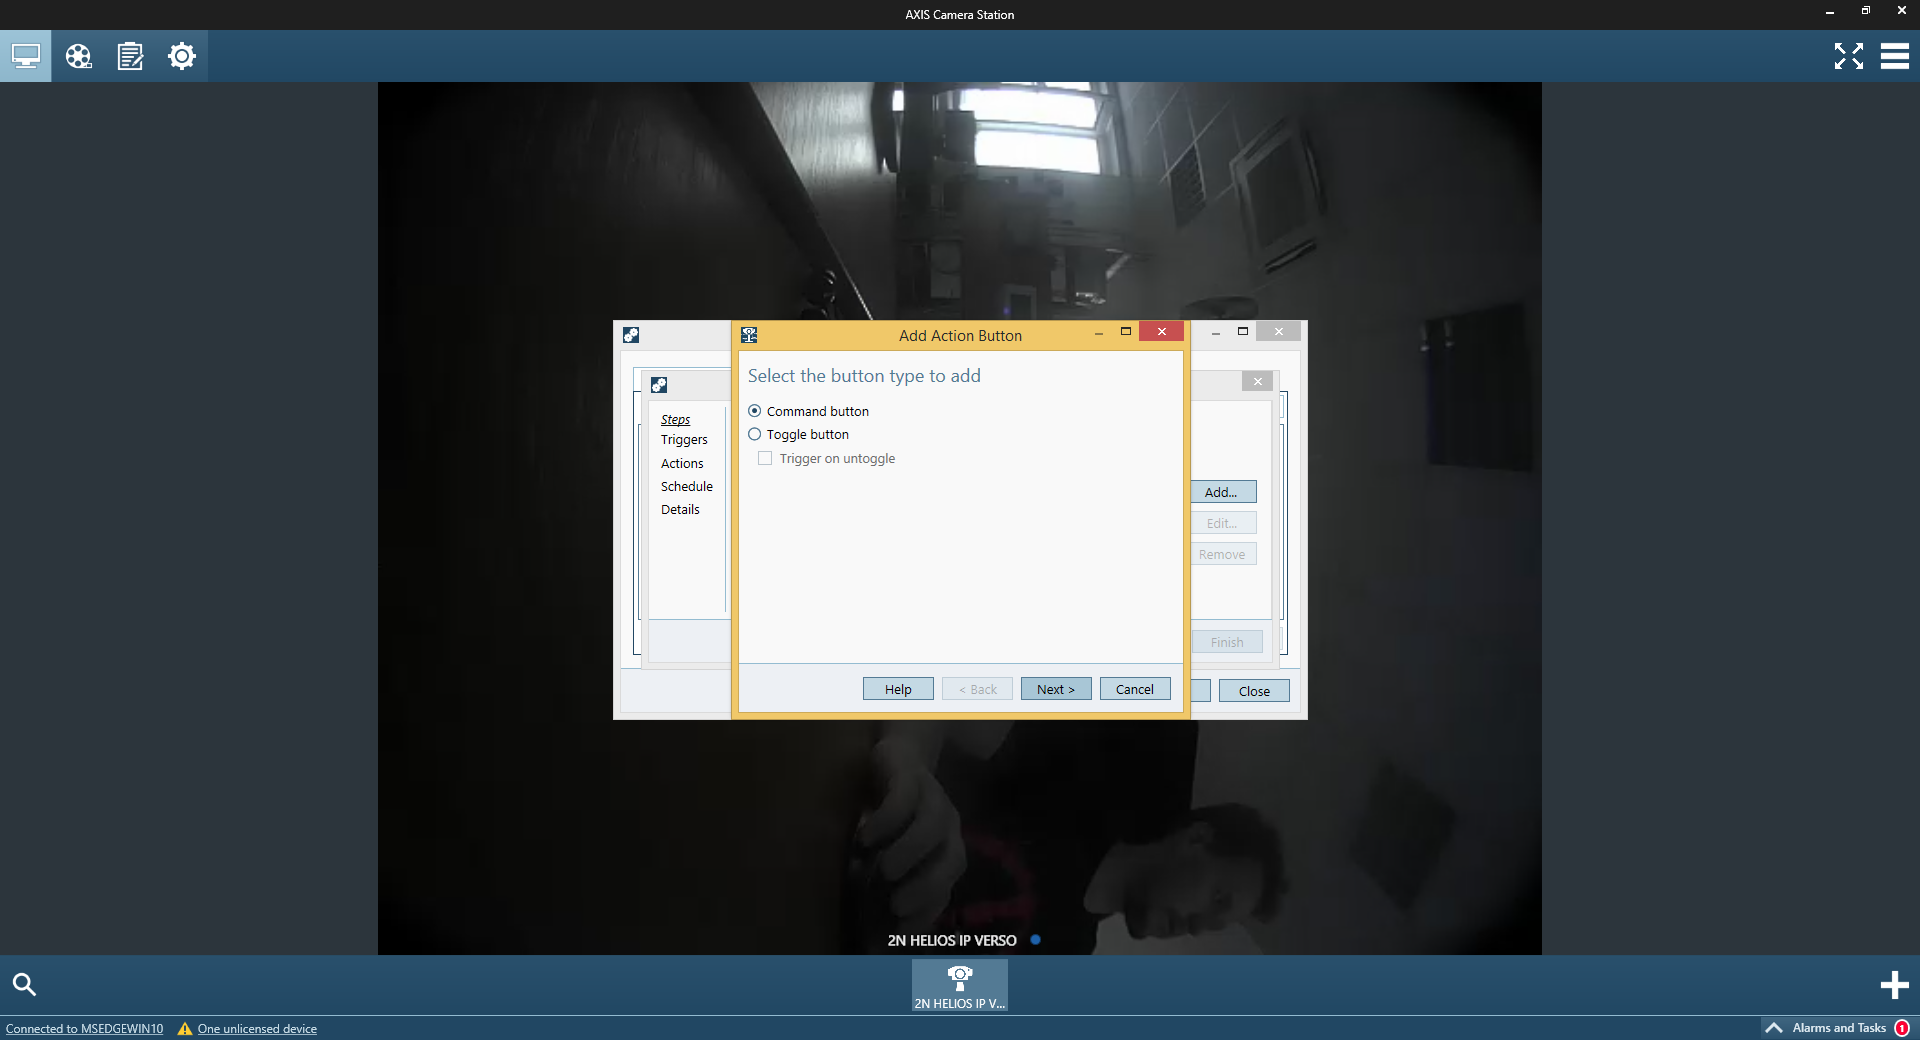
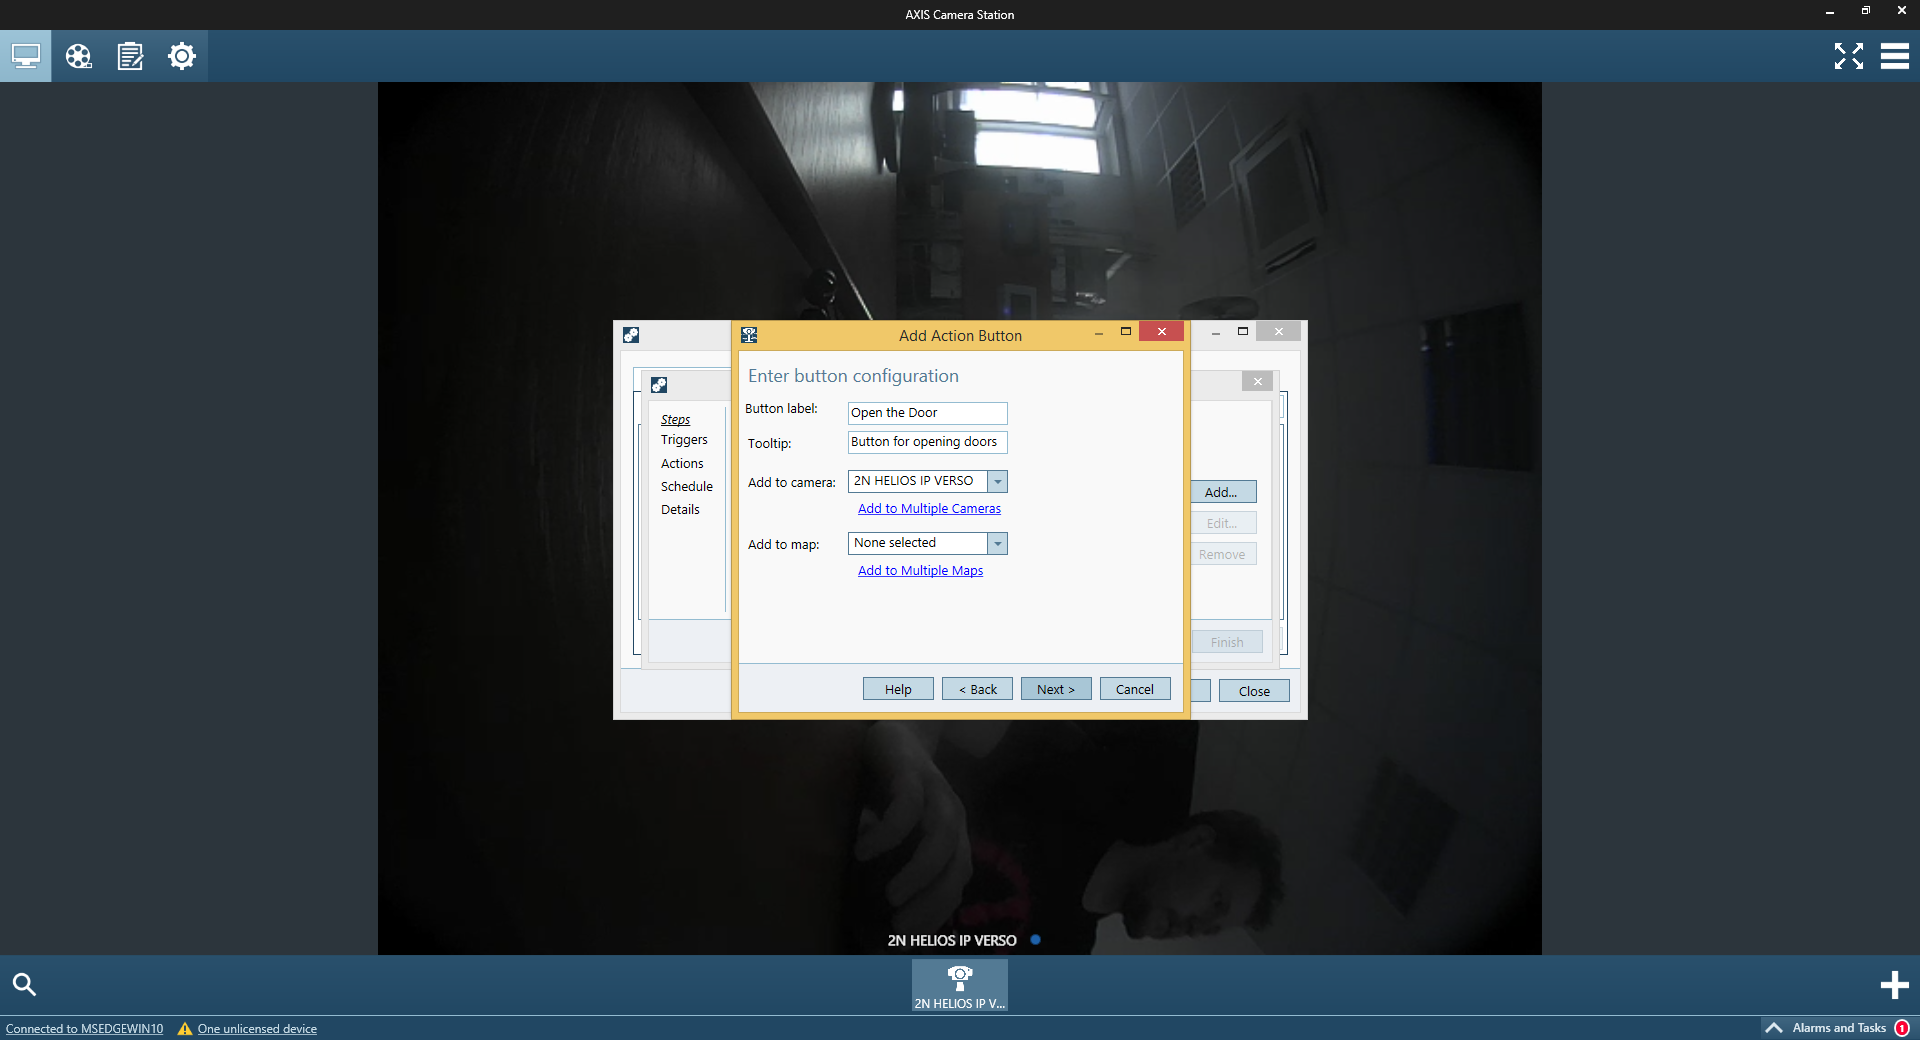
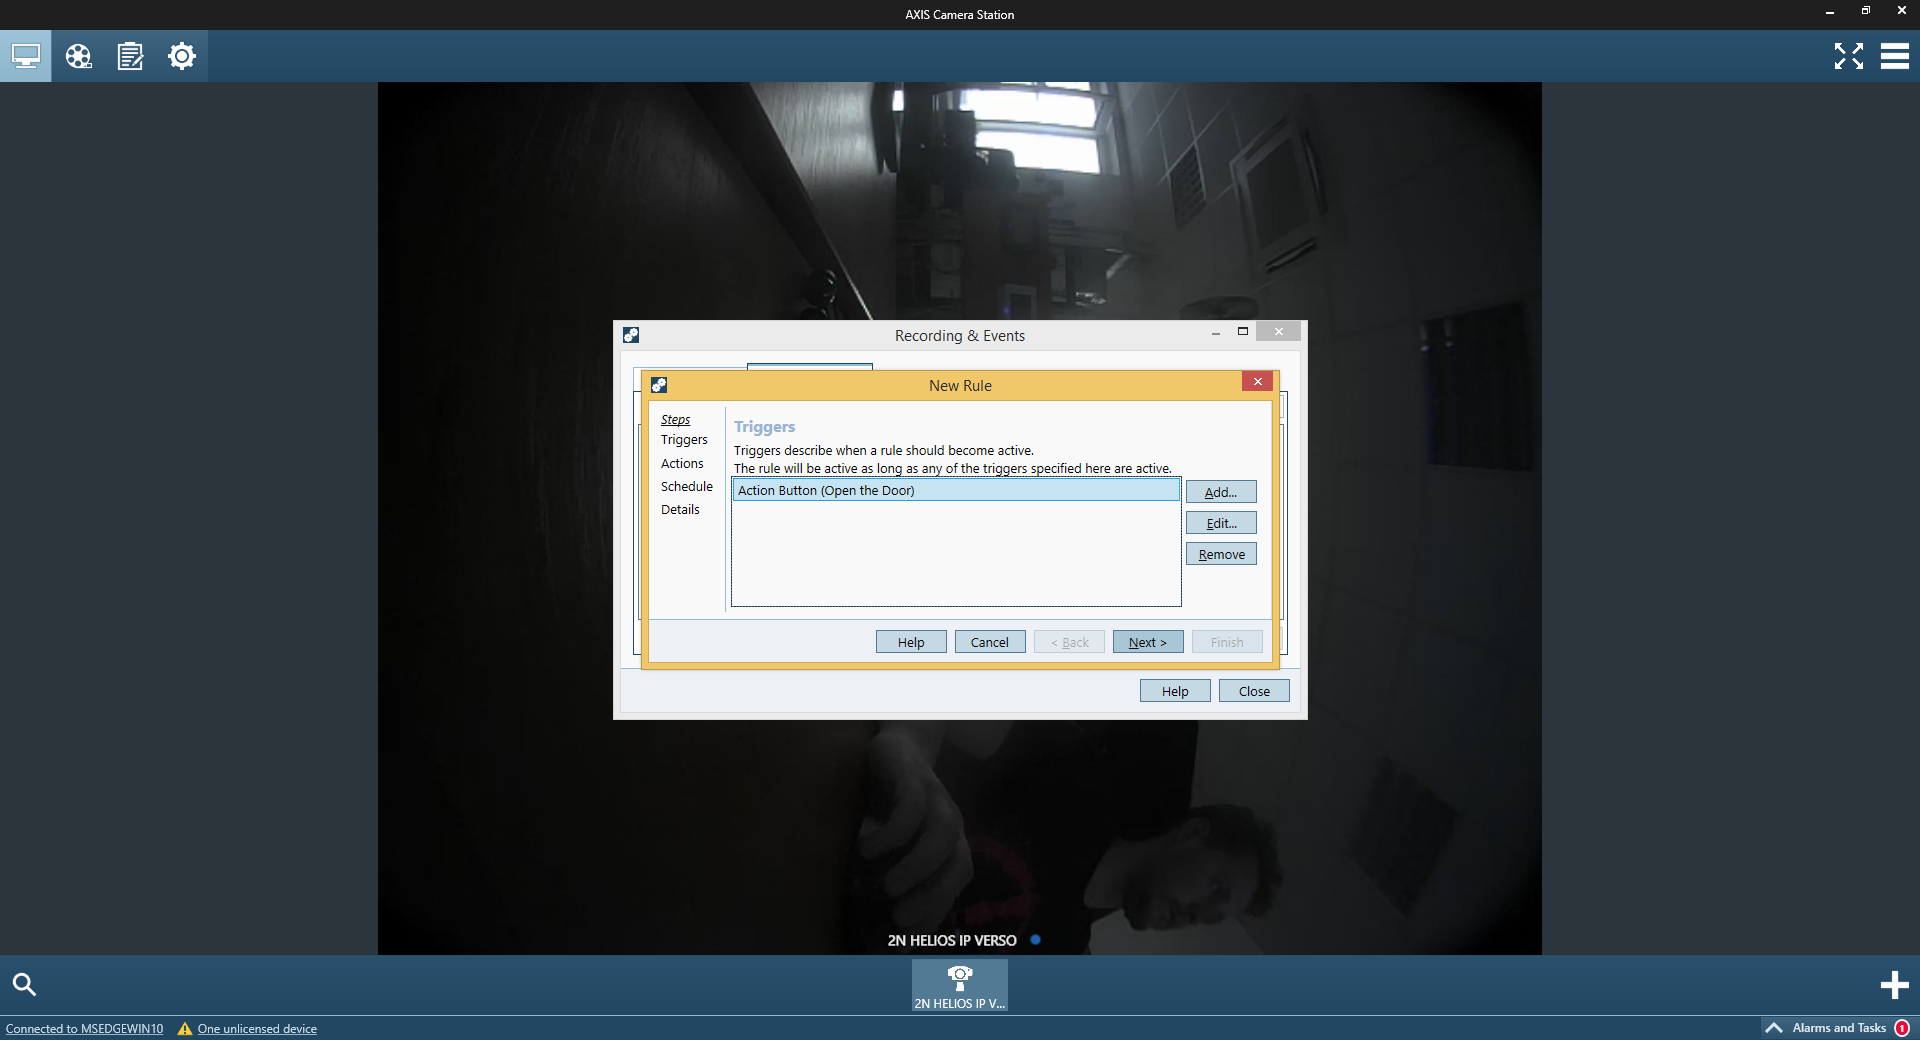
To add new Rule on switch click on New. In pop-up dialog click on Add to add trigger. And choose Action button in next dialog and confirm with OK.
 |
 |
 |
 |
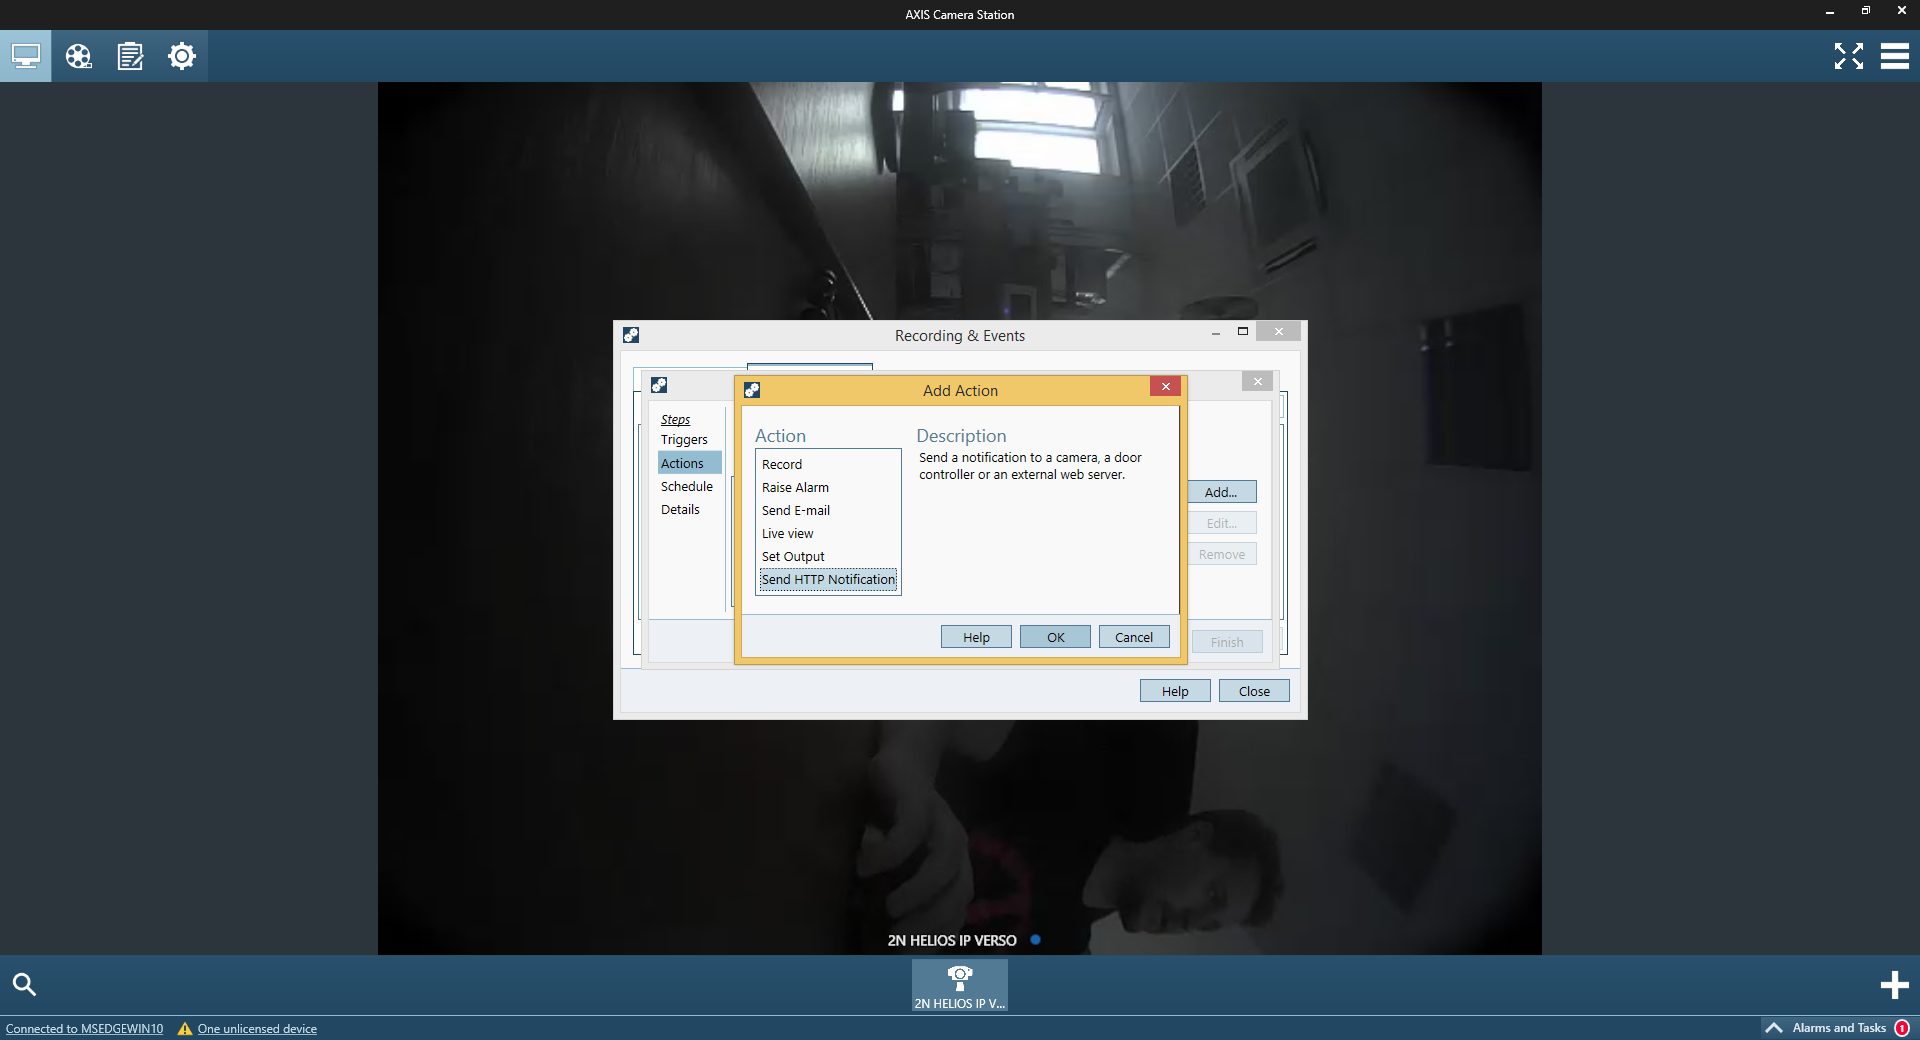
 |
 |
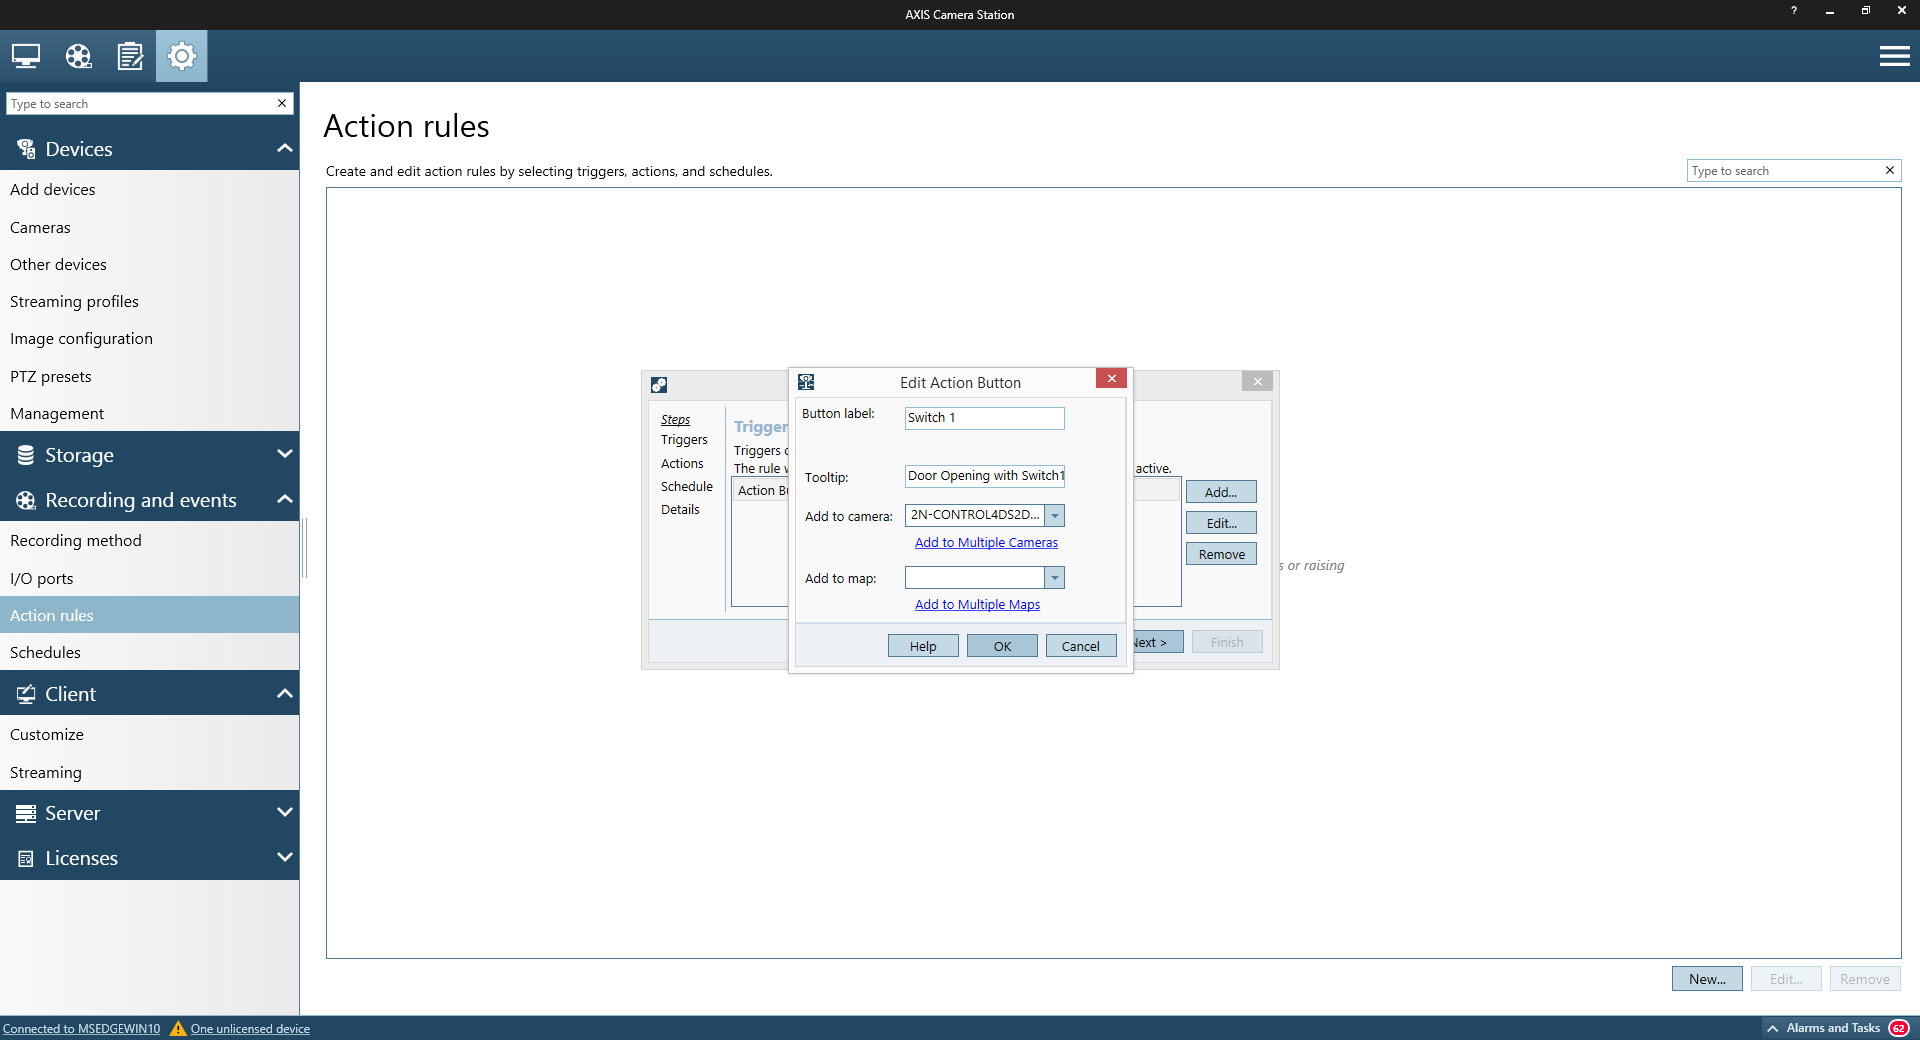
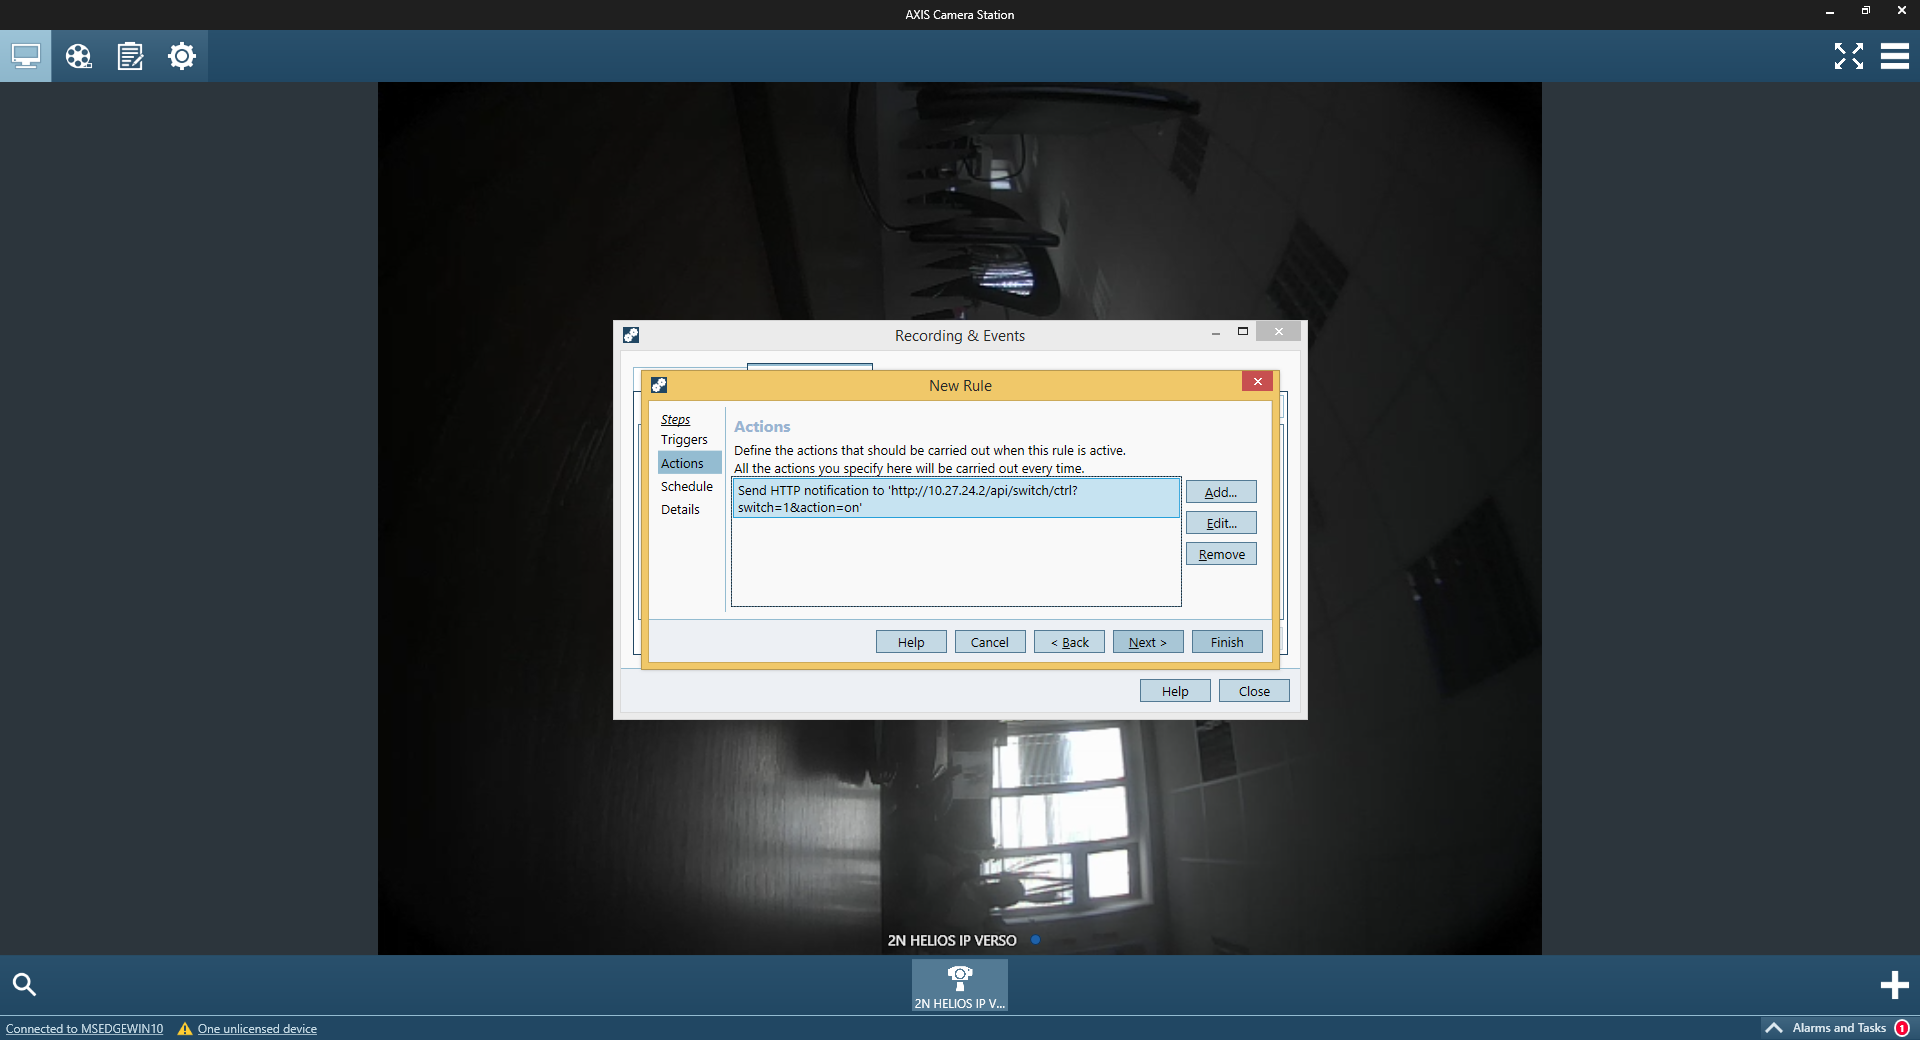
https://ipAddress/api/switch/ctrl?switch=1&action=on
And add Authentication credentials for HTTP API, set on 2N IP Intercom. And confirm with OK. Optionaly functionality of command can be tested with Test button.
 |
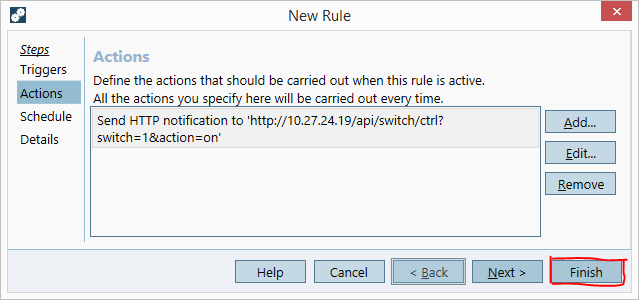
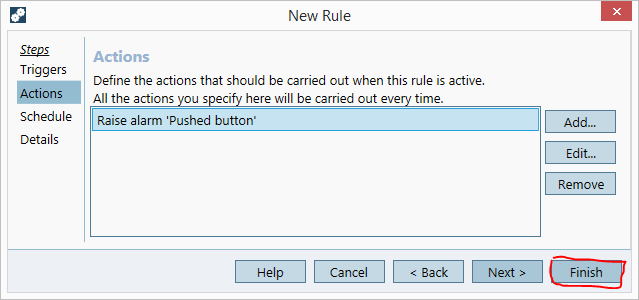
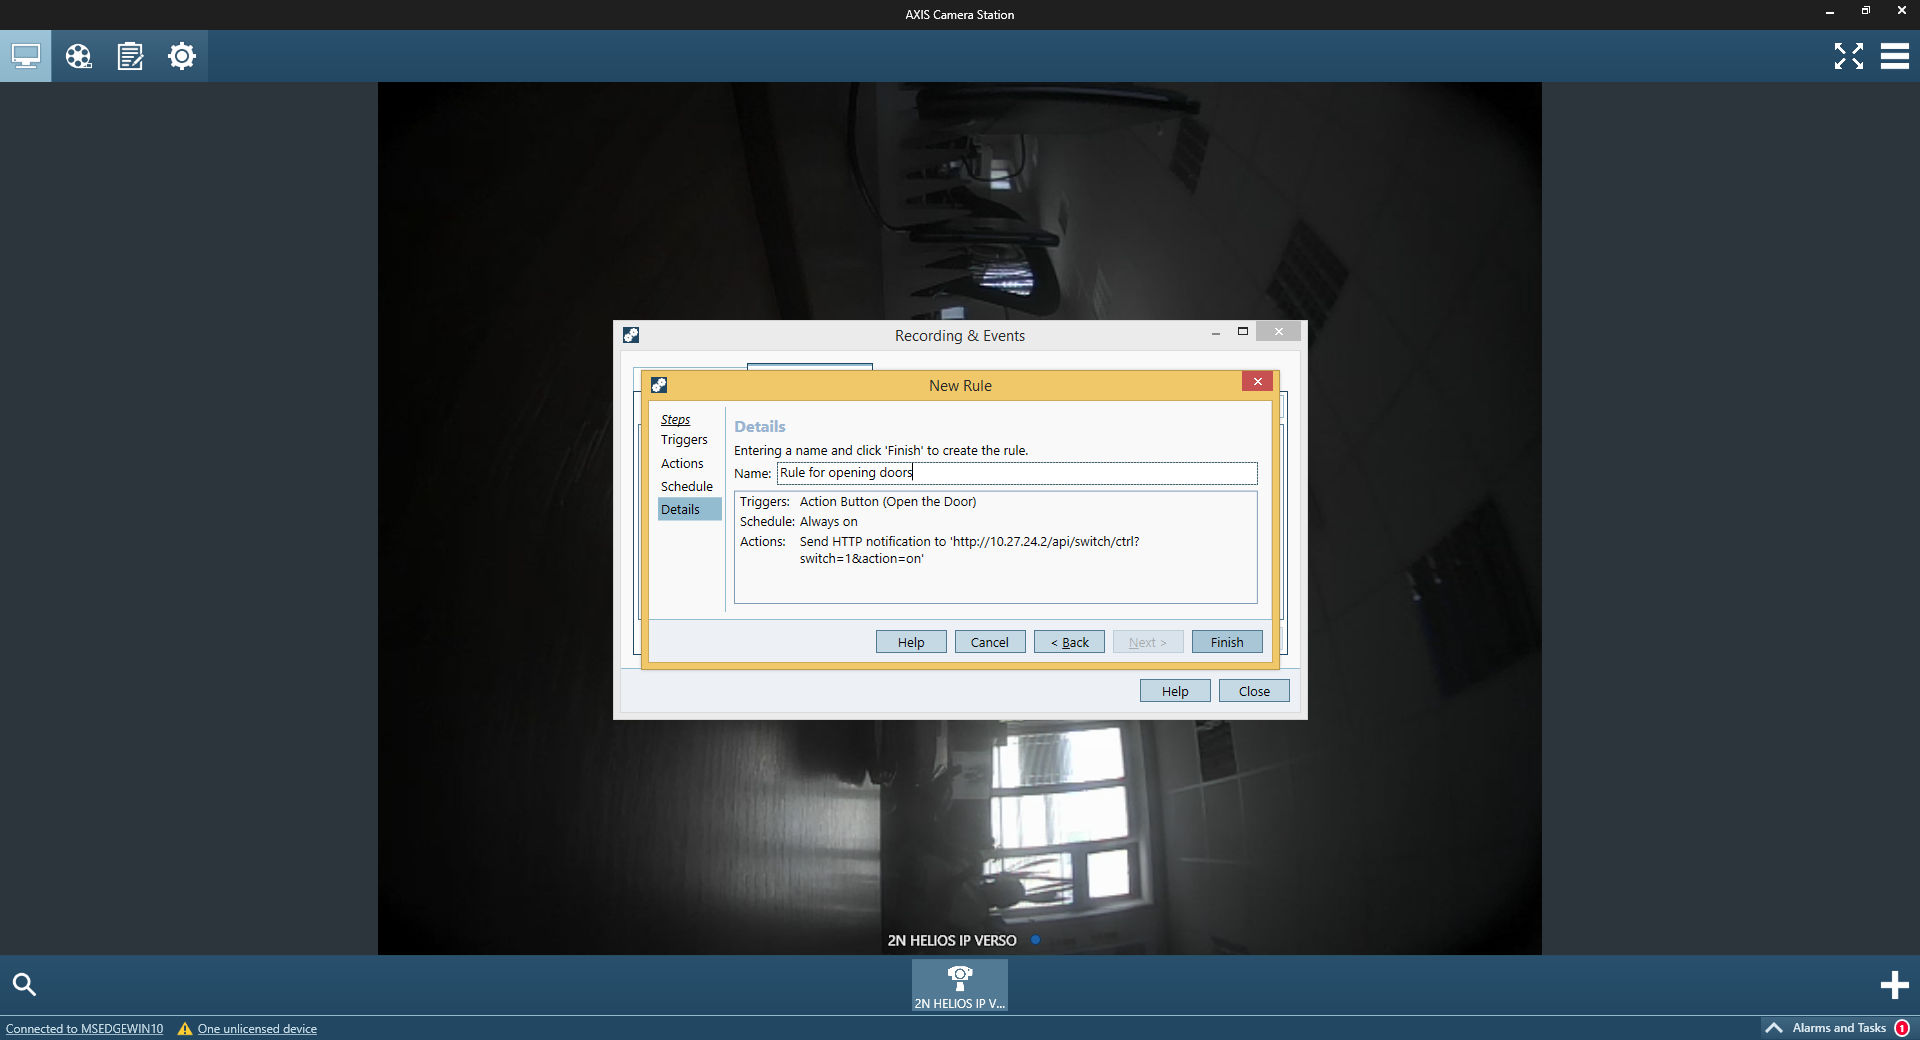
After adding action confirm the rule with Finish.
 |
 |
2N IP Intercom can send changes of virtual ONVIF inputs, this can be used to carry out some action, or to log such an event on side of Axis Camera Station. At first it is needed to set another Action rule in "Gears" section / Recording and events/ Action rules.
To add new Rule on switch click on New. In pop-up dialog click on Add to add trigger. And choose Device Event and confirm with OK.
 |
In following window choose appropriate device (2N IP Intercom), and Event "Trigger/DigitalInput", confirm with OK. In New Rule dialog continue with Next.
 |
 |
 |
 |
 |
Tested Features (5.11 and lower)
2N IP Intercom should be found by tool for adding cameras into the AXIS Camera Station VMS. Check your 2N IP Intercom and click next.
 |
In case you cannot check your 2N IP Intercom click on blue text "Enter password" and enter ONVIF credentials created on 2N IP Intercom.
 |
 |
Live Video stream from your 2N IP Intercom can be see by clicking on upper leftmost corner of the AXIS Camera Station GUI as highlighted on following picture.
 |
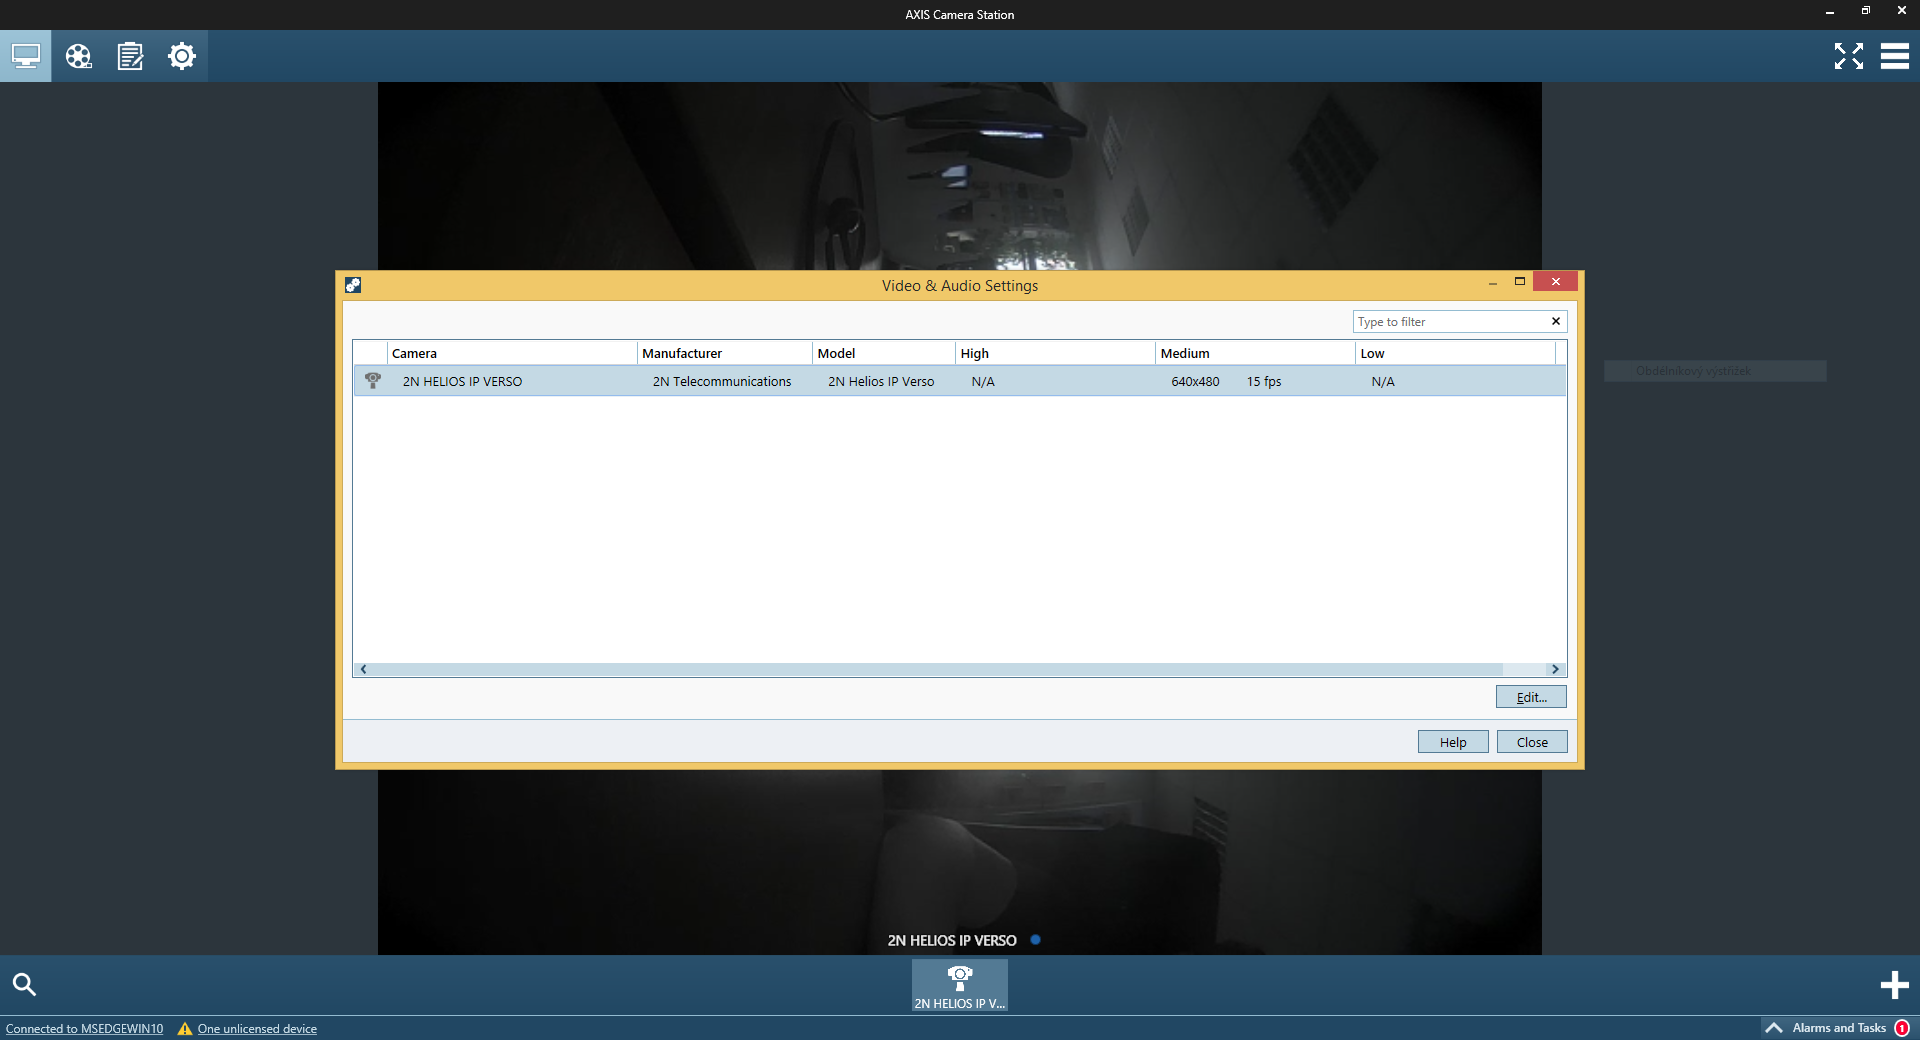
To enable audio from 2N IP Intercom to AXIS Camera Station, you need to go to rightmost menu and then Configuration / Video & Audio Settings.
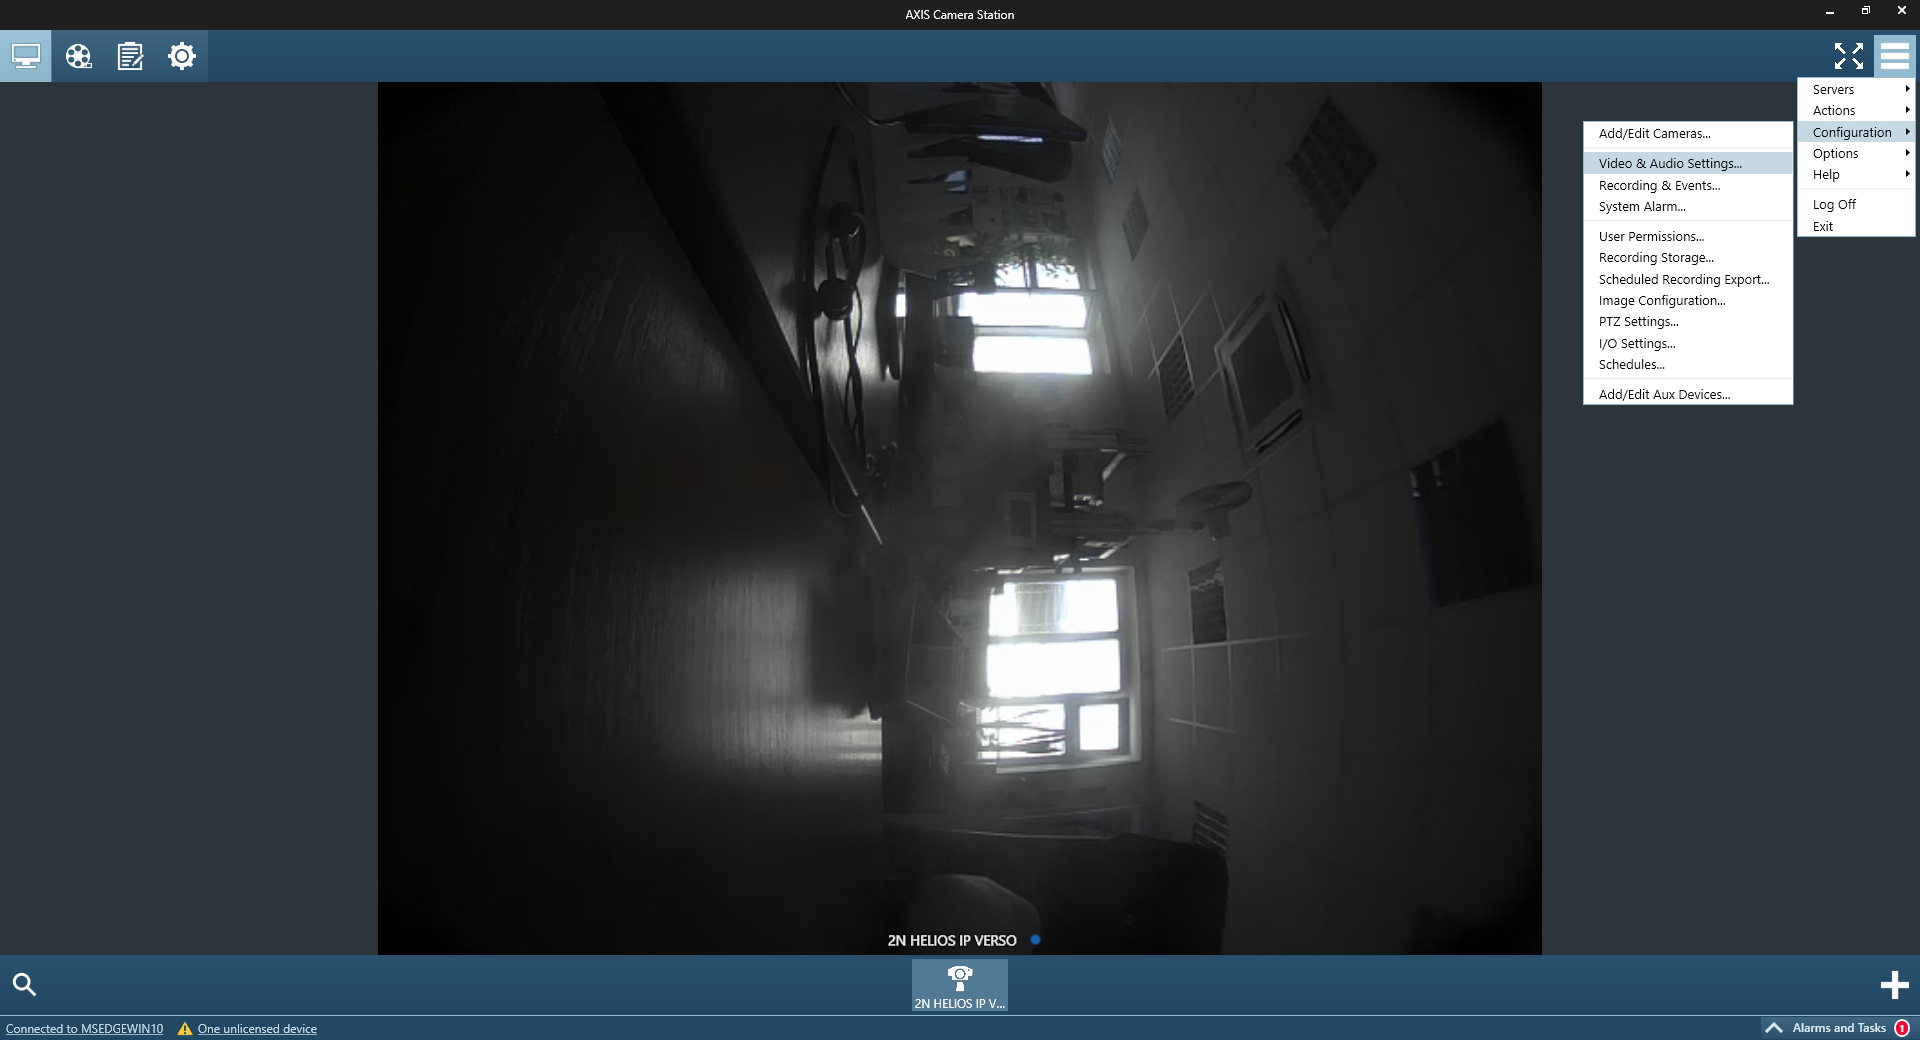 |
Choose your 2N IP Intercom and click on edit.
 |
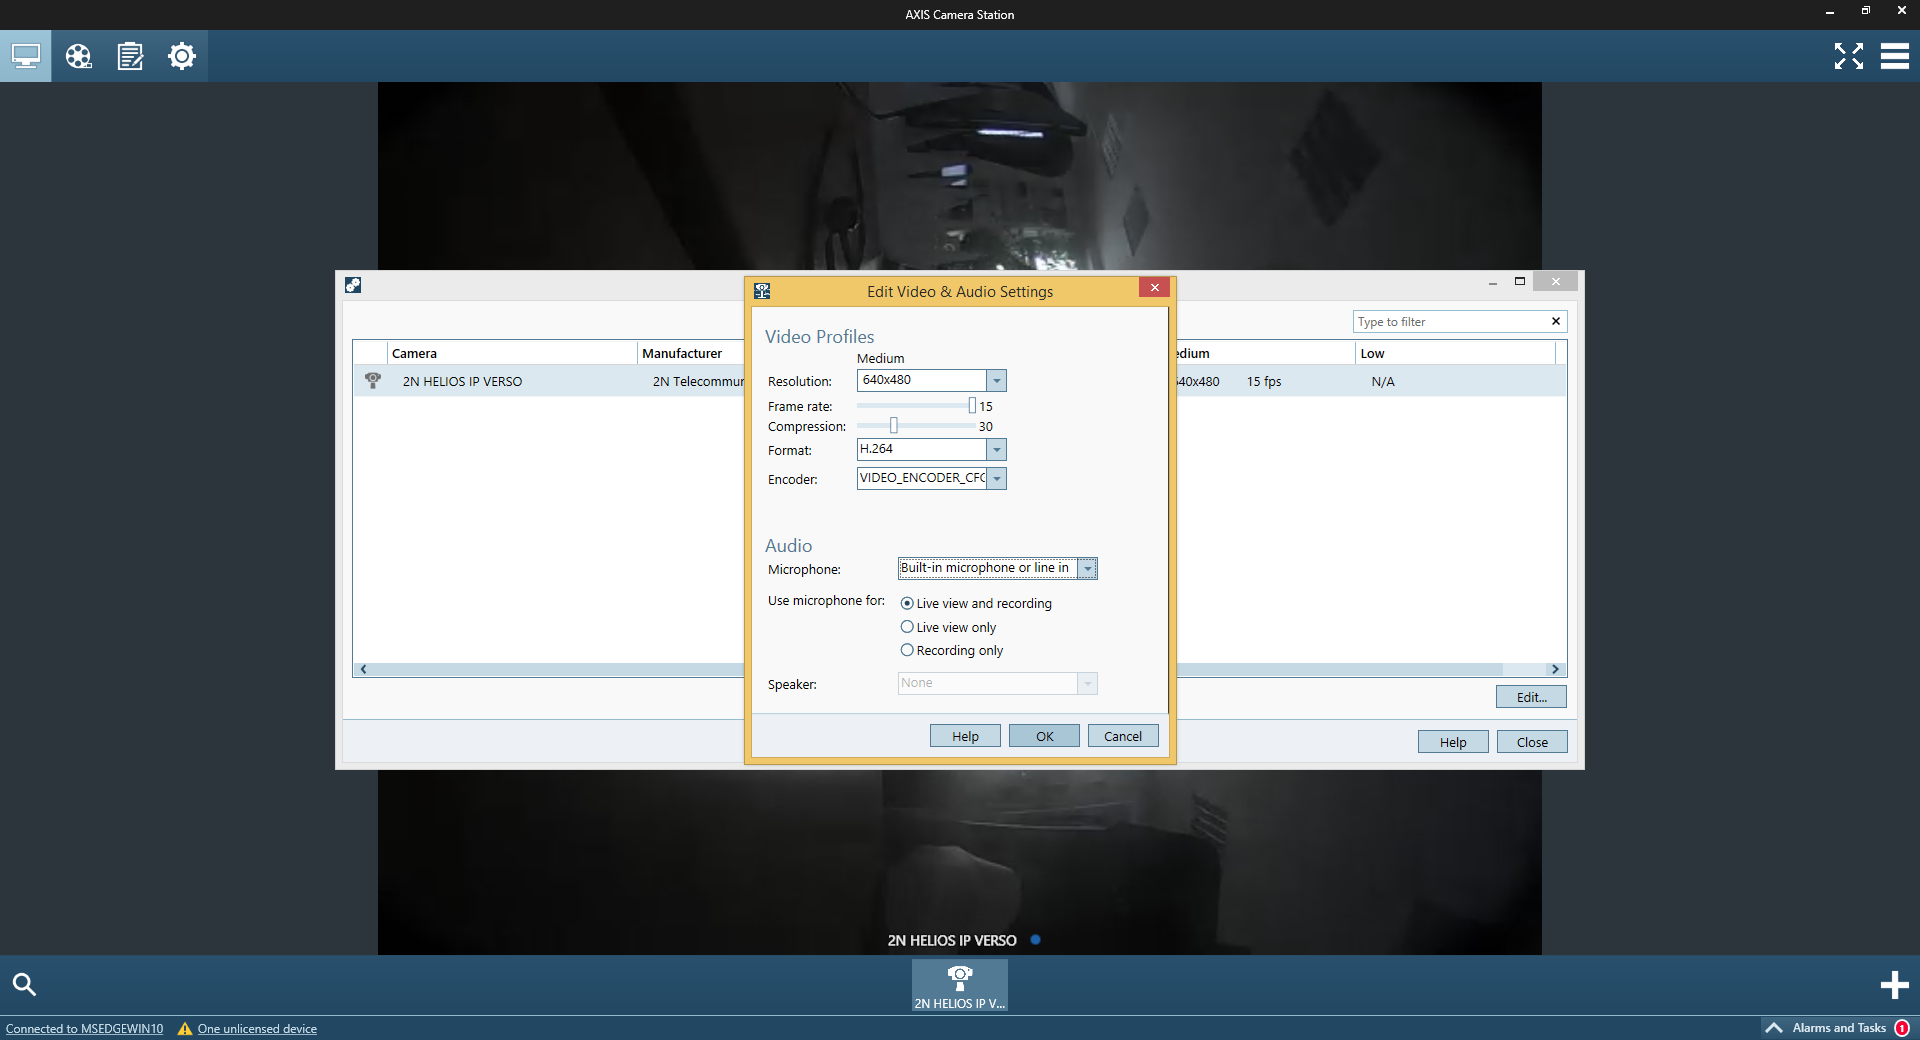 |
 |
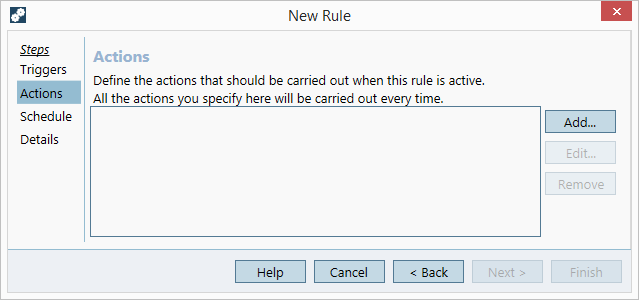
To create button for switching switch on 2N IP Intercom, go to rightmost menu a then Configuration / Recording & Events...
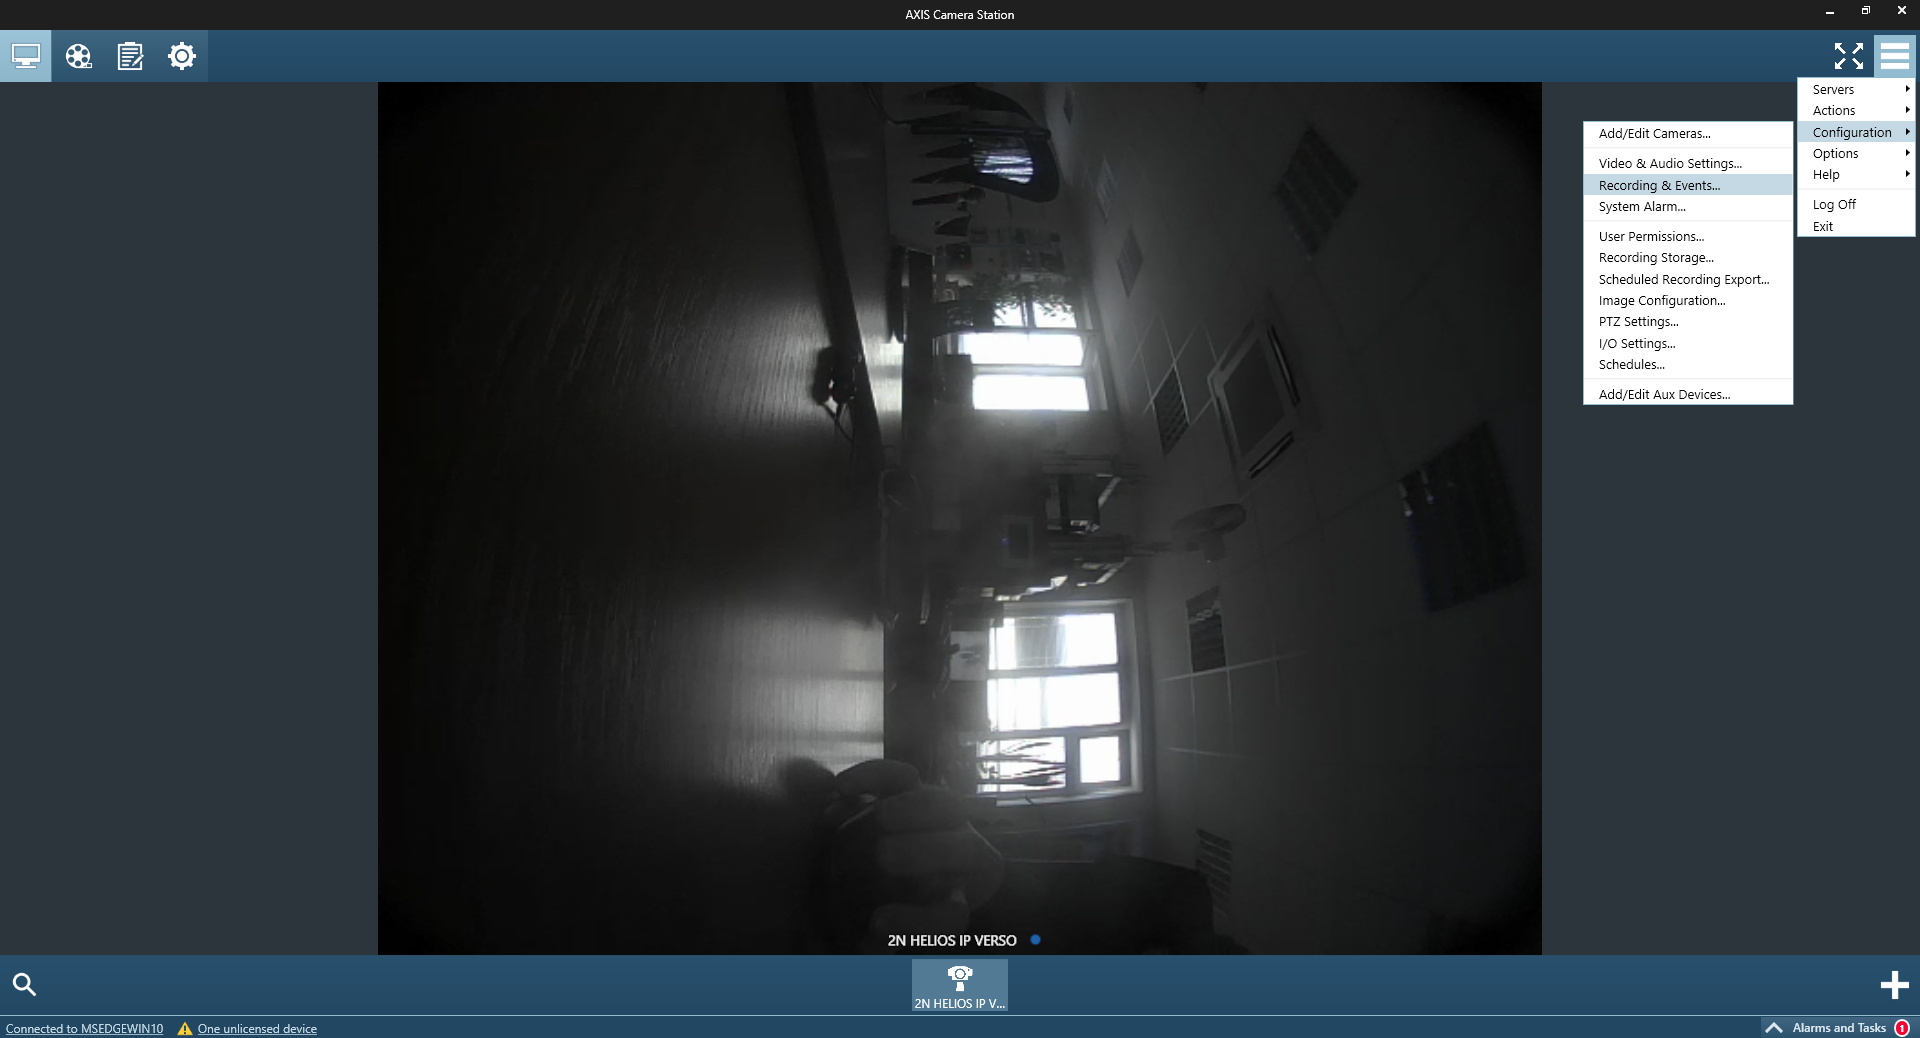 |
Then choose tab Advanced rules and click New to create new rule.
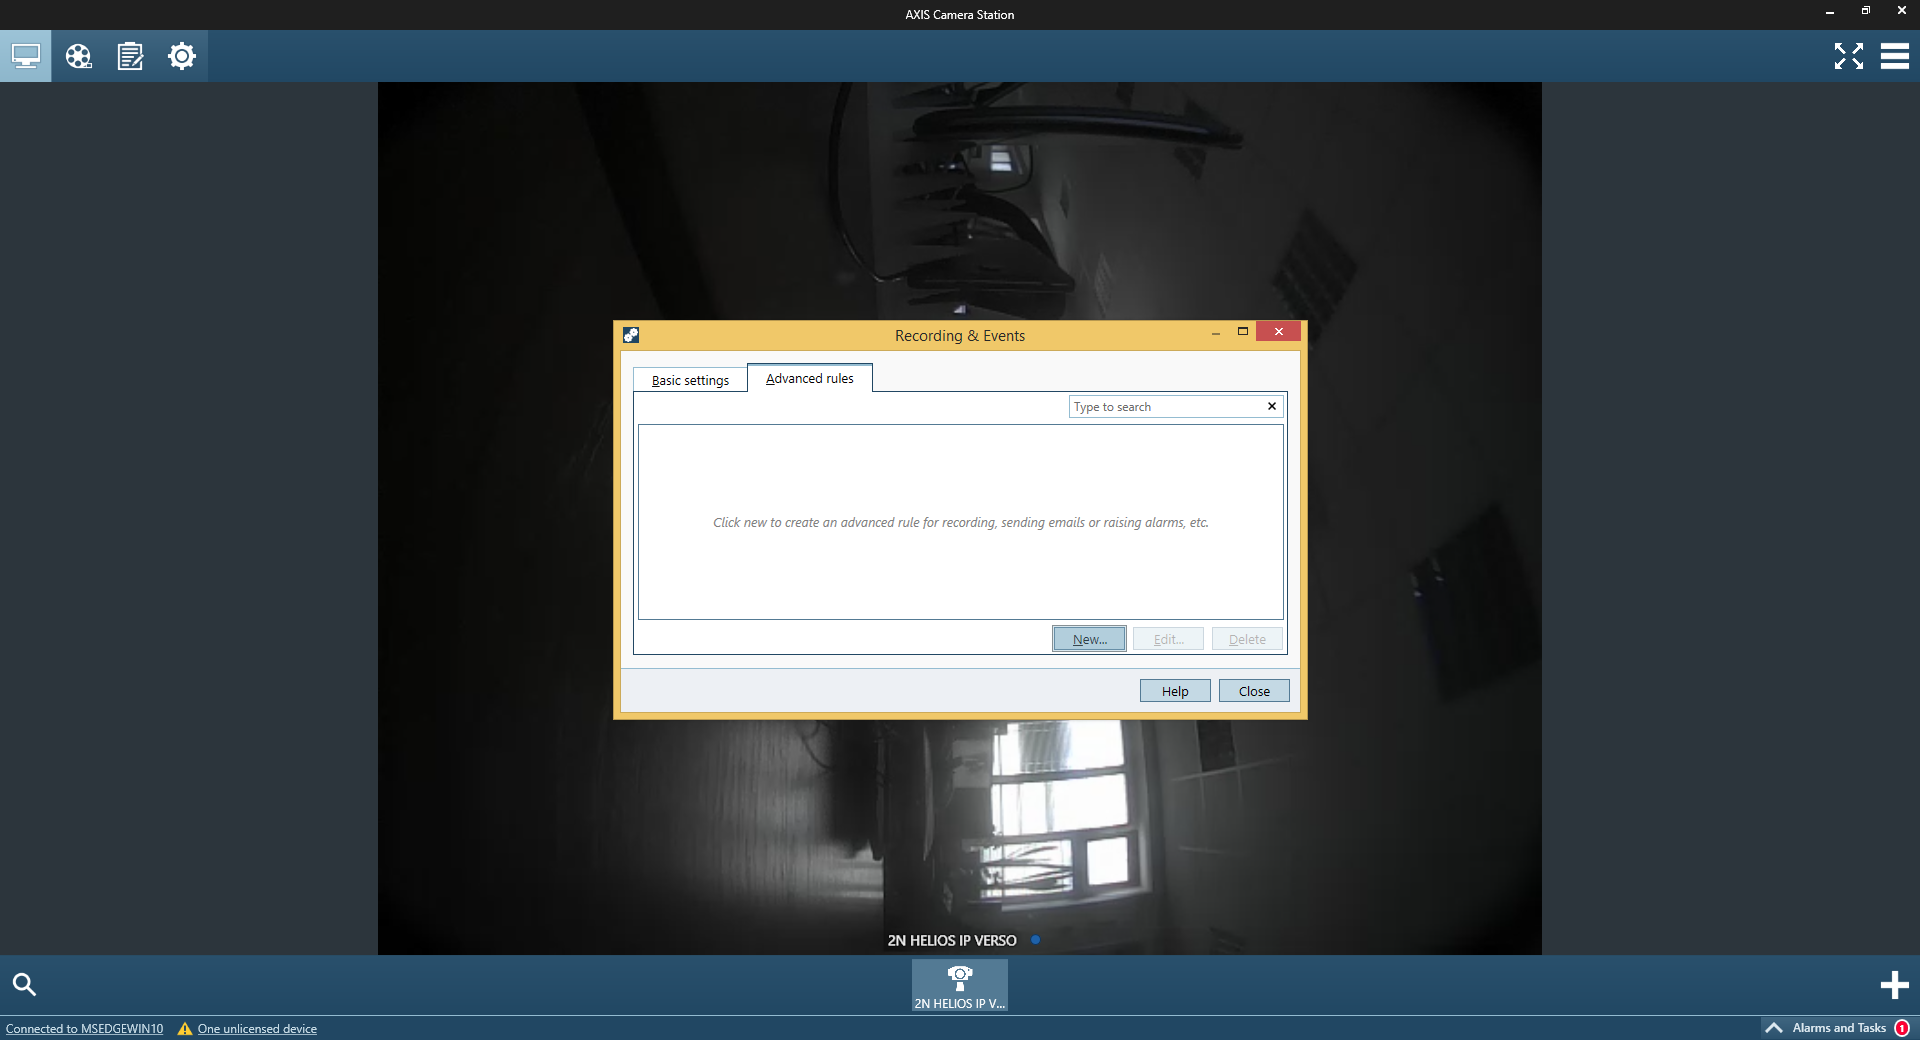 |
 |
 |
 |
 |
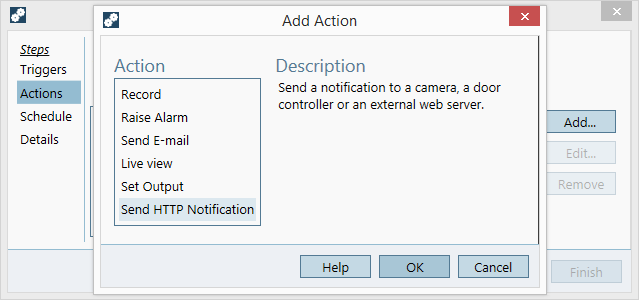
 |
- https://IP_ADDRESS/api/switch/ctrl?switch=X&action=on
Where IP_ADDRESS is IP address of your 2N IP Intercom, and X is ID of switch connected to door lock.
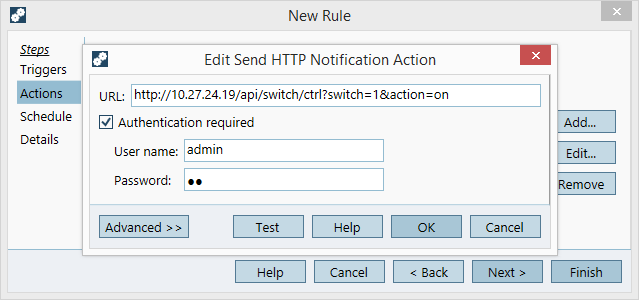
Next you need fill in authentication info created previosly on your 2N IP Intercom and enable box "Authentication required".
To test corect functioning of this HTTP Notification you can click on Test button. If 2N IP Intercom switch is activated correctly, continue by chosing OK.
 |
In next step just continue through clicking on Next.
 |
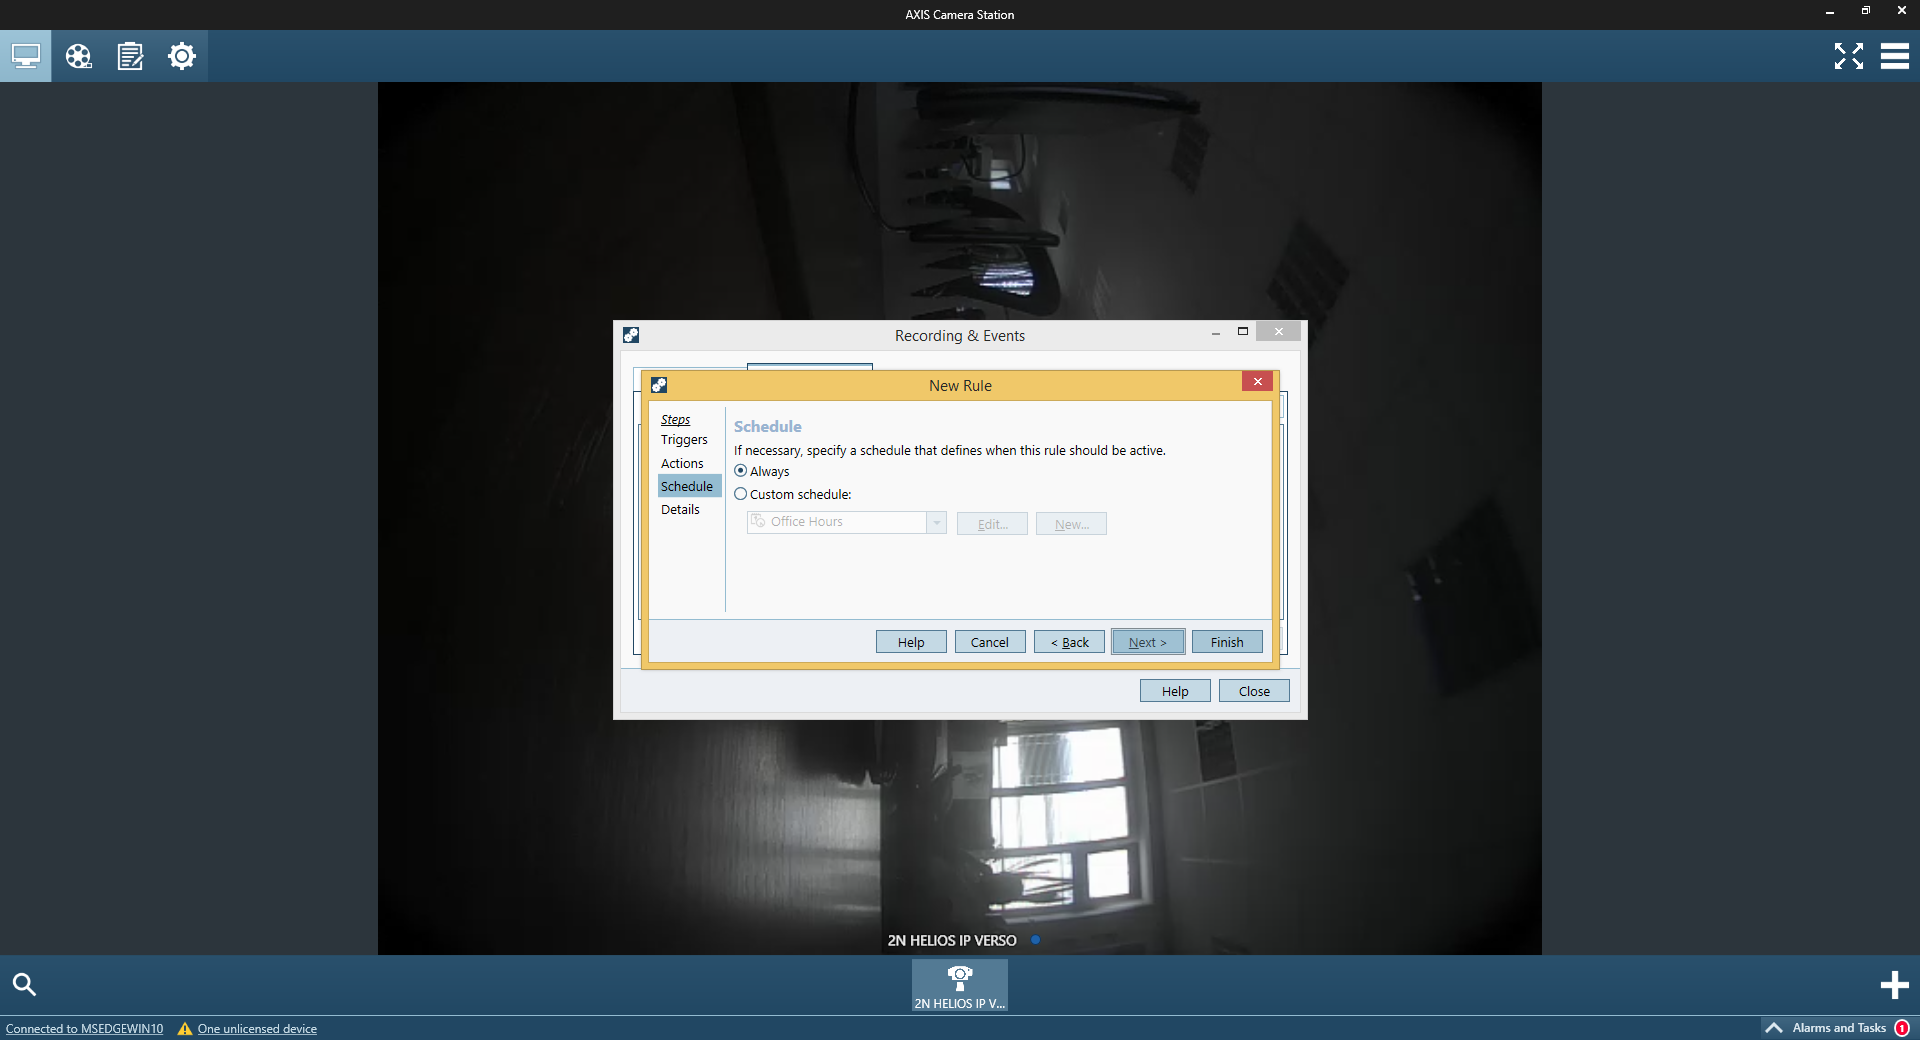
In this step you can asign time profiles for this rule so it will trigger only in specified time. If you do not wish to set schedule continue through clicking on Next.
 |
 |
 |
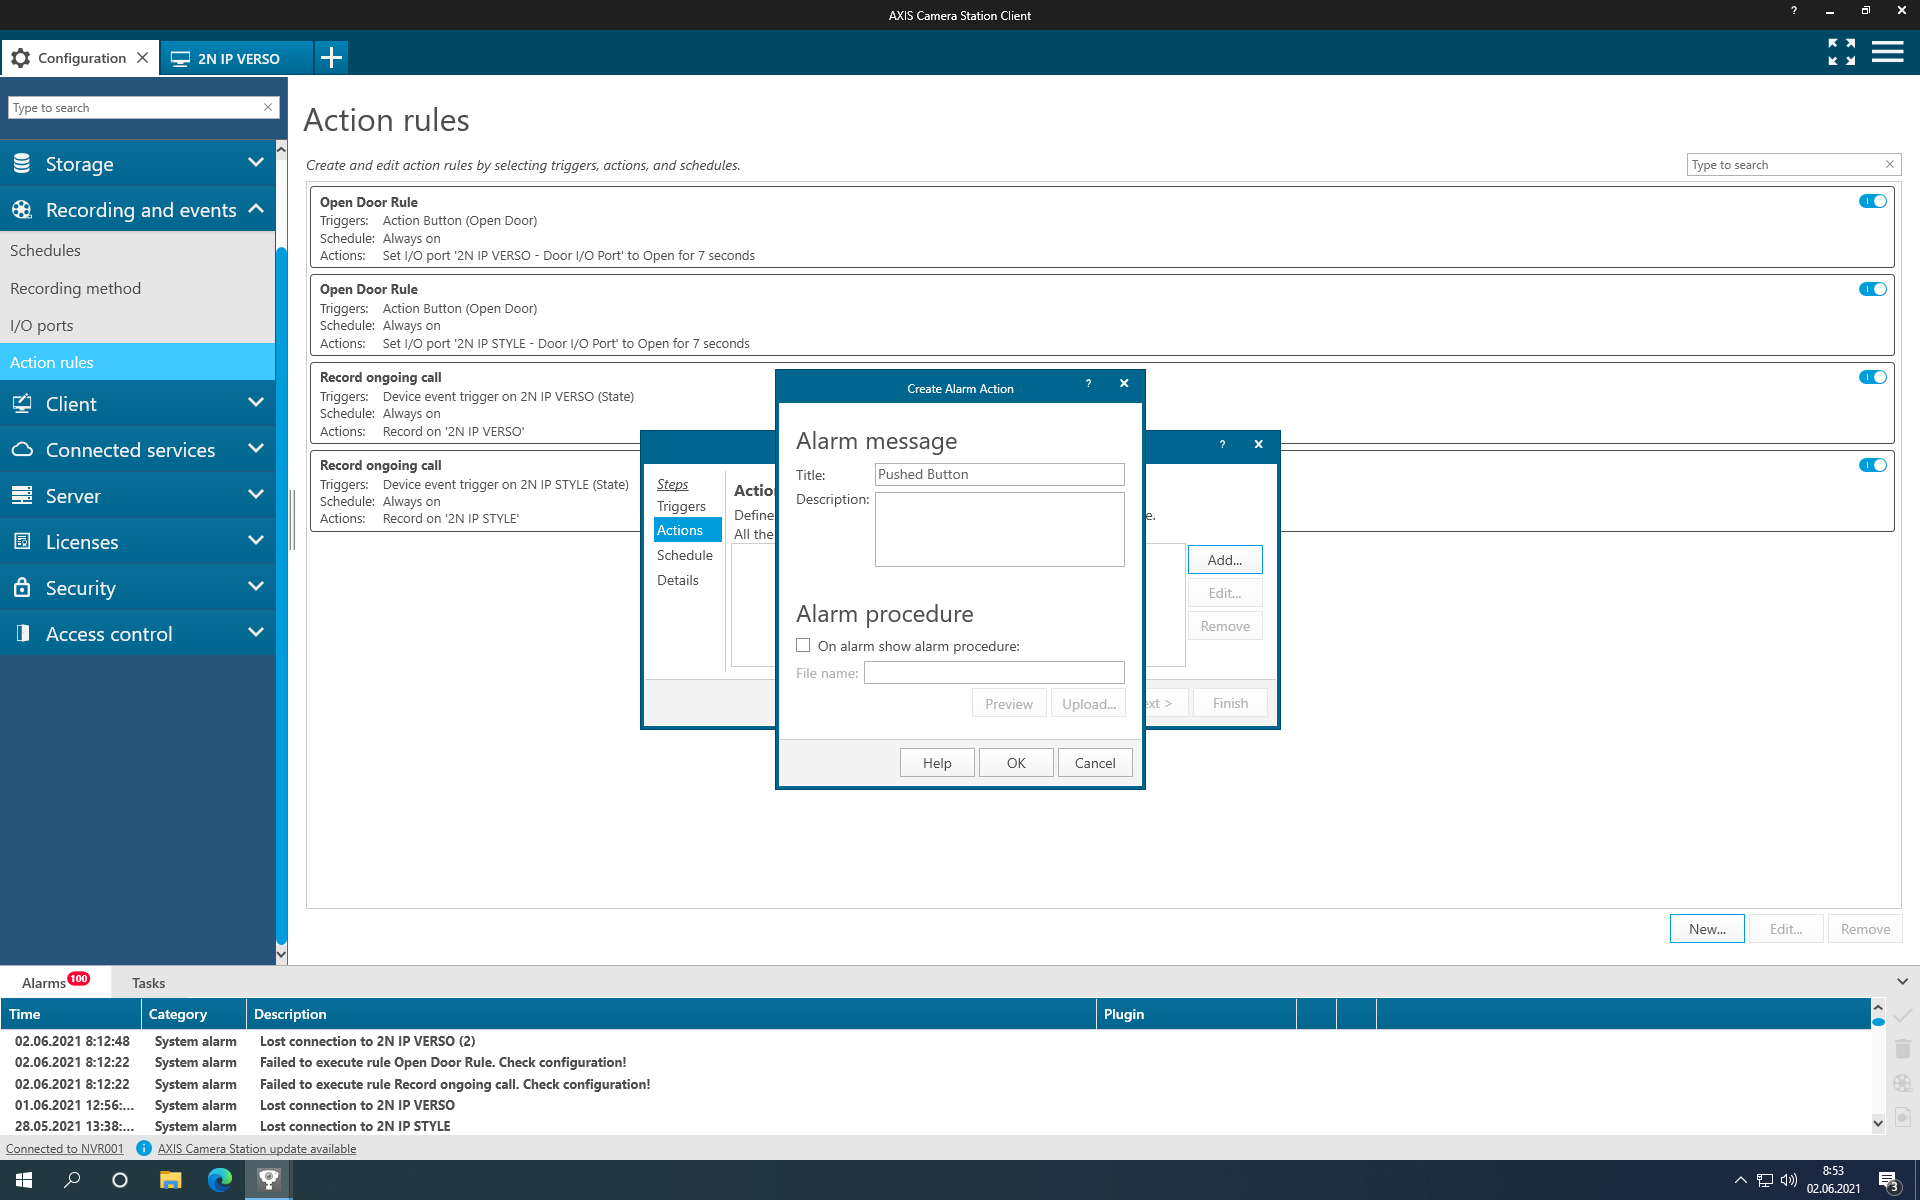
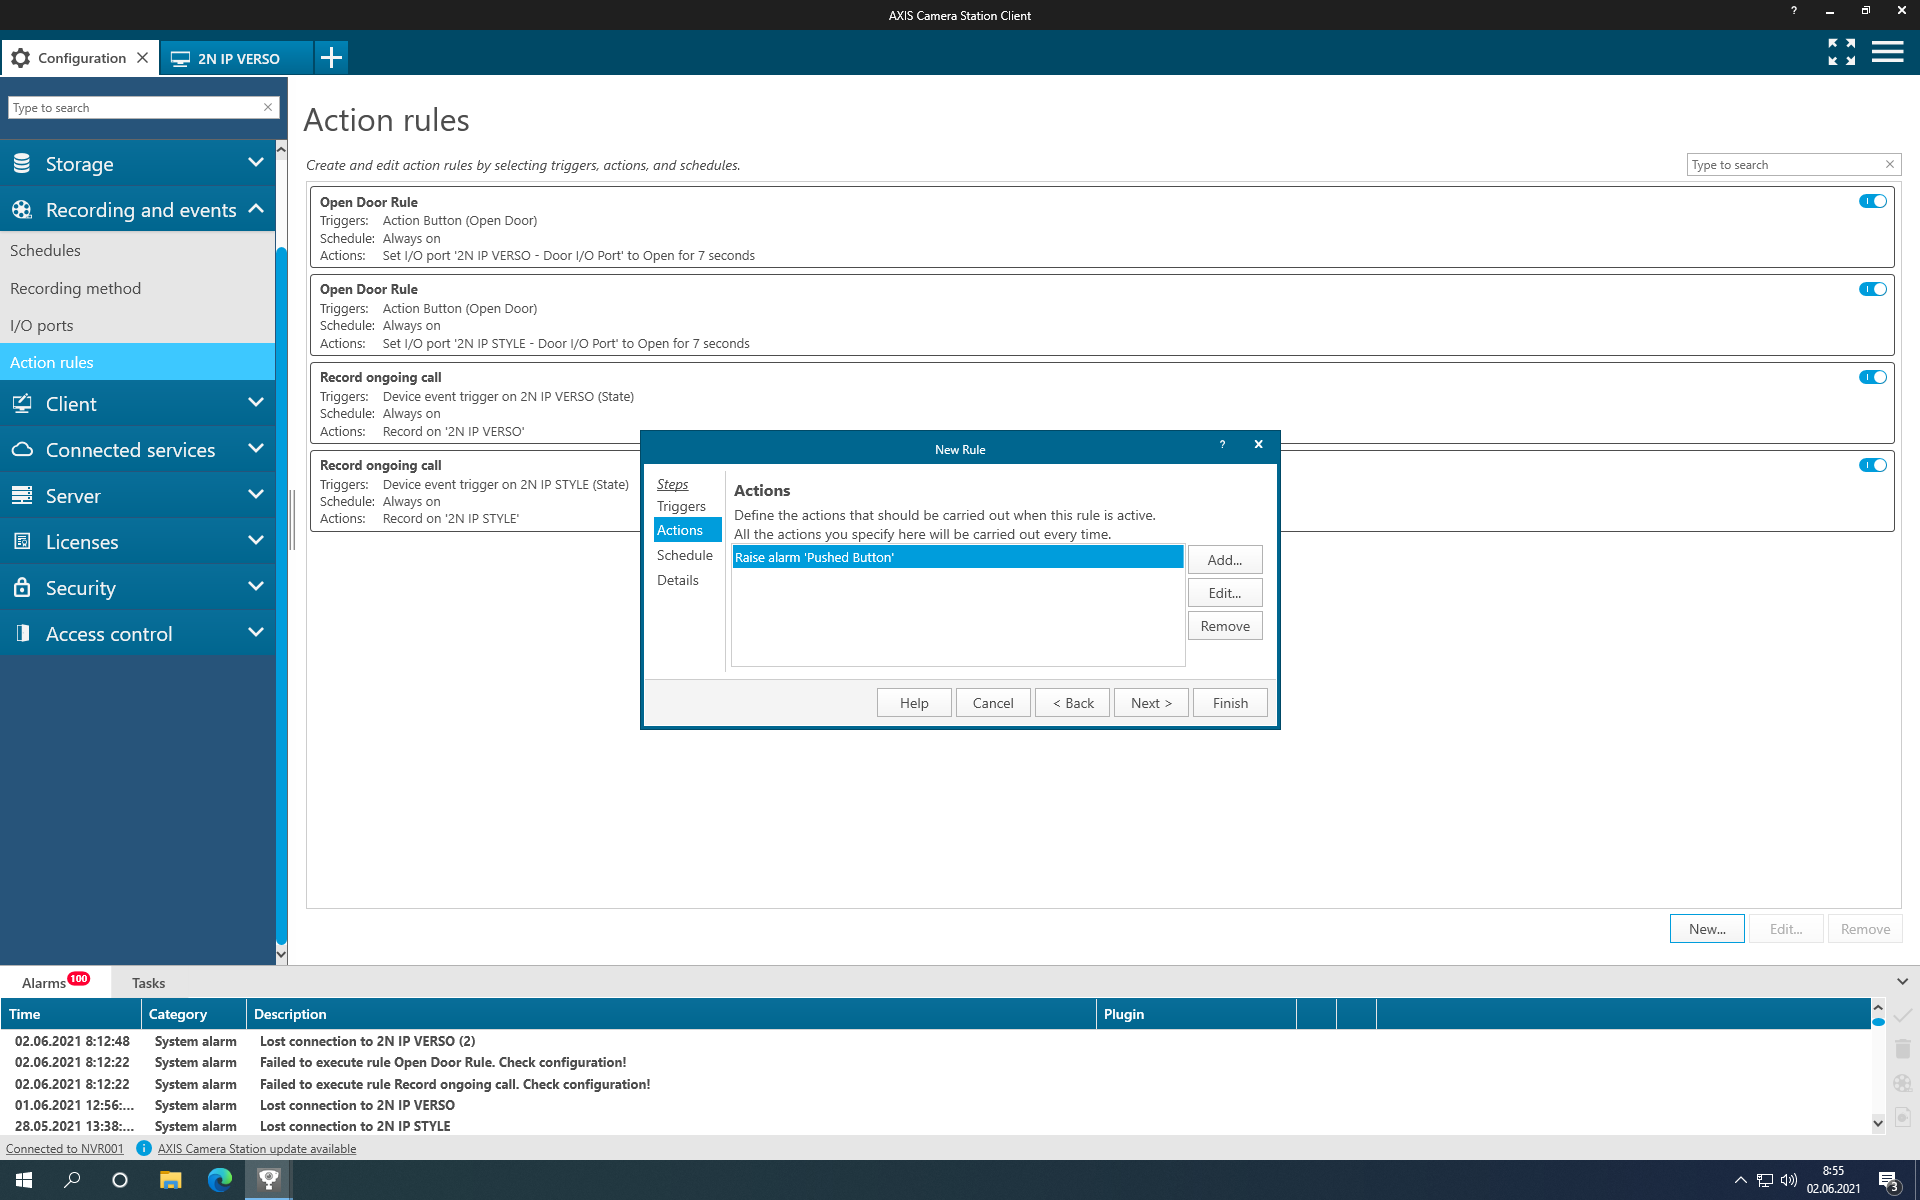
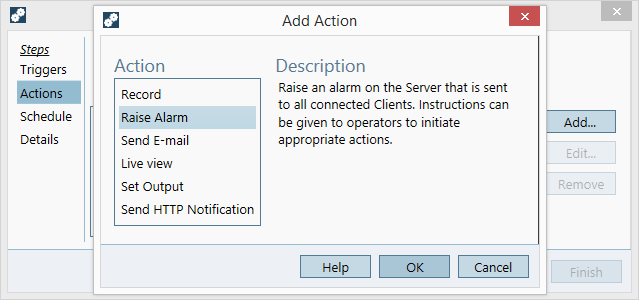
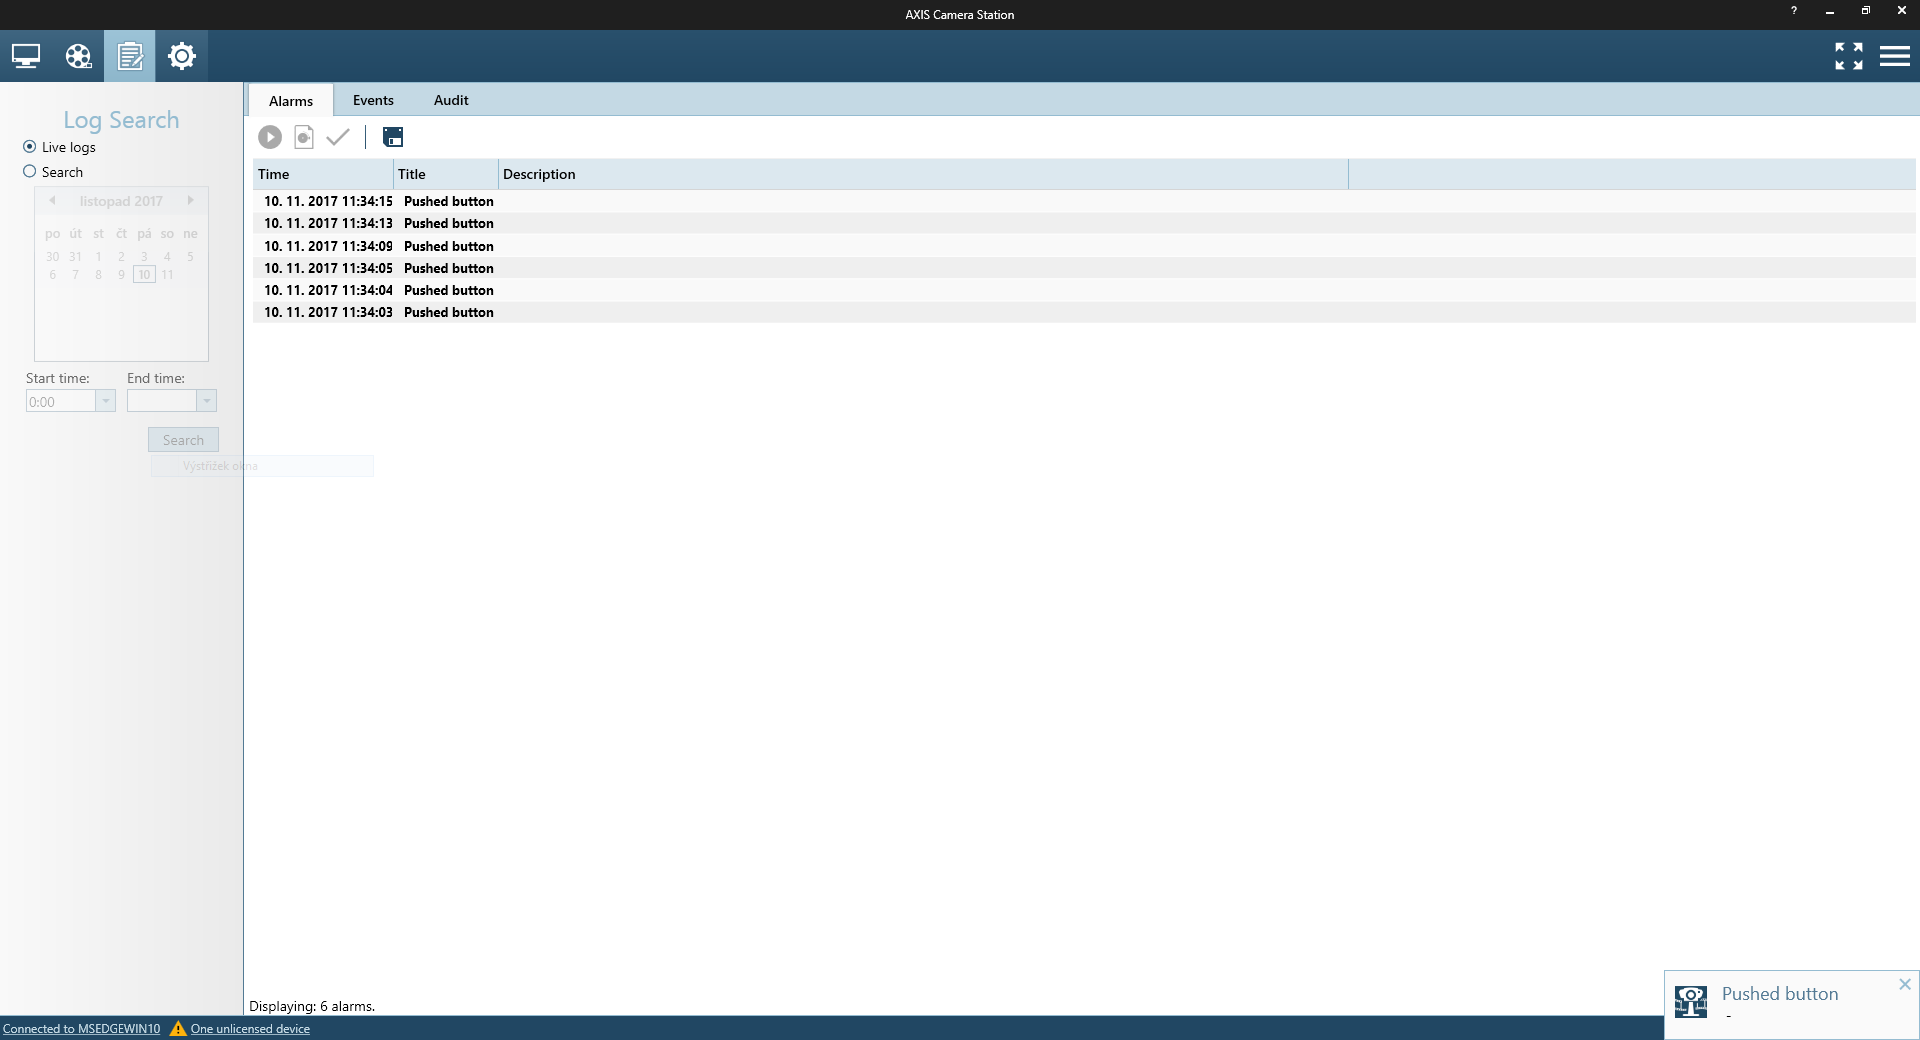
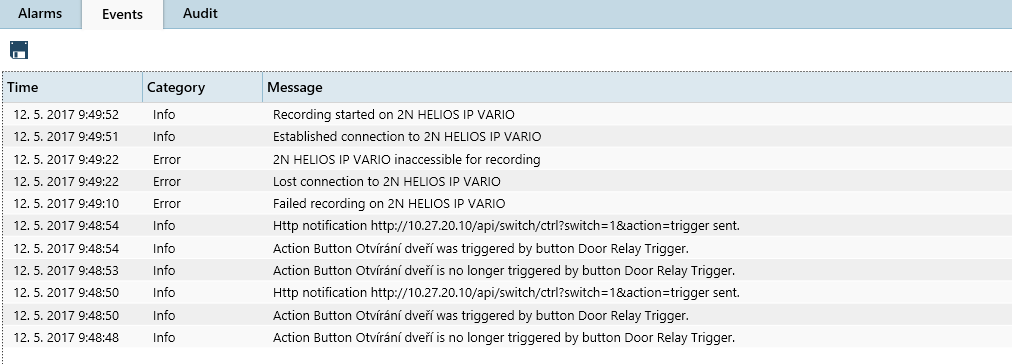
Events form 2N IP Intercom can be processed in AXIS Camera Station, but in default state it is not possible to log these events. It is possible however to trigger some action with such event. To do so refer to previous guide for Switch control. It is possible to log events defined from Axis Camera Station like triggering the Door Lock or Powering Up/Down the 2N IP Intercom device.
 |
Used Symbols
![]() - Compatible
- Compatible
![]() - Work with limitation
- Work with limitation
![]() - Incompatible
- Incompatible