Genetec Synergis
Content
About
The Security Center Synergis™ IP access control system (ACS) heightens the security of your organization and increases your readiness to respond to incidents and threats, while leveraging any existing network and security equipment investments. With advanced security measures and support for an ever-growing number of 3rd party access control devices, the Synergis system gives you the confidence to protect your people and assets.
https://www.genetec.com/solutions/all-products/synergis
Version
| Genetec Synergis (Security Center) | 2N IP Intercom Version | RIO protocol |
|---|---|---|
| 11.4.1314.0 (5.11.2.0) | 2.39.2.54.6 and higher | |
| 10.10.496.0 (5.10.0.0) | 2.32.0.41.2 | |
| 10.8.487.21 (5.7.809.45) | 2.24.1.33.11 | |
10.5.500.25 (5.6.977.19) | 2.22.0.31.8 |
License
2N Enhanced Integration License is required.
Caution - 2N IP Intercom Version 2.35 and lower
- Before settings of your device, connect all modules (RFID readers) to the device.
- Enable Settings of Genetec Synergis and do not fill IP addesss, username and password
- Restart the device
- Go to menu menu Hardware/Door/Door and fill IP address, username and password of Genetec Server
- Go on steps in chapter Genetec Synergis Settings
2N IP Intercom Settings
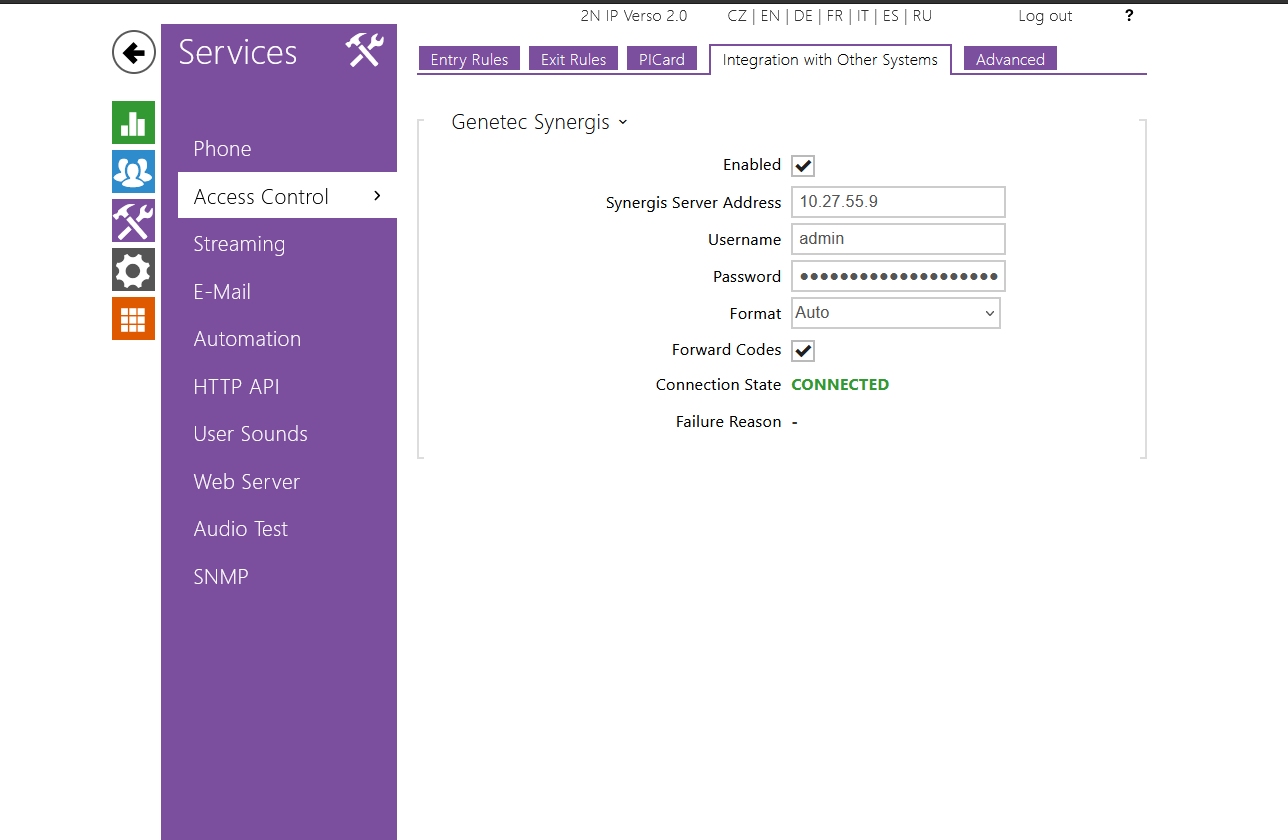
Go to Services – Access Control - Integration with Other Systems and fill Synergis Server Address, Username, Password and click to Save. IP Intercom should connect to Genetec Synergis. If you want to allow PIN forwarding, you have to tick the checkbox "Forward Codes".
 |
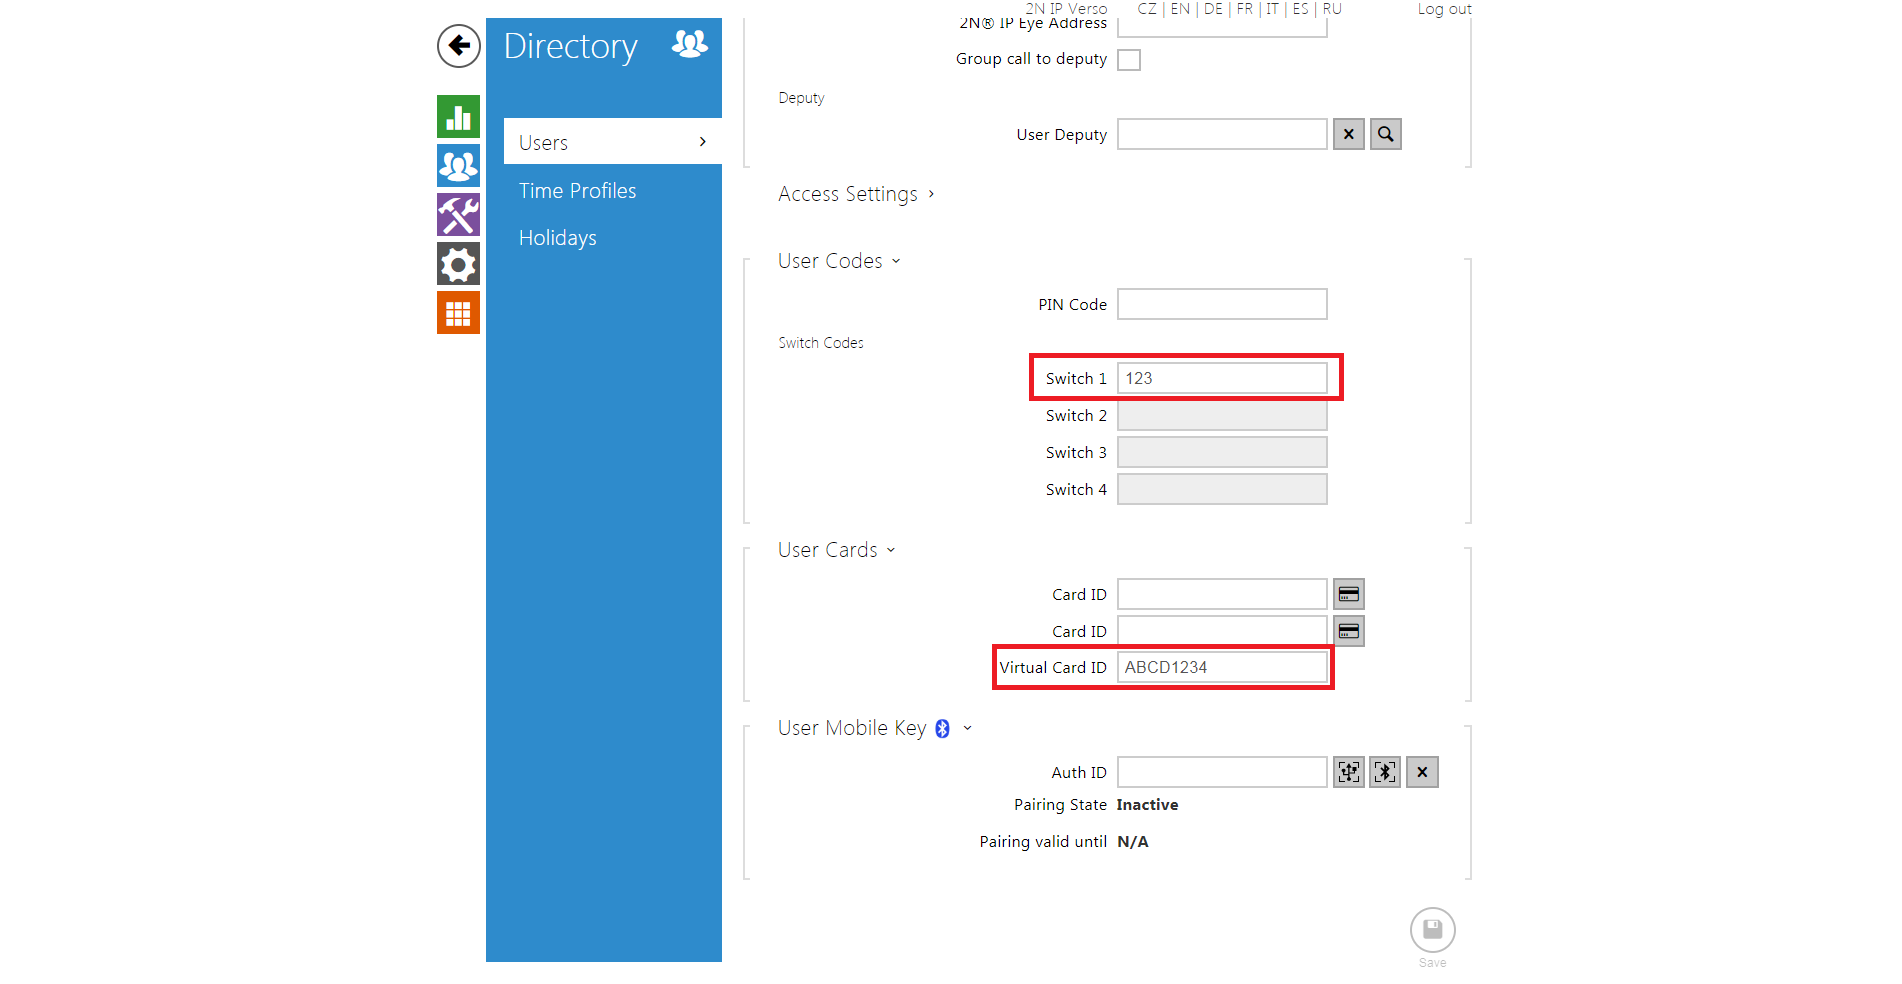
If you use Bluetooth module or Keypad module you have to set virtual Card ID (e.g. the minimum number of characters of format CSN (32bits) is 8). This example is for Keypad module.
 |
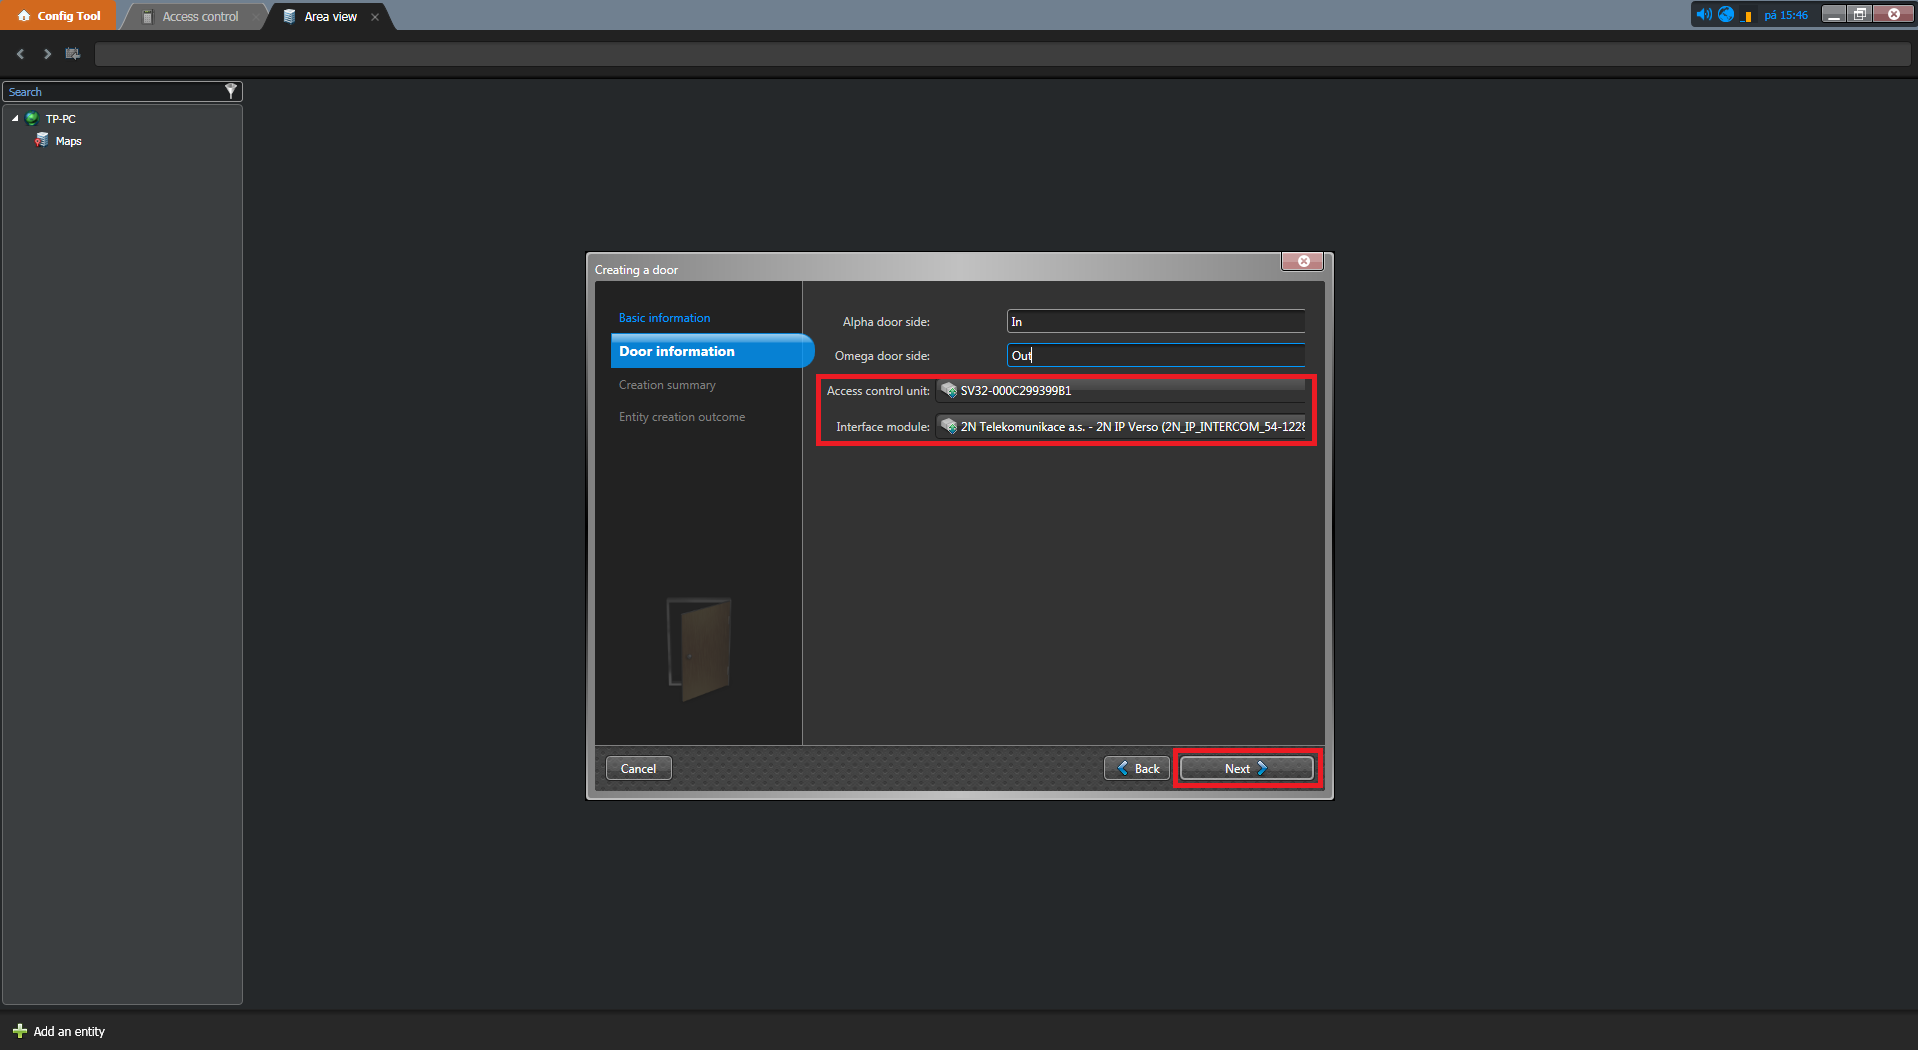
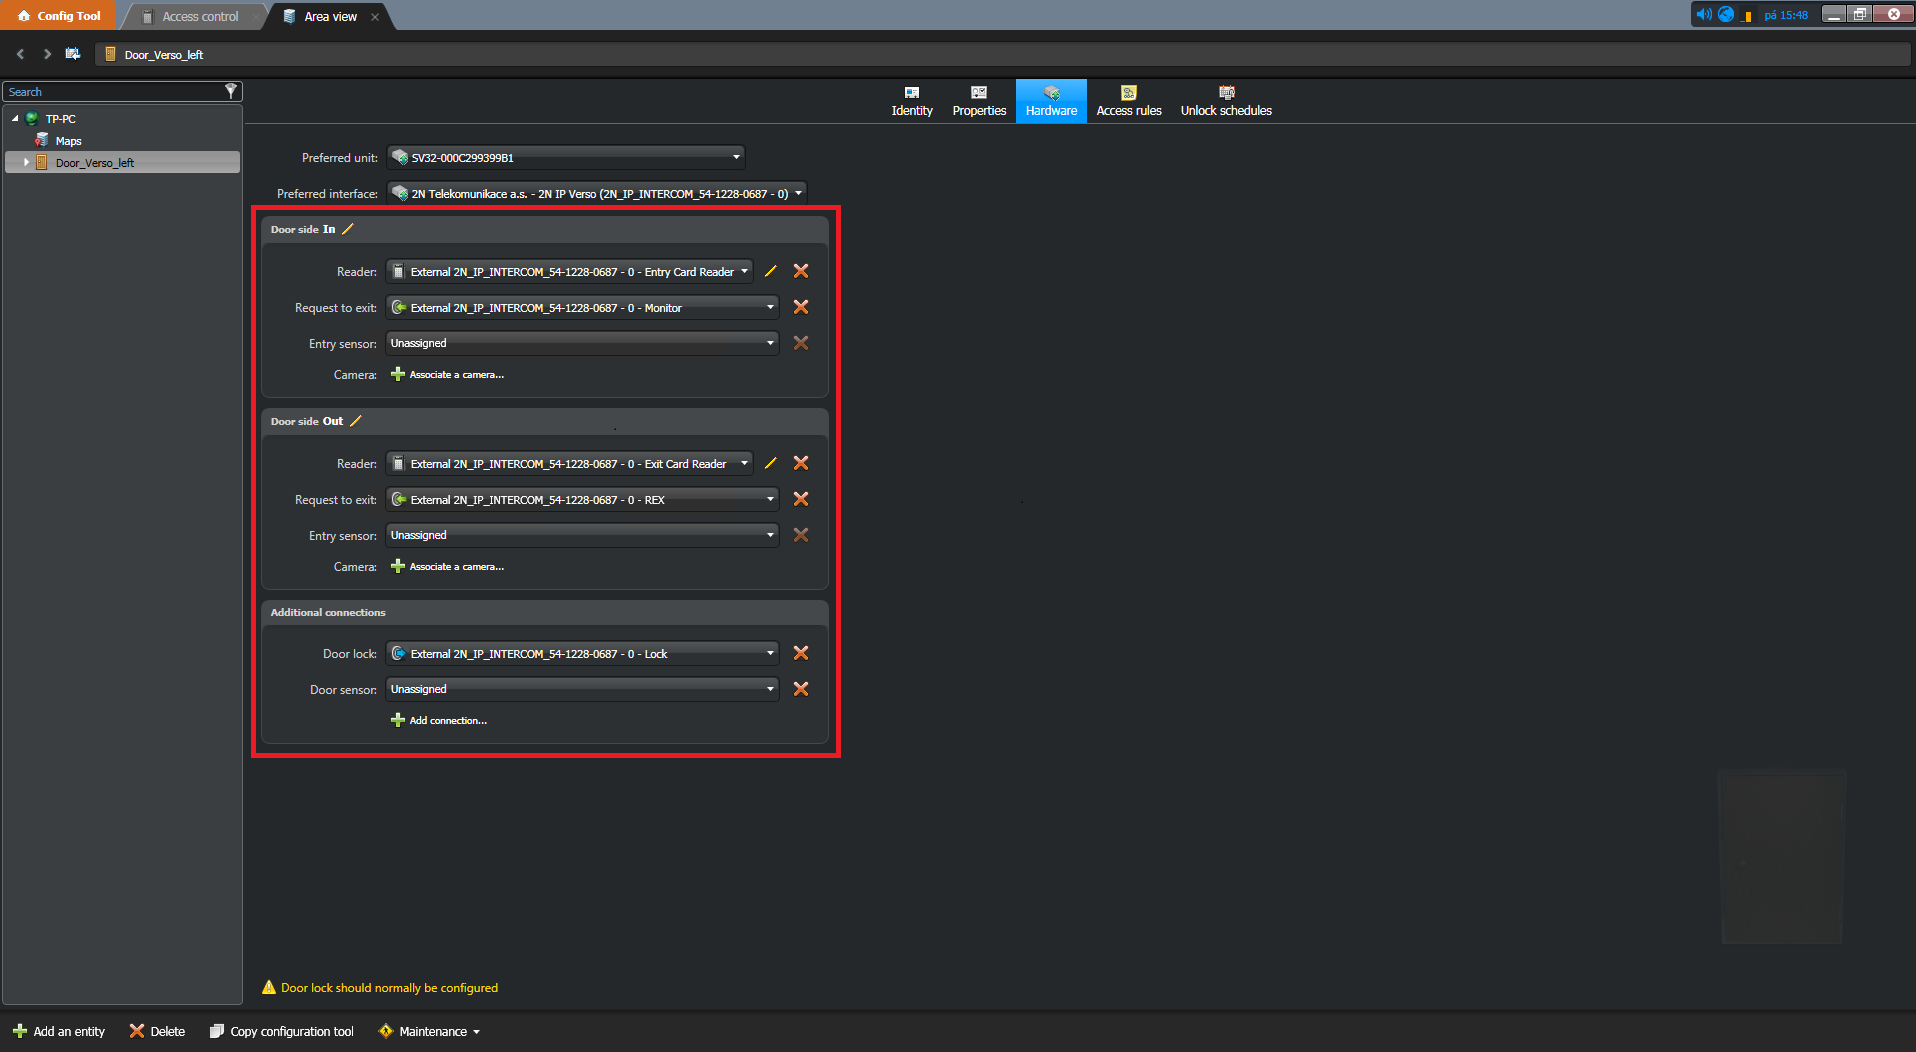
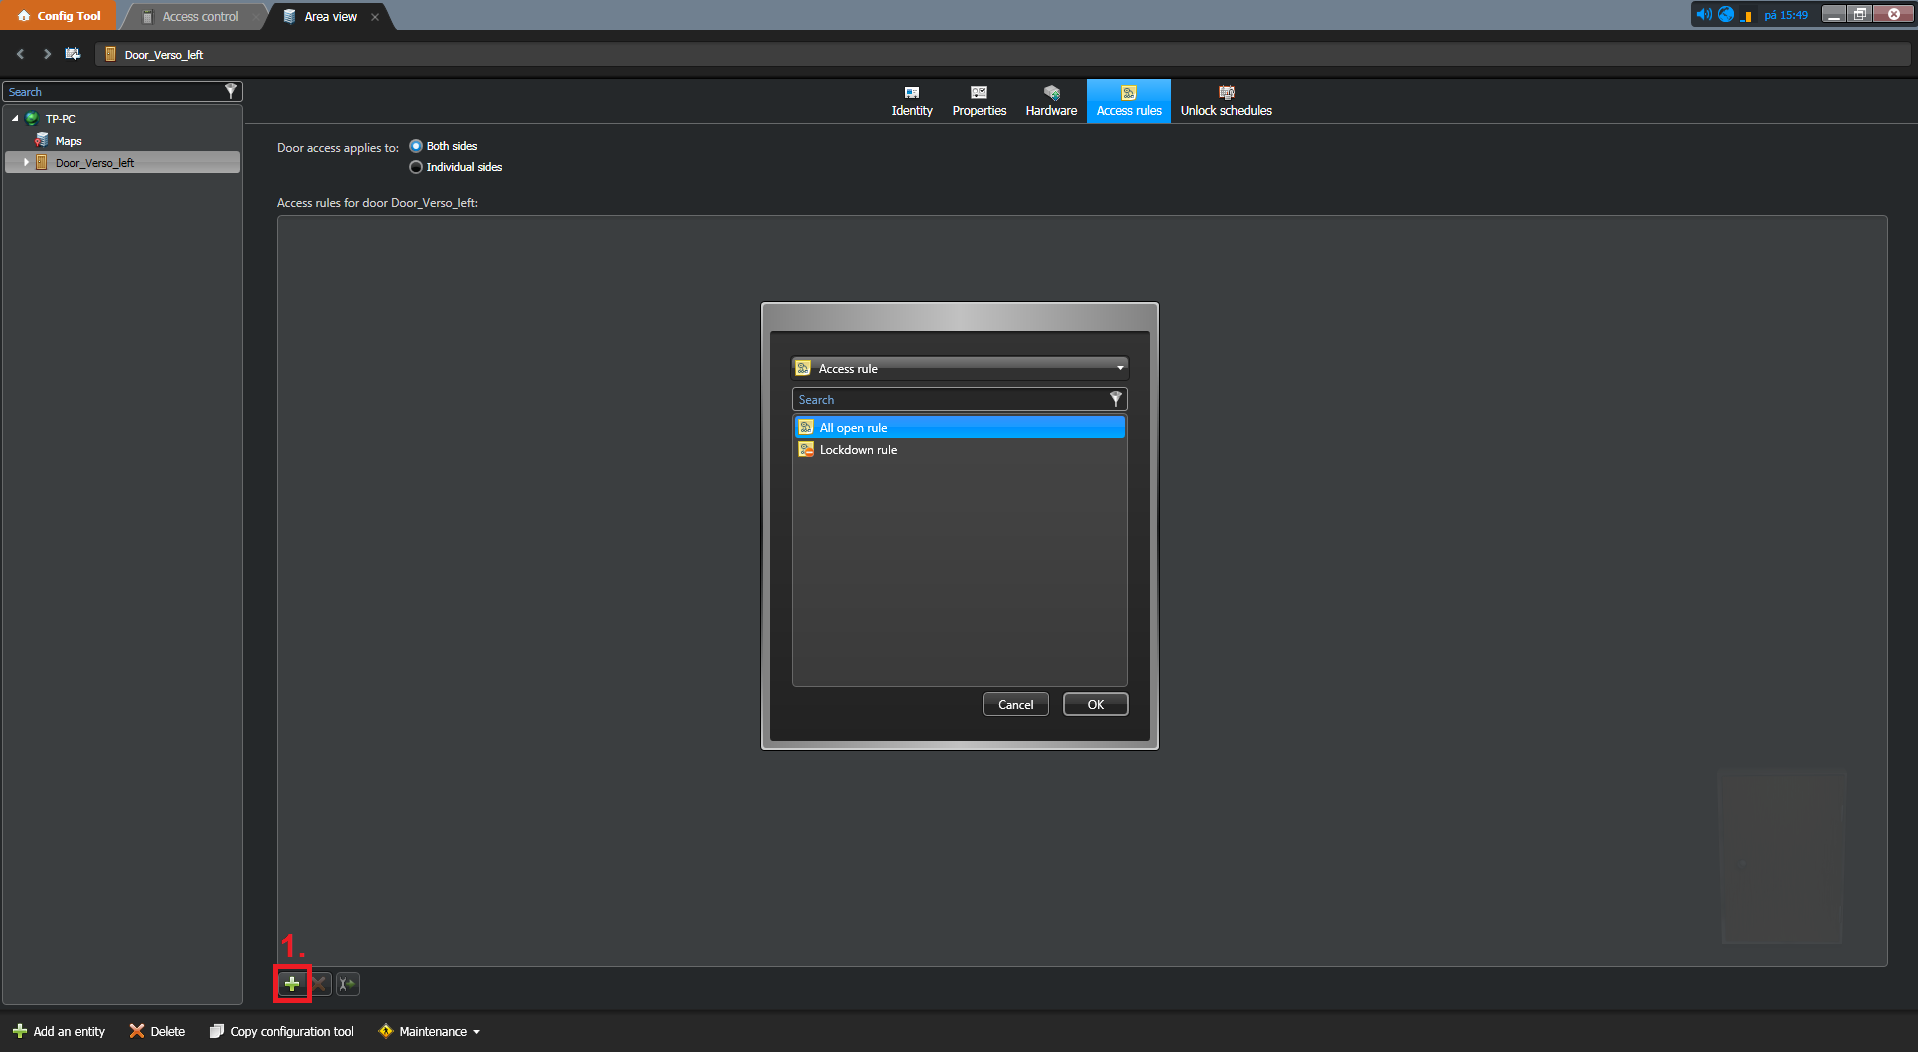
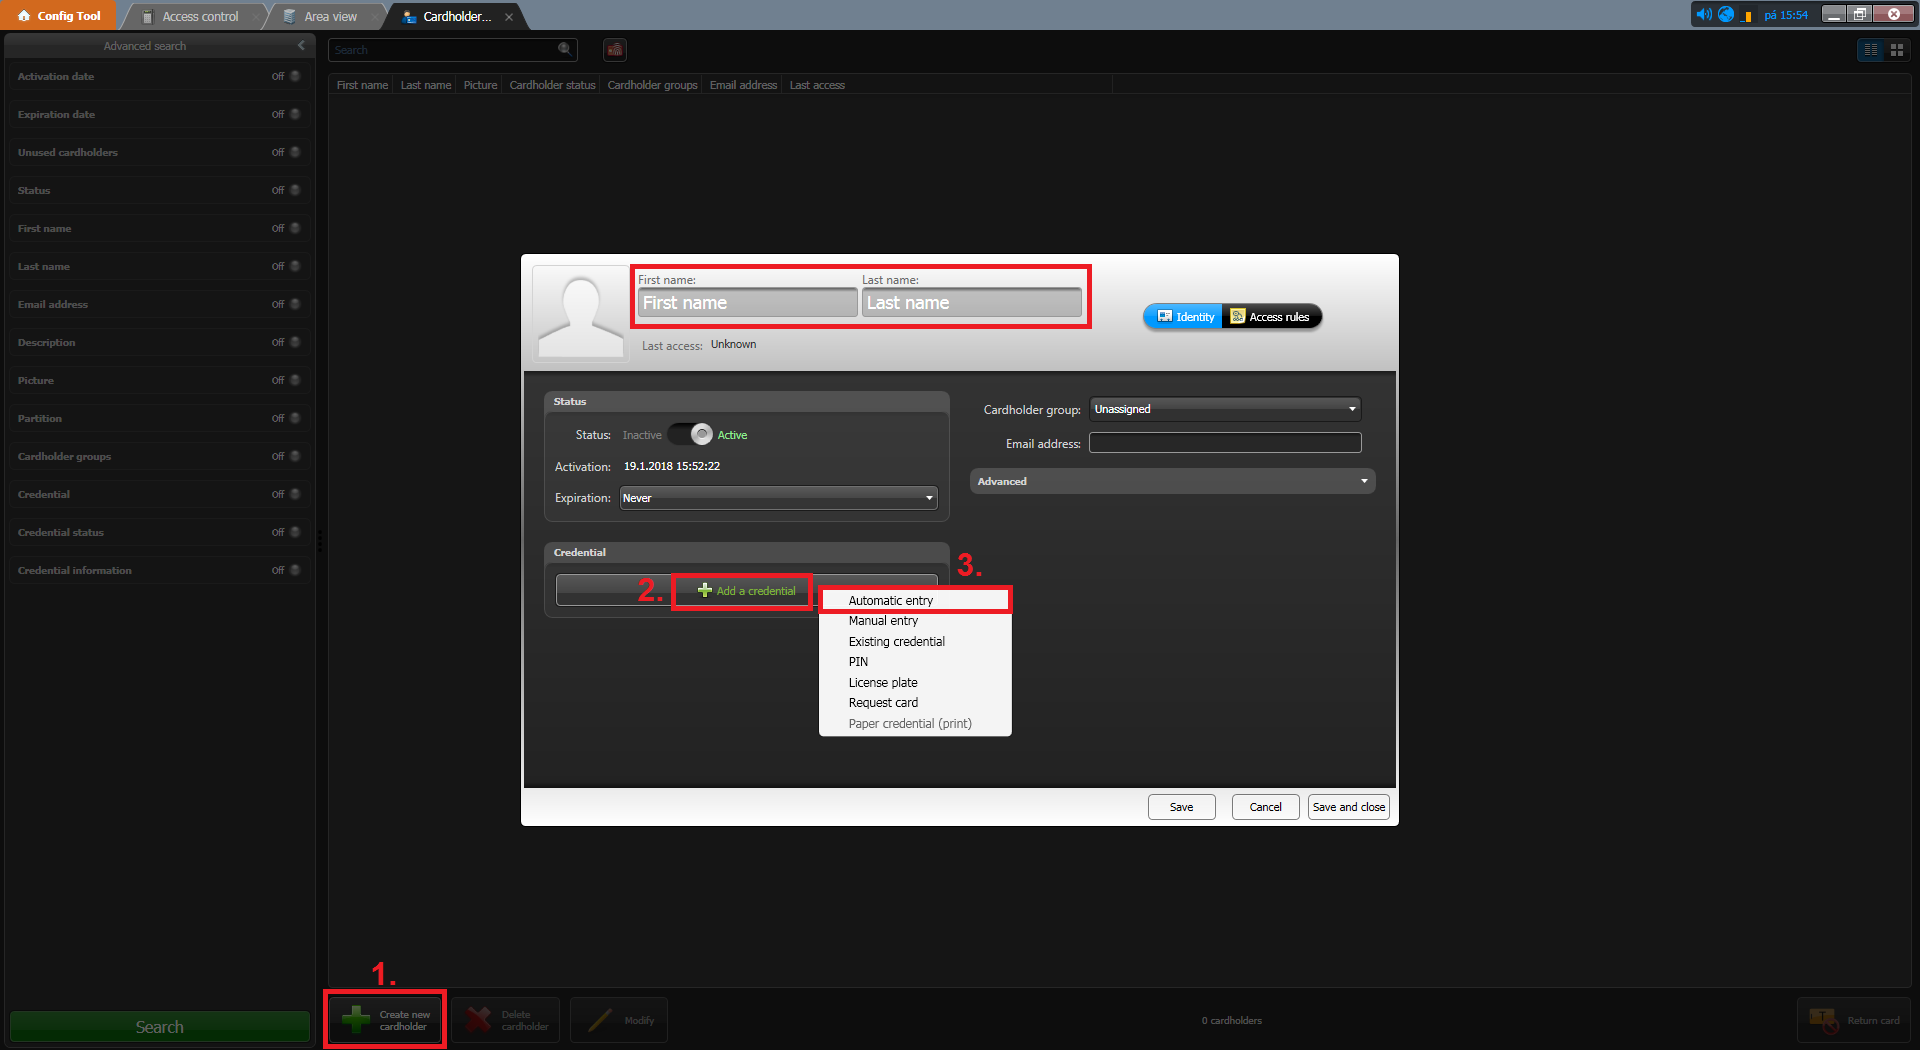
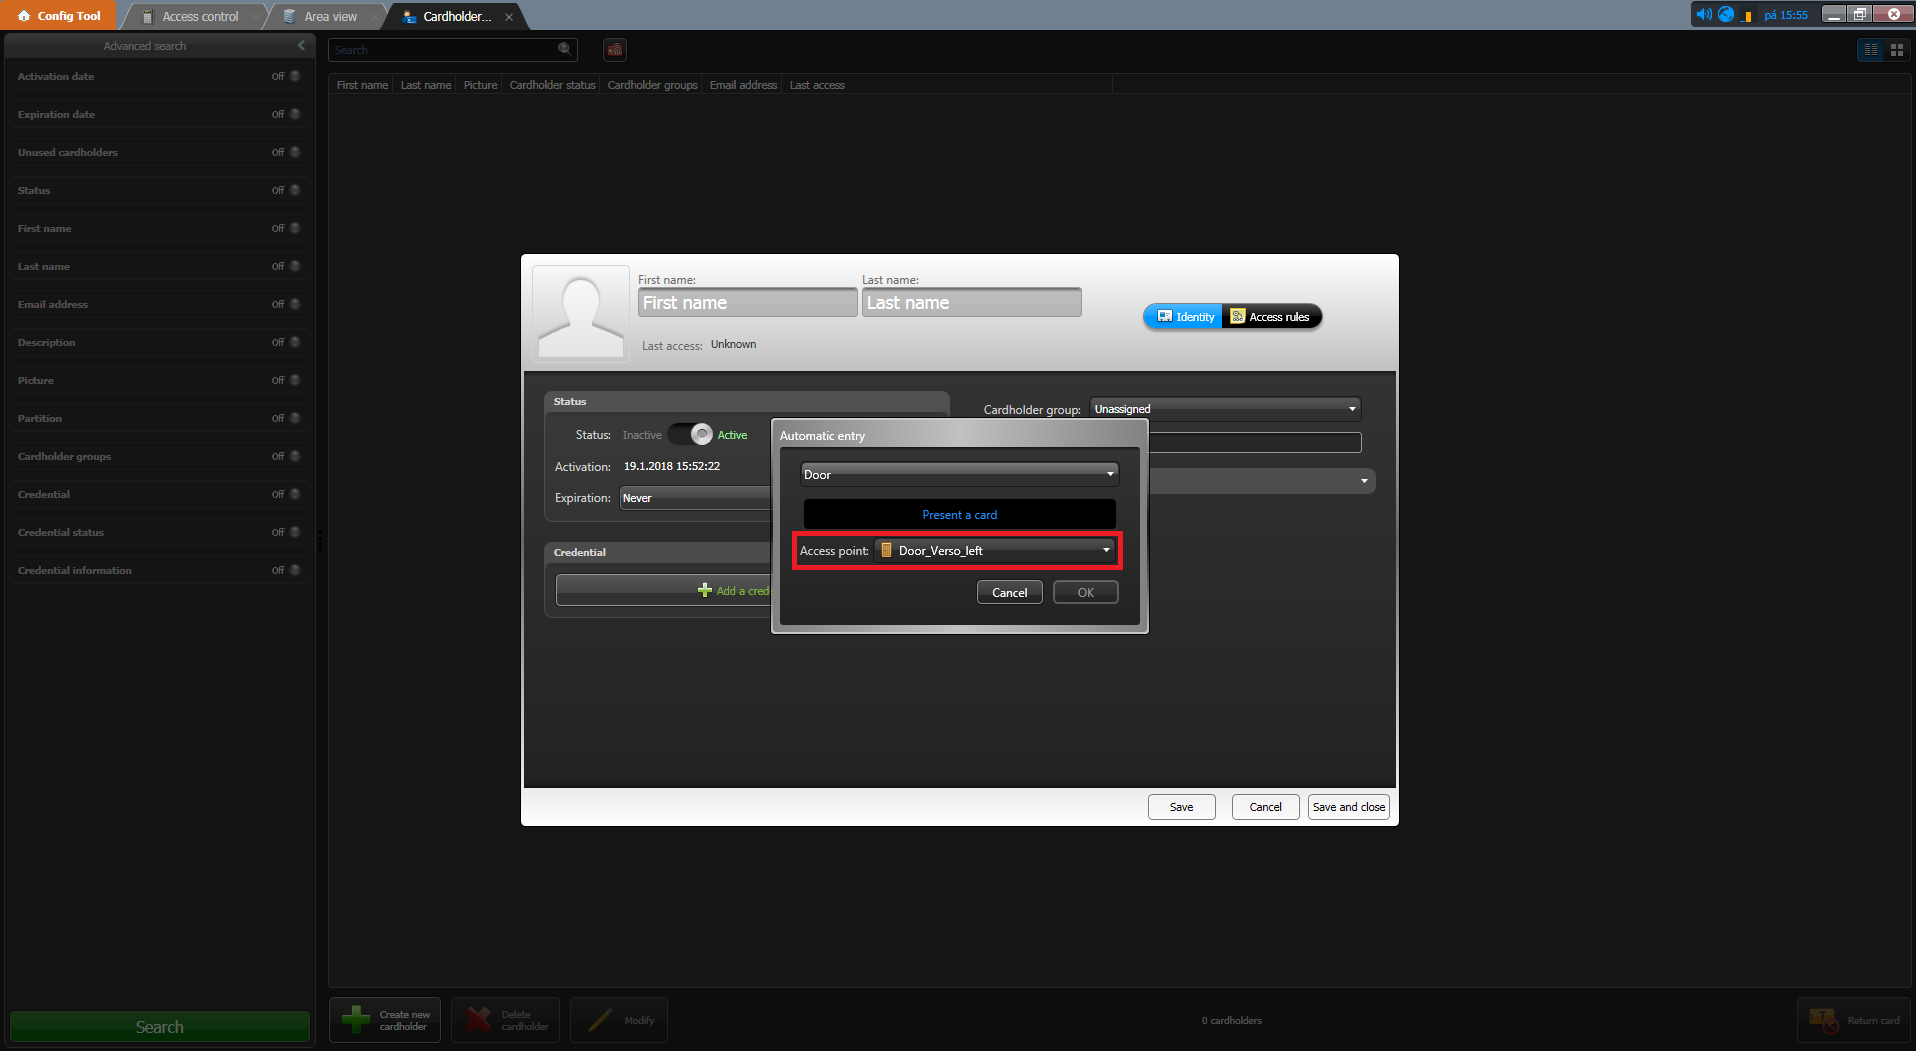
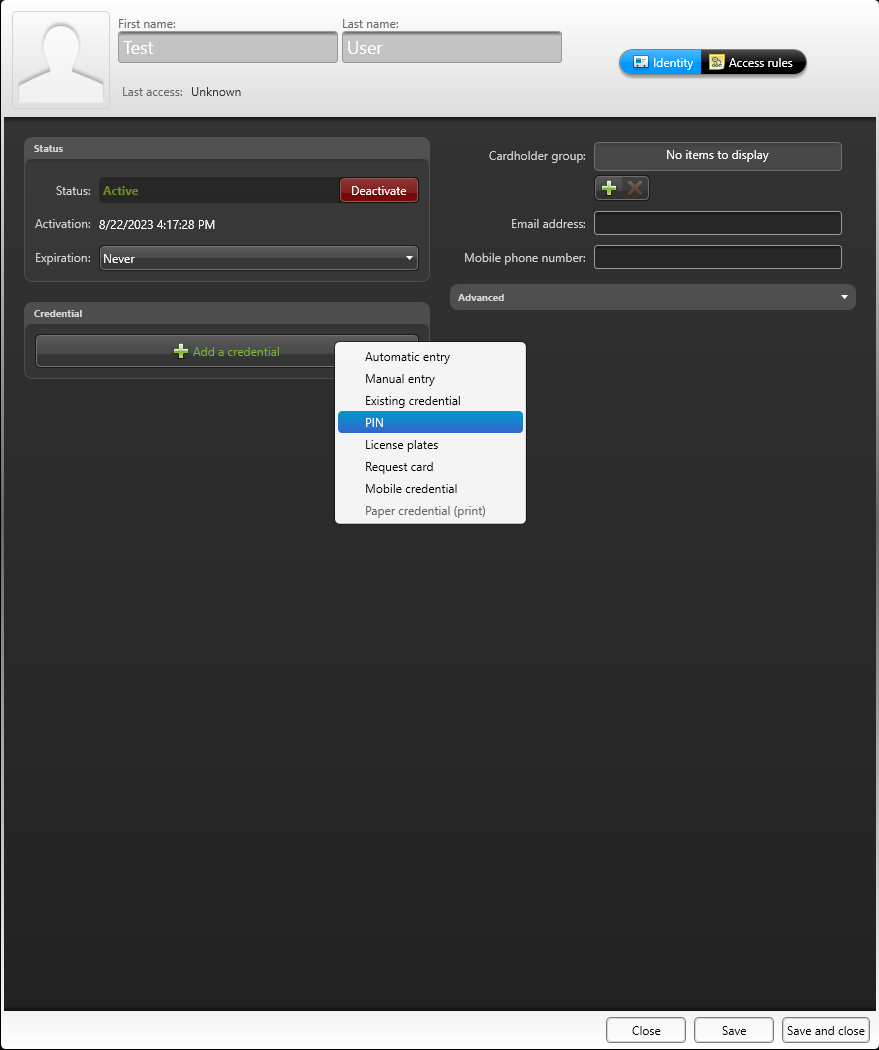
Genetec Synergis Settings
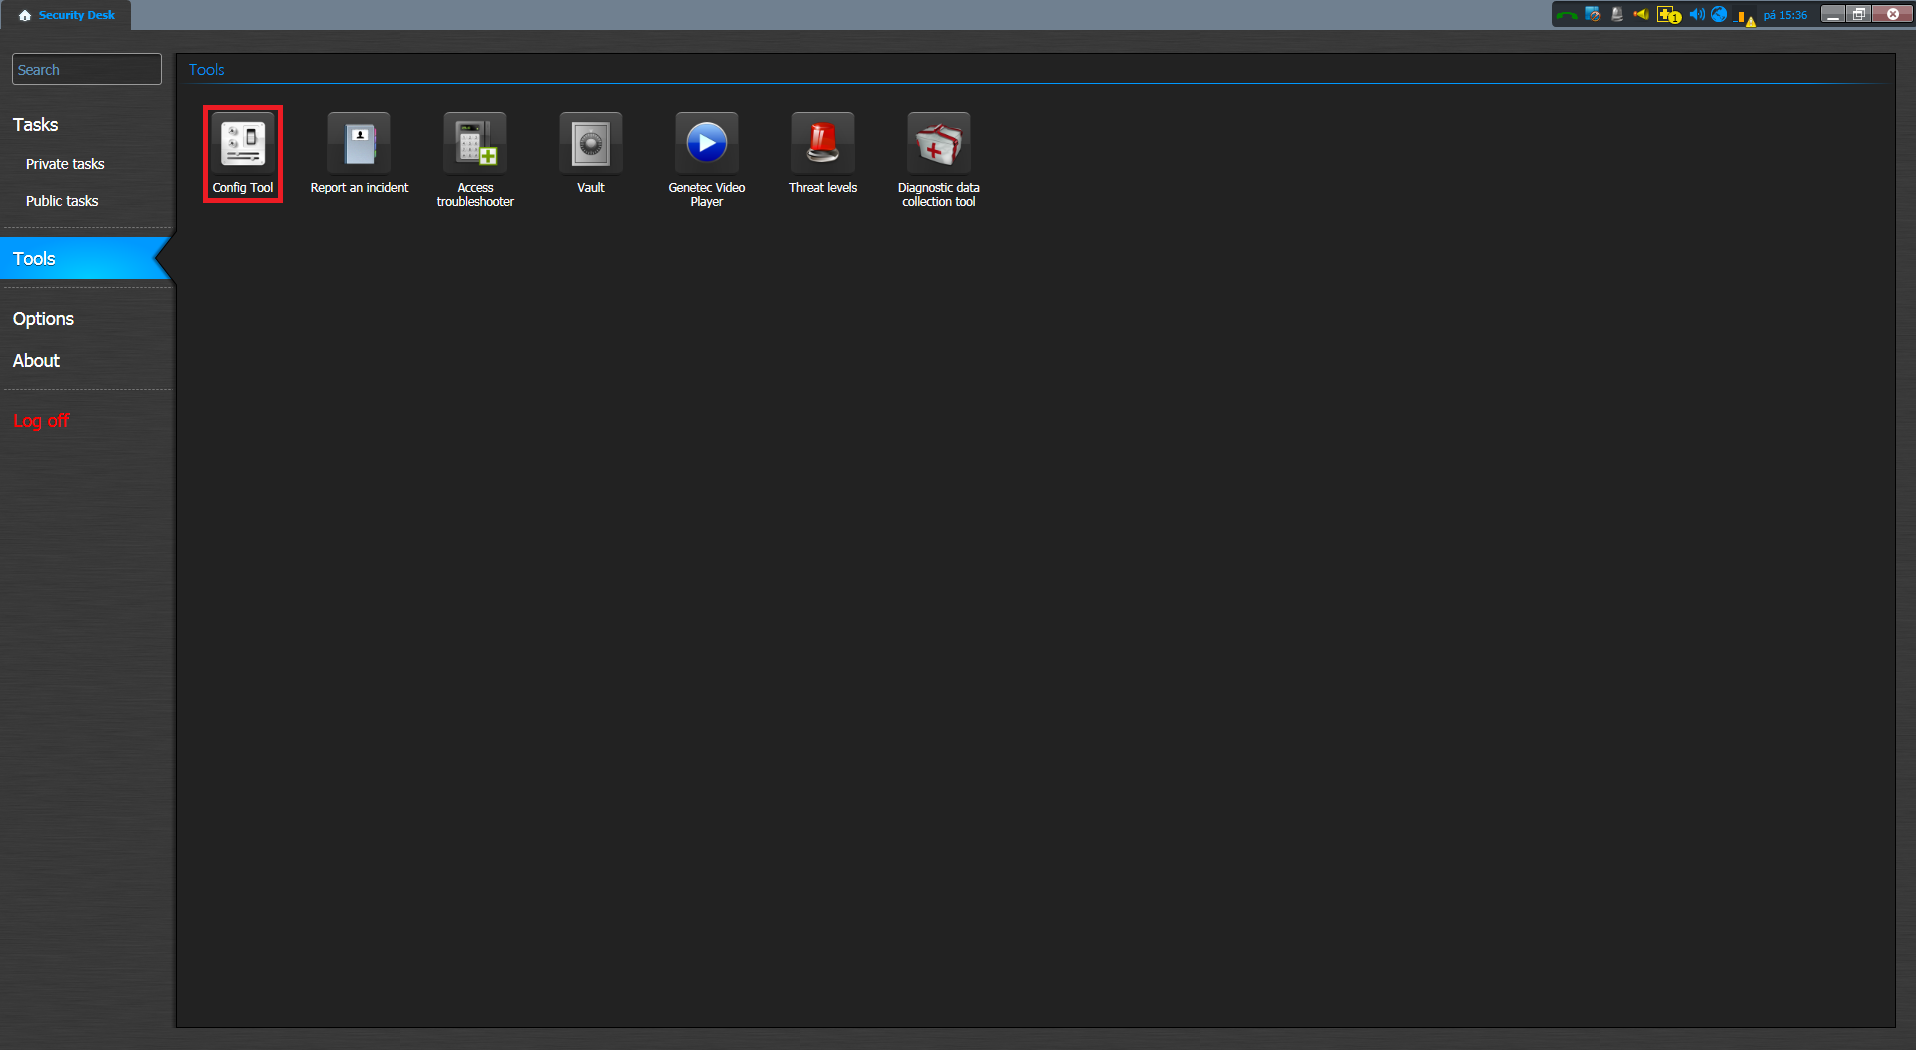
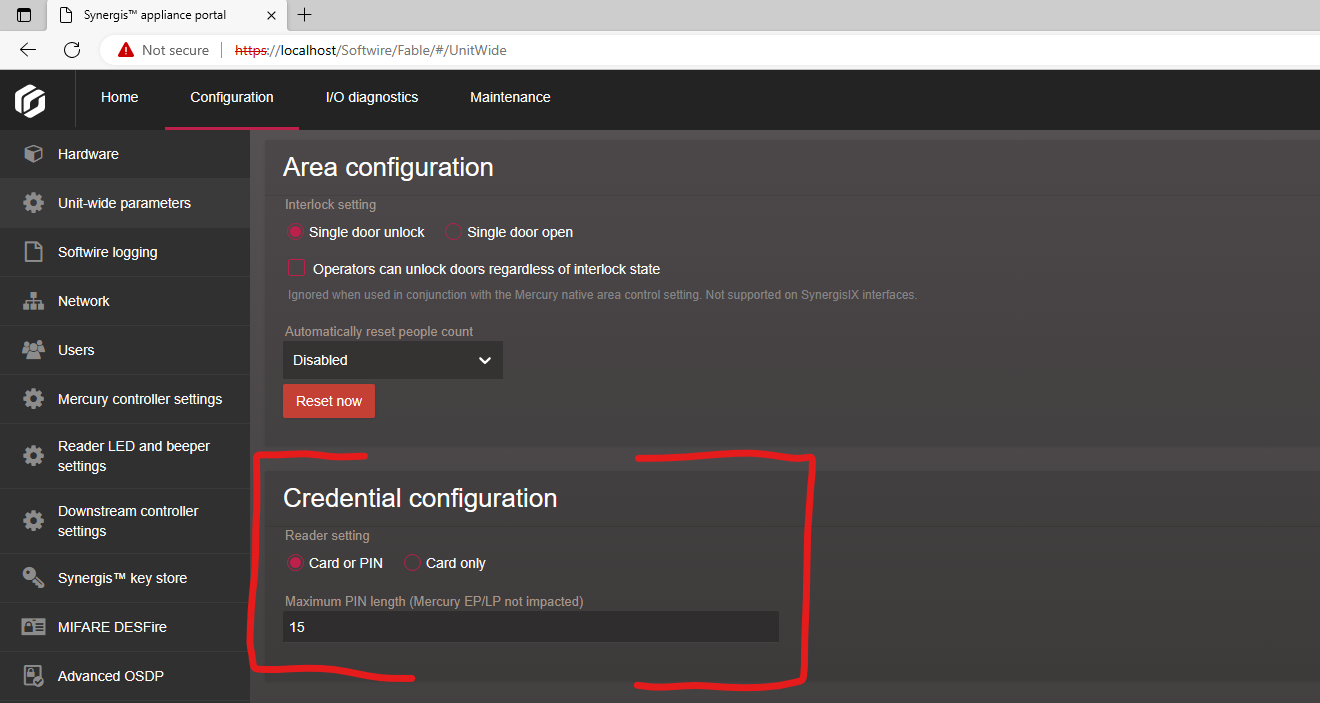
Before setting Genetec Synergis you have to enable the RIO endpoint as it is off by default. Enter in your browser: https://[Unit IP]/Features/DuiRIO/Enabled/Set?value=true where [Unit IP] is the IP address of your Synergis™ unit. Now start Genetec Security Desk and open menu Config Tool.
 |
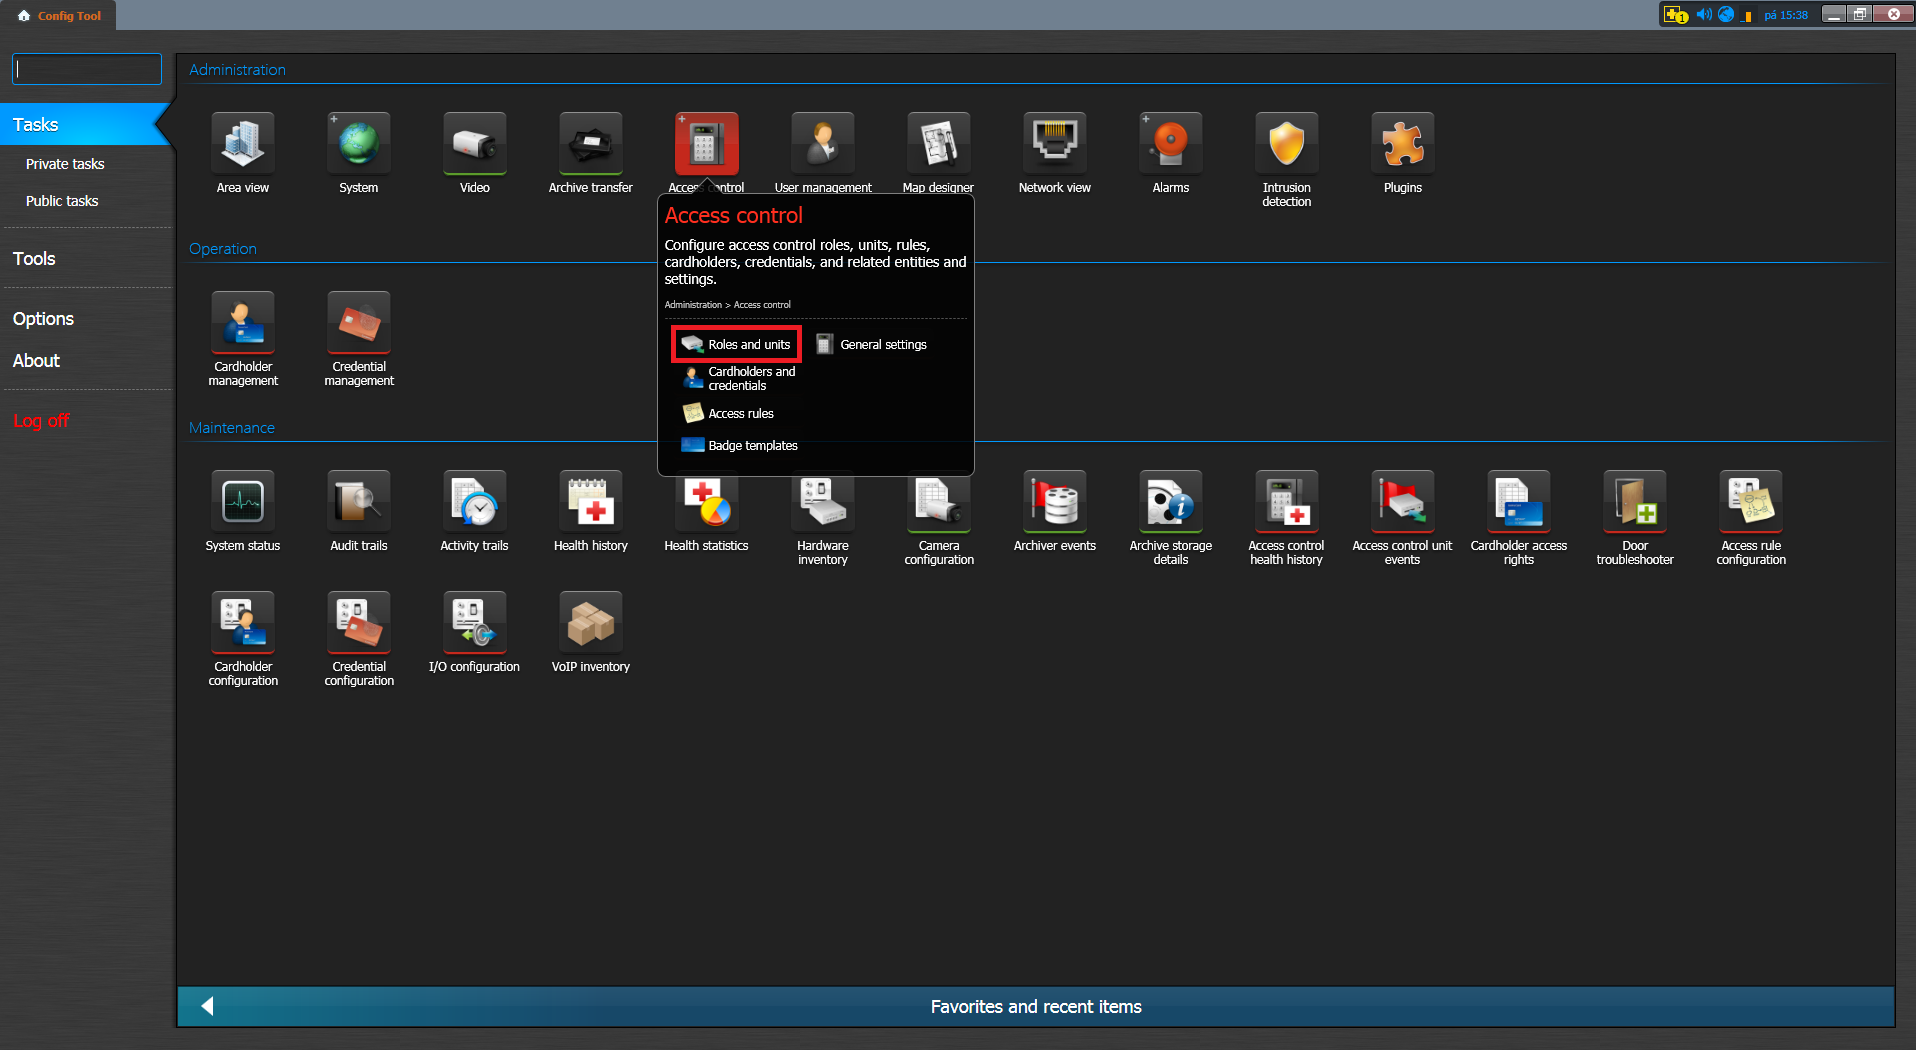
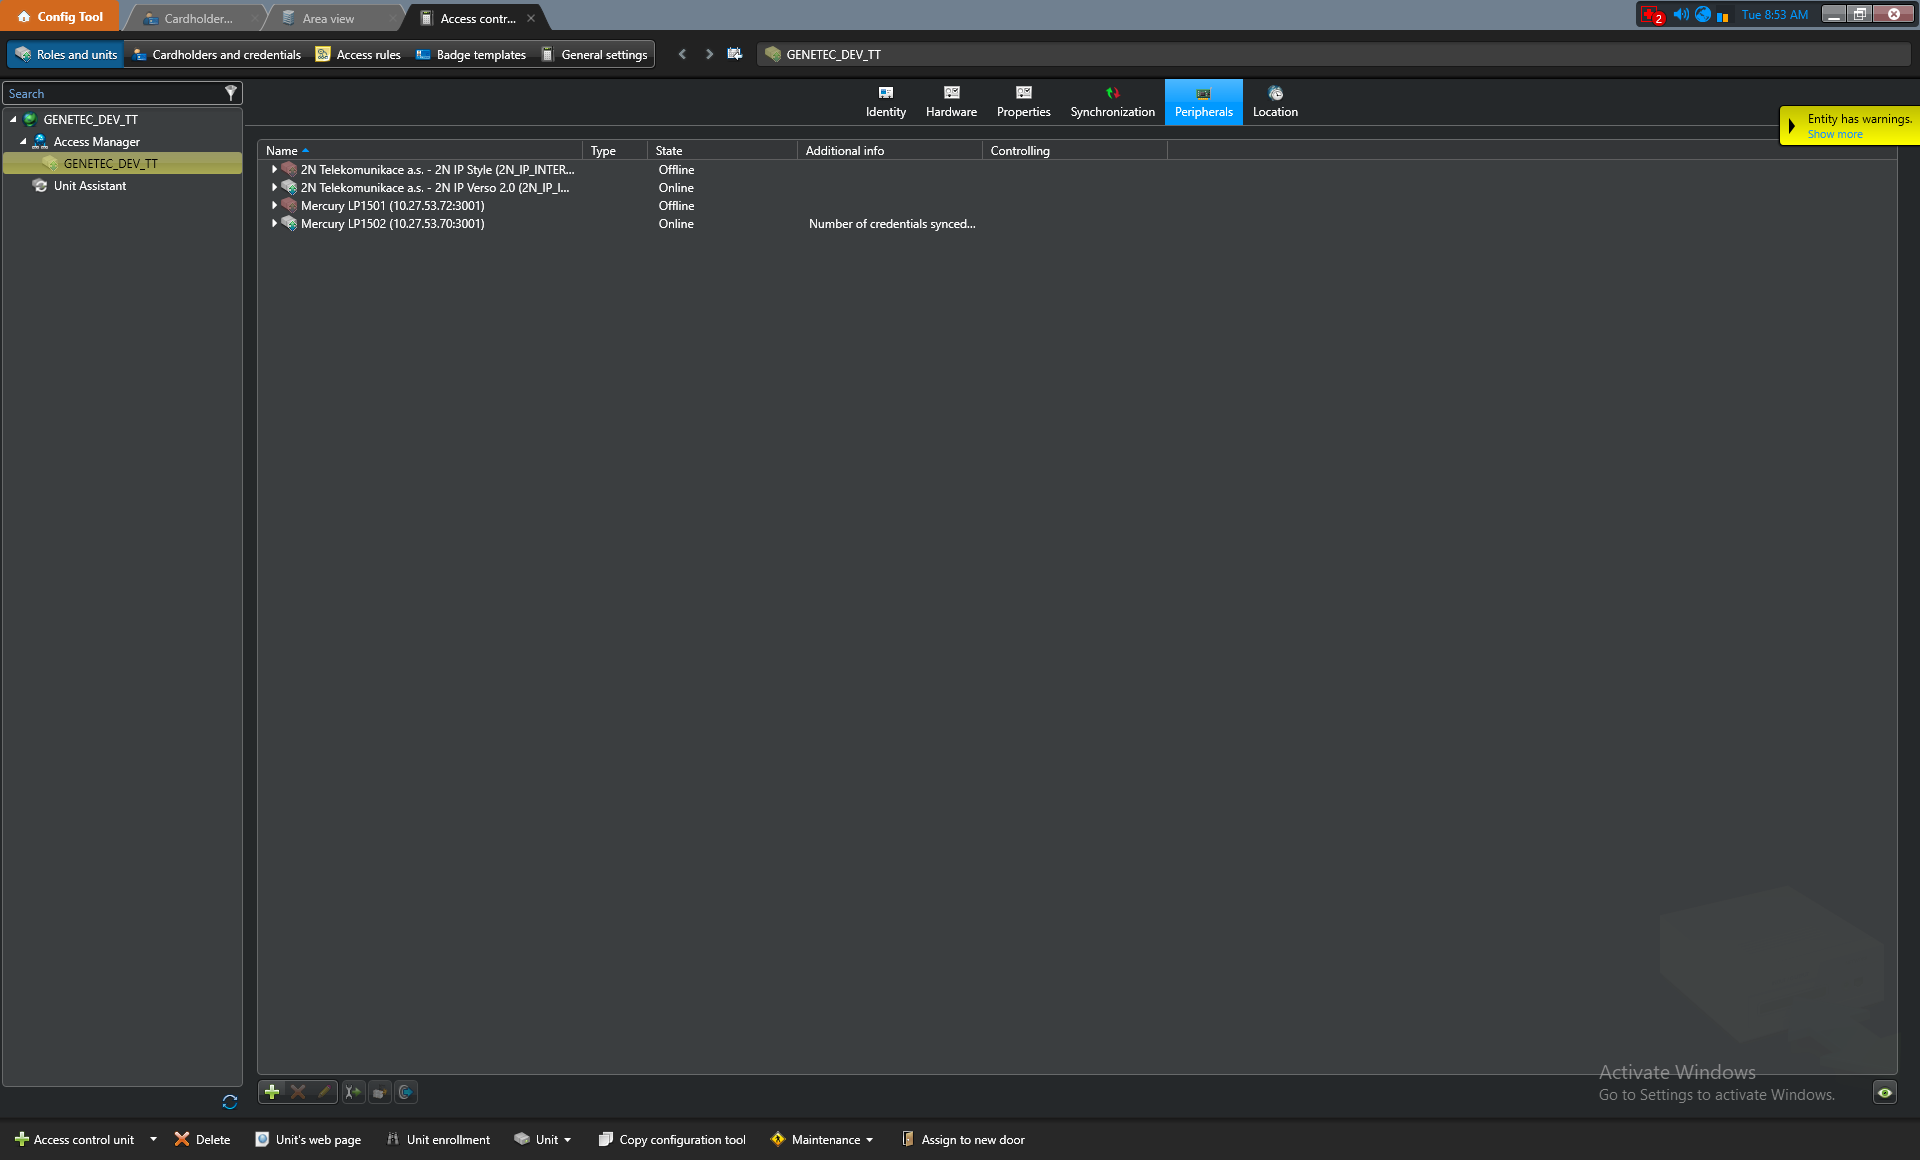
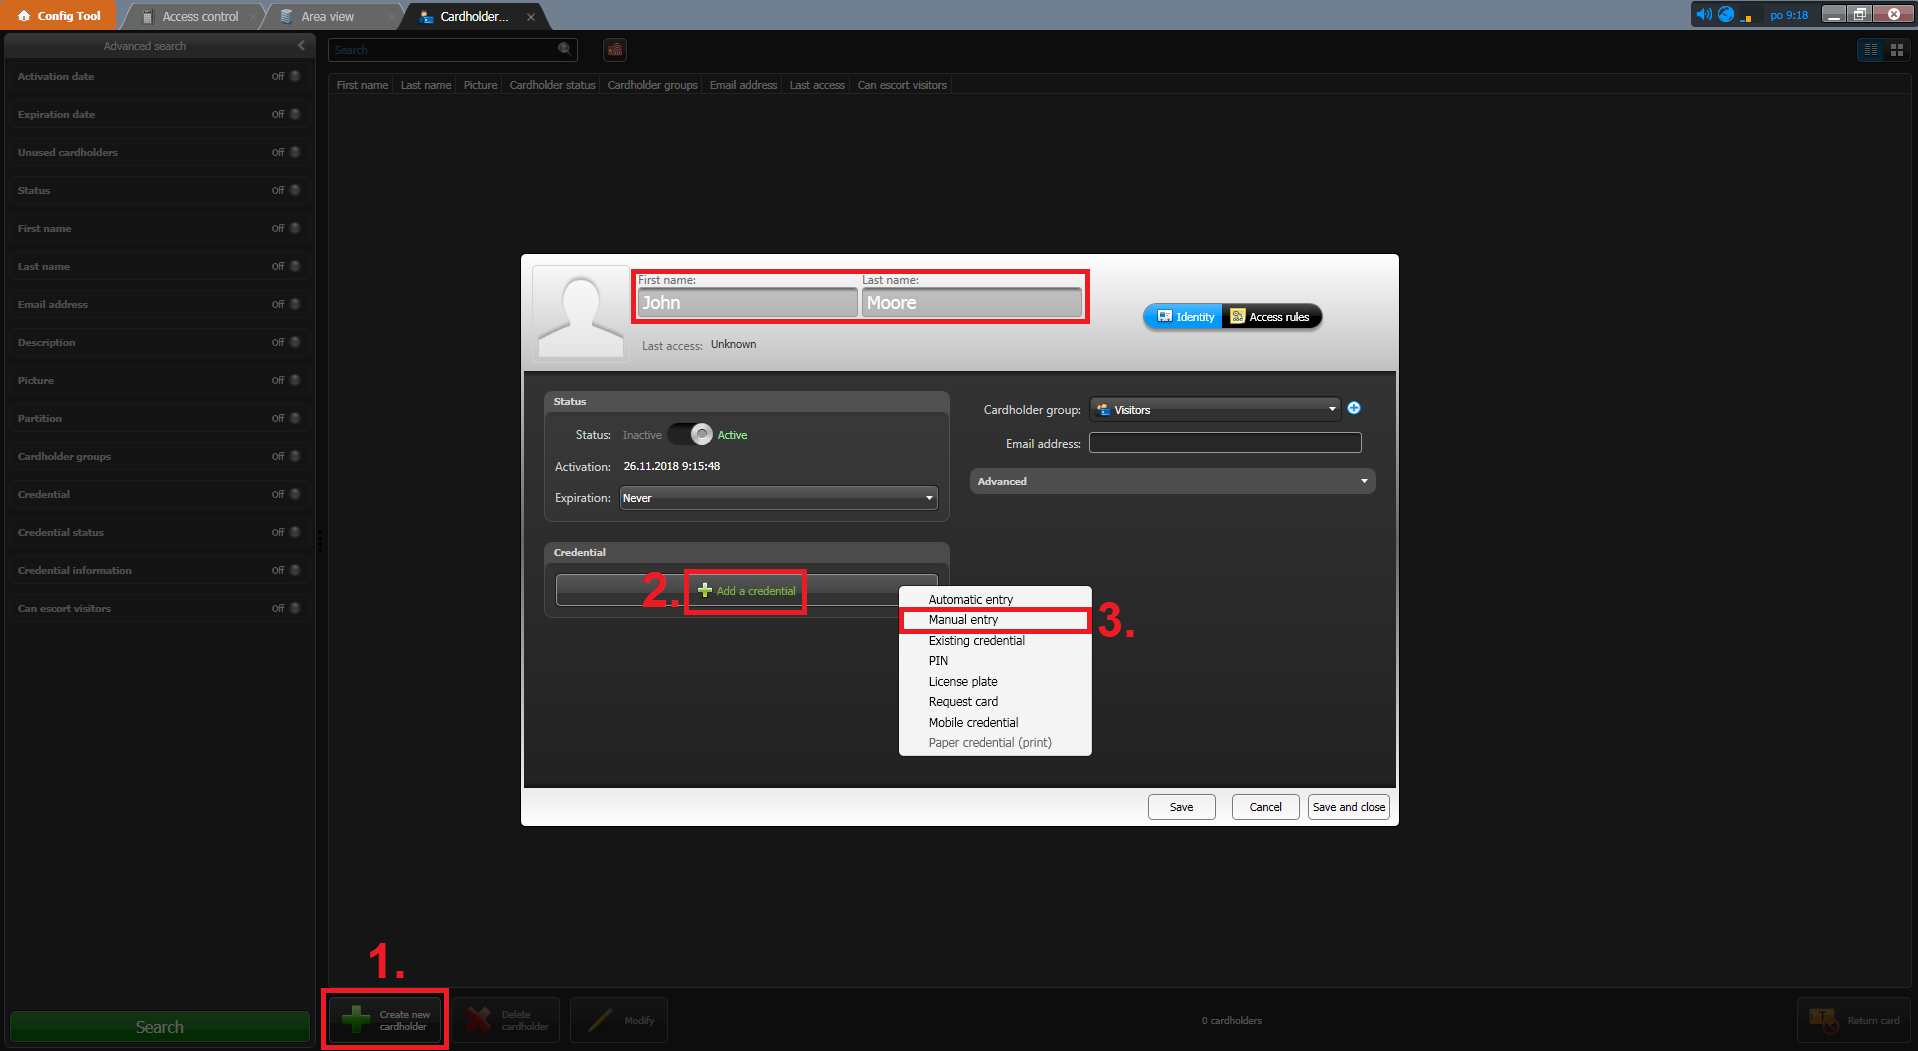
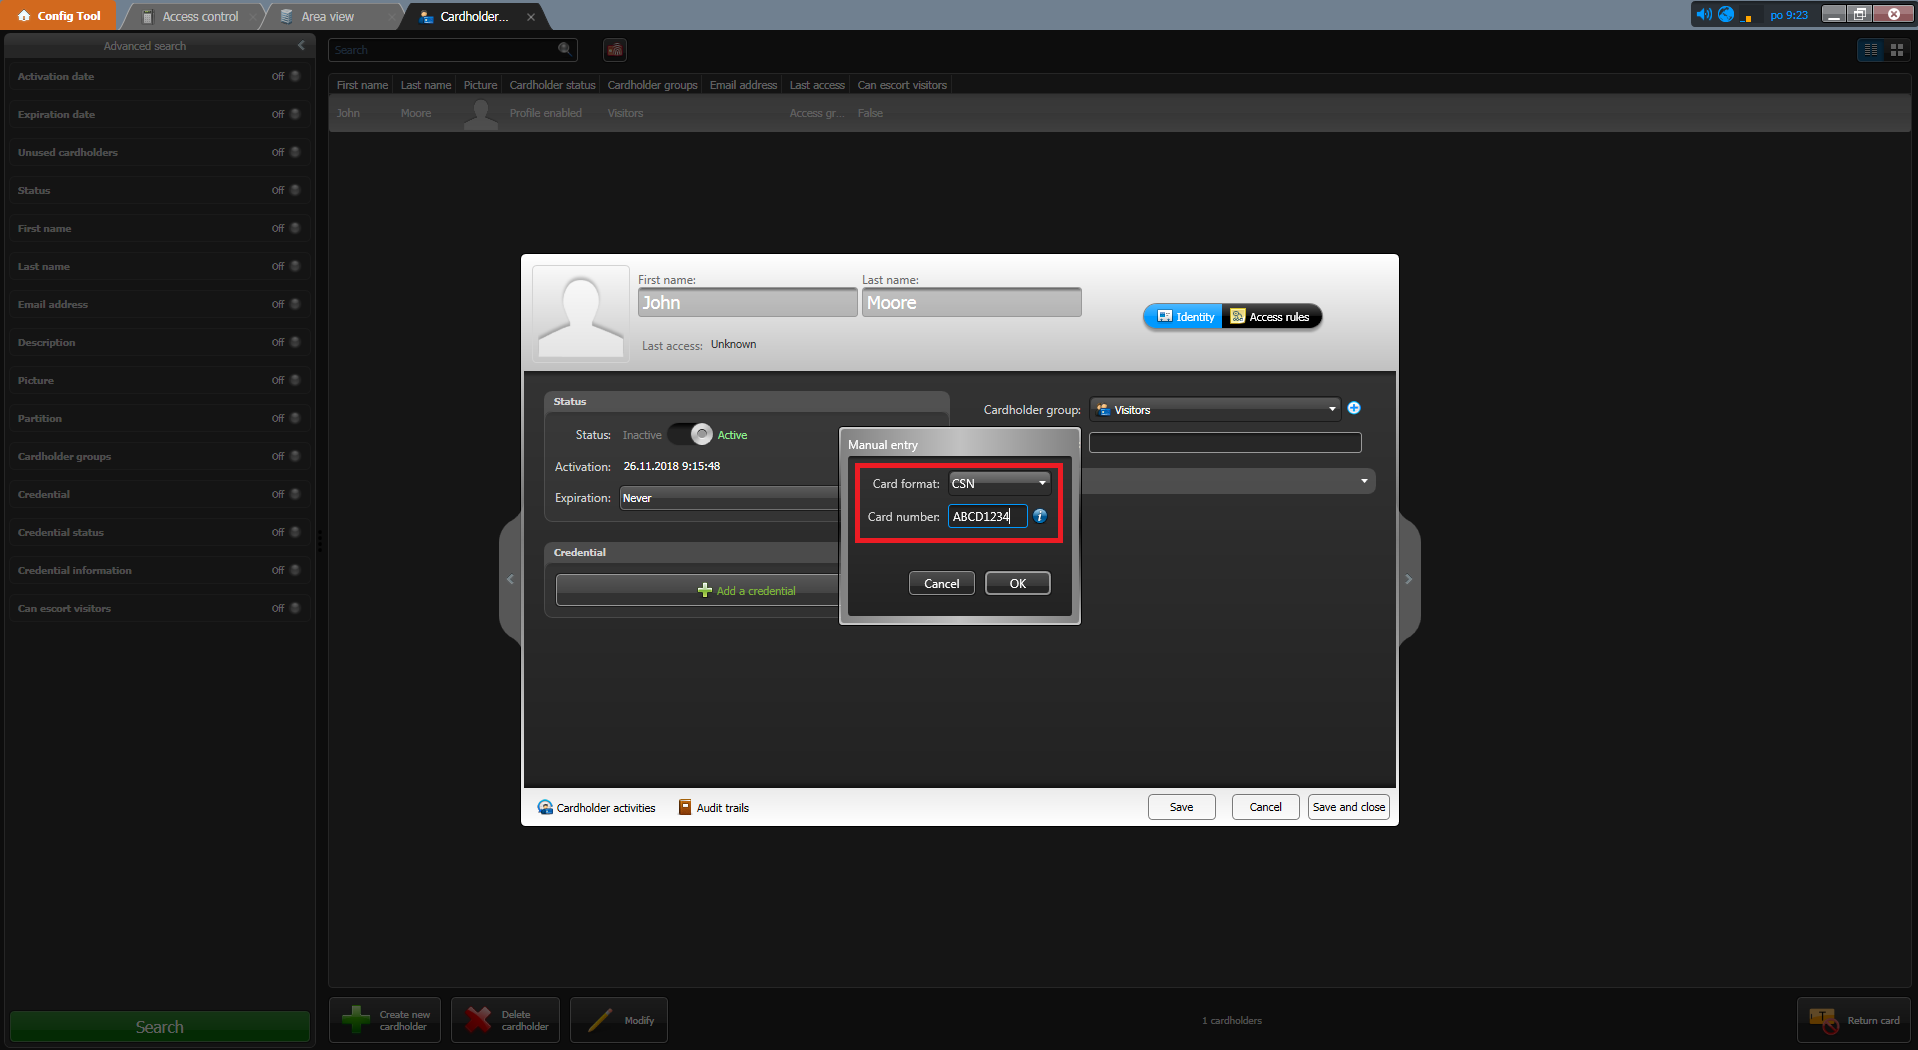
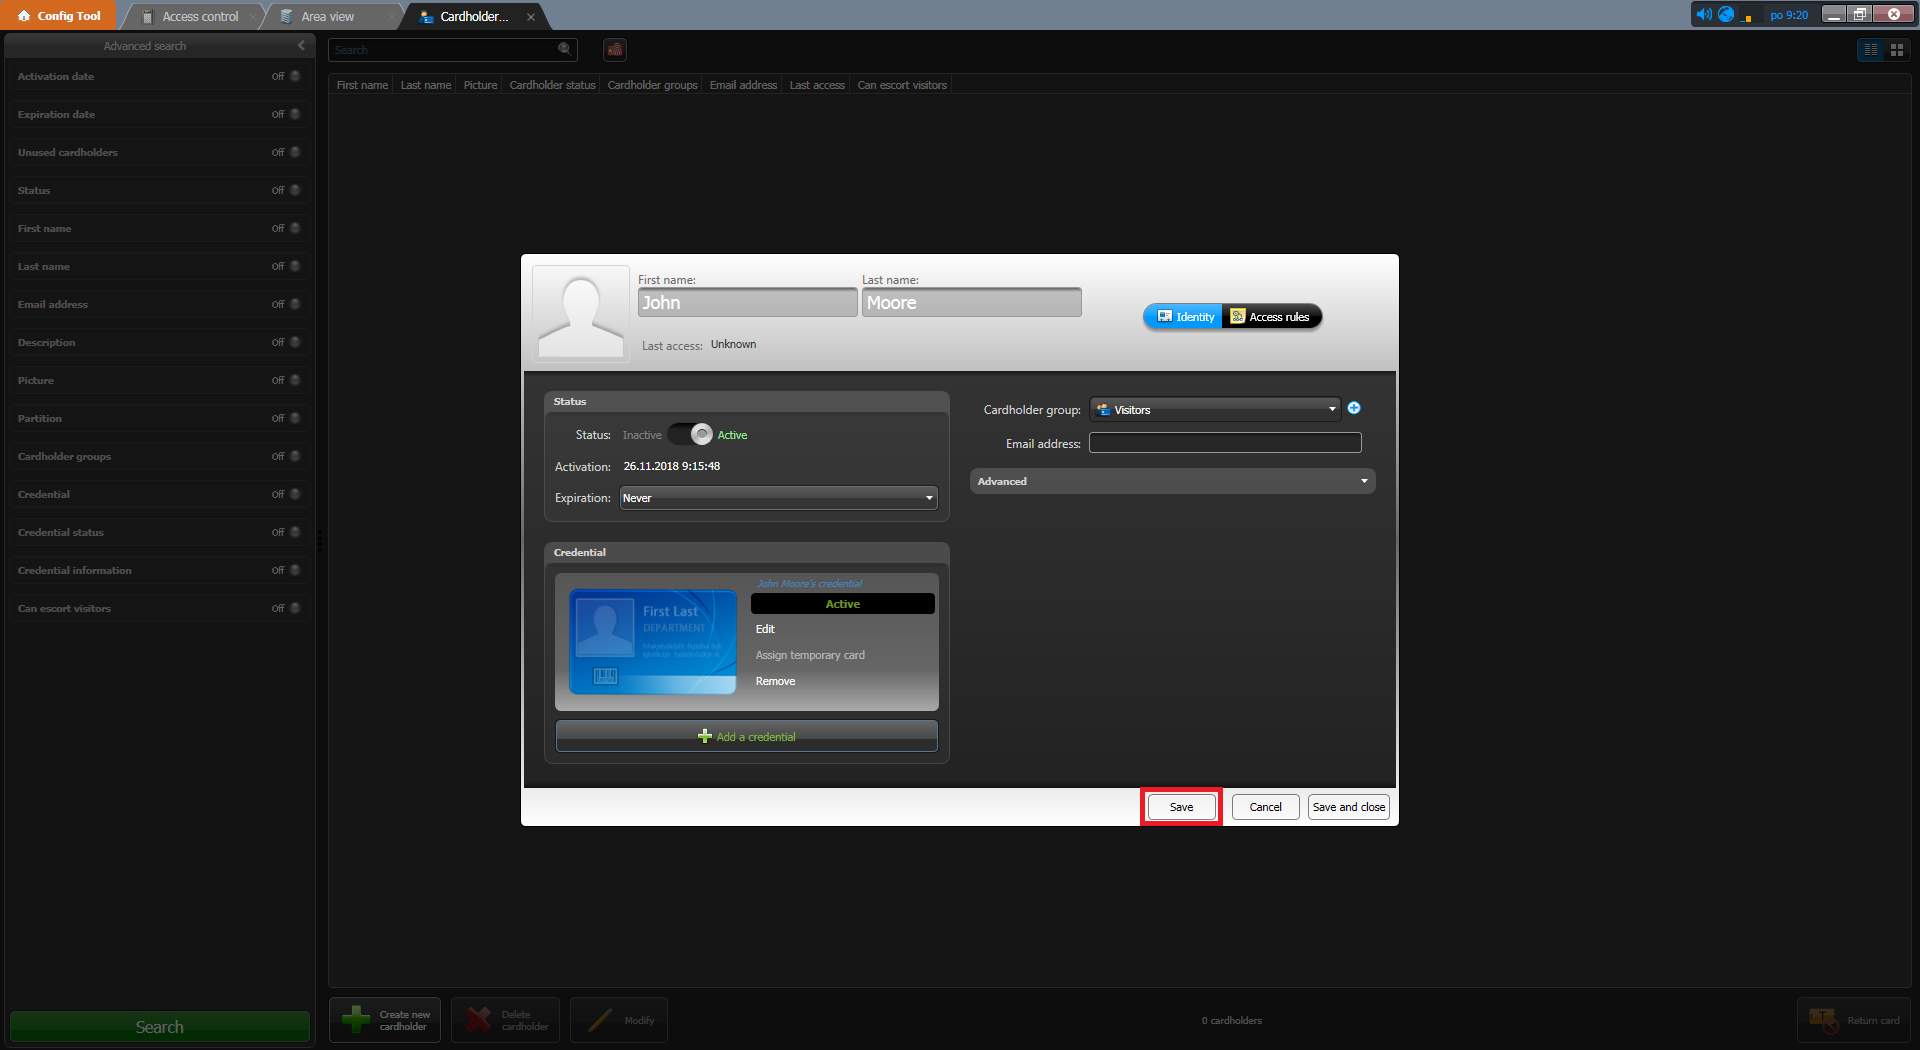
In Config Tool open menu Access Control - Roles and units.
 |
 |
 |
 |
 |
 |
 |
 |
 |
 |
 |
 |
 |
 |
 |
 |
 |
You can save the settings.
 |
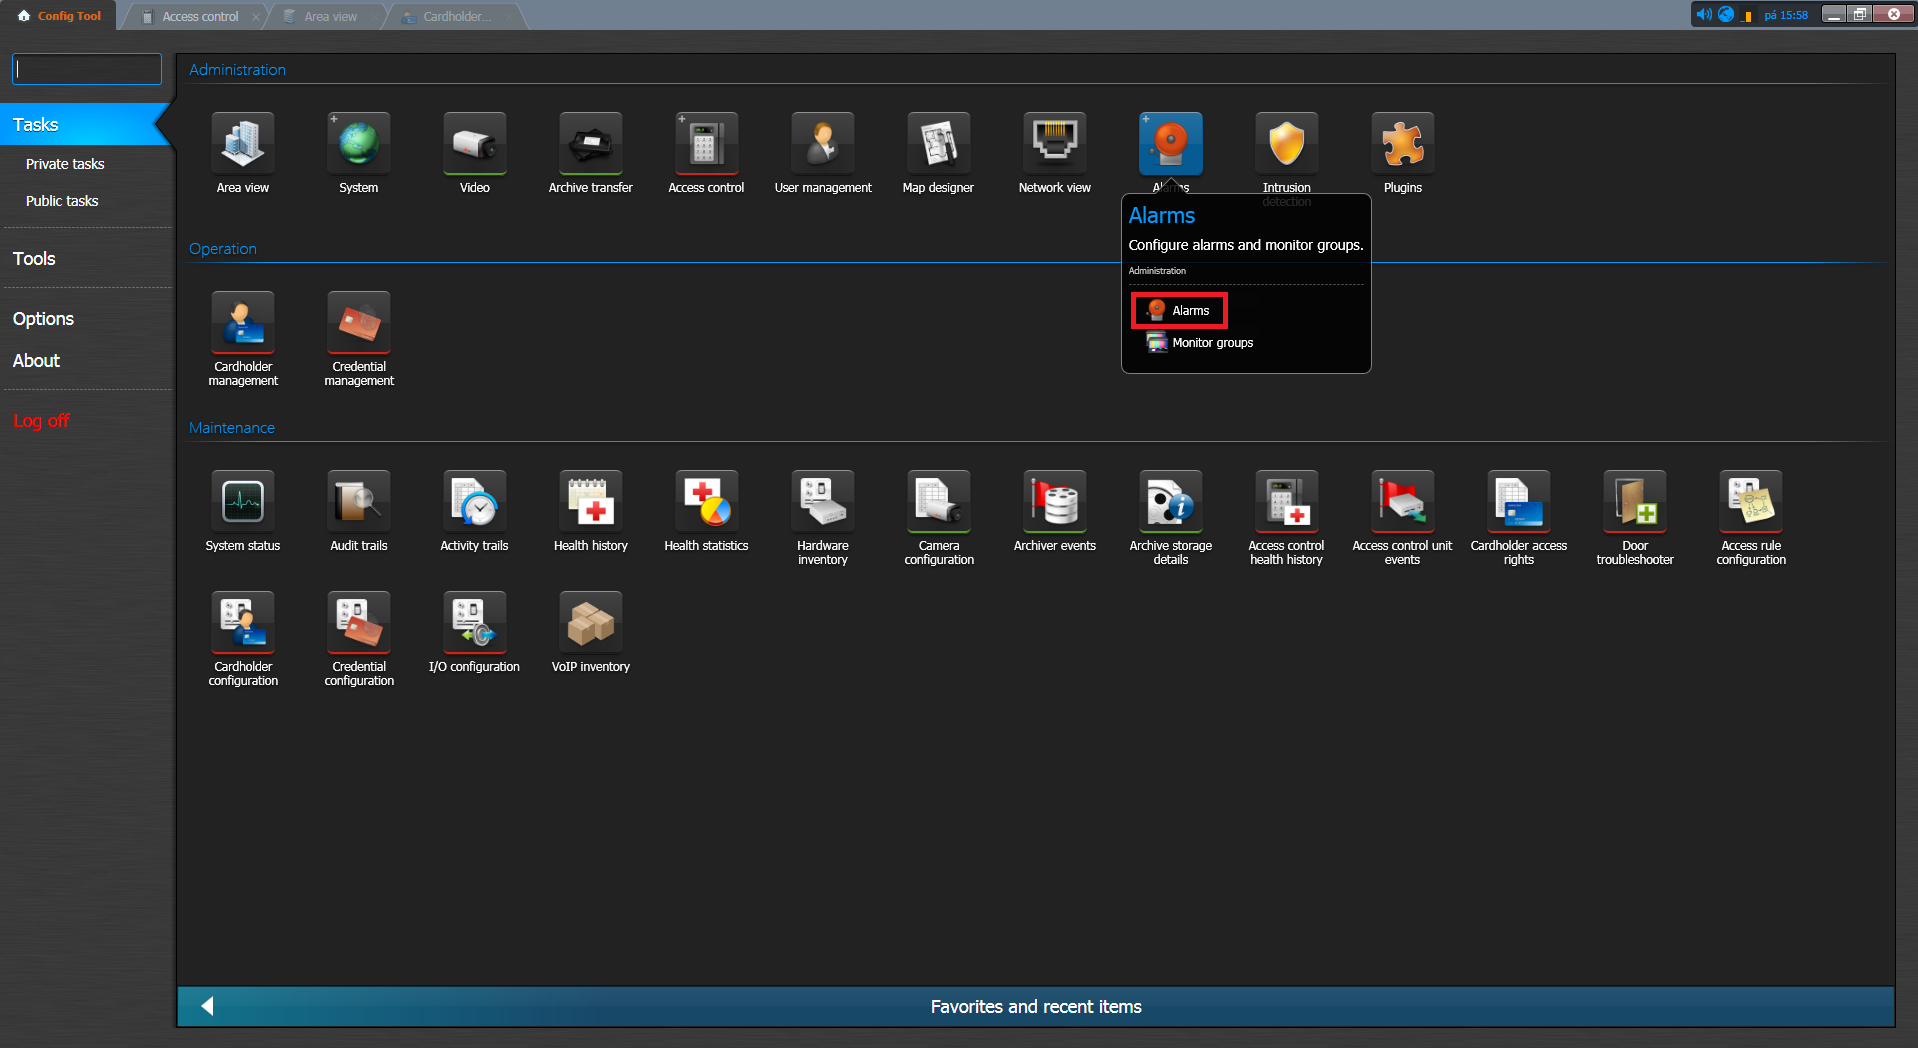
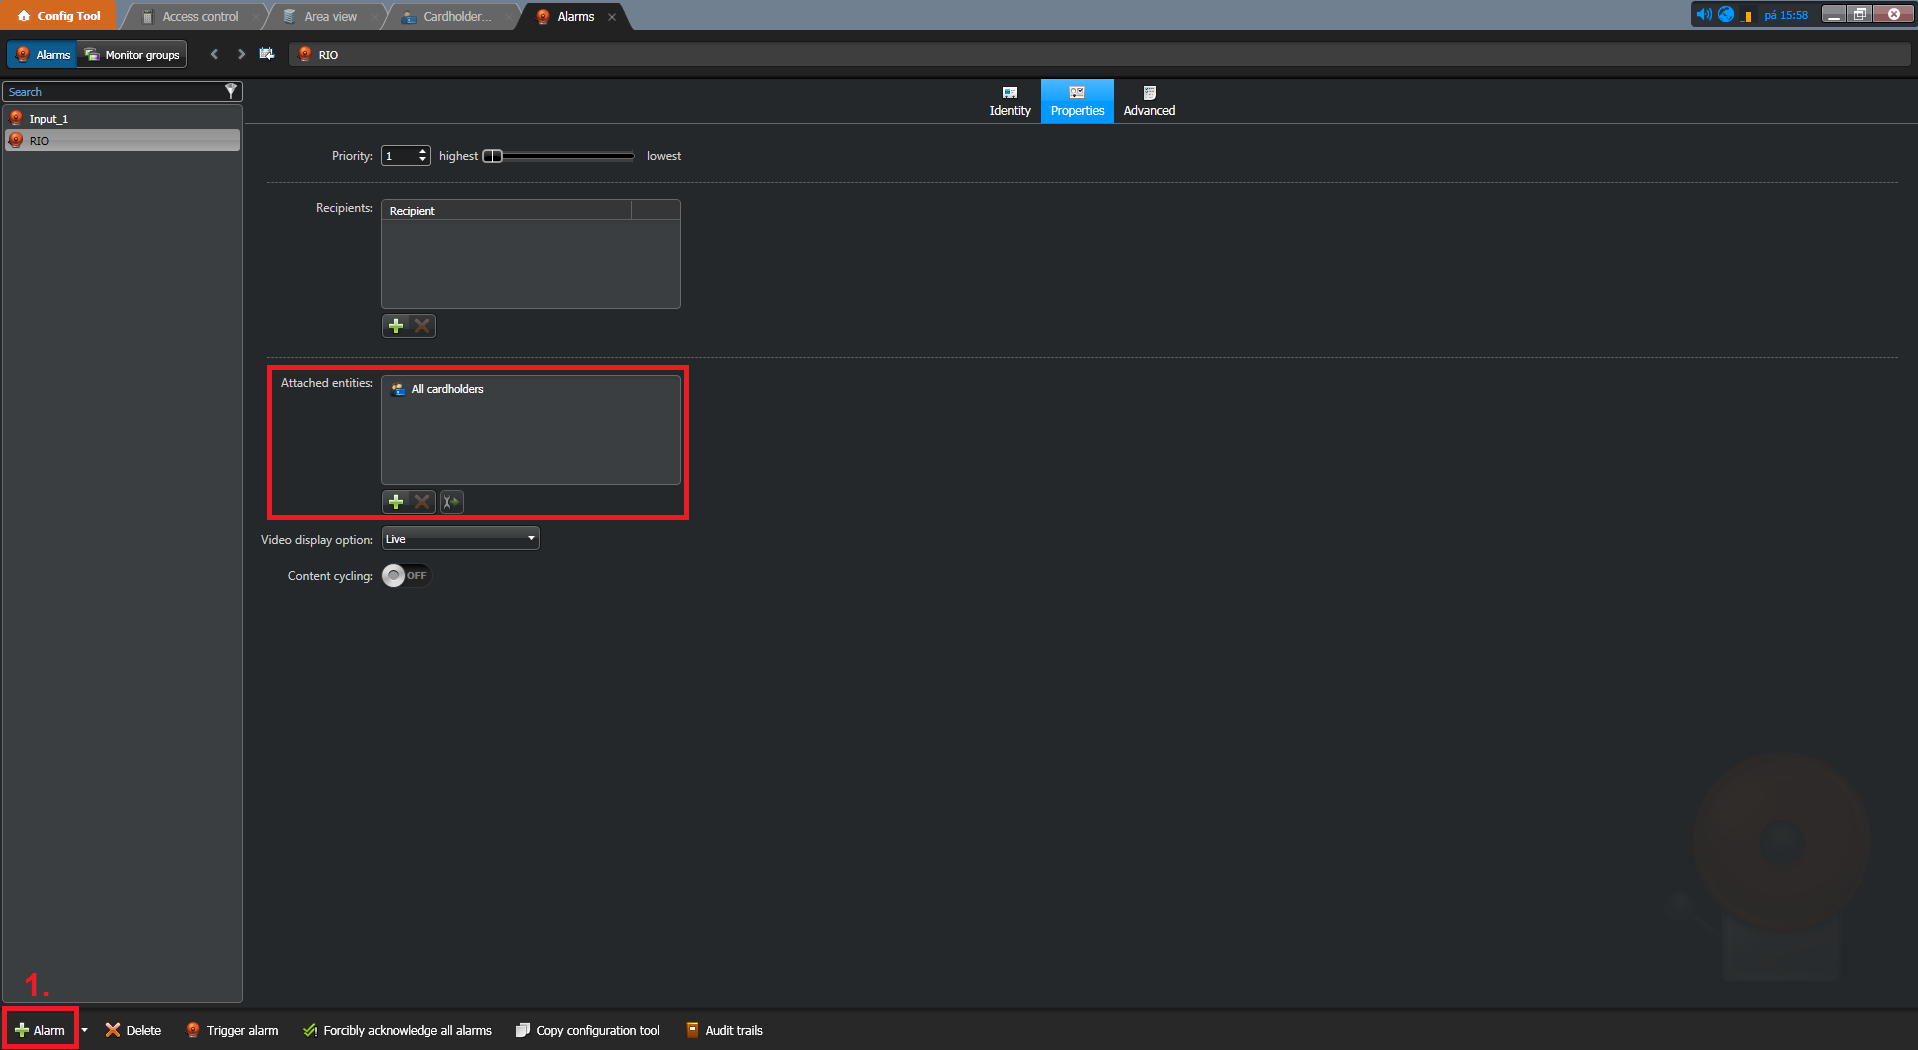
Now go to menu Alarm - Alarm. Create new Alarm and set Attached entities in menu Properties.
 |
 |
 |
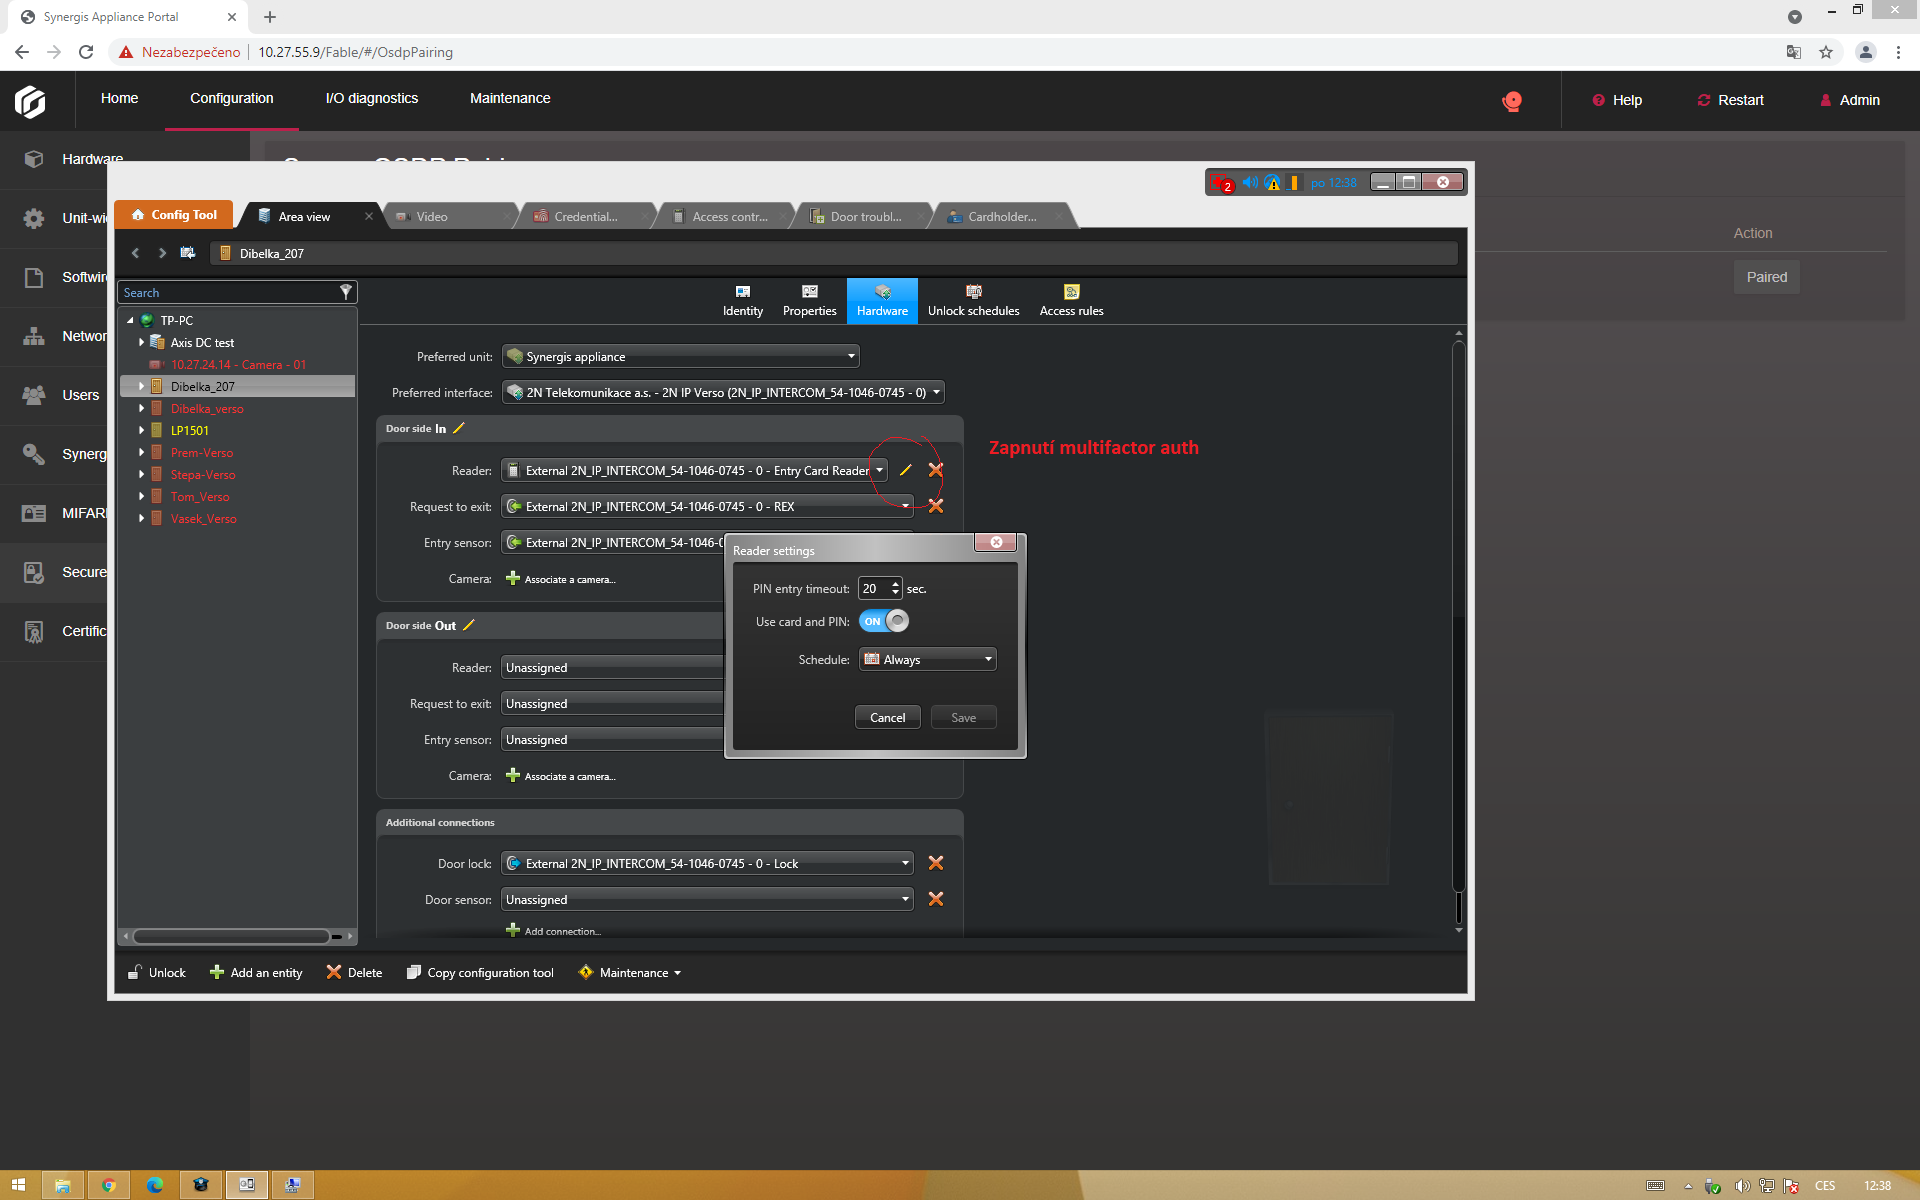
Add PIN timeout to the reader that limits the user's time to use multifactor credential validation for example in the combination of PIN and Card.
 |
Used Symbols
![]() - Interoperable
- Interoperable
![]() - Work with limitation
- Work with limitation
![]() - Incompatible
- Incompatible