Linphone
Content
About
| Phone web page | Linphone |
| Default login | N/A | |
| Default password | N/A | |
| Video support | Yes |
Version 3
Tested with
| Linphone | 2N IP Intercom | Audio | Video | Switch Control | Video Preview | Call Completed Elsewhere | Secure RTP (SRTP) |
|---|---|---|---|---|---|---|---|
| 3.10.2 | 2.18.0.27.5 |
Direct Call
Connect to the 2N IP Intercom web configurator.
Enable one of the quick dial button position. When it is enabled, specify position name and phone number of the Linphone client.
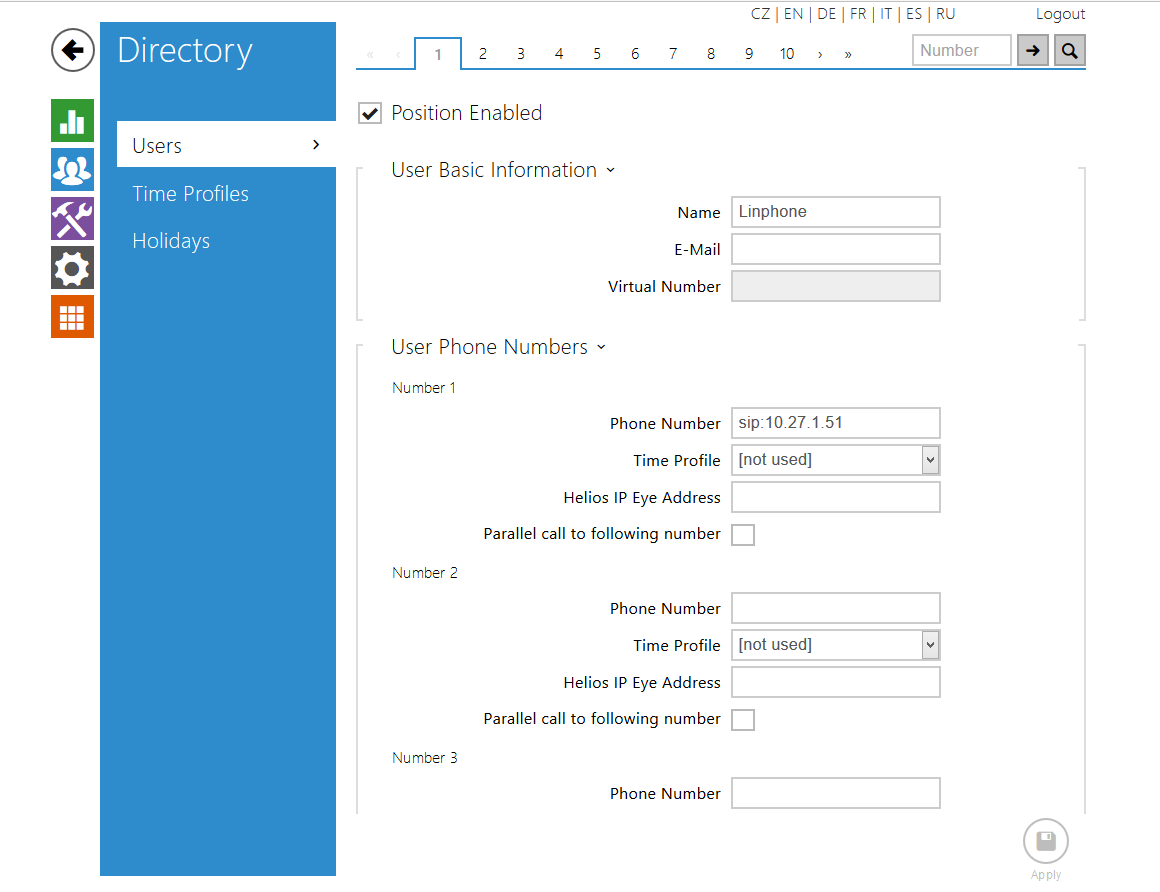
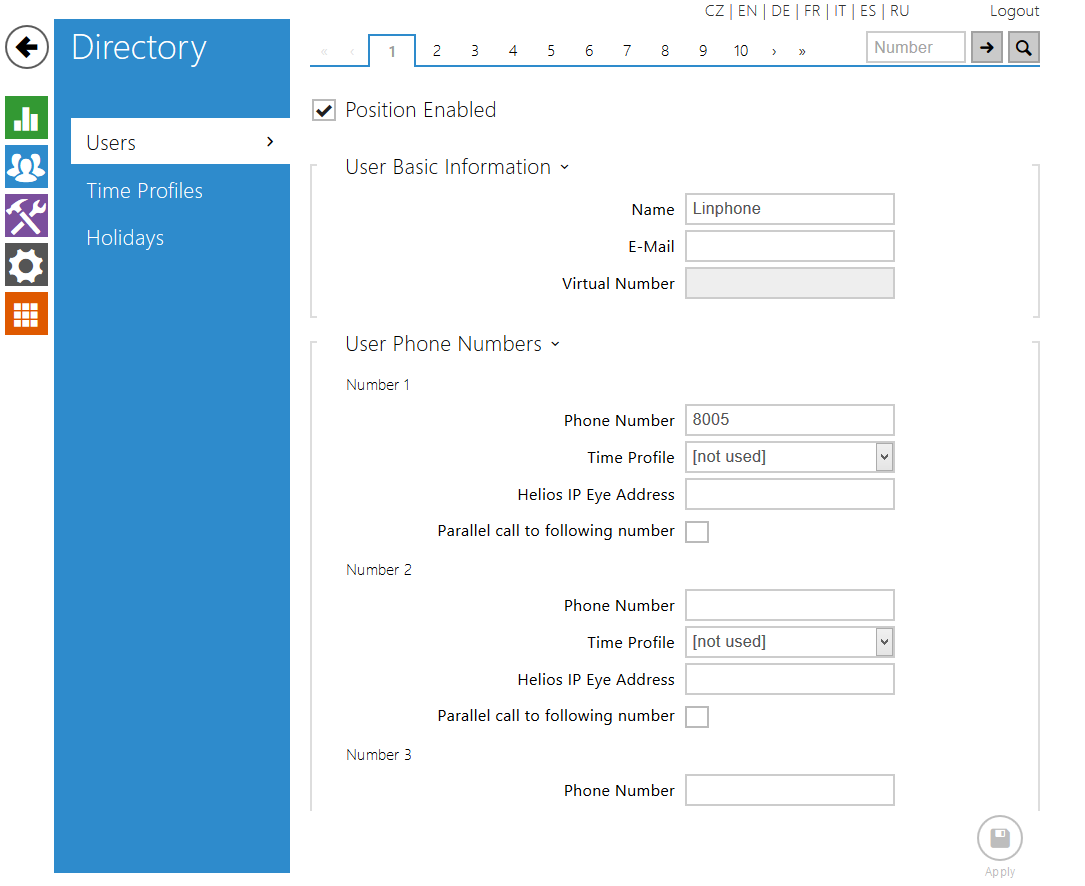
- set the user in Directory / Users to dial direct IP call according to Linphone settings. Linphone has an ip address 10.27.1.51, set the Phone Number to sip:10.27.1.51 – see the picture below.
 |
 |
For Direct Call write down sip:IP_ADDRESS_OF_YOUR_INTERCOM and push the button for direct call to your 2N IP Intercom.
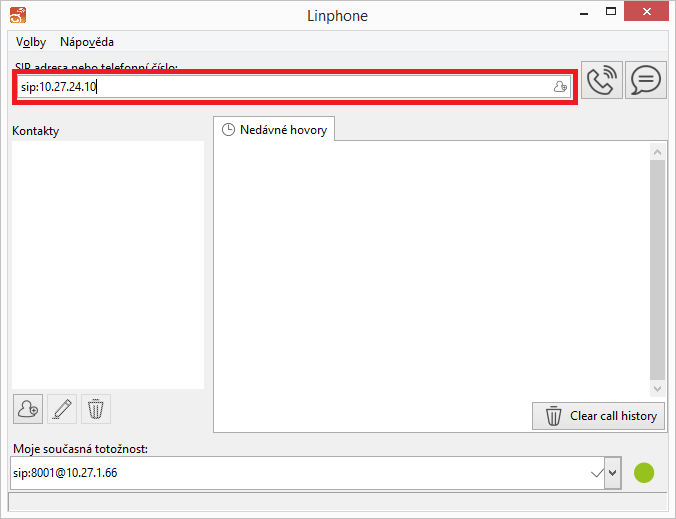 |
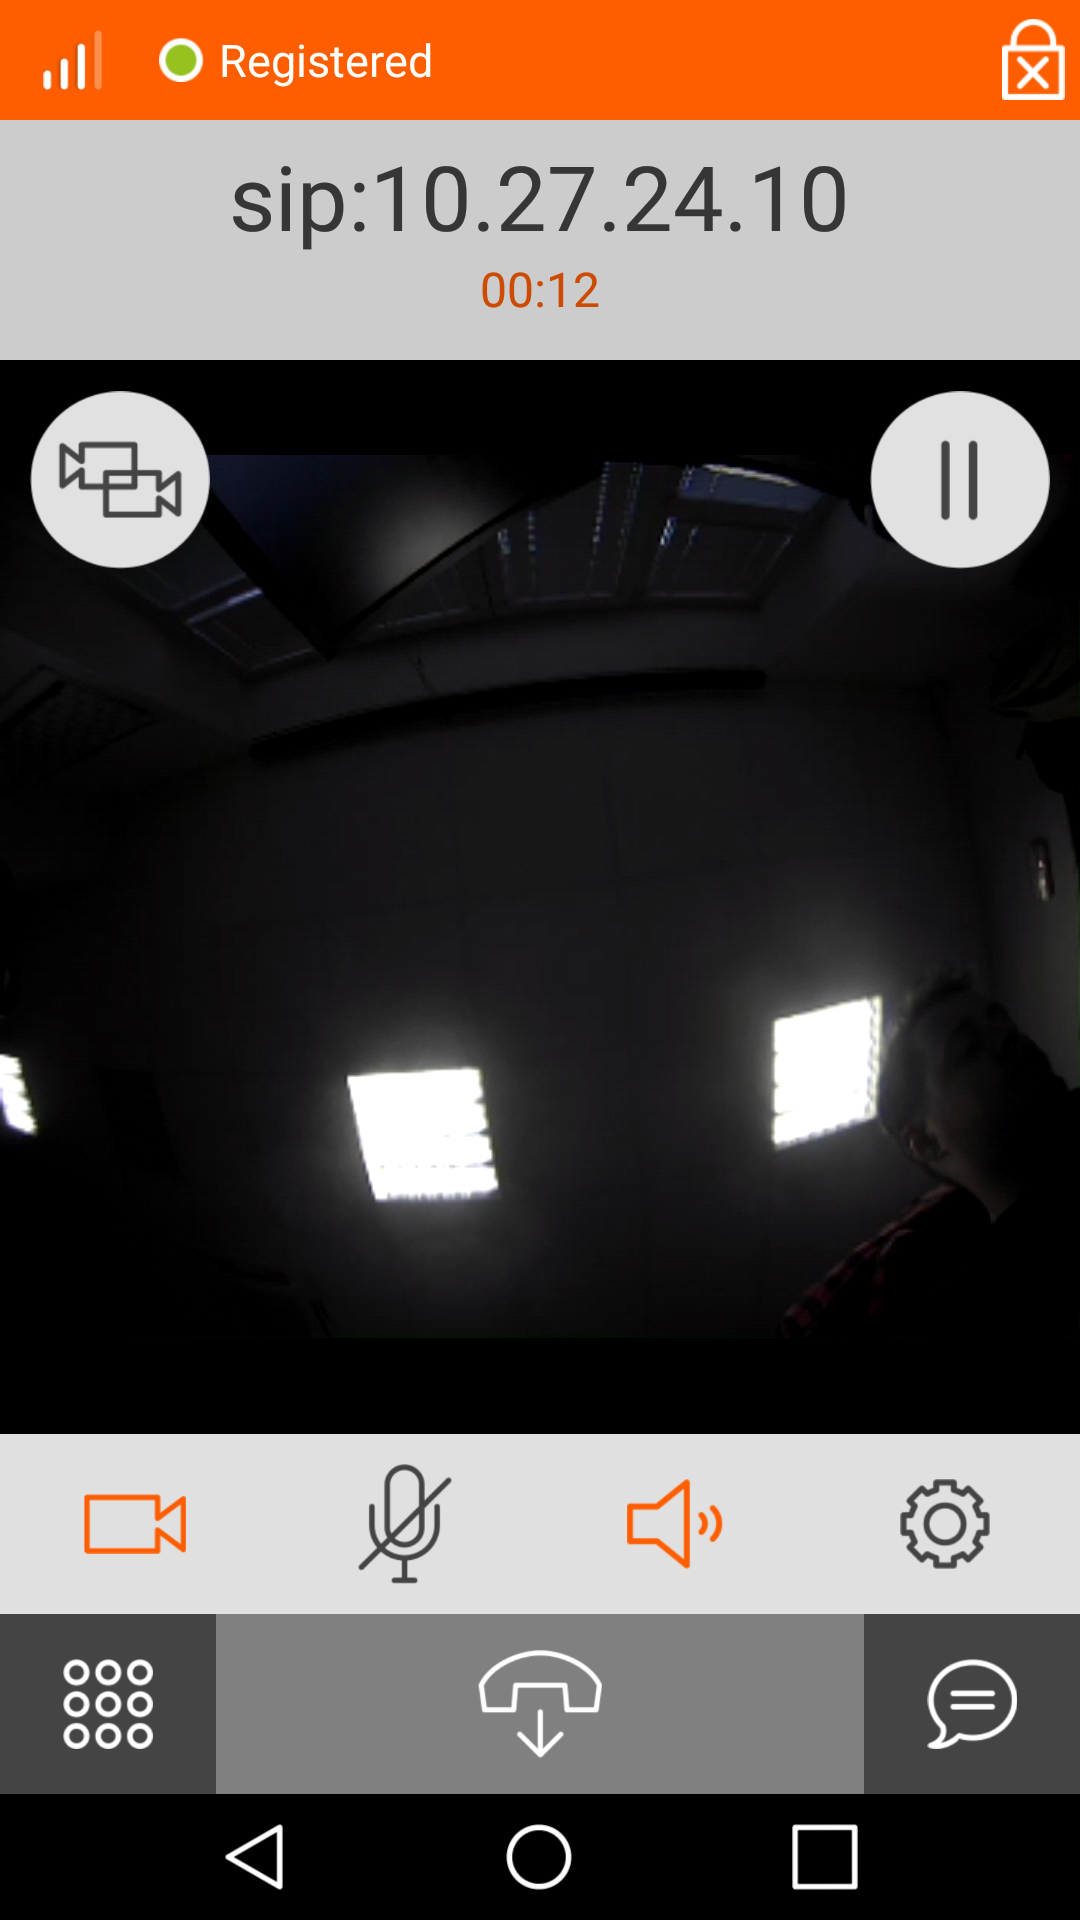
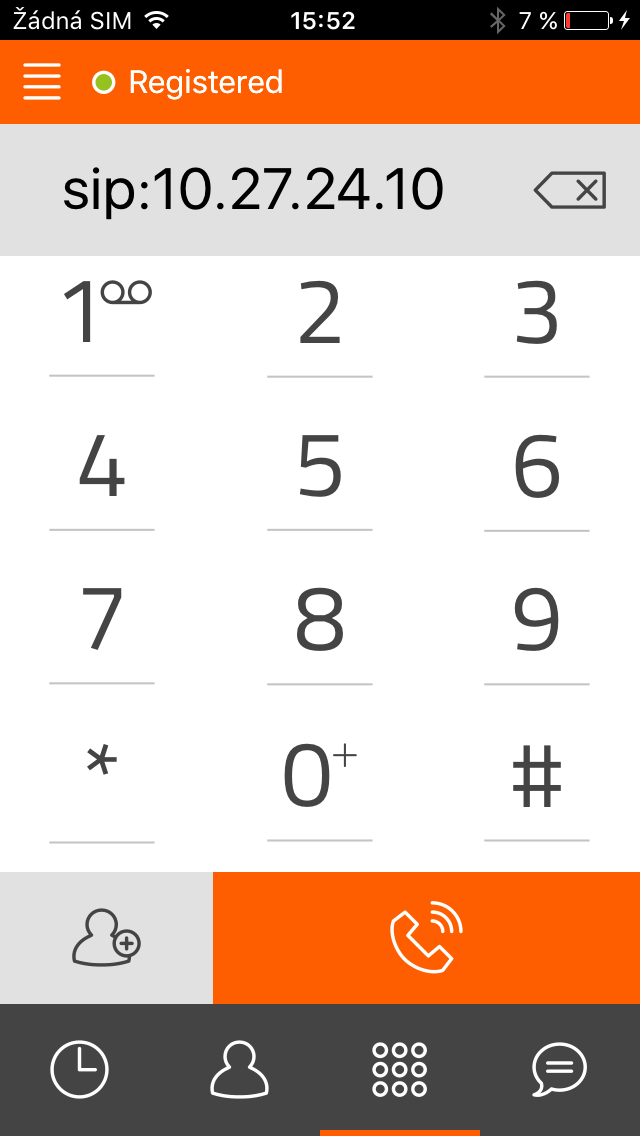
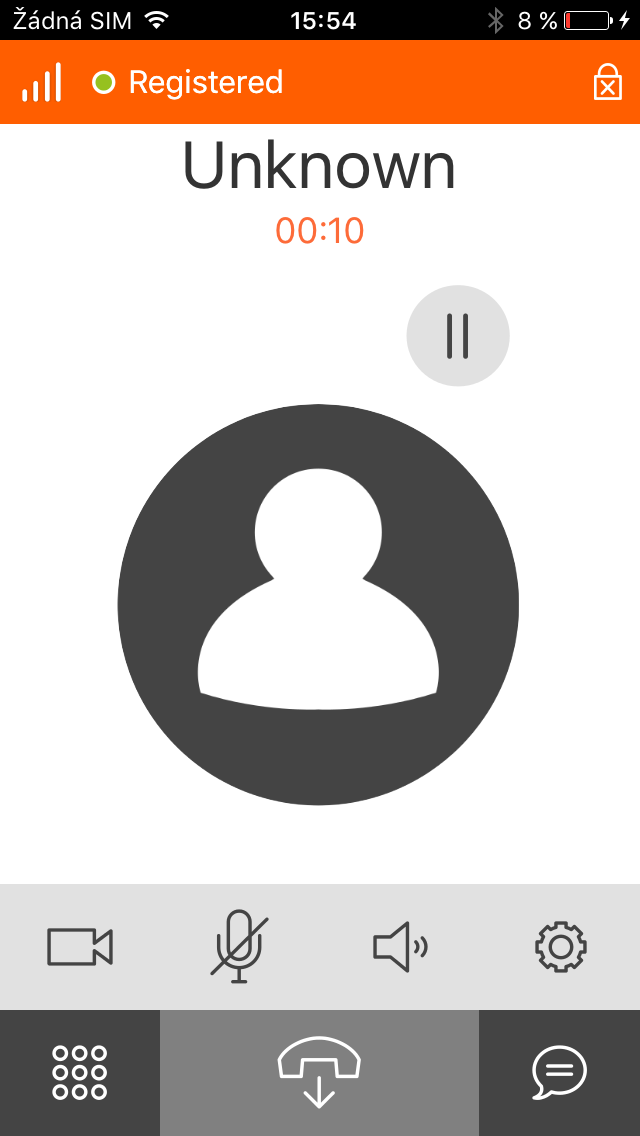
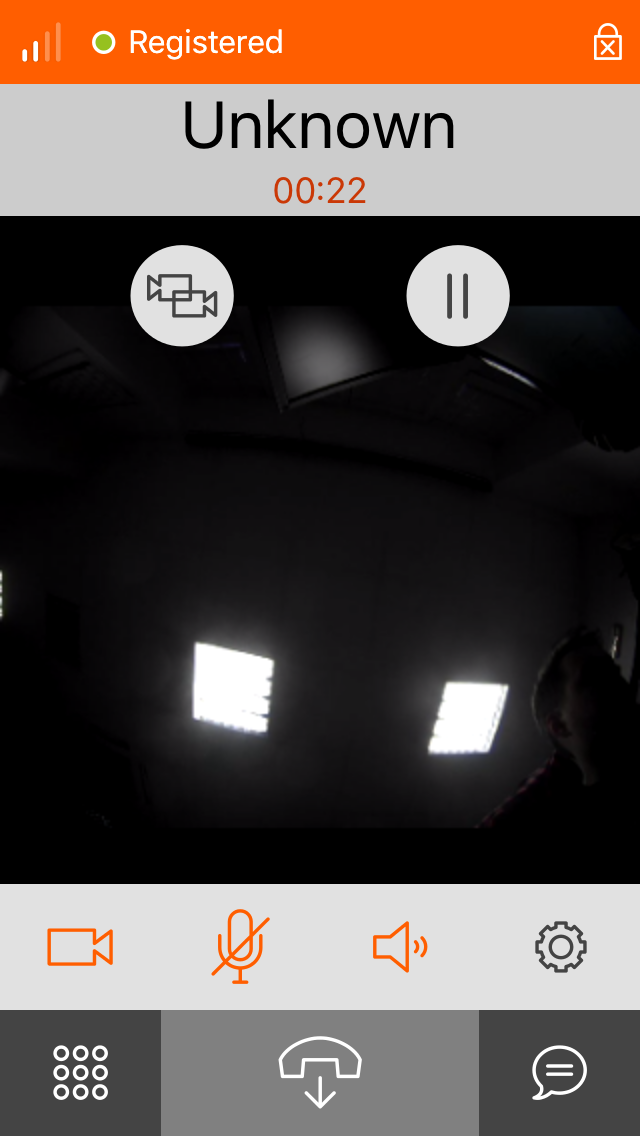
For direct call go to Dialer through Dial pad icon and in tho the upper grey line write down the sip:ip_address, where ip_address is IP address of your intercom. On the picture IP address is 10.27.24.10.
 |
  |
 |
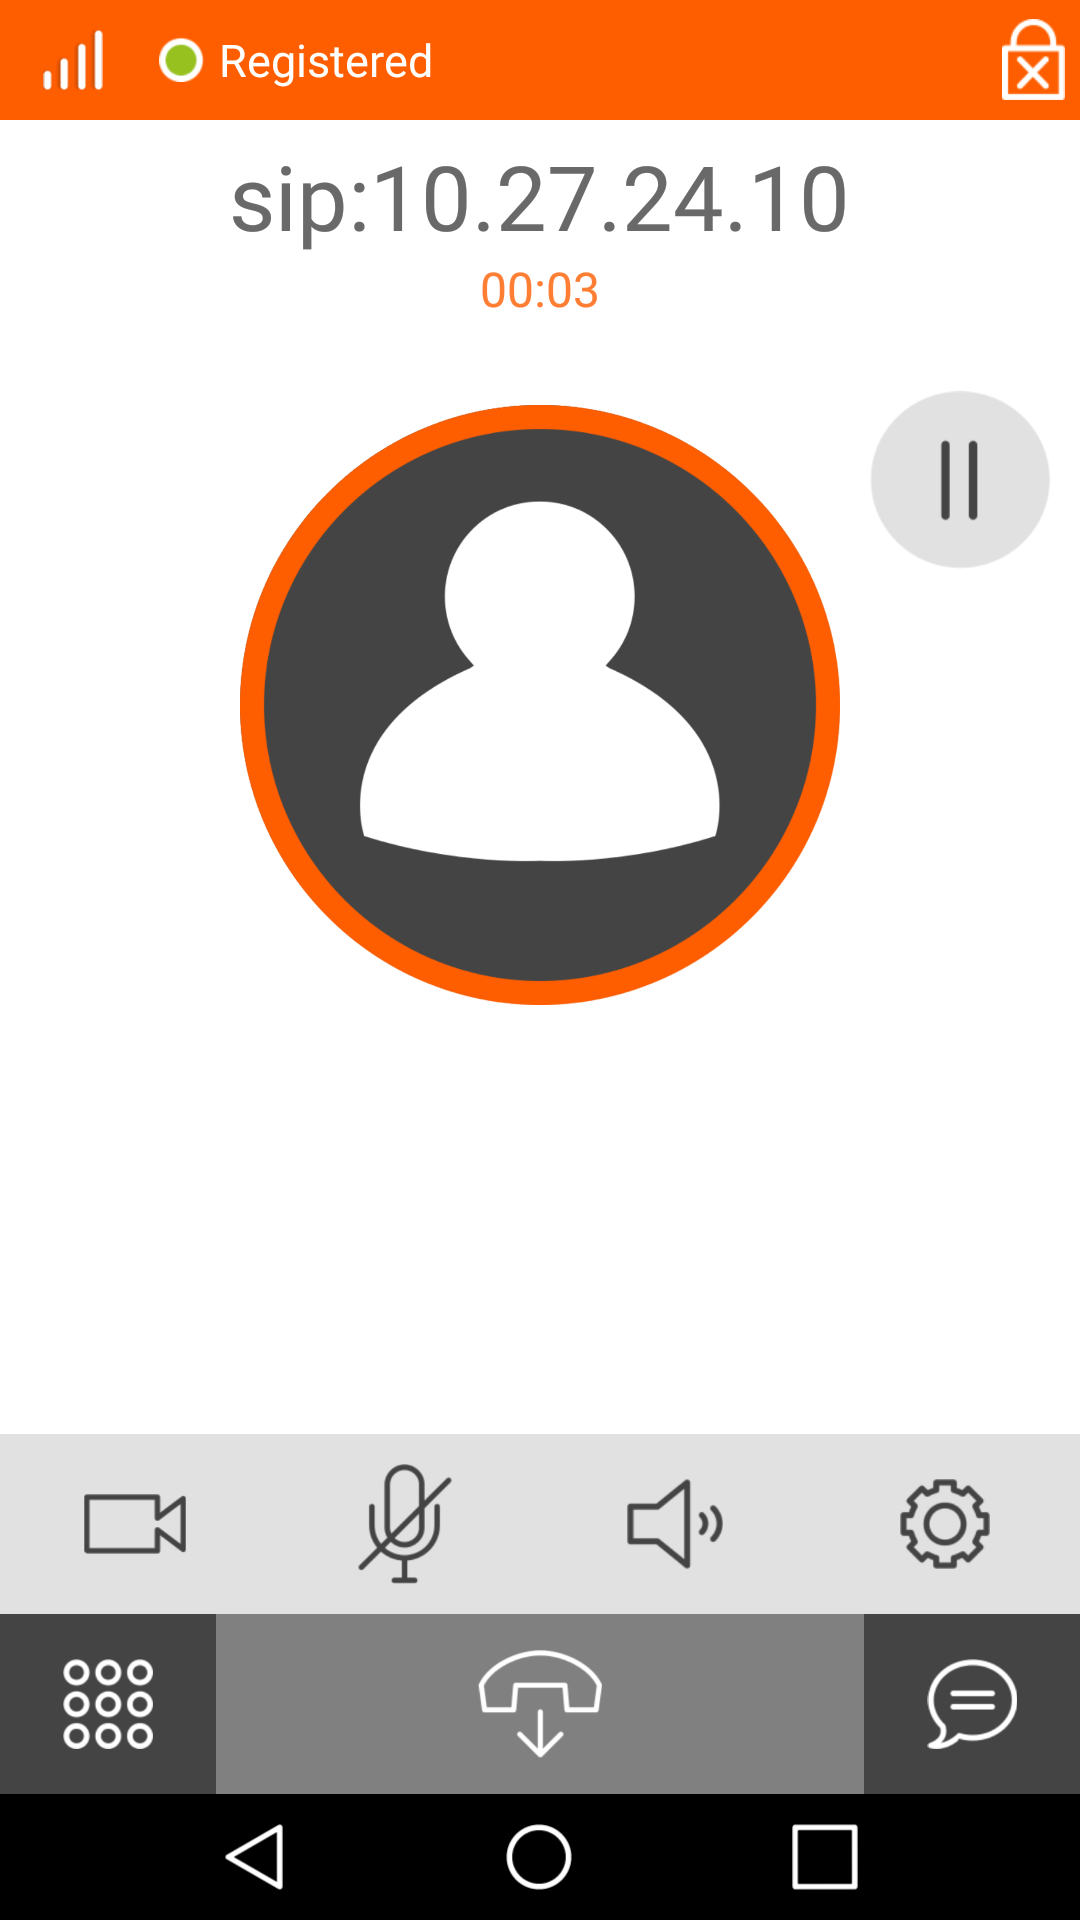
For direct call go to Dialer through Dial pad icon and in tho the upper grey line write down the sip:ip_address, where ip_address is IP address of your intercom. On the picture IP address is 10.27.24.10.
 |
  |
 |
Warning
- To extend battery life, iOS terminates applications in the background. This feature results in a situation, that it is not possible to call to the application.
Settings with SIP proxy
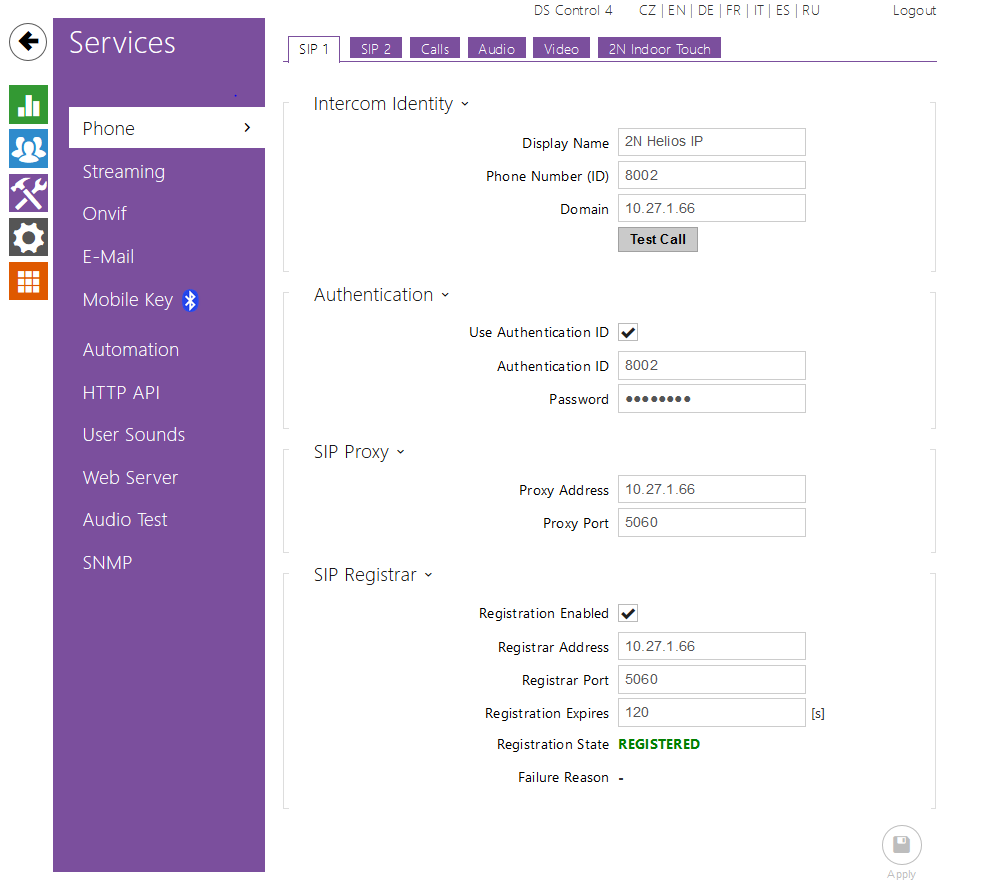
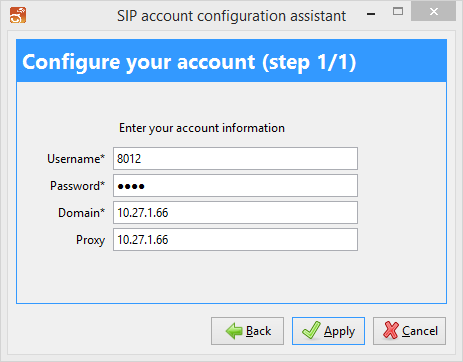
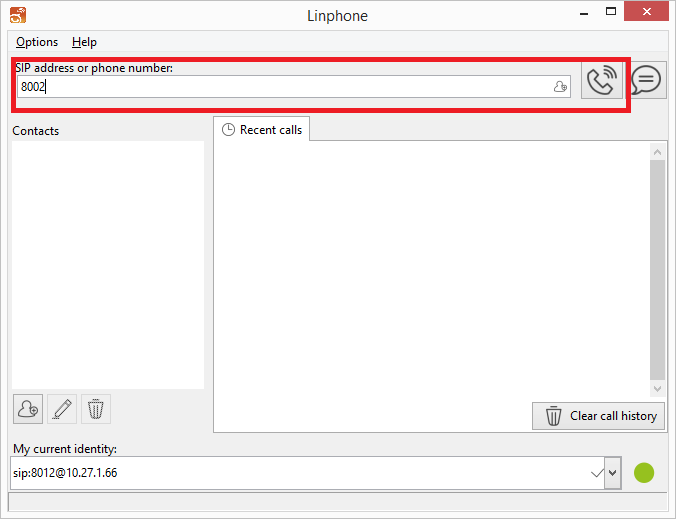
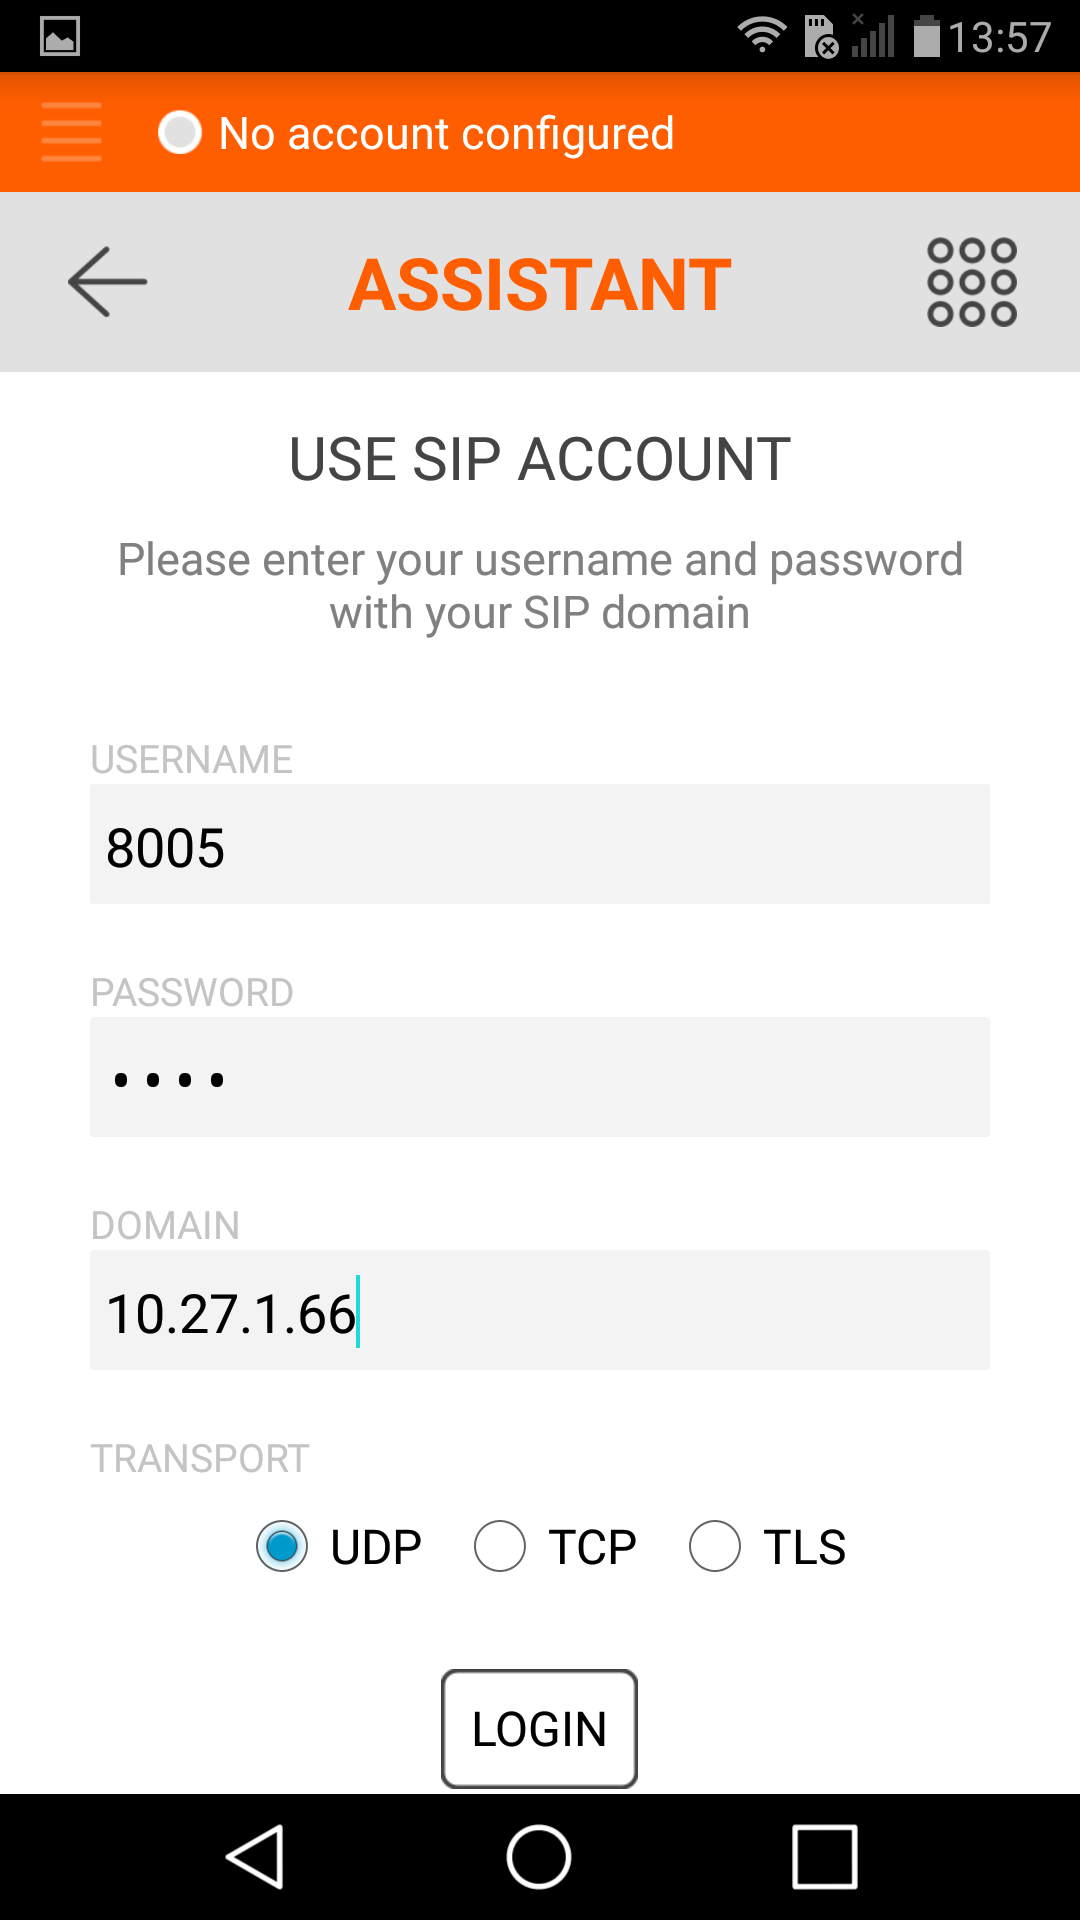
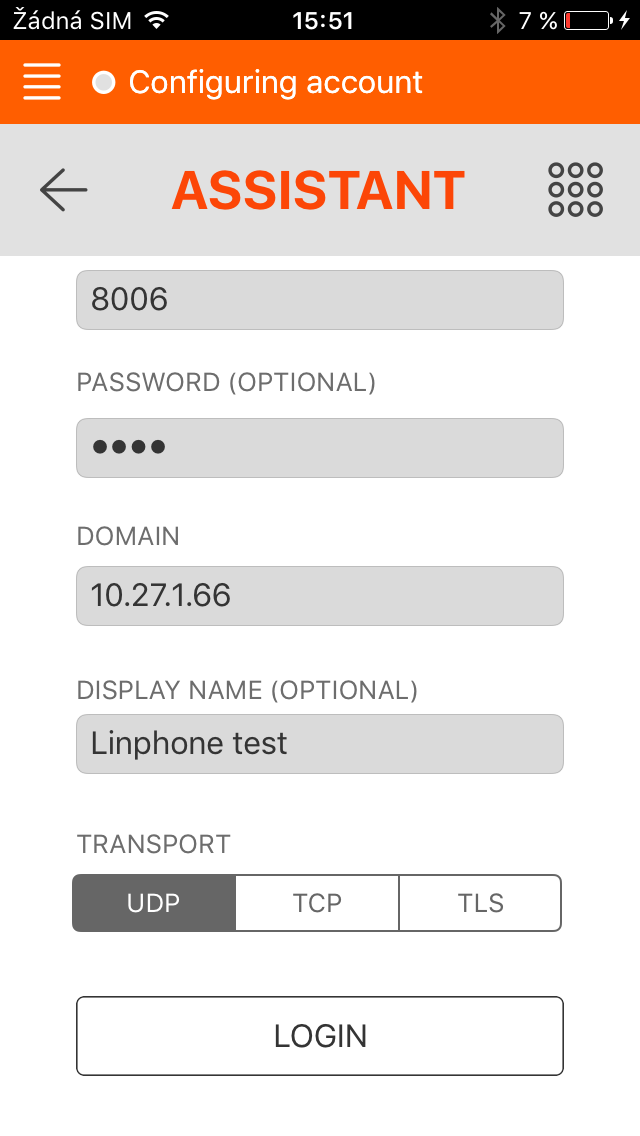
To set your 2N IP Intercom to communicate with SIP over your SIP Proxy (or PBX), you need to fill in credentials like Phone number, password and IP address of your SIP Proxy like in following picture. In this case IP address of SIP proxy is 10.27.1.66 and Phone Number is 8002.
 |
|
 |
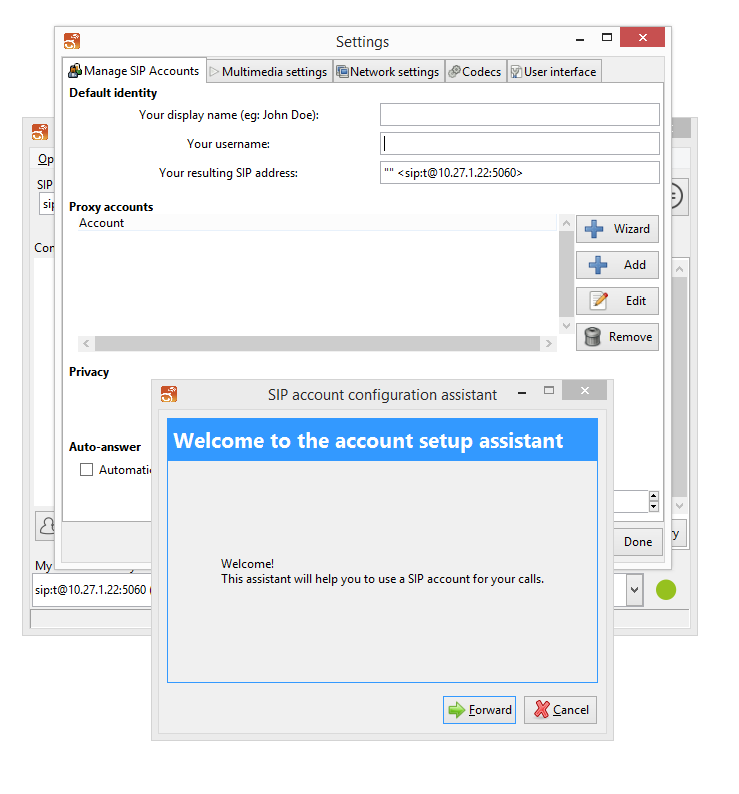
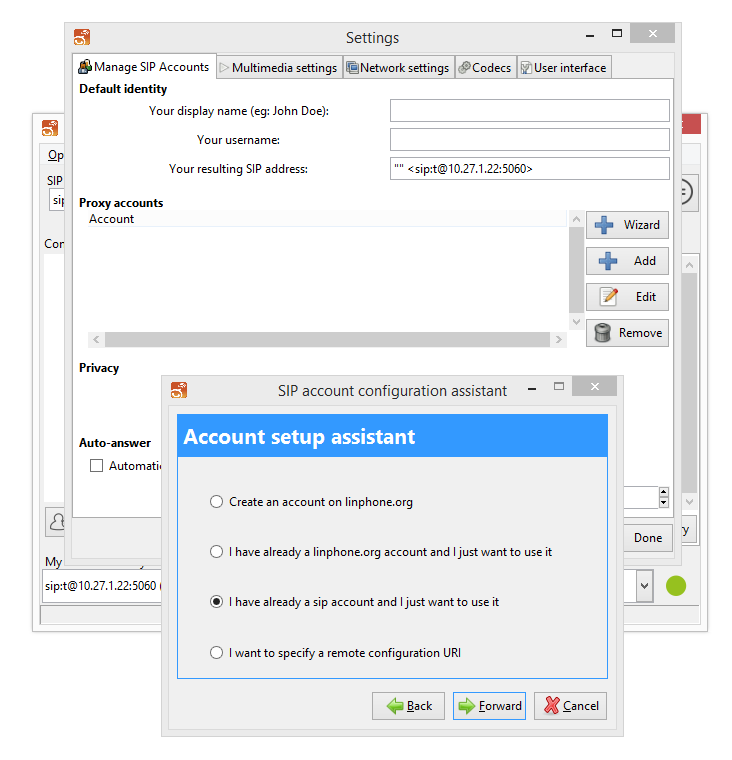
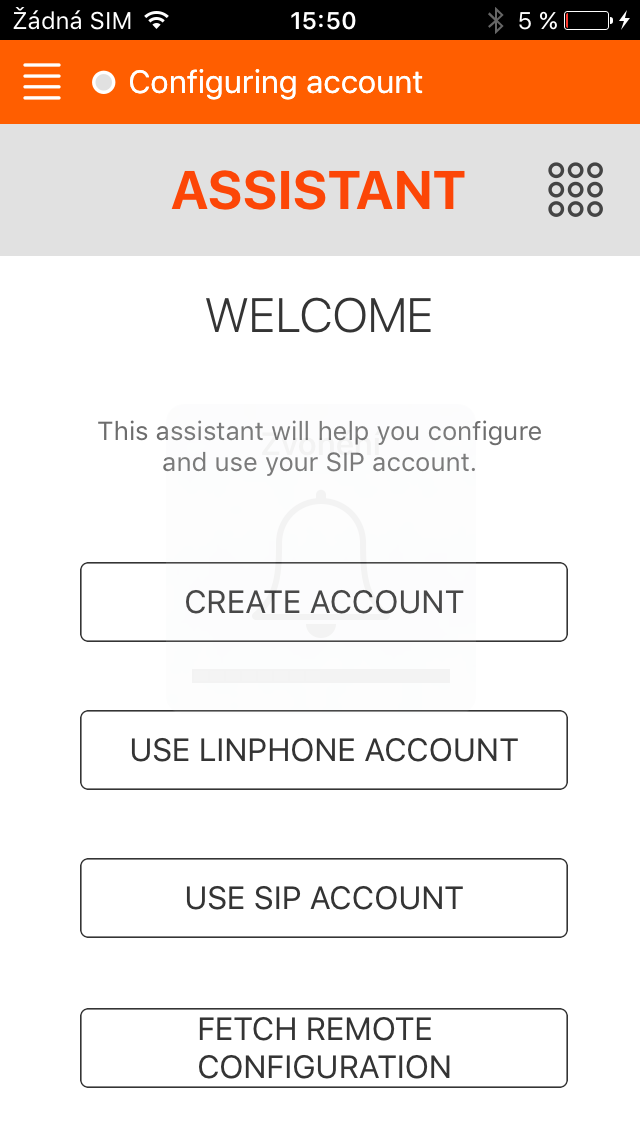
To connect your Linphone application to SIP proxy (or PBX) SIP account must be created first. In Options / Preferences chose Wizard to create new account.
 |
 |
 |
 |
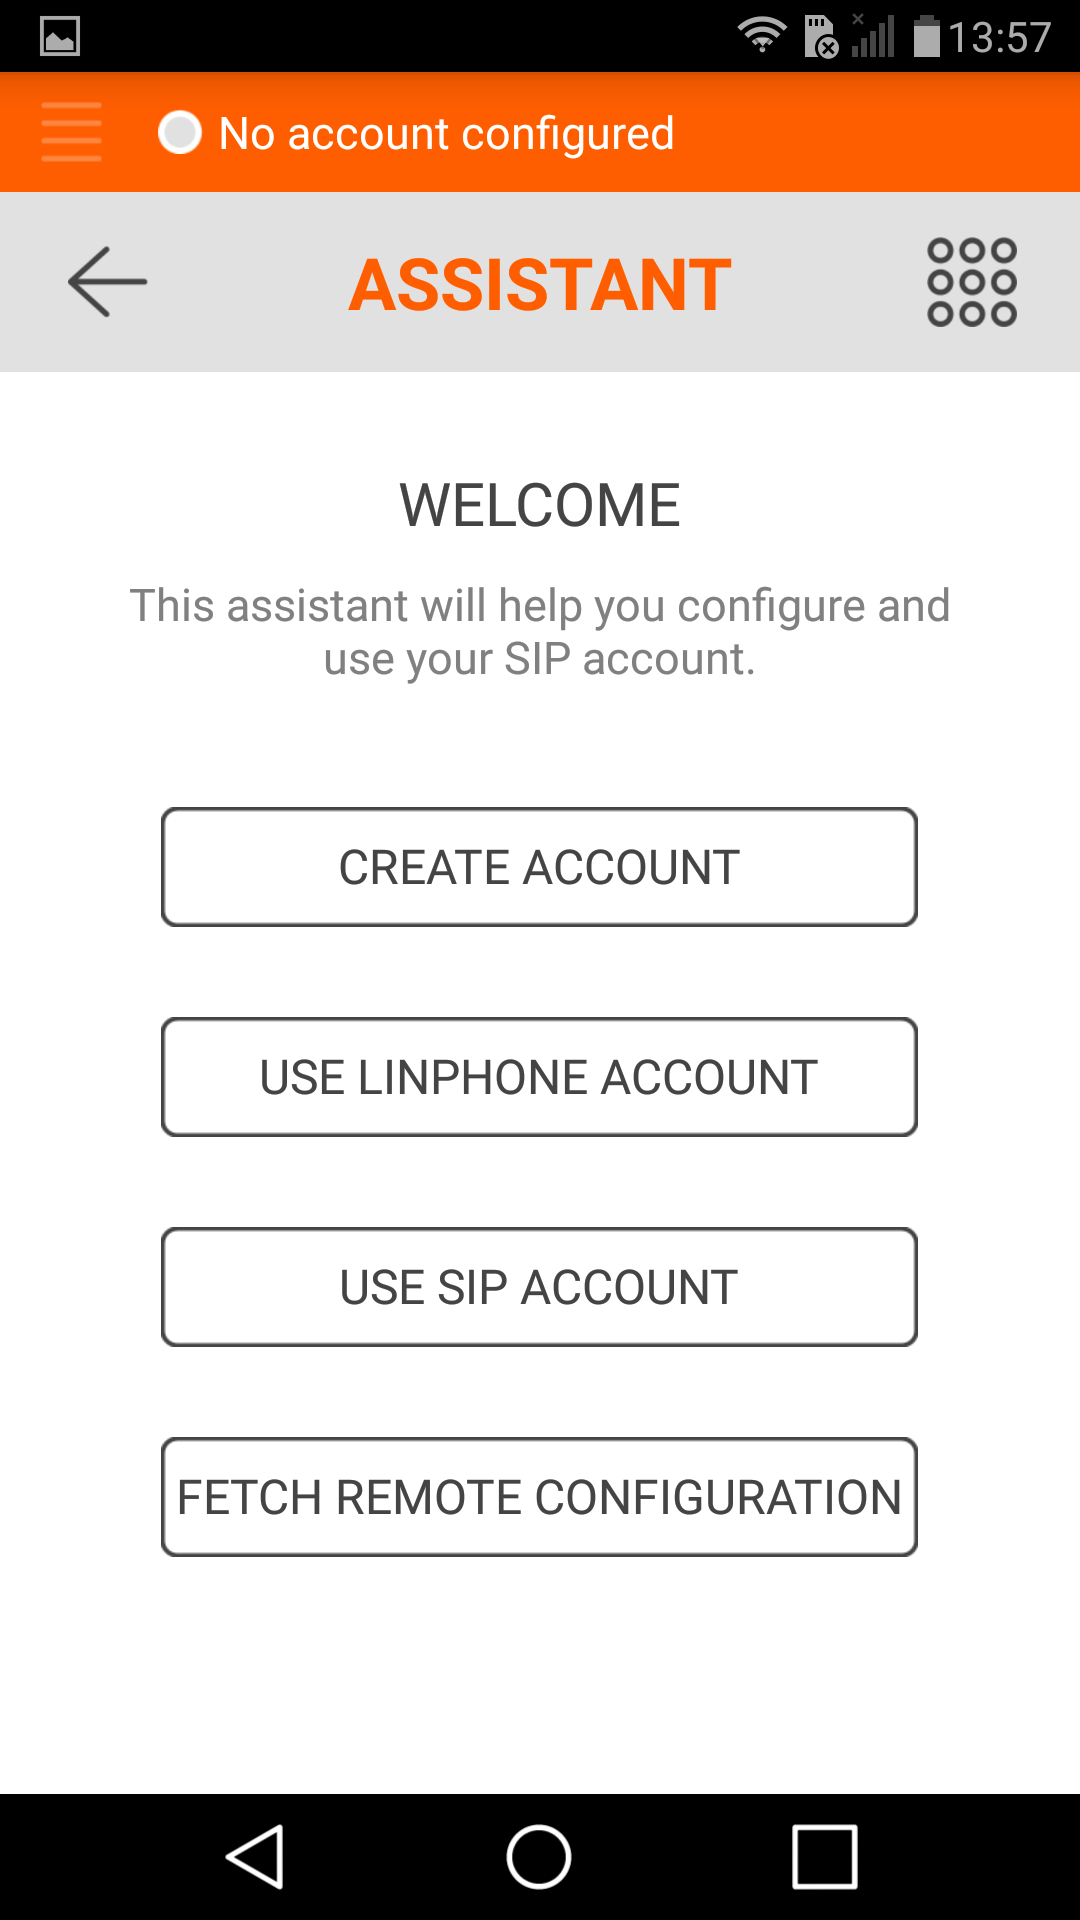
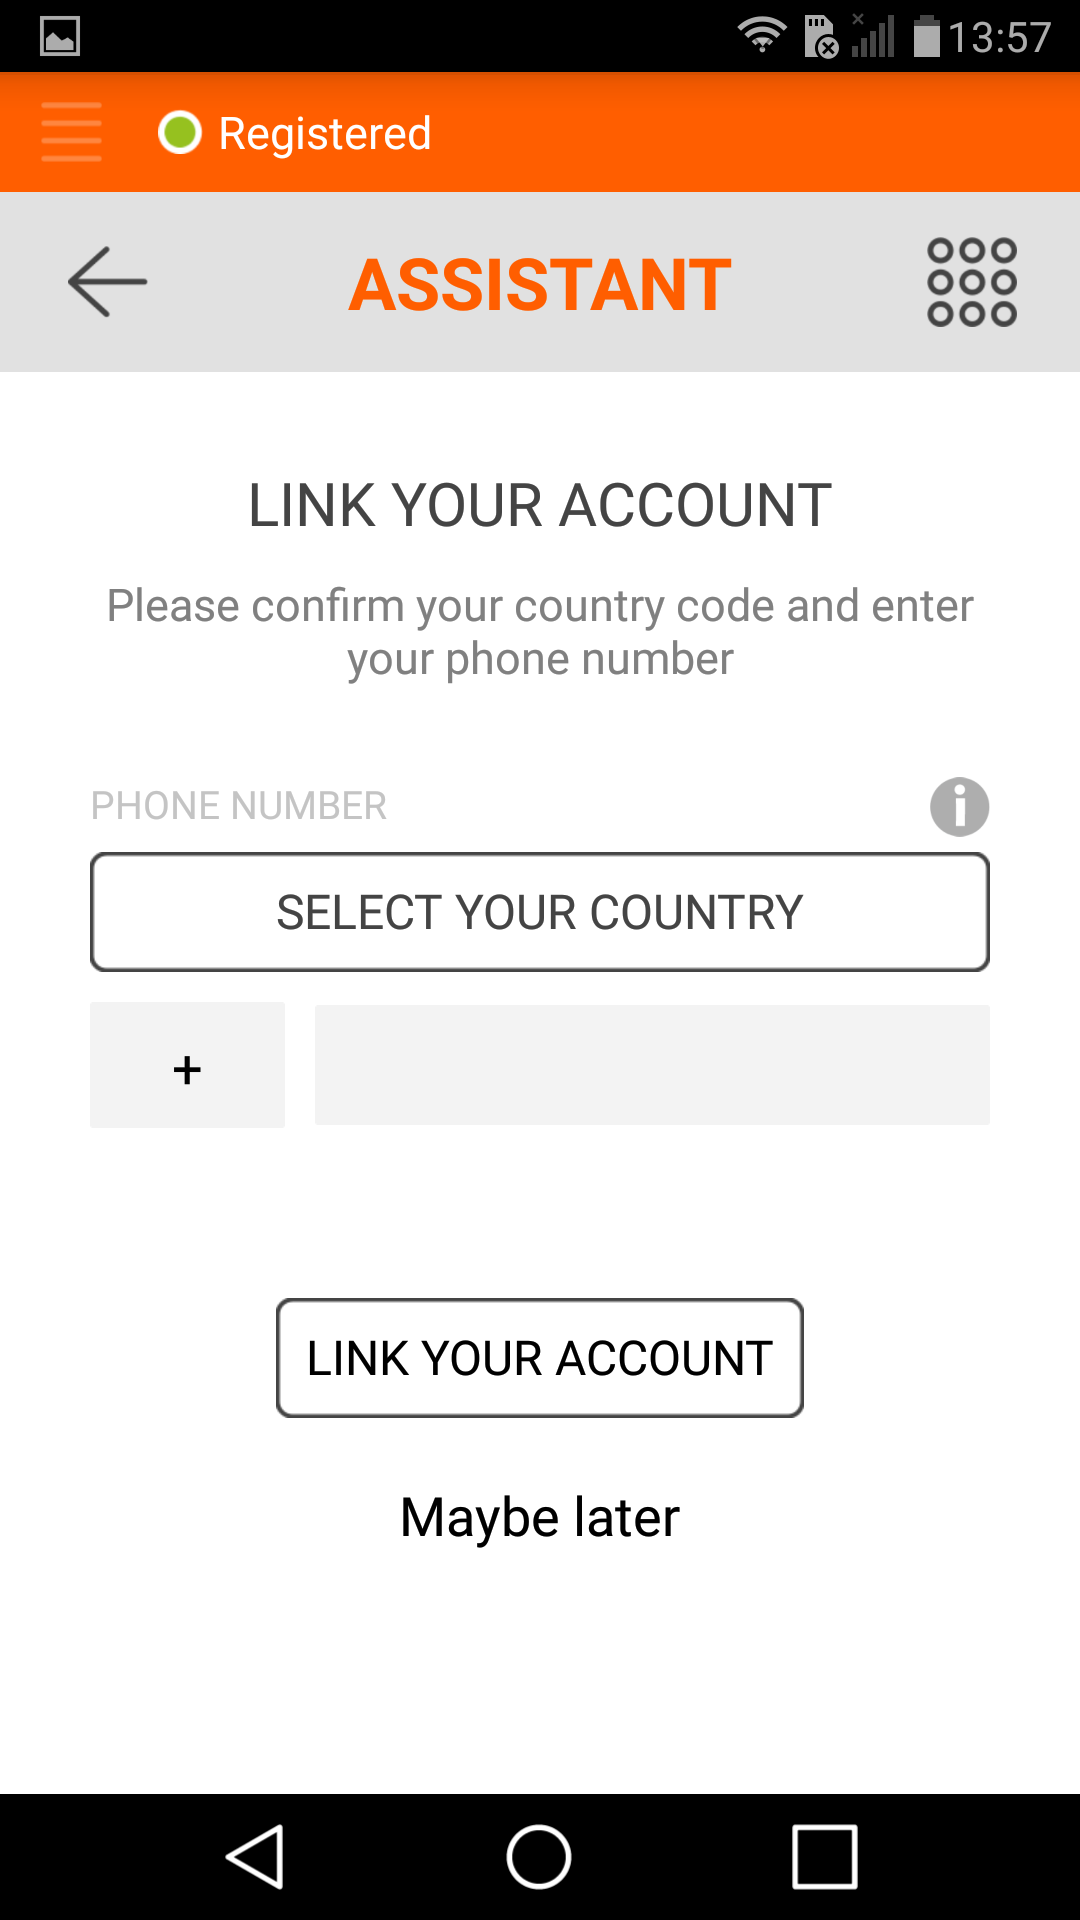
To set Linphone for android with your SIP proxy (or PBX) in the Assitant choose "USE SIP ACCOUNT".
 |
 |
 |
|
To set Linphone for iOS device with your SIP proxy (or PBX) in the Assitant choose "USE SIP ACCOUNT".
 |
 |
|
Warning
- To extend battery life, iOS terminates applications in the background. This feature results in a situation, that it is not possible to call to the application.
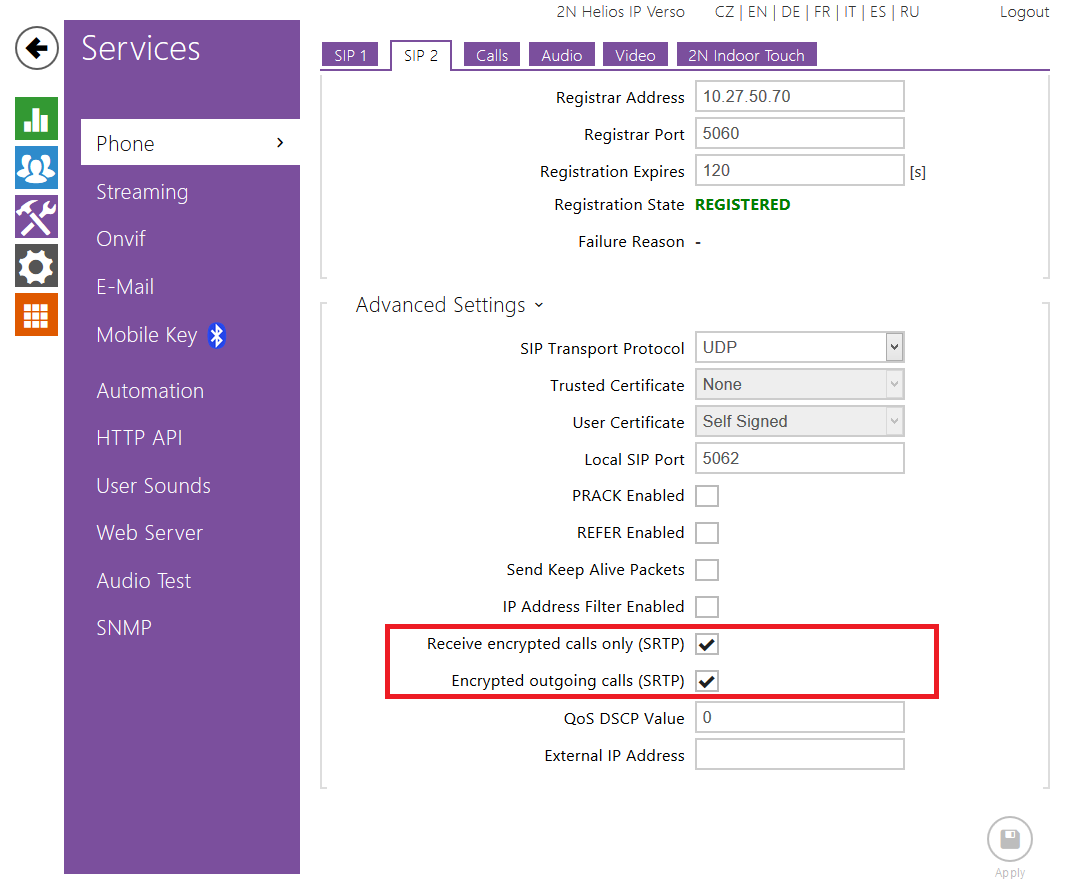
SRTP Setting
Go to SIP settings in Services and in Advanced settings enable recieving and transmitting of SRTP calls.
 |
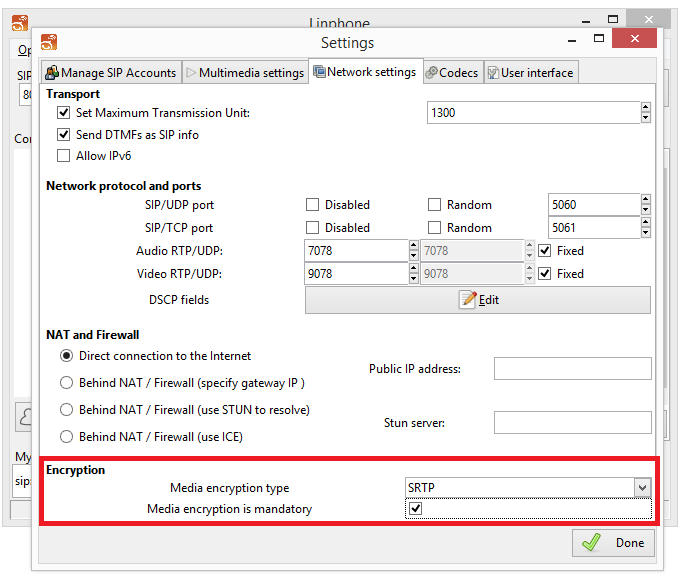
To enable RTP encryption (SRTP) go to Options / Preferences / Network settings and in Encryption section set "Media encryption type to" SRTP and enable option "Media encryption is mandatory".
 |
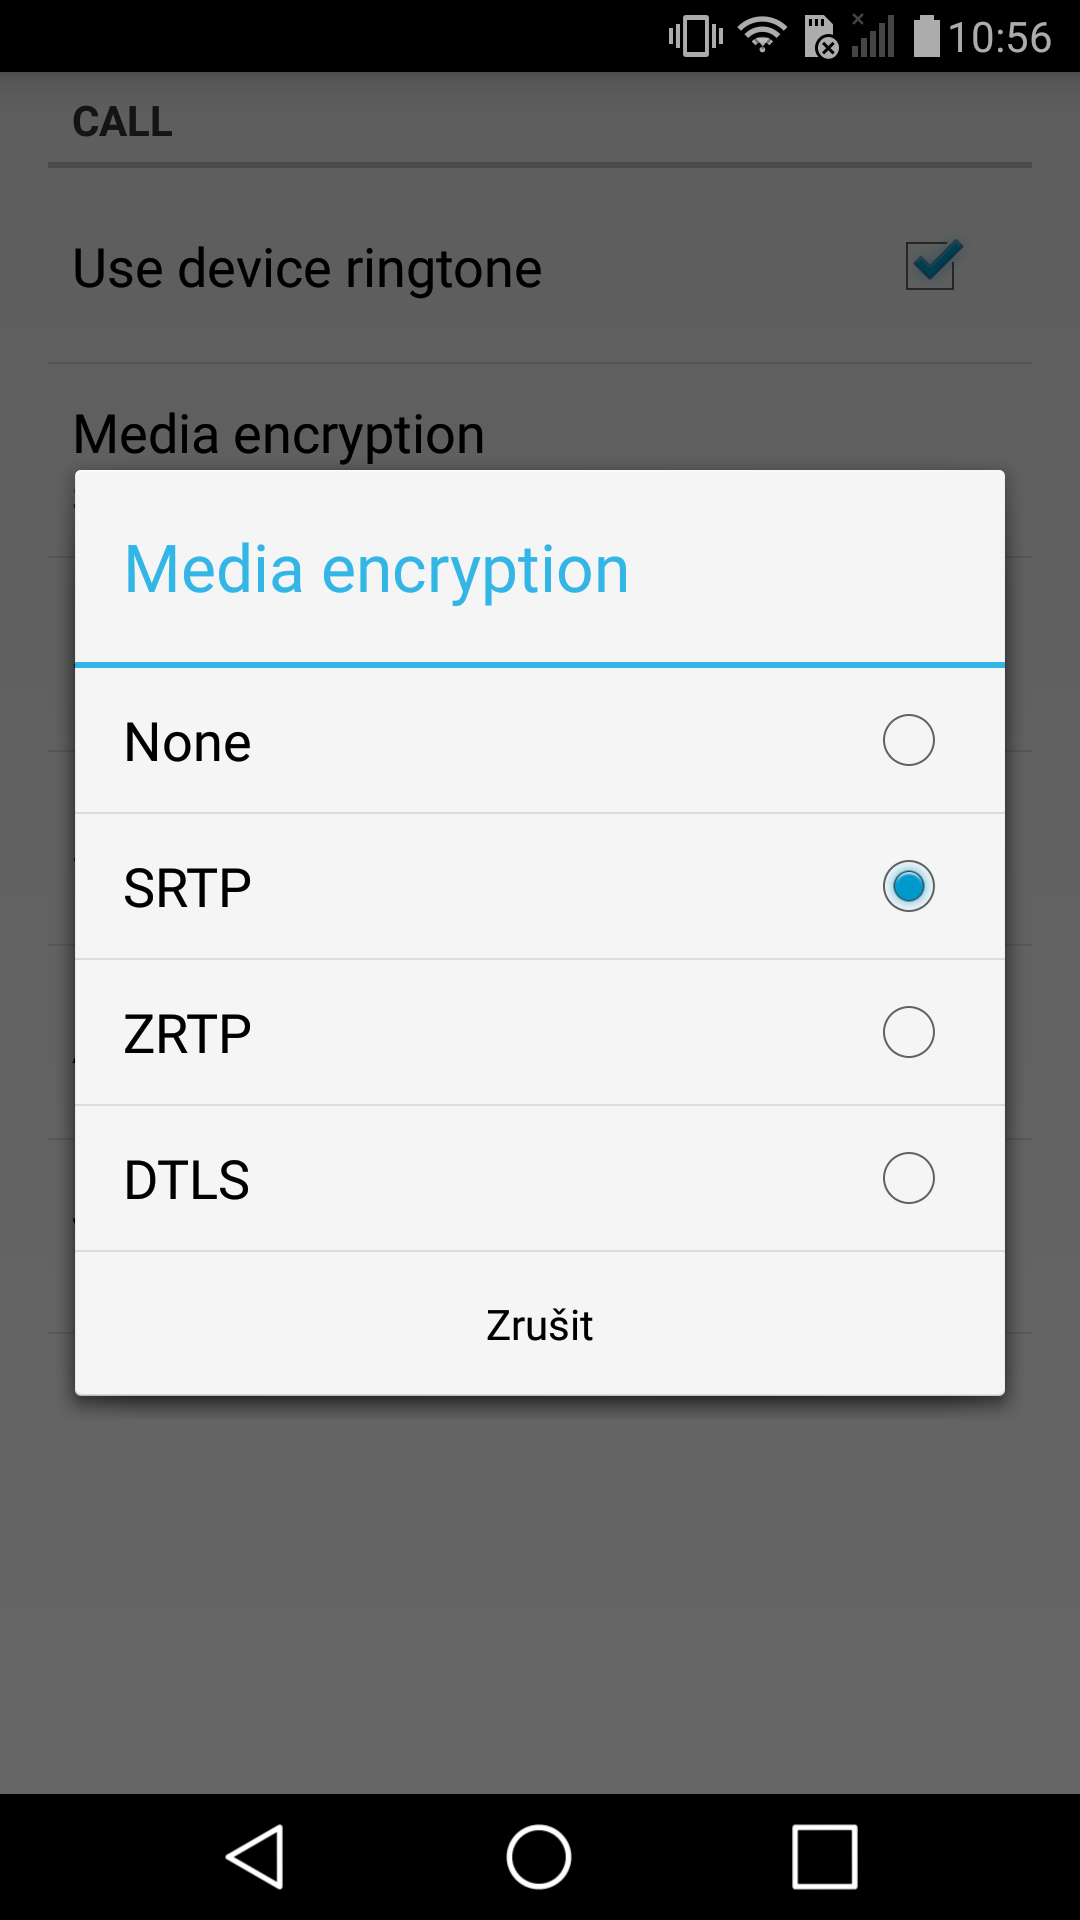
To enable RTP encryption (SRTP) go to menu in the left-most corner of the screen / Settings / Call / Media encryption and then chose SRTP.
 |
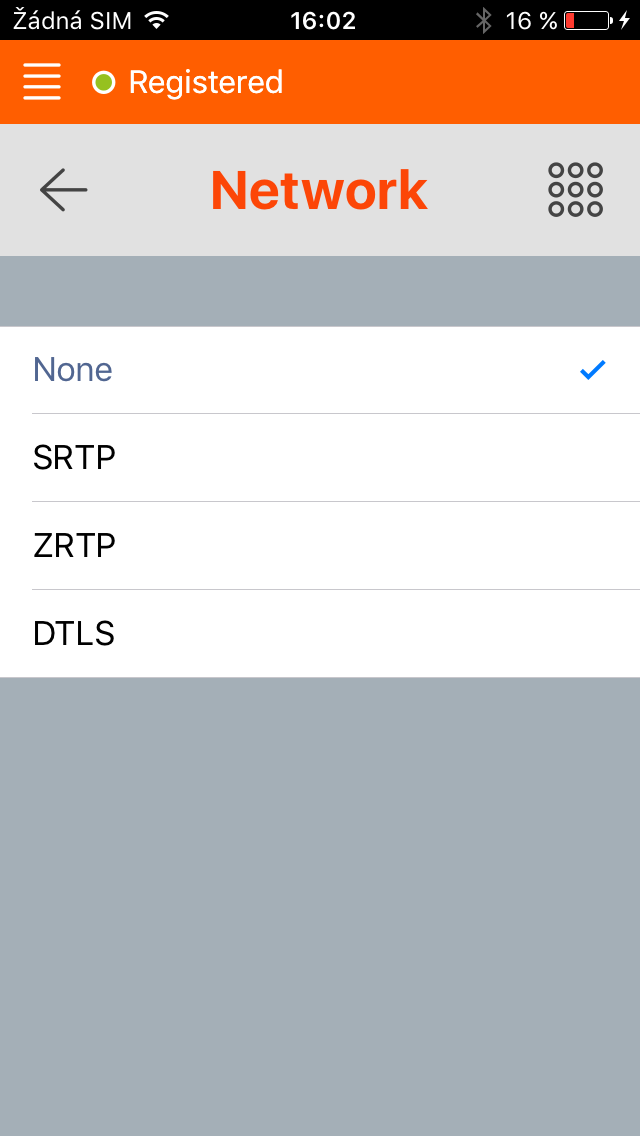
To enable RTP encryption (SRTP) go to menu in the left-most corner of the screen / Settings / Network / Media encryption and then chose SRTP.
 |
Warning
- To extend battery life, iOS terminates applications in the background. This feature results in a situation, that it is not possible to call to the application.
Used Symbols
![]() - Verified with video
- Verified with video
![]() - Verified with audio only
- Verified with audio only
![]() - Work with limitation
- Work with limitation
![]() - Incompatible
- Incompatible