2. Express Wizard for Basic Settings
LAN Connection Setting
You have to know the intercom configuration interface address to connect to the LAN successfully. Automatic IP address retrieval from the DHCP server is set by default in the 2N IP intercoms. Thus, if connected to a network in which a DHCP server configured to assign IP addresses to all new devices is available, the intercom will obtain an IP address from the DHCP server. The intercom IP address can be found in the DHCP server status (according to the MAC address given on the production plate), or will be communicated to you by the intercom voice function; refer to the Installation Manual of your intercom model.
If there is no DHCP server in your LAN, use the intercom buttons to set the static IP address mode, refer to the Installation Manual of your intercom model. Your intercom address will then be 192.168.1.100. Use it for the first login and then change it if necessary.
Now enter the intercom IP address into your favourite browser. We recommend you to use the latest Chrome, Firefox or Internet Explorer 9+ versions 2N IP intercom is not fully compatible with earlier browser versions.
Use the name admin and password 2n (i.e. default reset password) for your first login to the configuration interface.
The intercom requires a password change upon the first login. Strong passwords are only accepted - eight characters at least including one capital letter, one small letter and one digit.
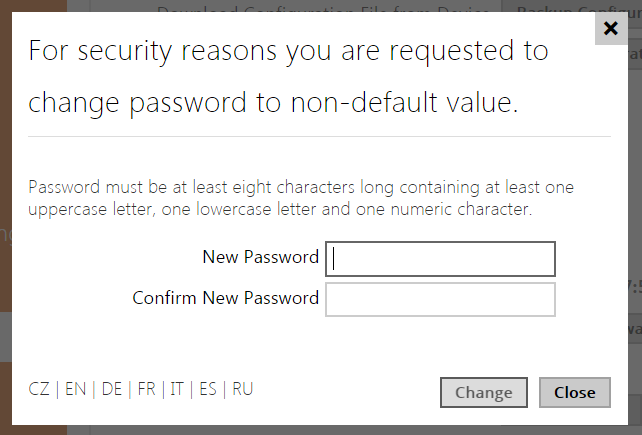 |
Remember the new password well or put it down just in case. Because if you forget the password, you will have to reset the intercom to default values (refer to the Installation Manual of your intercom model) and lose all your current configuration changes.
Firmware Upload
We also recommend you to update your intercom firmware upon the first login to the intercom. Refer to www.2n.cz for the latest firmware version. Press the Update Firmware button in the System / Maintenance menu to upload firmware. The intercom will get restarted upon upload and only then the updating process will be complete. The process takes about 30 seconds.
SIP Server Connection Setting
To allow your intercom make calls and be accessible within your VoIP infrastructure Set the following parameters in the Services / Phone / SIP menu to allow your intercom make calls and be accessible within your VoIP infrastructure.
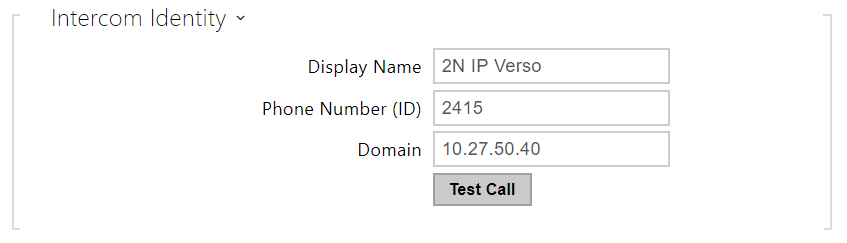 |
- Display name – set the name to be displayed as CLIP on the called party's phone. Set the name to be displayed in the login window and web interface start page.
- Phone number (ID) – set the intercom phone number (or another unique ID composed of characters and digits). Together with the domain, this number represents a unique intercom identification in calls and registration.
- Domain – set the domain name of the service with which the intercom is registered. Typically, it is equivalent to the SIP Proxy or Registrar address. If you do not use a SIP Proxy in your intercom installation, enter the intercom IP address.
- Test call – display a dialog window allowing you to test a call to a selected phone number, see below.
If you use a SIP server (Proxy, Registrar), set the addresses for the following network elements :
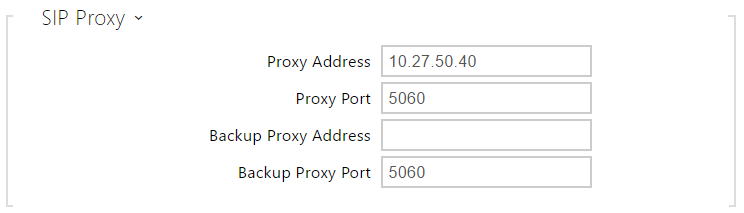 |
- Proxy address – set the SIP Proxy IP address or domain name.
- Proxy port – set the SIP Proxy port (typically 5060).
- Backup Proxy Address – set the SIP Proxy IP address or domain name to be used where the main proxy fails to respond to requests. The address is used where the main proxy fails to respond to requests.
- Backup Proxy Port – set the backup SIP Proxy port (typically 5060).
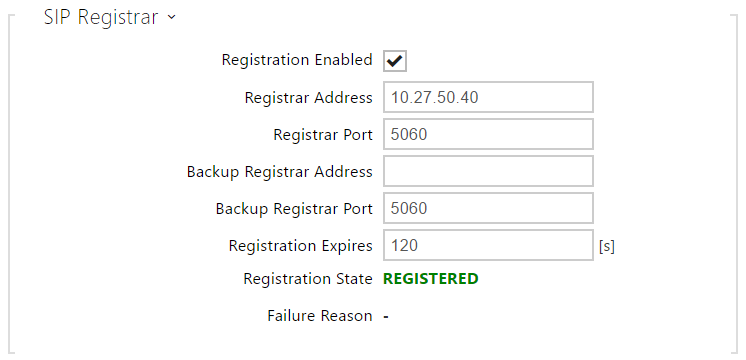 |
- Registration enabled – enable intercom registration with the set SIP Registrar.
- Registrar address – set the SIP Registrar IP address or domain name.
- Registrar Port – set the SIP Registrar port (typically 5060).
- Backup Registrar Address – set the backup SIP Registrar IP address or domain name. to be used where the main registrar fails to respond to requests.
- Backup Registrar Port – set the backup SIP registrar port (typically 5060).
- Registration Expires – set the registration expiry, which affects the network and SIP Registrar load by periodically sent registration requests. The SIP Registrar can alter the value without letting you know.
- Registration State – display the current registration state (Unregistered, Registering..., Registered, Unregistering...).
- Failure Reason – display the reason for the last registration attempt failure: the registrar’s last error reply, e.g. 404 Not Found.
If your SIP server requires authentication of terminal equipment, enter the following parameters:
 |
- Password – enter the password for intercom authentication.
Quick Dial Button Settings
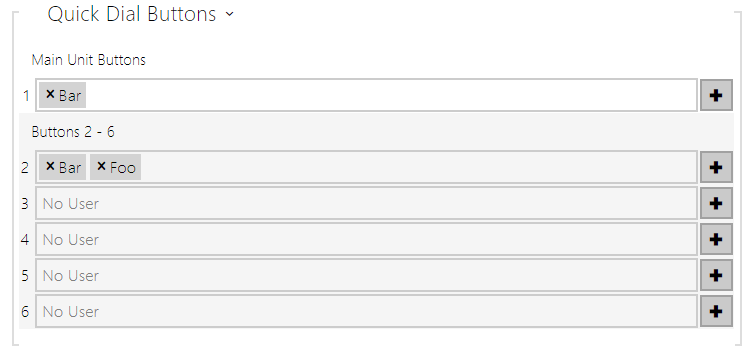
All the 2N IP intercom models are equipped with quick dial buttons. If you press a quick dial button, a call will be set up to the phone number assigned to the respective Users list position.
In the Hardware / Buttons menu is displayed the list of all potentially available intercom buttons The list is including those that are physically absent. In some intercom models (2N® IP Vario, 2N® IP Verso), the button list is divided into 8/ 5-item groups corresponding to the button extending modules. Click ![]() , select the user and press Add to add a user to the editing field. To search a user in the list, use the fulltext field and the username. One quick dial button can be shared by multiple users.
, select the user and press Add to add a user to the editing field. To search a user in the list, use the fulltext field and the username. One quick dial button can be shared by multiple users.
 |
 |
You can also use the 2N IP intercom with one or more IP phones without a SIP server. Use the Direct SIP Call. For outgoing calls and enter the called phone SIP address (sip:phone_number@phone_ip_address) instead of the phone number.
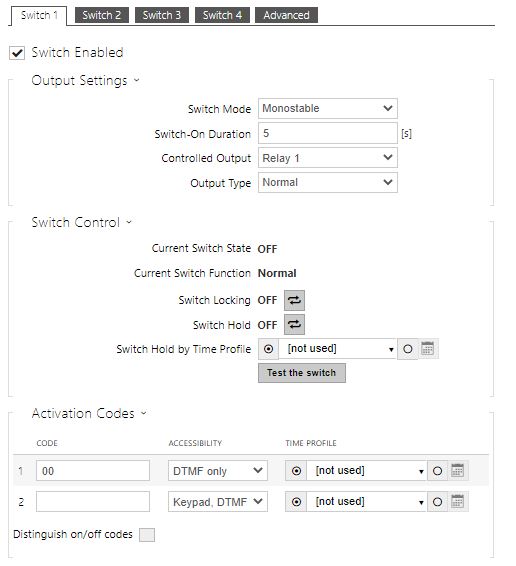
Electric Lock Switching Settings
An electric lock can be attached to the 2N IP intercoms and controlled by a code from the intercom numeric keypad, or a code from the IP phone keypad during a call. Connect the electric lock as instructed in the Installation Manual of your intercom model.
 |